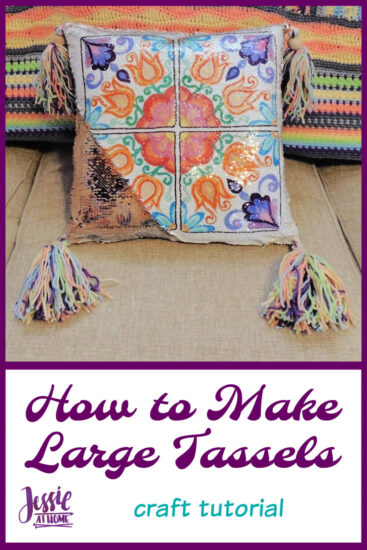
Make large tassels and add them onto pillows, various home décor, hats, scarves, umbrella handles, almost anything and make a statement!
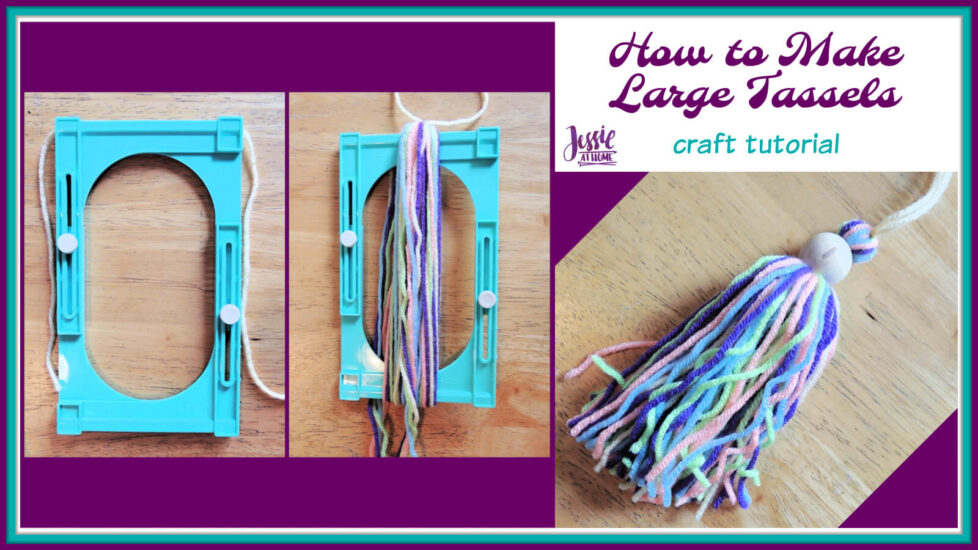
I’ve always loved the look of big wood beads as the “wrapping” for tassels. However, it can be hard to find a big enough bead, or one with a big enough hole. Plus, if you make a super chunky tassel, the top can be huge. I experimented and found a way to make one of these tassels just to my liking, and now I’ll teach you.

Supplies
- Yarn (WeCrochet Brava Worsted used in tutorial)
- 1″ Wood Beads with 3/8 – 1/2″ hole
- Tassel Making Tool (or a book, piece of wood, cardboard…)
- Sharp Scissors
- Sharp Big Eye Needle
How to Make Large Tassels
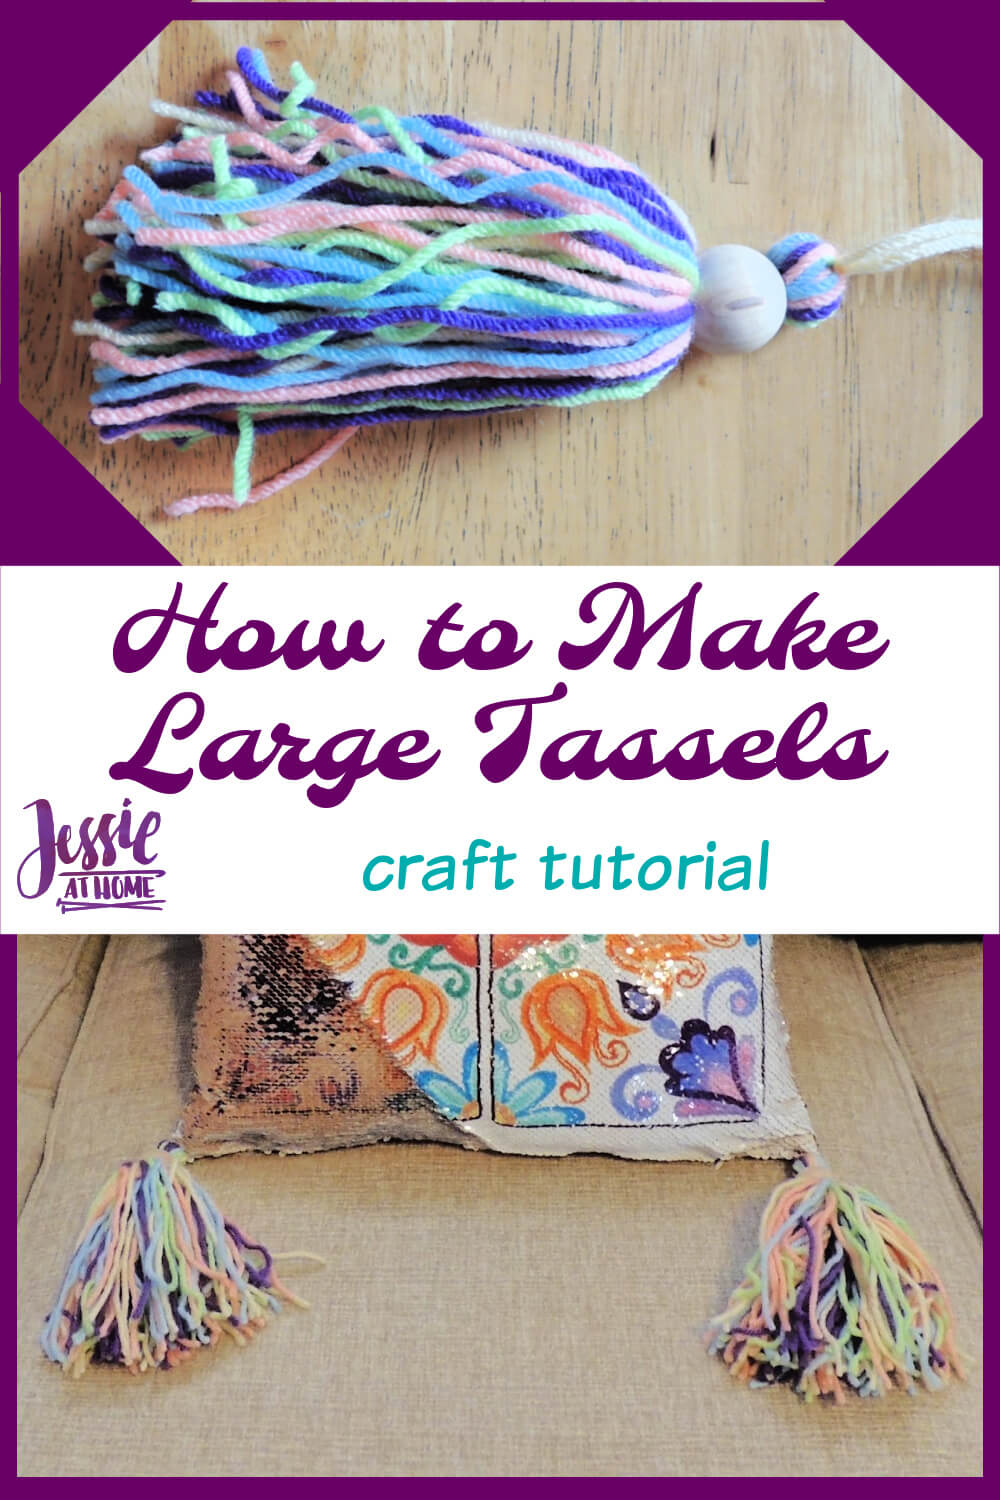
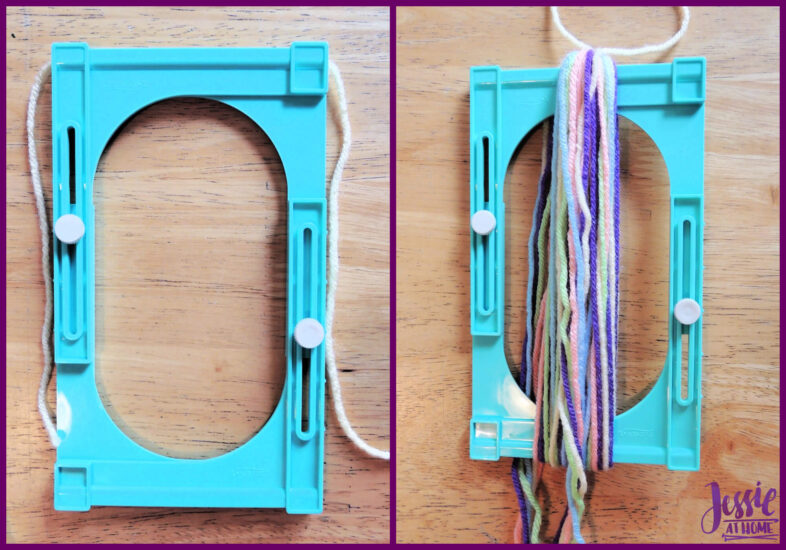
In order to get the tassels through the beads, and still be able to make large tassels, I found I needed to make 2 bundles for each tassel. For the top bundle (this one needs to be able to fit through the bead), I used 20 strands of yarn. Then I used 50 strands of yarn for the bottom bundles which provides the rest of the bulk.
Wrapping the Bundles
To make each bundle with the Clover tassel maker, first lay a 10-12″ piece of yarn across the top, sitting in the groove. Next, wrap your yarn around the tool as many times as desired.
Now, take the ends of the yarn laying across the tool and tie it tightly around the bundle just wrapped. Slide your scissors in the groove at the bottom of the tool and cut the wraps.
Constructing the Tassel
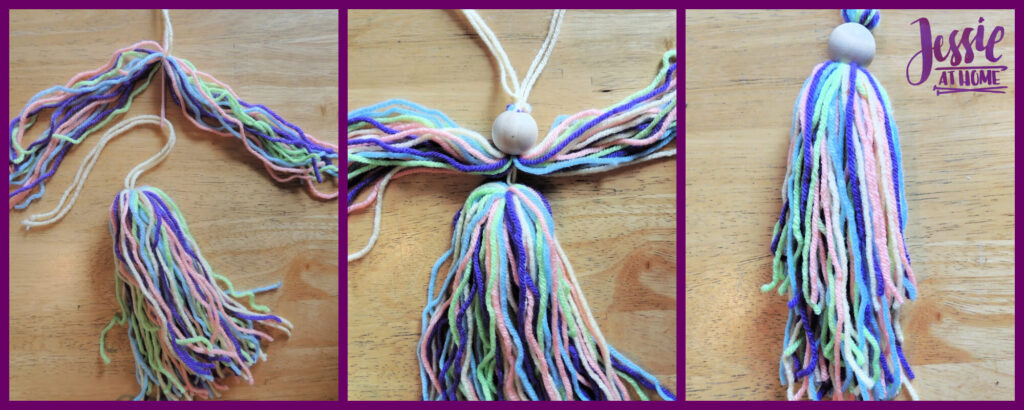
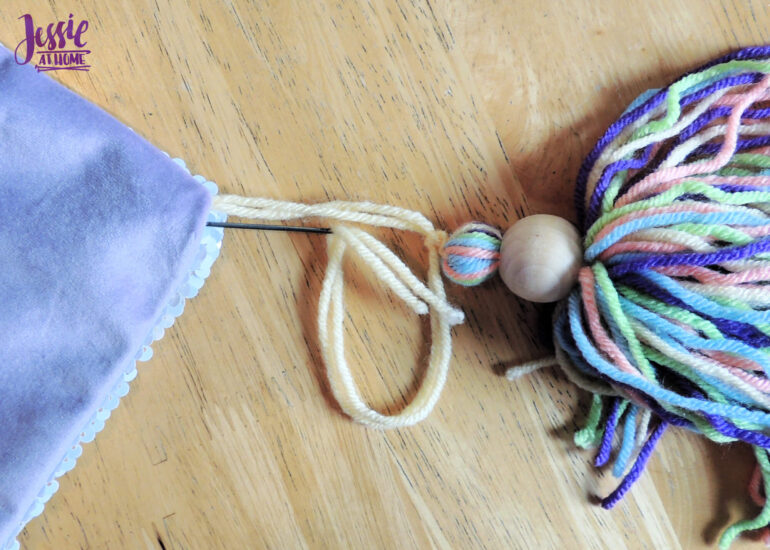
Here’s a suggestion I realized after making my tassels: use a different color of yarn to tie each of your two bundles. Thread the tie ends of the bottom bundle into your needle. Open up the top bundle and sew the ends of the bottom bundle through the center of the top bundle.
Pull the tie ends of both bundles through the center of the bead. Grab the tie ends of the top bundle and pull about 1/2-3/4″ of the bundle through the bead. Now gently pull the tie ends of the bottom bundle to get it snug up against the bottom of the bead.
Spread the top bundle around to cover the top of the bottom bundle. Tie all the tie ends together snug against the top of the bead.
Finishing
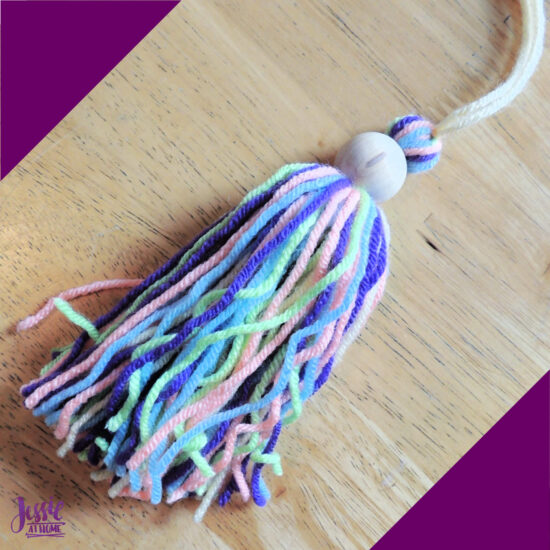
Now cut the ends to the length you like, and you’re done! Congratulations, you know now how to make large tassels!!
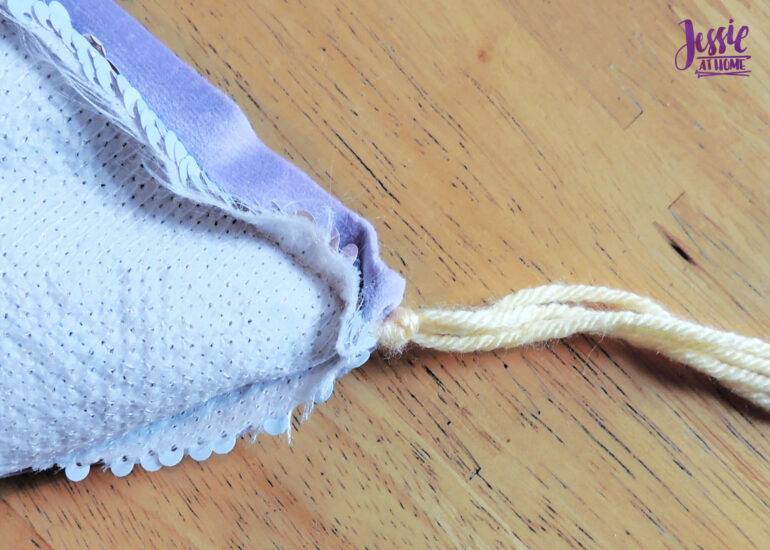
To attach the large tassels, just thread up 2 of the tie ends into a needle and sew them through whatever you’re attaching them to. Then thread up the other 2 tie end and sew them through just next to the first two.
Tie the ends together and you’re good to go! You can also attach the tassel to a snap or button to make it removable, or even just glue it on, depending on what you’re attaching it to.
Ta-da! You can make large tassels and attach them to all sorts of creations to make a statement. That statement is that you are awesome!
Here are some supplies you may find useful.
Happy stitching my friends.
Did you enjoy what you found here at Jessie At Home? Then sign up for my newsletter and like my Facebook page, so you’ll get all the updates on new tutorials, other posts, sales, and coming events.
If you have any questions, want to share pictures of your work, or just want to chat with Jessie and other crafty individuals, than join my Facebook group.

© Copyright 2021 Jessie Rayot / Jessie At Home All my videos, patterns, charts, photos and posts are my own work, so you may not copy them in any way. If you want to share this information with someone, then share the link to this post. If you want to share on your own blog / website, then you may use the first photo in this post and link back to this post. Also, you may not give away printed copies of this post.
Now that you know how to make large tassels, try making one of these.