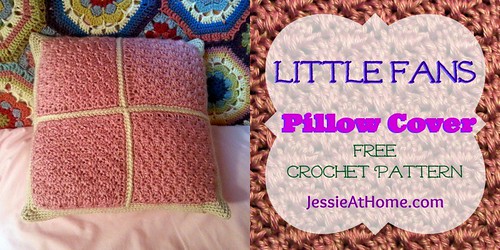
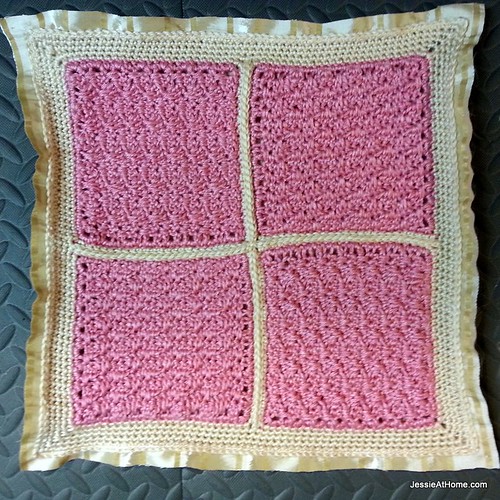
Little Fans Pillow Cover
Crochet Pattern
Easy Skill Level
Designed by Jessie Rayot
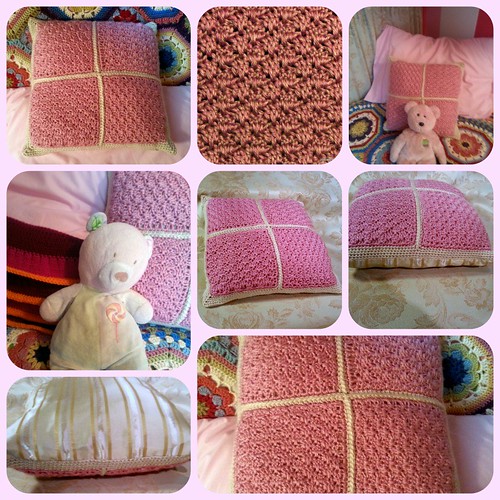
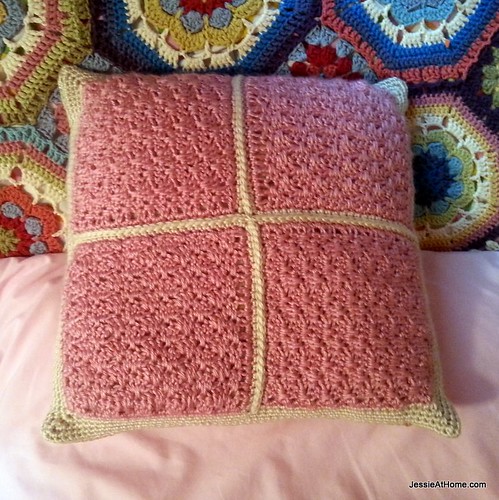
Four squares of little fans stitches add a nice texture to this pillow cover. The sample in this pattern is sewn onto a fabric lining, and has a fabric back as well, instructions are included. However, there is no reason why you could not make 2 of the crochet fronts and stitch them together to make an entirely crochet pillow cover, if you can’t or don’t want to sew.
Sizes:
About 18” by 18” or whatever size you want!
Yarn:
Lion Brand Heartland, 1 skein each of 2 colors. I used: Acadia and Denali
Hook:
US 10/J/6.00 mm
Gauge:
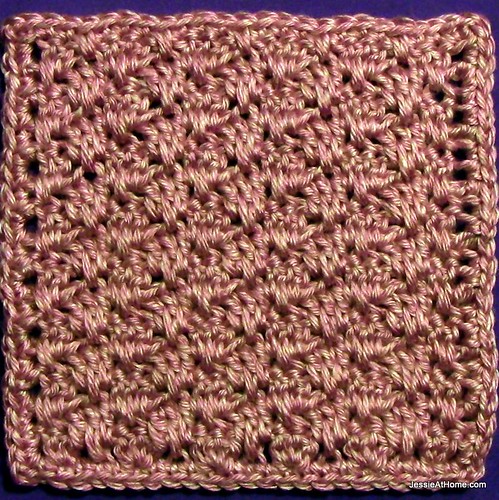
3 1/2 fans across and 5 rows tall in pattern to make a 4” square
(See this tutorial for the fan stitch pattern)
Other Supplies:
18″ square pillow
2/3 yd of fabric (enough for 2 20″ squares)
Sewing thread to match the fabric
Sewing needle
Stitches and Skills used:
ch ~ chain
dc ~ double crochet
sc ~ single crochet
st(s) ~ stitche(es)
Getting Started:
For a video tutorial on how to make the little fans stitch, see this Stitchopedia entry.
Pattern:
Squares: Make 4
Foundation chain: Ch 25. If you are making another size, then ch a multiple of 4 plus 1.
Row 1: 2 Dc in 4th ch from hook, *ch 1, skip 3, 3 dc in next ch, rep from * until 5 chs remain, ch 1, skip 3, 2 dc in next ch, dc in last ch.
Row 2: Turn, ch 4 (counts as first dc, ch 1), * dc in next ch-1, dc in center st below the same ch-1, dc in same ch-1, ch 1, rep from * until 4 sts remain, dc in the last foundation chain.
Row 3: Turn, ch 3 (counts as first dc), dc in center st below the ch-1, dc in same ch-1, *ch 1, dc in next ch-1, dc in center st below the same ch-1, dc in same ch-1, rep from * to end, working the last dc in the 3rd chain of the starting ch 4 from the previous row.
Row 4: Turn, ch 4 (counts as first dc, ch 1), * dc in next ch-1, dc in center st below the same ch-1, dc in same ch-1, ch 1, rep from * until 4 sts remain, dc in the top of the starting ch 3 from the previous row.
Repeat rows 3 & 4: 5 more times, then repeat row 3 once more (15 rows total in piece)
If you are making another size, repeat rows 3 & 4 until your piece is the size you need, ending with row 3.
Border: Turn, ch 1 (does not count as a st) * sc in each of next 3 dc, sc in center st below the ch-1, rep from * across, the last sc will be in the top of the starting ch 3 of the previous row, {23 sc across top of piece}, ch 2, rotate 2 sc in the side of the last row, *sc in the side of the next row, 2 sc in the side of the next row, repeat from * down the side of the piece {23 sc down side}, ch 2, rotate, sc in each st across bottom {23 sc across bottom}, ch 2, rotate 2 sc in the side of the first row, *sc in the side of the next row, 2 sc in the side of the next row, repeat from * up the side of the piece {23 sc up side}, ch 2, slip st to first sc, fasten off.
If you are making another size, you will sc in each st at the top and the bottom of the piece, and you will need to determine how many sc sts are needed along the sides by doing some math. If your piece is square then use the same number of sc as used across the top and bottom. If it is not square then divide the number of sc across the top by the number of inches across the top, then multiply that number by the number of inches up the side. The result will tell you how many sc you need up the side.
Here is a video to show how to add the border.
Joining:
Square 1: With second color, sc in any ch-2 corner sp, [sc in each sc to next corner, (sc, ch 2, sc) in ch-2 corner] 3 times, sc in each sc to next corner, sc in ch-2 corner, ch 2, join with a slip st to first sc, fasten off. (25 sc on each side, with ch-2 corners)
Squares 2 ~ 4: Work in same manner as for square 1, joining as you go on adjoining sides. See the join as you go method here.
Your finished piece should be 14” square at this point.
You can find a video tutorial on this single crochet join as you go method here.
Border:
Row 1: (sc, ch 2, sc) in any ch-2 corner, [sc in each of the next 25 sc, sc in each of the next 2 ch-2 spaces, sc in next 25 sc, (sc, ch-2, sc) in ch-2 corner] 3 times, sc in each of the next 25 sc, sc in each of the next 2 ch-2 spaces, sc in next 25 sc, slip st to first sc. (54 sc on each side, with ch-2 corners)
Row 2: slip st into ch-2 corner, ch 1 (does not count as first st), (sc, ch 2, sc) in ch-2 corner, [sc in each of the next 54 sc, (sc, ch-2, sc) in ch-2 corner] 3 times, sc in each of the next 54 sc, slip st to first sc. (56 sc on each side, with ch-2 corners)
Row 3: slip st into ch-2 corner, ch 1 (does not count as first st), (sc, ch 2, sc) in ch-2 corner, [sc in each of the next 56 sc, (sc, ch-2, sc) in ch-2 corner] 3 times, sc in each of the next 56 sc, slip st to first sc. (58 sc on each side, with ch-2 corners)
Row 4: slip st into ch-2 corner, ch 1 (does not count as first st), (sc, ch 2, sc) in ch-2 corner, [sc in each of the next 58 sc, (sc, ch-2, sc) in ch-2 corner] 3 times, sc in each of the next 58 sc, slip st to first sc. (60 sc on each side, with ch-2 corners)
Your finished crochet pillow cover should be about 1″ smaller than the pillow cover needs to be. In this case that is 16″, as I made a 17″ pillow cover for an 18″ pillow. I like my pillows to be firm, so I tend to make the covers 1″ smaller than the actual pillow.
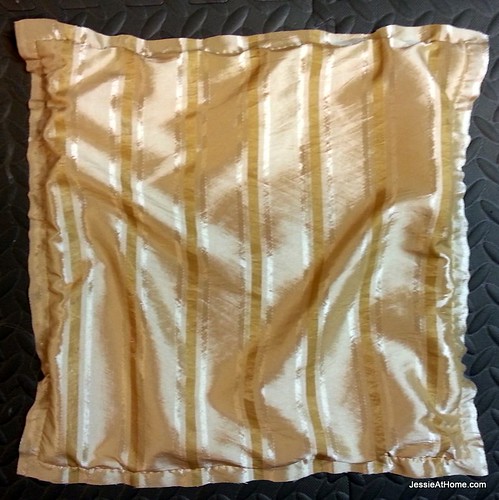
Sewing:
Cut 2 squares/rectangles of fabric that are 1 ¼” larger than you want your pillow cover. So for my 17″ pillow cover, I cut two 18 1/4″ squares.
Lay one of these pieces right side up. Place the crochet piece on top, also right side up. Pin it onto the fabric with ½” of fabric showing all around. The crochet piece will need to be pulled to fit this size. That is a good thing, as the crochet part tends to grow a bit as it is used, and by stretching it initially it will not start to sag after some use.
With a sewing machine, or by hand, top stitch the crochet piece to the fabric it is pinned to close to the edge of the crochet.
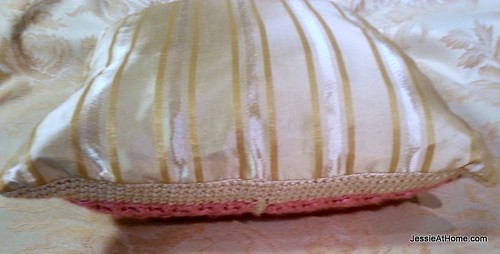
Place the second fabric piece on top of this piece, right sides facing each other. Pin it together. Sew with a 5/8” seam allowance, leaving one side open to turn. This will put the edge of the crochet IN the seam.
Turn the pillow cover right side out, and stuff in the pillow. Hand stitch the opening shut.
To find a printer friendly version of this pattern (text only, in black, no photos) click here. This will bring you to the listing for this pattern on Craftsy, where you can also find printer friendly versions of all my free patterns, and where you can purchase my sale patterns.
If you enjoy what you have found here at JessieAtHome, please like our Facebook page to get all the updates on new tutorials, other posts, sales, and coming events.
If you have any questions or concerns, want to share pictures of your work, or just want to chat with Jessie and other crafty individuals, than join our Facebook group.

©Copyright 2014 Jessie Rayot / Jessie At Home All my videos, patterns and posts are my own work. Do not copy them in any way. If you want to share this information with someone, share the link to this post. If you want to share on your own blog / website, then you may use the first photo in this post and link back to this post. You may not give away printed copies of this post. Thank you.
This post may contain affiliate links/ads. If you purchase something from a link in this post, I may be compensated.


This is lovely!