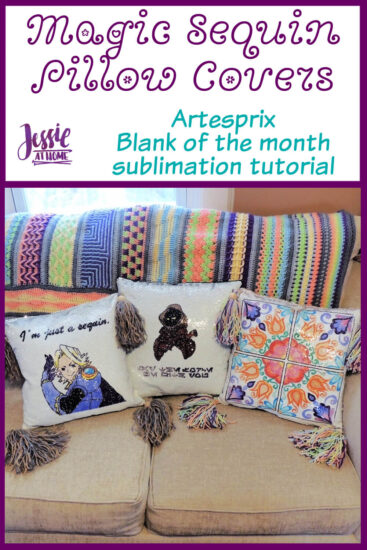
I’ve been wanting to try to sublimate a yarn blank for years. I finally did with this NEW sublimation paint and the results are epic! First I made my own yarn blank; some of you may call it a sock blank. Next, I painted a giant rainbow, which was super fun. Then there was the magic of sublimation, and finally some yarn winding. Now I have the most awesome rainbow polka dot yarn!
Some products in this tutorial were provided by Artesprix. All opinions are my own.
When my friend Pia found nice polyester yarn that could be used as a sublimation blank, a whole new world opened up. I put that thought together with patterned and gradient sock blanks I had been seeing at all the yarn festivals and an idea formed. The problem was coloring a paper large enough for a yarn blank with DIY supplies. I don’t have a sublimation printer, and I really enjoy doing the coloring/painting myself.
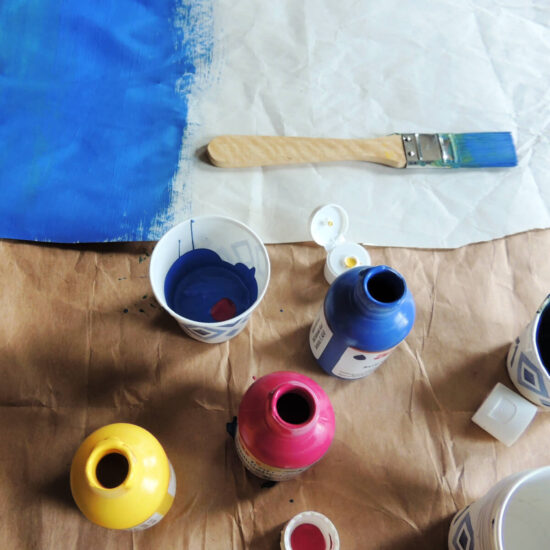
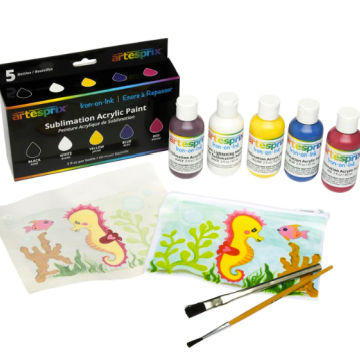
The sublimation paint comes in 4 colors, red, yellow, blue, and black. In addition, there is a white acrylic paint for lightening. For those who don’t have a master’s degree in painting, Artesprix has made an easy to use color mixing chart.
OK, enough preamble, how about some instructions?
- Polyester Yarn
- I used Lion Brand Feels Like Butta. I like this one because it looks and feels nice, it’s 100% polyester, and it’s from a company I trust. You need a yarn that will work with whatever took you are using to make your blank. In my case, a 3-4 yarn weight was best.
- As far as how many skeins or what yd / oz your need, it all depends on what you want to make. A pair of socks or a shawl will use less yarn than a sweater. The more polyester in your yarn, the better your finished sublimation or “dye job” will be.
- Scrap Yarn
- I added about 2″ of scrap yarn to the top and bottom of my blanks. It gives something to pin down and it’s also a good idea when using a machine because the start and finish can be funky sometimes. I just used an acrylic yarn of the same weight as my poly yarn
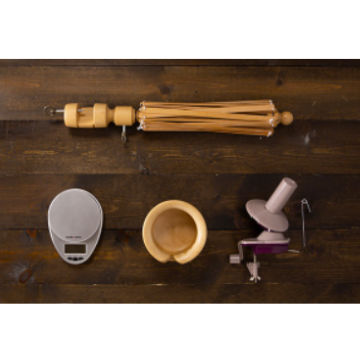
- Knitting Machine or Knitting Needles
- I used a Sentro circular knitting machine which makes panels as well, you just need something to knit your blank, and this is so much faster then hand knitting. You could also use one of those loom knitters in all the craft stores. Heck, you could weave a fabric blank if you want, it just seems like a lot of work for something your going to unravel at the end.
- Blocking Wires and Stainless Steal Blocking Pins
- You can find a set on WeCrochet. I like the straight blocking wires, as opposed to the bendable wires for curves. For the pins I prefer the T-pin shape. You need a way to hold the blank taught while sublimation.
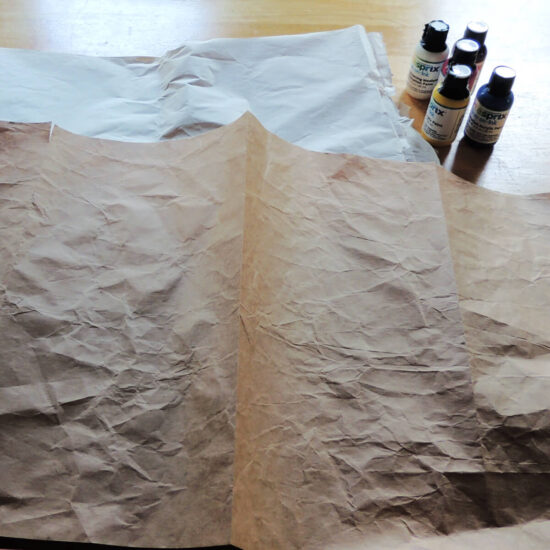
- Paper and Masking Tape
- Enough paper to cover the blank. I used packing paper and taped it together with small pieces of masking tape spread several inches apart. I was worried about how the sublimation would work through the masking tape. In the end, I couldn’t tell where the tape had been, so I guess the masking tape was a decent choice. I would NOT use any tape that may melt under high heat.
- Sublimation Paint
- YEAH!! This is what made this project doable for me! Get your Artesprix acrylic sublimation paint HERE and be sure to use code JESSIE10 to get 10% off.
- Paint Brushes
- You need to get the paint on the paper. I used nylon brushes from Plaid and found them to be perfect.
- Small Disposable Cups
- Those little 3-4 oz paper cups Grandma always had in her bathroom are perfect for mixing the amount of paint you need in this project. For a smaller blank, a craft store paint pallet with little indents for the paint is fine,
- Hand Held Heat Press
- My blank was way too big for a non-industrial press. Your going to need a press you can pick up and move so you can do this in pieces. I used my Cricut Easy Press and I would HIGHLY recommend it.
- Scrap Sheet(s)
- Next time you see sheets at a garage sale or thrift store, buy them! They have so many crafty uses. I layed one down on my work table to protect it from the sublimation.
- Protective Paper
- Never sublimate without it. Artesprix has siliconized paper that is perfect, use the discount code.
- Heat Tape
- You may or may not need this. I didn’t because I didn’t need to tape anything down. However, it’s nice to have and you can use the discount code.
- Yarn Swift
- Optional, but super handy. For this I used an Amish-style swift, but I think any would do.
- Yarn Ball Winder
- Optional, but super handy. I used my trusty Knit Picks cake winder.
With a blank it’s easier to get a gradient or stripe pattern in the yarn. It also provides a nice surface if you’re painting on the dye. I’ve even seen people dye the blank then use a darker color to write a poem or message on the blank. When you unravel it, the message is just a series of speckles, so it becomes a secret message!
Yarn blanks are often made with sock weight yarn. You can make a pair of socks with just one blank. This is why they are also called sock blanks
How do you make a sock blank?
You can of course make a blank by grabbing some knitting needles and knitting a rectangle with with your yarn. However, this is something that is going to be unraveled before it becomes something else, so I vote for a quick way about it!
For my yarn blanks, I actually knit 2 full skeins into a panel on my circular yarn knitter. It’s one of those inexpensive plastic ones, but it makes tubes and panels and I’ve found plenty of uses for it. I was able to make 2 stockinette blanks, each with 2 skeins of yarn.
In addition to hand knitting and machine knitting, you could also use a loom knitter. The point is to get all your yarn knit up in flat piece of stockinette. You can use garter stitch, but you need to be extra sure to knit loosely. The blank needs to be knit loosely so that the dye is more likely to get into all the nooks and crannies. With sublimation, the more yarn that is exposed, the better the results.
Prepping the Blank(s)
As I mentioned a moment ago, I made 2 blanks. They each had a top and bottom of a couple of inches of waist yarn. I wanted to get them to lay nice and flat, so I used blocking wires. I ran one wire in between the two blanks. Basically, I caught an edge loop from one blank, then an edge loop from the other, and repeated.
Next I ran wires through the other long sides of the blanks. Finally I ran wires through the top and bottom waist yarn. This made the two blanks side by side with wires around the outline and down the center lengthwise. You can see the center wire and top wire in the photo below.
Once the blank was all wired up, I used T-pins to pin it taught on my table, which I had covered with a sheet. I made sure to put the pins at an angle, so they were less likely to interfere with the paper or press later on.
Painting the Paper
I love painting. It relaxes me. Art has always been my happy place, and painting is one of those arts that I can disappear into for hours.
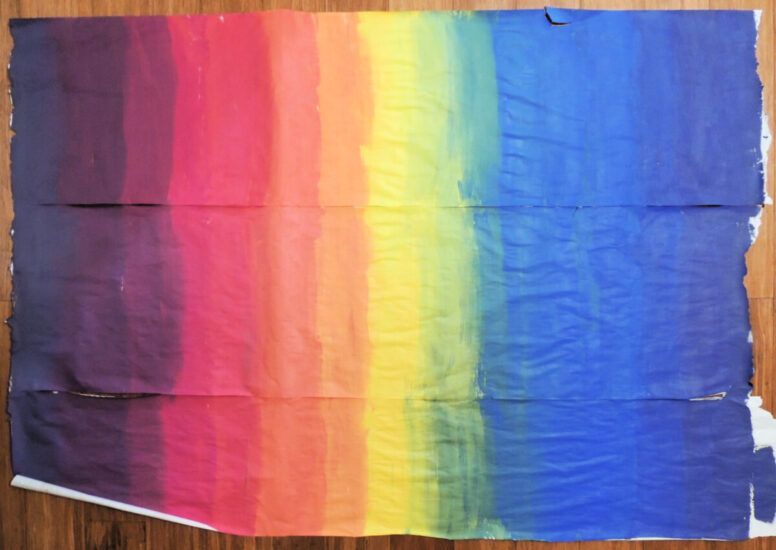
I started off with some yellow paint in a cup and painted a stripe in the middle. I realized later that I really should have divided the paper into 6 parts (one for each color) and painted the yellow in the 3rd part.
Then I started adding a little blue at a time to slowly phase into green. If you use this method and have divided the paper into 6 parts, you want the center of the 3rd part to be true yellow, and then have it phase into green to the center of the 4th part.
Now put some blue in a cup and paint the center of the 5th part true blue, and then make the blue and green phase into each other. I did this by adding more and more blue into the green to mix it into the blue, as the green cup was getting pretty low, so it was easy to darken.
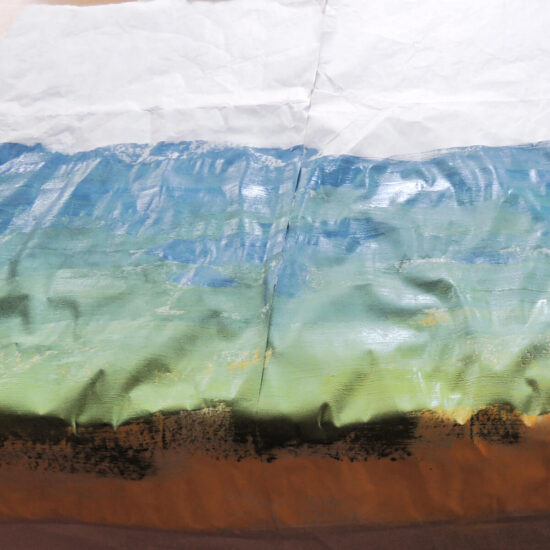
Below you can see that I added just a little red to the blue to start phasing it to purple. I kept adding more red as I worked up to the top of the paper (the 6th section, for those of you keeping count).
There you go, yellow to green to blue to purple. The yellow and green are painted a bit sparsely because I was worried I would run out of paint. As I went on, I realized I was going to be fine.
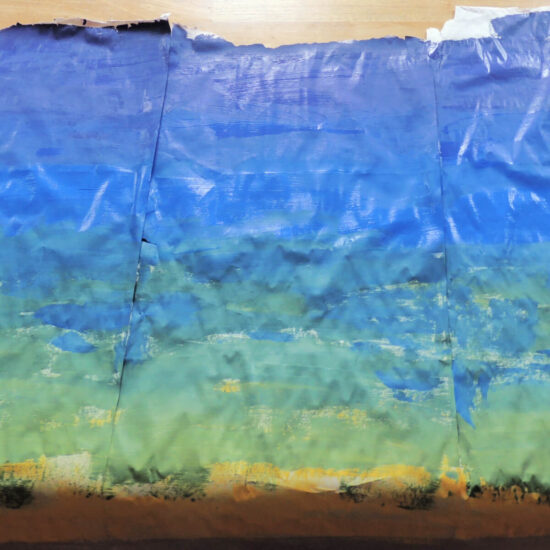
Next I worked in the same manner to go from yellow to orange (2nd section) to red (1st section). The paints mixed well together. Clearly there was color mixing thought put into the production. I’ve mixed colors before that should end up with one color, and end up with a different color because the paints weren’t the true colors they should be.
Now, because I didn’t divide the paper into 6 sections, and I put the yellow in the middle, I had the same amount of space for orange and red as I did for green, blue, and purple. So, I started adding black to the red to go from orange to red to brickish purple.

At this point, I had enough of the yellow and blue paint left for fill in the yellow and green sections that I had painted sparingly the first time around.
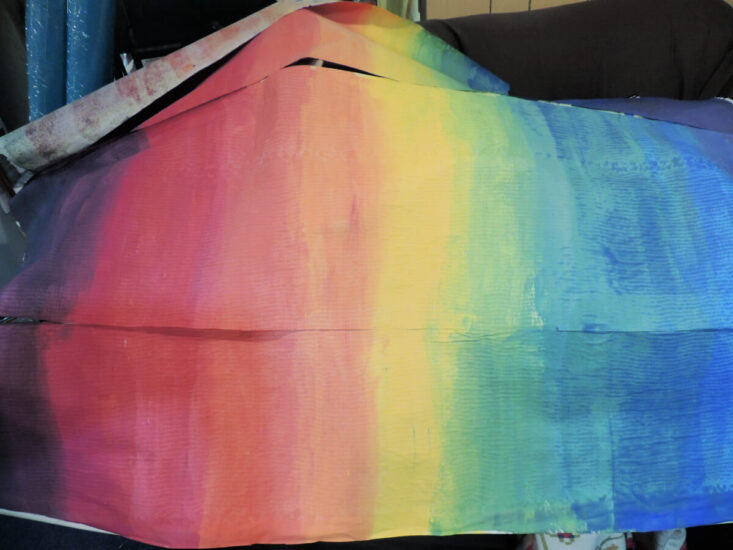
I layed it out on the floor for a few hours to completely dry. Isn’t it pretty?
Yarn Sublimation Time
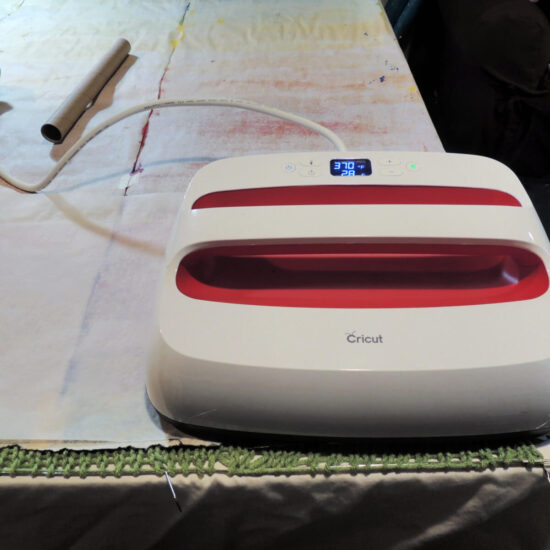
Now it was time to sublimate the yarn blank! I already had the blank stretched out on my sheet-covered table. I layed the dry painted paper, sublimation paint sided down, on the blank. Then I put my Easy Press on it’s base on the table and warmed it up to 370 degrees.
Once the Easy Press was warmed up, I started sublimating. I layed a piece of protective paper, about 3 times as long as the Easy Press, on the painted paper. I started with 45 seconds on the timer and pressed in overlapping sections.
As I went on, I switched to 50, then 55 seconds. At this point, I would say 60 seconds is probably the best way to go. Once the timer was done, I moved the press over so it covered a little over the middle of the protective paper, and a little of what I had already pressed. Then I moved it 2 more times. So, with a piece of protective paper that was 3 times the length of the press, I pressed in 4 parts to be sure of overlap.
Then I slid the paper up so that it overlapped the top of what I had just pressed, and repeated the process. I did this over and over until I hit the edge of the blank, then I repeated next to that column of pressed blank until the entire blank had been pressed.
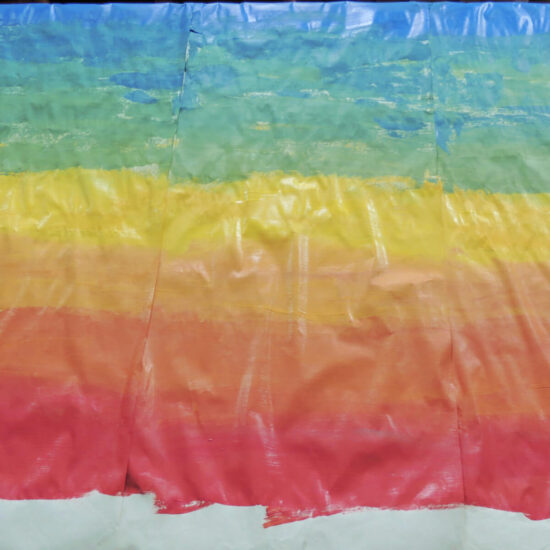
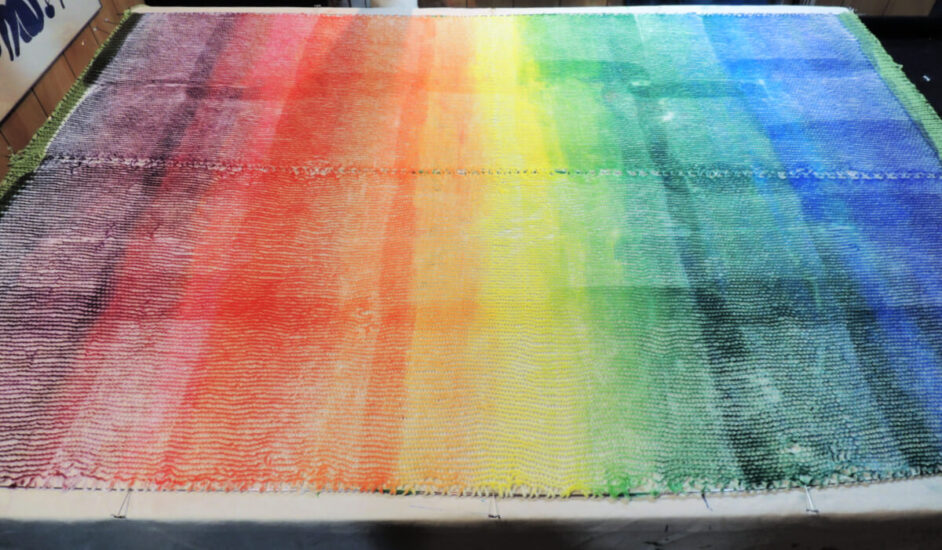
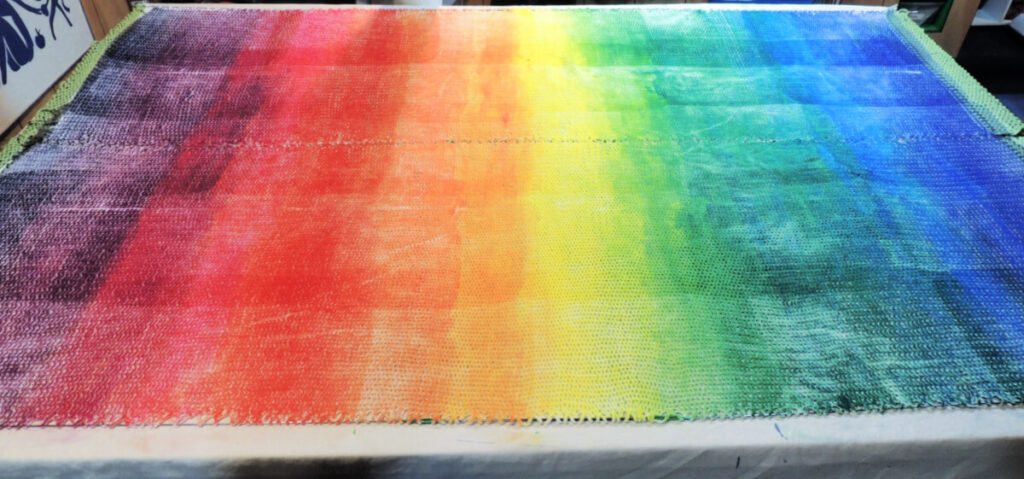
Here you can see the yarn blank after I sublimated it. The overlap areas are pretty clear. This is why I think 60 seconds may be a better bet, and maybe even overlap so that the whole thing gets pressed twice, if you want even more vibrant color.
You’ll see at the end, this was still plenty vibrant.
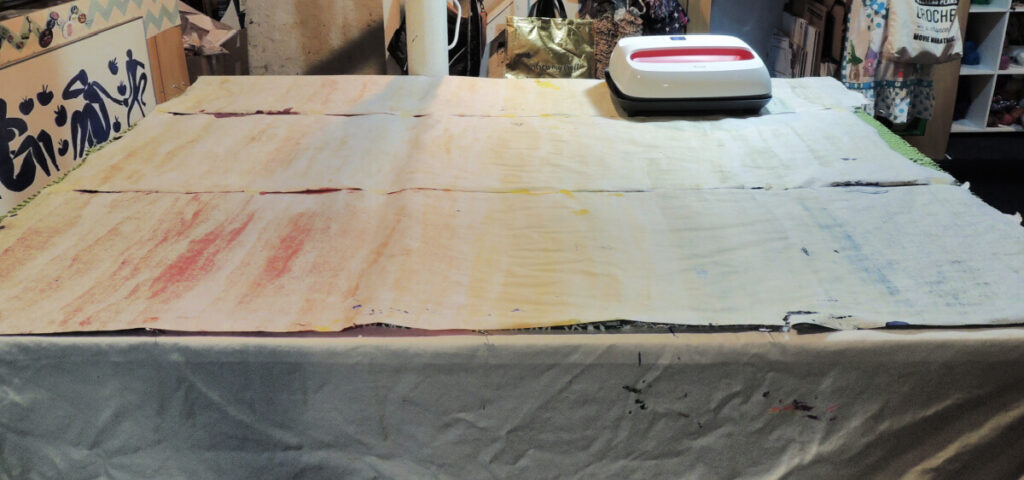
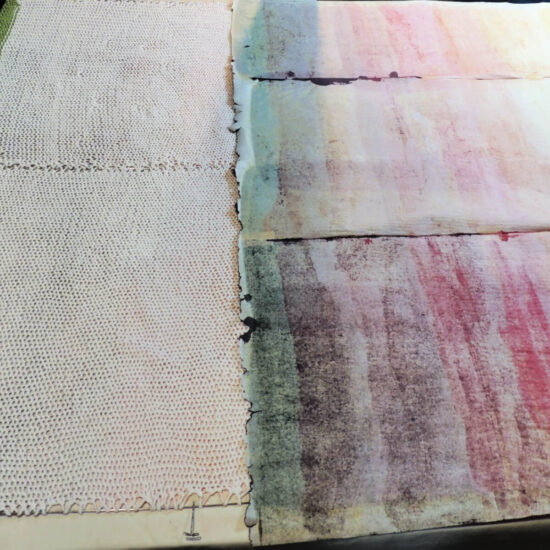
This is what the paper looked like after I had sublimated one side of the blank. Still FULL of sublimation paint!!
I called a child down for some help at this point. I unpinned the blank from the table, and we then flipped it over. This was a 2 person job because it was so large and had a blocking wire “frame” making it need to be flipped all at once.
Then I layed the painted paper on top of it, and repeated the sublimation process.
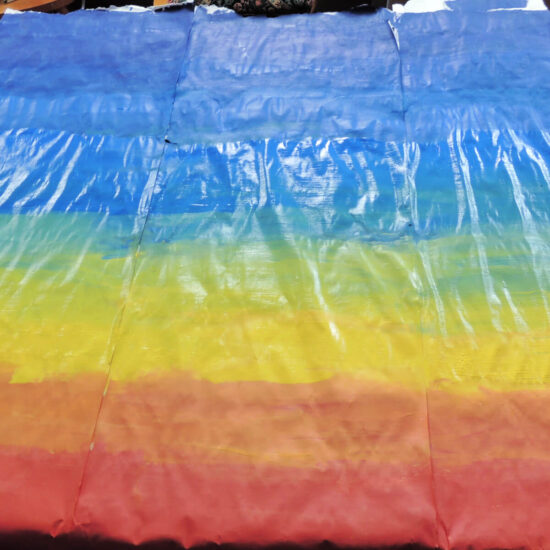
Look at that, side 2. It’s even brighter because of the increased time. This is so cool! I think I may at some point knit or crochet something in poly yarn and sublimate it after it’s done so it has this sort of look. I really like it! Plus, I’d be done at this point if I had made my yarnie creation first. 🙂
Sublimation Done, Time to Wind the Yarn
Next I removed all the wires and ended up with my 2 separate blanks again. The blanks looked the same, as they had been side by side on the table. I did this on purpose because I want to make an item with it that has a center seam, and each half is made from the center out. This way the two sides will have the same color pattern.
How do you unravel a yarn blank?
Unraveling the yarn blanks was easy. First I cut most of the scrap yarn off the top, then I just pulled the cut bit until I got to the poly yarn. I cut off the scrap yarn and attached one end of the yarn to a peg of my swift, and slowly spun the swift so it unraveled the blank while winding the yarn around the swift.
I was so excited to see the polka dot rainbow yarn I had created, it was epic!! Below you can see one of the blanks wound on the swift, and the other ready to be unraveled on the table.
I tied the yarn that was on the swift in the center of each of the 4 sides before removing it. Once I had both blanks made into hanks this way, I put them each in a mesh bag.
Next I ran the mesh bag through the delicate cycle on my washing machine, with some Unicorn Fibre Wash. If you’ve been here for a while, you know Unicorn Clean is my go-to brand for yarn care. It’s never let me down and, like Artesprix, it’s a family owned business that is a joy to work with!
One last step! After allowing my yarn hanks to air dry for 2 days (I wanted to be super sure they were dry!) it was time to wind them. I placed the hanks on a swift and used my trusty winder to make them into happy little cakes.
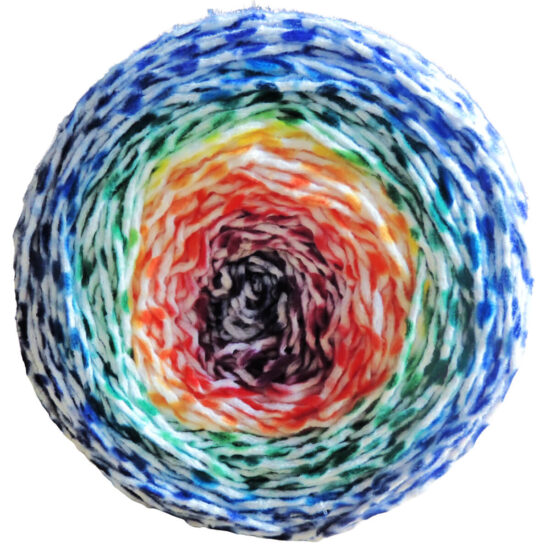
Look at those, aren’t they just fab?!! I am so unbelievably happy with these 2 yarn cakes. I’ve been wanting to try this for years and just needed a sublimation medium like this sublimation acrylic paint to be able to make it happen. After all that time, the result is even better than I imagined!

Happy crafting my friends!
FAQs
Can I use machine-knit stockinette stitch tubes instead of panels?
I don’t see why not. You would have to sublimate each side, then flip it inside out and sublimate each side again, but it should still work fine.
Can I get rid of all the kinks in my sock blank yarn?
The washing after it’s made into a hank will help. Another trick is to take the hanks when they are still wet and whip them over a deck railing or chair back. Do it outside, water goes everywhere! The water won’t have dye in it, as the sublimation doesn’t bleed. The whipping helps to get the kinks out and starts the drying process.
I don’t mind if my yarn is slightly kinky, as I feel like it keeps it from winding too tight when I make the yarn cake with it.
What is the point of a yarn blank?
It’s a method of getting yarn ready to dye, or in this case, sublimate. With a blank you can make some awesome long color change, self striping, or gradient yarn that’s not so easy to make when the yarn is in hank form. I also adore the secret message tip I mentioned close to the beginning of this post.
Oh, and FUN!! Isn’t that the real point of art? To enjoy and express yourself. Even if what you need to express is sad, it’s still therapeutic. Arts and crafts are so good for your mental health, and have shown to help kids do better in school. It makes us happier and healthier and smarter. What’s not to love?!
Did you enjoy what you found here at Jessie At Home? Then sign up for my newsletter and like my Facebook page, so you’ll get all the updates on new tutorials, other posts, sales, and coming events.
If you have any questions, want to share pictures of your work, or just want to chat with Jessie and other crafty individuals, than join my Facebook group.

© Copyright 2022 Jessie Rayot / Jessie At Home All my videos, patterns, charts, photos and posts are my own work, so you may not copy them in any way. If you want to share this information with someone, then share the link to this post. If you want to share on your own blog / website, then you may use the first photo in this post and link back to this post. Also, you may not give away printed copies of this post.