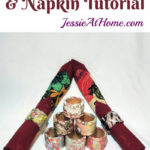
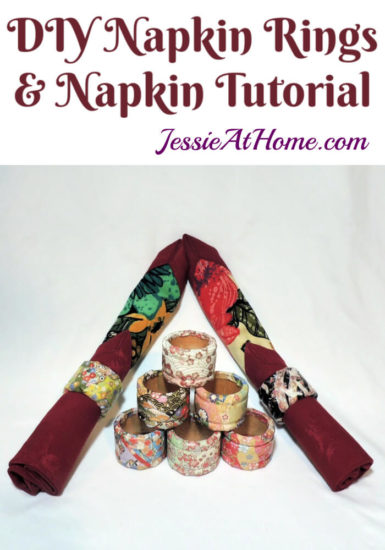
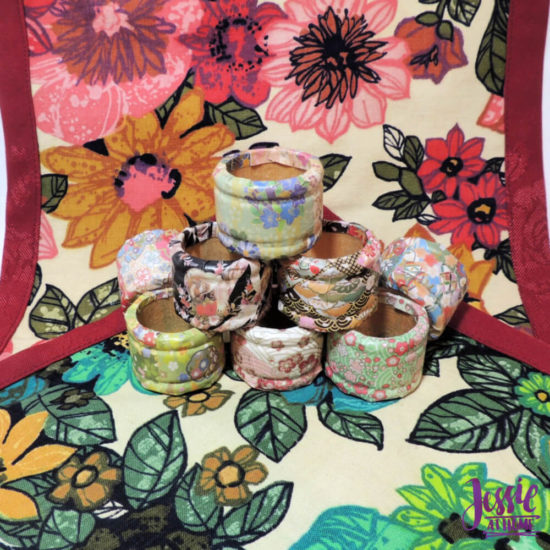
DIY napkin rings with origami paper allow you to show off your style and even celebrate the seasons and holidays. You can make these with solid or print origami paper, or any other paper. You can even decorate and color your own paper. Plus, I’ve included a tutorial to make your own fabric napkins to go with the napkin rings.
Products used in this post were provided by Woodpeckers Crafts, Clover, and Plaid. All opinions are my own.
I’ve had these wood napkin rings for a while now and I’ve been trying to decide how I want to decorate them. Then the other day I received a box from my parents who are stationed in Japan and it included some really pretty origami paper. Suddenly I had an idea!!
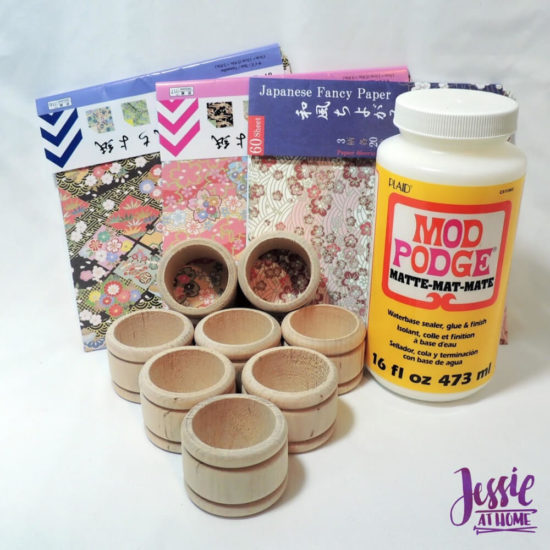
Here is what you will need for your napkin rings and napkins
- 8 unfinished wood napkin rings
- 8 sheets of origami paper
- Mod Pogde matte or gloss (matte used in samples)
- 1/2 – 1″ flat paint brush
- 1 yd napkin fabric (washable)
- 1 yd decorative fabric (washable)
- thread to match napkin fabric
- fabric scissors
- straight pins
- iron
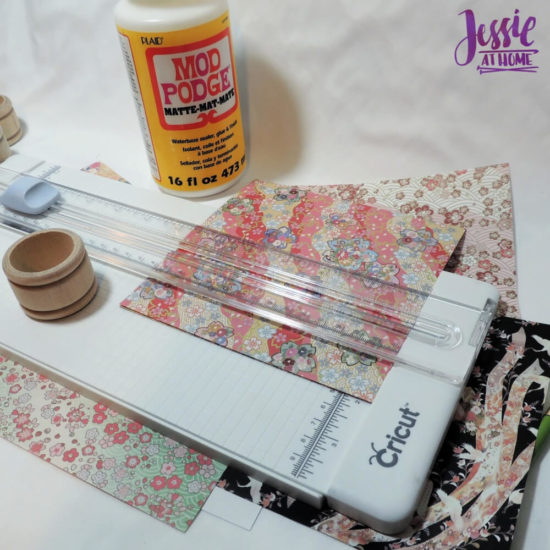
Start off by cutting the paper into 2″ x 6″strips. Most origami paper is 6″ square, so you only need to cut it once. If you are using the same paper on multiple rings, you can get 3 strips from each piece.
- Plaid Website
- Amazon – Folk Art, Mod Podge, Bucilla, Fabric Creations, Gallery Glass, Plaid, PlaidFX
- YouTube
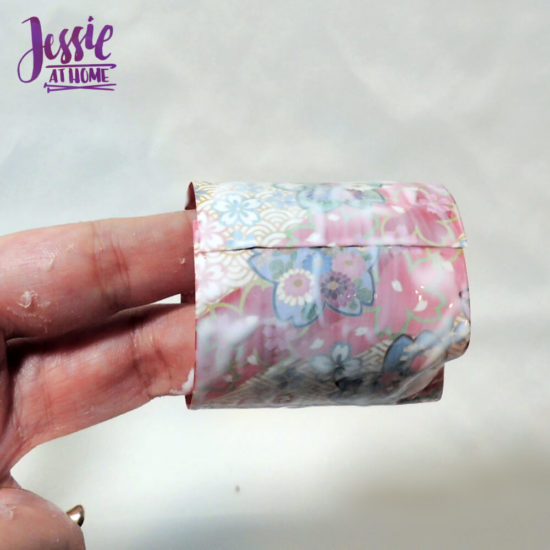
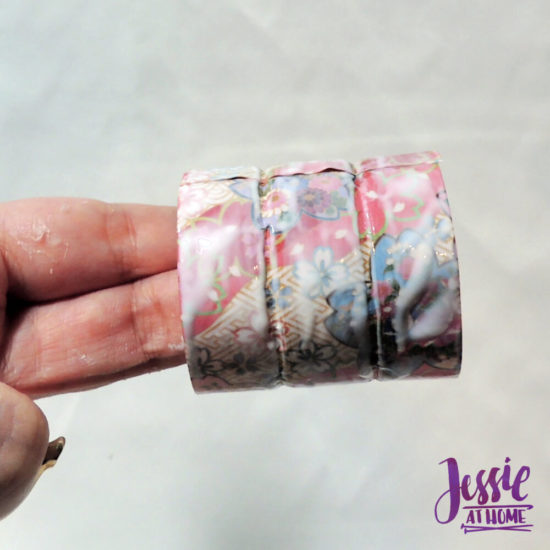
Next, paint the ring with Mod Podge, then carefully wrap it with a strip of paper so that there is an even amount of paper hanging off both ends. You will need to paint a little more Mod Podge on the paper where it overlaps.
Then generously paint the outside of the paper with Mod Podge. It is possible to do this step and the remaining steps for just the top half of the ring first, let it dry, and then the bottom half. I sometimes like getting messy, so I just did it all at once! 🙂
There are 2 groves in the napkin ring. Use the back end of the paintbrush or something else with a dull tip to gently push the paper into the groove. The wetness of the paper from the Mod Podge will make it push in nicely.
Now hold the napkin ring up so you can see inside. Paint the inside of the paper overlap, and the top of the inside of the napkin ring with Mod Podge.
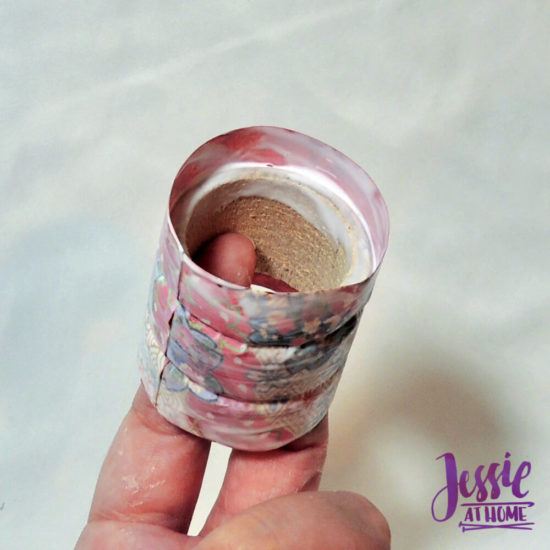
Use the brush to “paint” the paper over and into the ring. You may have to occasionally whip the brush on a paper towel. If there is too much Mod Podge it won’t start to dry enough to make the paper actually stick and stay while you do this. Once it is all pressed in, just keep smoothing it with the brush until it stays down.
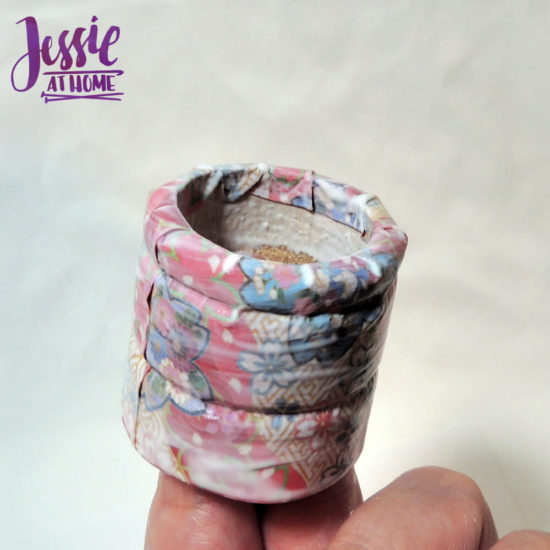
Flip over and repeat on the other end. Allow to dry. I layed a thin dowel between 2 chairs and then slid the napkin rings onto the dowel to dry so they wouldn’t stick to anything. You could also stand them on end on plastic wrap or wax paper and flip them every 10 minutes or so.
While those dry, let’s make some napkins! My napkins are rather small (12″ square” as I did not have large enough pieces of the decorative fabric I wanted to use. You can make yours whatever size you want. Most napkin are 16″ 18″ or 20″ square.
Cut the decorative fabric so it is 1″ smaller then your desired square – so for 12″ square I cut 11″ square, for 16″ square you would cut 15″ square.
Cut the napkin fabric so it is 2 1/2″ larger then your desired square – so for 12″ square I cut 14 1/2″ square, for 16″ square you would cut 18 1/2″ square.
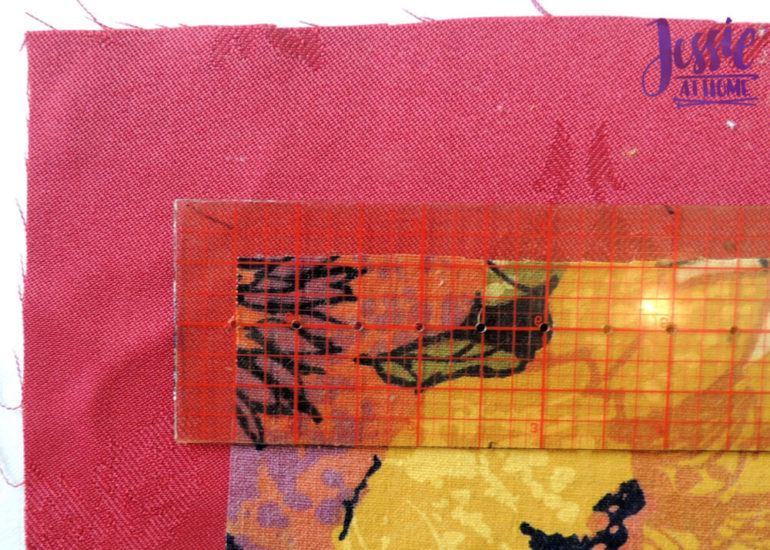
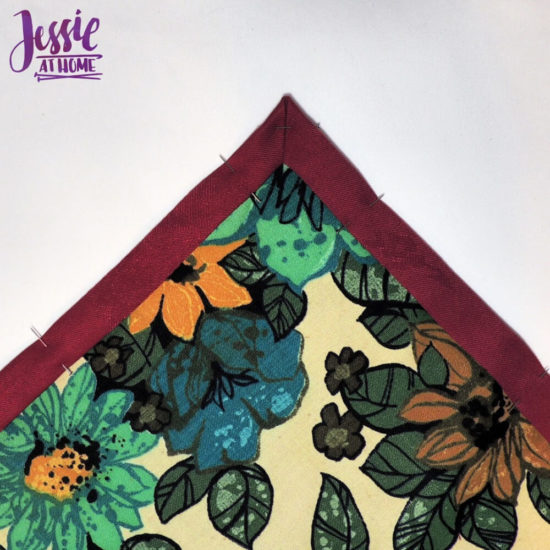
Lay the napkin fabric out with the right side down, place the decorative fabric on top with the right side up and centered on the napkin fabric. Use a ruler to find the corner 1/2″ up and 1/2″ over from the corner of the decorative fabric (see above) and then fold the napkin fabric diagonally from that point (see below.) Slide out ruler and press well.
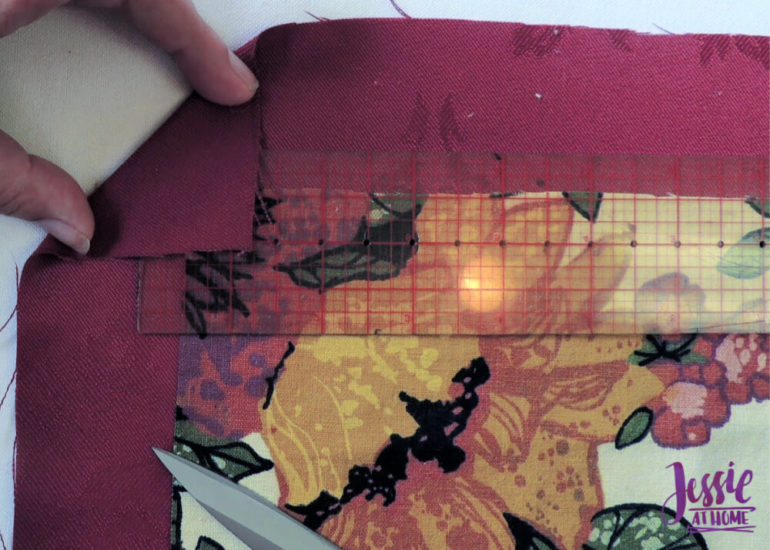
Measure up 1 1/4″ from the top of the decorative fabric and fold down then press the napkin fabric.
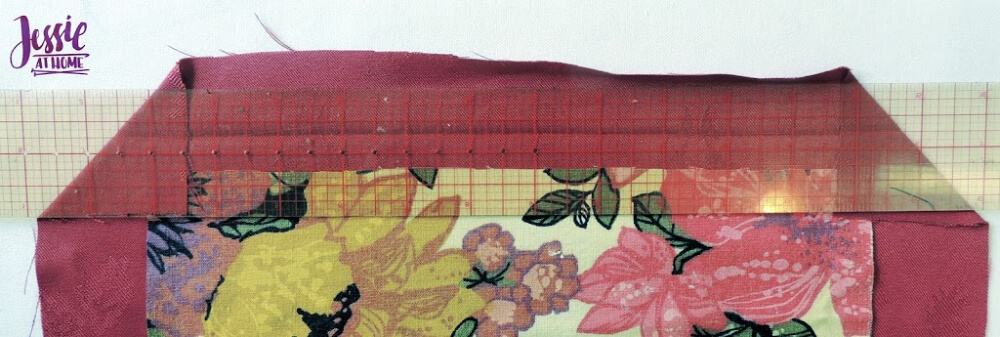
Measure up 1/2″ from the top of the decorative fabric and fold down then press the napkin fabric again.
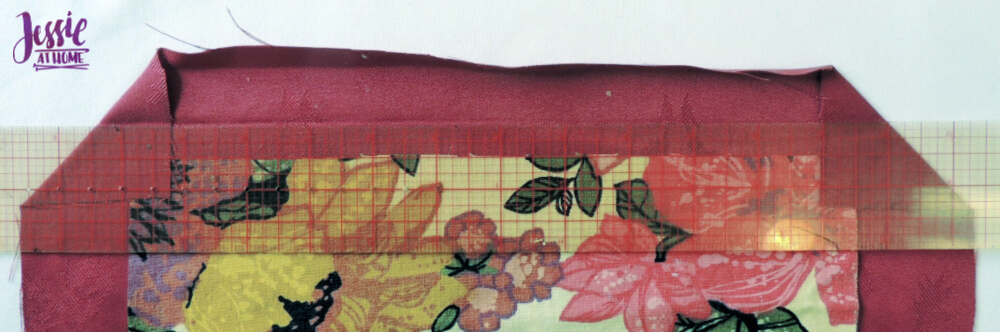
Clip the corners about 1/2 in from the diagonal fold. Fold on both pressed lines and pin down.
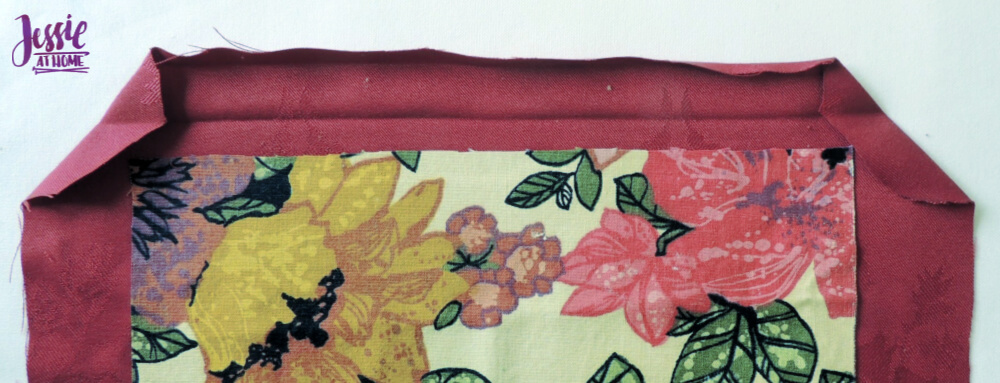
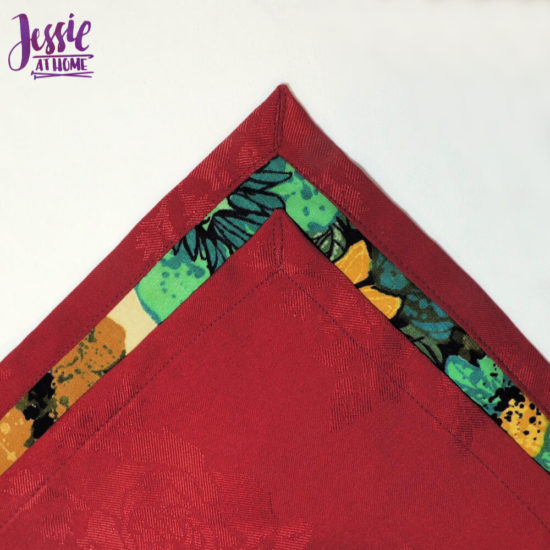
Rotate the napkin and repeat this on the opposite side. Then repeat on the other 2 sides. Be sure the corners meet nicely as seen below.
Sew the napkin close to the edge of the fold over. Sew up one side and down the other of each corner as seen below.
Ta-da!! Your napkins are done and your DIY napkin rings should be dry by now as well. Time to invite some friends over and make them a yummy dinner.
Did you enjoy what you found here at Jessie At Home? Then sign up for my newsletter and like my Facebook page, so you’ll get all the updates on new tutorials, other posts, sales, and coming events.
If you have any questions, want to share pictures of your work, or just want to chat with Jessie and other crafty individuals, than join one of our free Zoom Sit & Stitches. Find them on our Events Calendar.

© Copyright 2019 Jessie Rayot / Jessie At Home®, LLC All my videos, patterns, charts, photos and posts are my own work, so you may not copy them in any way. If you want to share this information with someone, then share the link to this post.