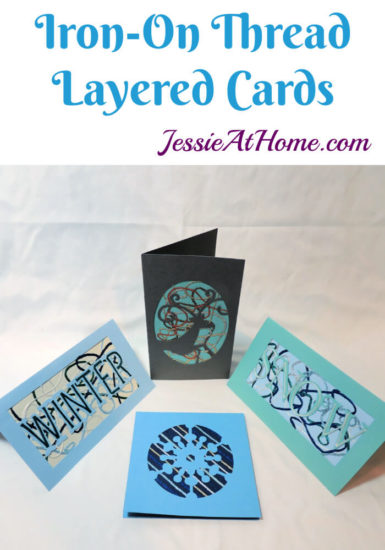
Iron-On Thread is such a nifty craft supply! I had a few sets of some, so I made layered cards with it and now I’ll show you how. It’s really easy to use and is a great way to add some personality to your crafting.
Products for this tutorial were provided by Kreinik, Clover, and Cricut. All opinions are my own.
I discovered Kreinik’s Iron-On Thread a year ago, and immediately thought it was just the coolest craft supply! Paired with the Clover Mini Iron and some layered cards which can be made on your Cricut (or bought at a craft store, or even hand-cut), and you have a great evening of crafting.
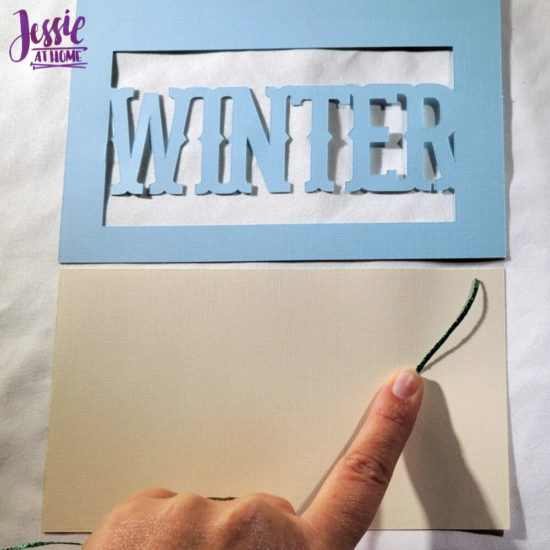
First you will need a layered card. Basically this is a card with an image cut out of the front, and a piece of card stock in another color that gets glued behind the image. When buying these in the craft store, sometimes they have the pieces that go behind the cut out, and sometimes they don’t. If they don’t, just buy some solid card stock and cut your own.
I made my cards with my Cricut Maker. The envelopes as well. I used designs in their library, but you can design your own as well. When making the backing, make it a tiny bit smaller then the entire front of the card so it won’t show on the edges or interfere with the fold.
To get started, take the backing piece of card stock and start ironing on your thread. The thread comes with a pad that sticks to the mini iron and keeps the glue from sticking to your iron. So stick that on your mini iron and heat it to high.
Take the end of a piece of thread and place it where it will be hidden by the card. Press it down with the iron. The heat will melt the glue and stick the thread to the card stock.
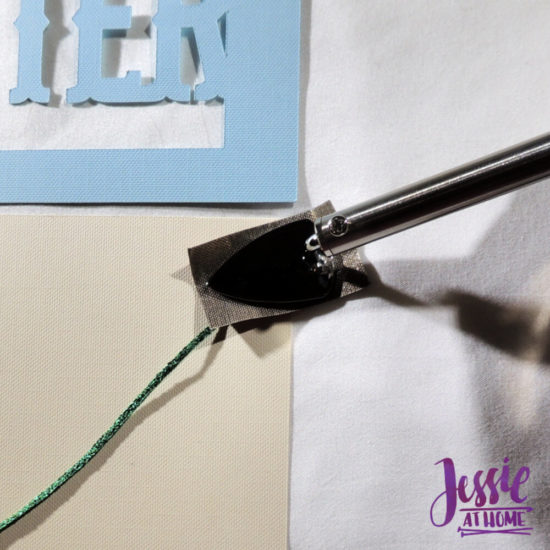
Continue laying out the thread and pressing it. Be sure to press both cut ends where they will be covered by the card, unless you want the cut edge as part of your design.
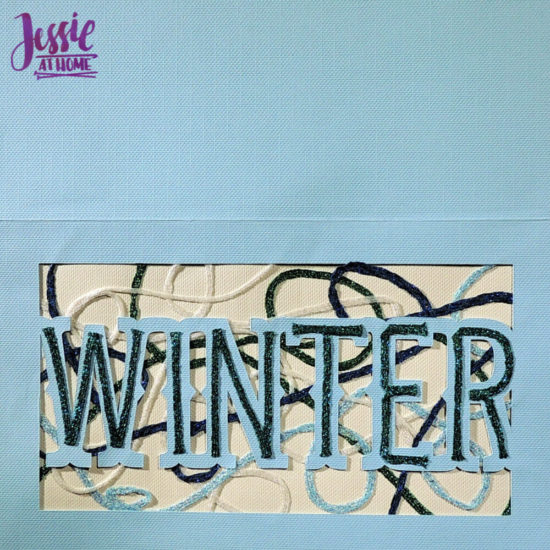
I attached the backing to the card in a couple ways. First I placed a glue dot on each corner. I then stuck it to the back of the card front. Next I pressed the back of the backing with the iron.
Then I flipped the card over so I was looking at the front of the card. I firmly pressed the parts of the card front that were not cut out and were over thread. This caused the iron-on thread to act as glue and hold the layers together.
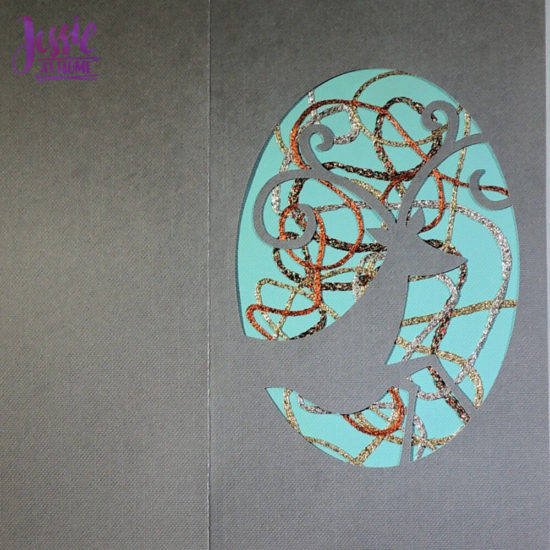
Lastly, I carefully ironed thread in the inside of the letters. I was very happy with the results!
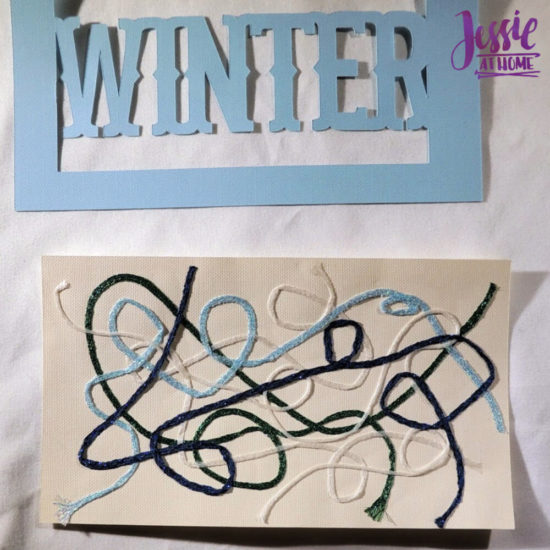
For my second card, I tried something a little different with the thread. I cut 5 lengths of thread first, then I ironed down just the end and allowed the rest to roll and shape on its own. You can see this step in the image below.
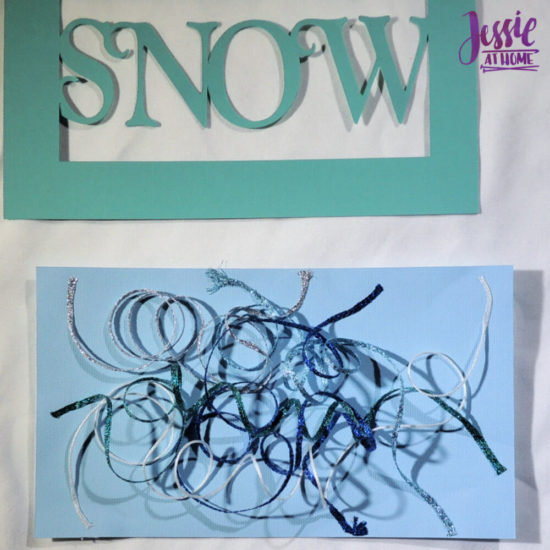
I then started pressing random sections, allowing the thread to make its own design as I went. Sometimes I nudged it a bit to keep away clumps and empty spots. I made sure all the thread was pressed and stuck well, then attached it to the card front. Once again, I highlighted the lettering with more thread.

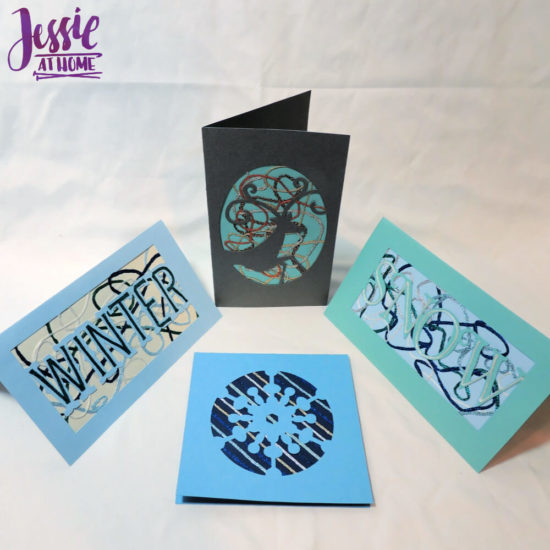
I made one more card in the same manner as I made the first. I’m not sure which way I like better, they were both fun!
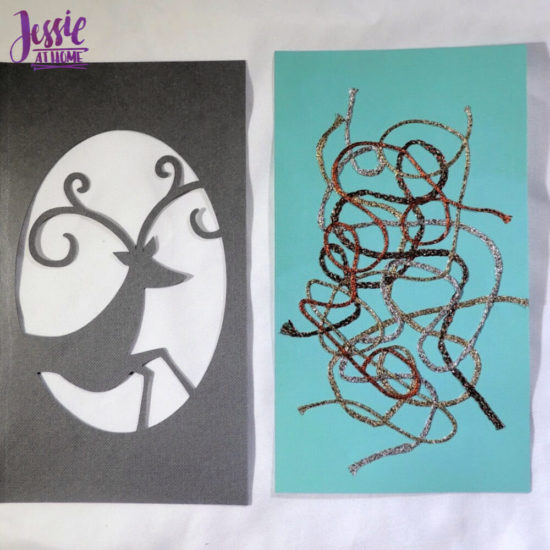
Of course, you could also make designs with the tread. There are so many options with this cool craft supply!
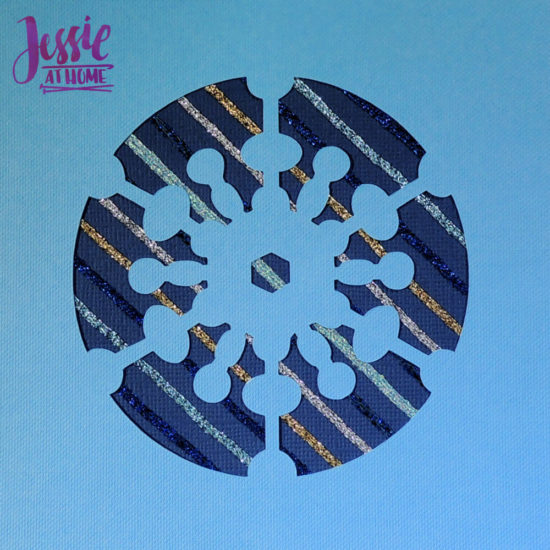
For my last card, I went more planned. I ironed diagonal stripes on the backing. I started with the middle stripe and worked out. Rather then cutting each stripe first, I ironed them down from one end, and then stopped just short of the edge, cut the thread, and ironed the end down.
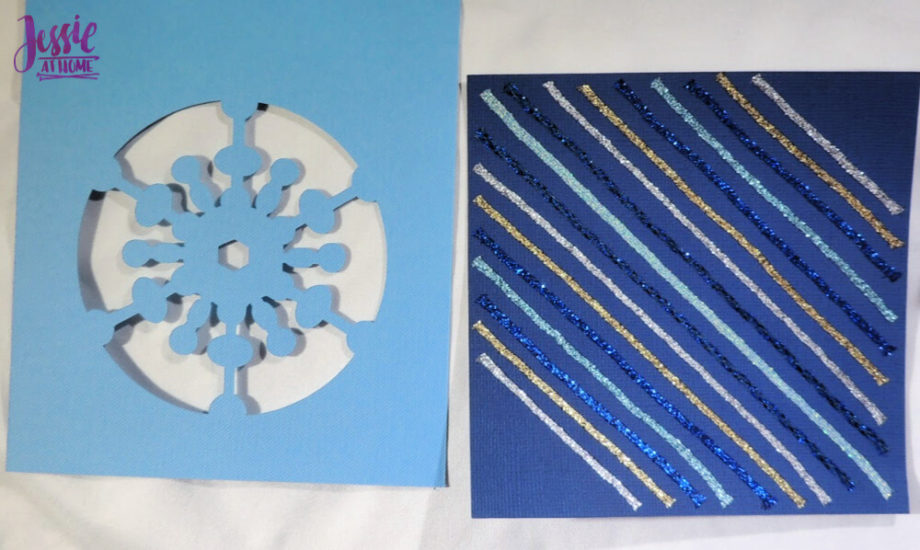
I really like the look this gave me. I think spirals would be really cool as well! If you want to make a more planned shape with the thread, you can first pencil out the design and then iron on the thread.
I don’t know who will be getting these cards, but they sure are pretty! Maybe I’ll have to buy some more card stock and make even more. I bet the kiddos would love to do this. They are old enough and safe enough that I feel fine letting them loose with the mini iron.
Happy crafting and happy holidays my friends!
Did you enjoy what you found here at Jessie At Home? Then sign up for my newsletter and like my Facebook page, so you’ll get all the updates on new tutorials, other posts, sales, and coming events.
If you have any questions, want to share pictures of your work, or just want to chat with Jessie and other crafty individuals, than join one of our free Zoom Sit & Stitches. Find them on our Events Calendar.

© Copyright 2019 Jessie Rayot / Jessie At Home®, LLC All my videos, patterns, charts, photos and posts are my own work, so you may not copy them in any way. If you want to share this information with someone, then share the link to this post.