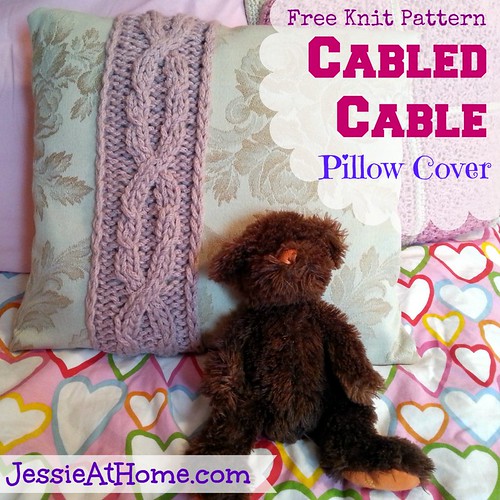
Cabled Cable Pillow Inset
Knit Pattern
Intermediate Skill Level
Designed by Jessie Rayot
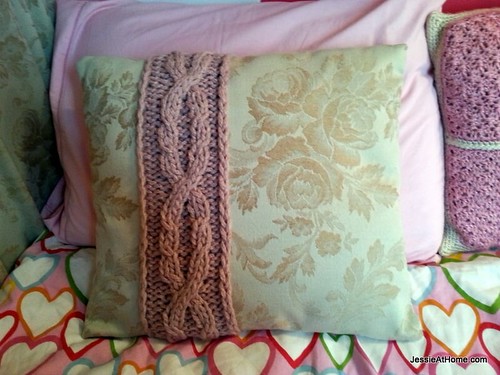
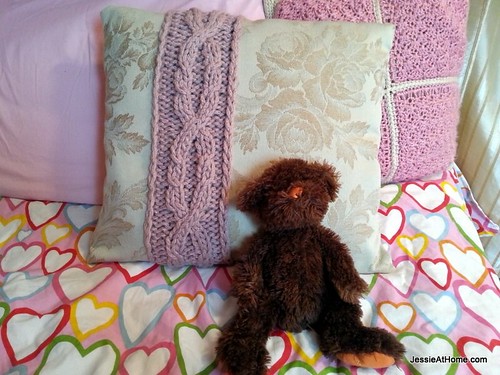
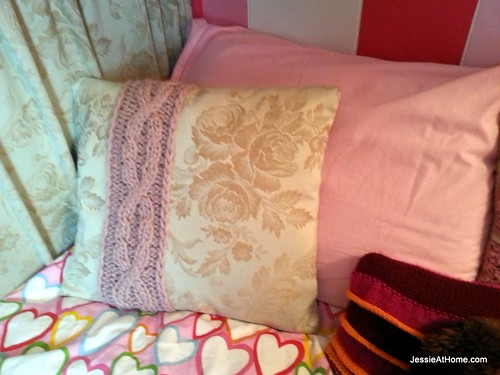
This little cable pattern can be used in many ways. Here I have used it as a stripe on a pillow cover for my daughter’s Pink Princess Room. It matches the giant cable rug I made for her. The fun of this pattern is that it is a cable that cables around itself!
Skill Level:
Intermediate
Yarn:
Super Bulky yarn, a description of mine is in the getting started section.
Needles:
Whatever works with your yarn
Gauge:
Not so important, as this is really more of an applique.
Size:
Depends on your yarn, and how long you work
Stitches and abbreviations used:
co ~ cast on
K ~ knit
P ~ purl
Getting Started:
This is really just a cable pattern I came up with (though that does not mean someone else didn’t think of the same cable pattern before) which I made and then sewed onto a pillow cover. I will explain how to do that.
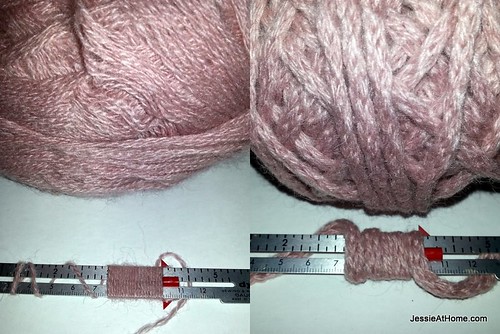
For my yarn, I started with 19 WPI (wraps per inch) or superfine lace weight yarn I bought from the Mill Ends bin, so that is all the info I have on it. I then used my Caron Embellish-Knit! to make the yarn into i-cord which was 4 ½ WPI or bulky weight.
I was covering a 16×19 inch pillow, so I needed a piece that was at least 17″ long. I followed the pattern and measured after each repeat until the piece was over 17”.
Pattern:
Co 12
Row 1: Slip 1 purl wise, p2, k2, p2, k2, p3.
Row 2 ~ 12 even: Slip 1 knit wise, k2, p2, k2, p2, k3.
Row 3: Slip 1 purl wise, p2, k2, p2, k2, p3.
Row 5: Slip 1 purl wise, p2, slip 1 to cable needle, hold in back, k1, k1 from cable needle, p2, slip 1 to cable needle, hold in front, k1, k1 from cable needle, p3.
Row 7: Slip 1 purl wise, p2, k2, p2, k2, p3.
Row 9: Slip 1 purl wise, p2, slip 1 to cable needle, hold in back, k1, k1 from cable needle, p2, slip 1 to cable needle, hold in front, k1, k1 from cable needle, p3.
Row 11: Slip 1 purl wise, p2, k2, p2, k2, p3.
Row 13: Slip 1 purl wise, p2, slip 2 to cable needle, hold in front, p1, k2 from cable needle, slip 1 to cable needle, hold in back, k2, p1 from cable needle, p3.
Row 14: Slip 1 knit wise, k3, p4, k4.
Row 15: Slip 1 purl wise, p3, slip 2 to cable needle, hold in back, k2, k2 from cable needle, p4.
Row 16: Slip 1 knit wise, k3, p4, k4.
Row 17: Slip 1 purl wise, p2, slip 1 to cable needle, hold in back, k2, p1 from cable needle, slip 2 to cable needle, hold in front, p1, k2 from cable needle, p3.
Repeat rows 2 ~ 17: until piece is desired length ENDING ON ROW 11.
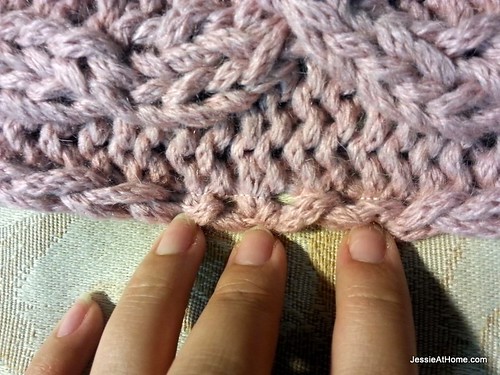
Last row: Slip 1 purl wise, p4, k4, p2, k4, p5.
Bind off purl wise.
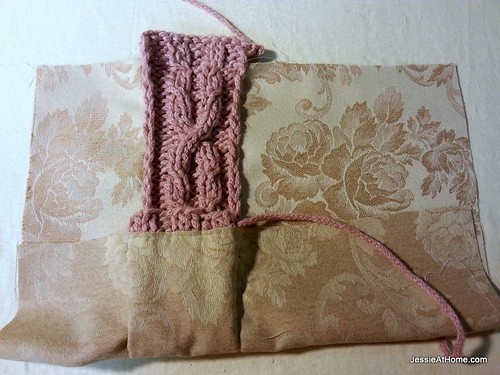
To make pillow cover:
Cut 2 pieces of fabric that are 1 ¼” larger than your pillow (my pillow was 16” x 19” so my 2 pieces were 17 ¼” x 20 ¼”.)
Pin cable strip onto one of the pillow cover pieces in the position you like. The best way to do this is to first pin the fabric piece onto a firm, flat surface, and to then pin the cable onto the fabric. The cable will be stretched, don’t worry, when the cover is on the pillow it will be pulled flat.
Top stitch the cable along the edge to the fabric, it will pull the fabric, but again, don’t worry.
Pin the two pieces of the pillow cover together, fronts facing each other, and sew around 3 sides. Turn the cover right side out and insert the pillow. Hand stitch the fourth side shut.
To find a printer friendly version of this pattern (text only, in black, no photos) click here. This will bring you to the listing for this pattern on Craftsy, where you can also find printer friendly versions of all my free patterns, and where you can purchase my sale patterns.
If you enjoy what you have found here at JessieAtHome, please like my Facebook page to get all the updates on new tutorials, other posts, sales, and coming events.
If you have any questions or concerns, want to share pictures of your work, or just want to chat with Jessie and other crafty individuals, than join my Facebook group.
 |

©Copyright 2014 Jessie Rayot / Jessie At Home All my videos, patterns and posts are my own work. Do not copy them in any way. If you want to share this information with someone, share the link to this post. If you want to share on your own blog / website, then you may use the first photo in this post and link back to this post. You may not give away printed copies of this post. Thank you.
This post may contain affiliate links/ads. If you purchase something from a link in this post, I may be compensated.


