
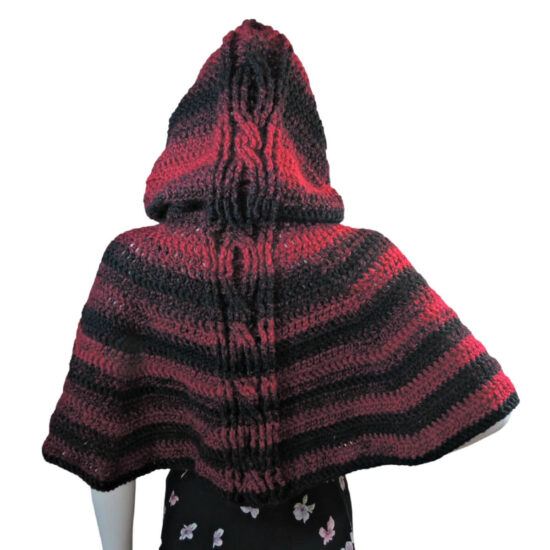
Inside: Make this crochet hooded cape with a cool cable detail. Everyone looks cool in a cloak with a hood. Try it in red!

The yarn for this design was provided by Lion Brand. All opinions are my own.
This pattern was originally published on 12/16/17. The most recent update was made on 4/8/25.
A while back I created the Hoodie Cowl, and ever since I have been wanting to create a hooded cape based on it. I finally have, and it’s everything I hoped it would be! The hood still has the cable running up the back, and the cape features 3 cables, one on the back, and one on each of the front edges. The cape can be completed with 3 skeins of Lion Brand Scarfie.
Table of contents
Hooded Cabled Cape
Crochet Pattern
Intermediate Skill Level
Designed by Jessie Rayot
Supplies
Size
Adult Woman
adjustable cape length
CLICK HERE for tips on altering size
Yarn
Lion Brand Scarfie: (78% Acrylic, 22% Wool), Size 5 – Bulky/Chunky, 312 yds / 150 g, (2.08 yds/g)
Cranberry/Black 205: 3 skeins to make pattern through Row 25 of Cape
-or-
Herrschners Worsted 8 Heathers: (100% acrylic), Size 4 – worsted weight, 489 yd / 448 m, 8 oz / 226 g per skein
Crochet Hook
US J/10, 6.00mm
Gauge
Learn about gauge HERE
12 sts x 7 rows = 4″ square in double crochet
Other Supplies
- Cloak Clasp
- Sewing Needle
- Sewing Thread
- Tapestry/Yarn Needle
Stitches and Abbreviations
click on highlighted sts for tutorials
blo – back loop only
bpdc – back post double crochet
bptr – back post treble crochet
ch – chain
dc – double crochet
fpdc – front post double crochet
fptr – front post treble crochet
hdc – half double crochet
rs – right side
sp(s) – space(s)
st(s) – stitch(es)
ws – wrong side
( ) – work step in parentheses in indicated stitch
[ ] – work step in brackets number of times indicated

Get the Ad-Free Printable PDF at These Sites
- Jessie At Home – Buy directly from me, you can also get bonus printables!
- Crochet Foundry – You can get bonus printables here as well.
- Ravelry
- Etsy
- LoveCrafts
Special Stitches
back post treble crochet (bptr): Yo twice, insert hook around post of indicated st from back to front to back again, yo, pull up a loop (4 loops on hook), [yo, pull through 2 loops] 3 times.
front post treble crochet (fptr): Yo twice, insert hook around post of indicated st from front to back to front again, yo, pull up a loop (4 loops on hook), [yo, pull through 2 loops] 3 times.
double chain 2 (dch2): Insert hook in st, yo, pull up a loop (2 loops on hook), yo, pull through both loops, insert hook in left (right if left-handed) vertical loop of st part just made, yo, pull up a loop (2 loops on hook), yo, pull through both loops.
Tips & Tutorials
Find video tutorials, gauge and size adjustment help, and other tips here: https://www.jessieathome.com/tips-tutorials-for-the-hooded-cabled-cape/
Pattern Notes
- Read through all instructions before beginning.
- The stitch count is at the end of each rnd/row after the period, usually only if the count has changed from the previous rnd/row. [count here]
- Chs are not included in stitch counts unless specified.
- Sl sts ARE counted as sts in the Hood section of the pattern.
Crochet Hooded Cape Pattern
Hood
Row 1 (RS): Ch 95, sl st in 2nd chain from hook and each of next 2 chs, sc in next 10 chs, hdc in next 10 chs, dc in next 48 chs, hdc in next 10 chs, sc in next 10 sc, sl sl in last 3 chs. [94 sts]
Row 2 (WS): Ch 1, turn, sl st in blo of first 4 sts, sc in next 10 sts, hdc in next 10 sts, dc in next 17 sts, bptr around next 2 sts, fptr around next 2 sts, bptr around next 4 sts, fptr around next 2 sts, bptr around next 2 sts, dc in next 17 sts, hdc in next 10 sts, sc in next 10 sts, sl st in blo of next 3 sts, leave last st unworked. [93 sts]
Row 3: Ch 1, turn, sl st in blo of first 4 sts, sc in next 10 sts, hdc in next 10 sts, dc in next 16 st, fptr around next 2 sts, bptr around next 2 sts, skip 2, fptr around next 2 sts, fptr around 2 skipped sts, bptr around next 2 unworked sts, fptr around next 2 sts, dc in next 16 sts, hdc in next 10 sts, sc in next 10 sts, sl st in blo of next 4 sts, leave last st unworked. [92 sts]
Row 4: Ch 1, turn, sl st in blo of first 5 sts, sc in next 10 sts, hdc in next 10 sts, dc in next 15 sts, bptr around next 2 sts, fptr around next st, skip 1, bptr around next 2 sts, fptr around skipped st, skip next 2 unworked sts, fptr around next st, bptr around 2 skipped sts working behind the previous st, fptr around next st, bptr around next 2 sts, dc in next 15 st, hdc in next 10 sts, sc in next 10 sts, sl st in blo of next 4 sts, leave last st unworked. [91 sts]
Row 5: Ch 1, turn, sl st in blo of first 5 sts, sc in next 10 sts, hdc in next 10 sts, dc in next 14 sts, fptr around next 2 sts, skip 1, fptr around next 2 sts, bptr around skipped st working behind previous 2 sts, bptr around next 2 unworked sts, skip 2, bptr around next st, fptr around 2 skipped sts, fptr around next 2 unworked sts, dc in next 14 sts, hdc in next 10 sts, sc in next 10 sts, sl st in blo of next 5 sts, leave last st unworked. [90 sts]
Row 6: Ch 1, turn, sl st in blo of first 6 sts, sc in next 10 sts, hdc in next 10 sts, dc in next 13 sts, bptr around next 4 sts, fptr around next 4 sts, bptr around next 4 sts, dc in next 13 sts, hdc in next 10 sts, sc in next 10 sts, sl st in blo of next 5 sts, leave last st unworked. [89 sts]
Row 7: Ch 1, turn, sl st in blo of first 6 sts, sc in next 10 sts, hdc in next 10 sts, dc in next 12 sts, fptr around next 2 sts, skip 2, bptr around next st, fptr around 2 skipped sts, bptr around next 2 unworked sts, skip 1, fptr around next 2 sts, bptr around skipped st working from behind previous 2 sts, fptr around next 2 unworked sts, dc in next 12 sts, hdc in next 10 sts, sc in next 10 sts, sl st in blo of next 6 sts, leave last st unworked. [88 sts]
Row 8: Ch 1, turn, sl st in blo of first 7 sts, sc in next 10 sts, hdc in next 10 sts, dc in next 11 sts, bptr around next 2 sts, fptr around next st, skip 2, fptr around next st, bptr around 2 skipped sts working behind previous st, skip 1, bptr around next 2 sts, fptr around skipped st, fptr around next unworked st, bptr around next 2 sts, dc in next 11 sts, hdc in next 10 sts, sc in next 10 sts, sl st in blo of next 7 sts, sl st in blo of unworked st of Row 6, sl st in blo of unworked st of Row 4, sl st in blo of unworked st of Row 2. [91 sts]
Row 9: Ch 1, turn, sl st in blo of first 11 sts, sc in next 10 sts, hdc in next 10 sts, dc in next 10 sts, fptr around next 2 st, bptr around next 2 sts, skip 2, fptr around next 2 sts, fptr around 2 skipped sts, bptr around next 2 unworked sts, fptr around next 2 sts, dc in next 10 sts, hdc in next 10 sts, sc in next 10 sts, sl st in blo of next 8 sts, sl st in blo of unworked st of Row 7, sl st in blo of unworked st of Row 5, sl st in blo of unworked st of Row 3. [94 sts]
Repeat rows 2-9 two more times.
Neck
Row 1 (WS): Turn, dch2 in first st, *[dc2tog, dc in next st] across. [63 sts]
Row 2: Turn, dch2 in first st, fpdc around next st, [bpdc around next st, fpdc around next st] until 1 st remains, dc in last st.
Row 3: Turn, dch2 in first st, bpdc around next st, [fpdc around next st, bpdc around next st] until 1 st remains, dc in last st.
Row 4: Rep Row 2.
Cape
NOTE: The video tutorial for Row 1 is different, there are 7 increases instead of 1 decrease. It is still useful, just be sure to note the difference.
Row 1 (WS): Turn, dch2 in first st, bptr around next 2 sts, fptr around next 2 sts, bptr around next 4 sts, fptr around next 2 sts, bptr around next 2 sts, [dc in next 3 sts, pm in last st made] 3 times, dc in next 2 sts, dc2tog, bptr around next 2 sts, fptr around next 2 sts, bptr around next 4 sts, fptr around next 2 sts, bptr around next 2 sts, [dc in next 3 sts, pm in last st made] 4 times, bptr around next 2 sts, fptr around next 2 sts, bptr around next 4 sts, fptr around next 2 sts, bptr around next 2 sts, dc in last st. – [62 sts]
Row 2: Turn, dch2 in first st, *fptr around next 2 sts, bptr around next 2 sts, skip 2, fptr around next 2 sts, fptr around 2 skipped sts, bptr around next 2 unworked sts, fptr around next 2 sts, [2 dc in marked st, dc in each st to next marker, pm in last st made] 4 times; rep from * once more, fptr around next 2 sts, bptr around next 2 sts, skip 2, fptr around next 2 sts, fptr around 2 skipped sts, bptr around next 2 unworked sts, fptr around next 2 sts, dc in last st. [70 sts]
Row 3: Turn, dch2 in first st, *bptr around next 2 sts, fptr around next st, skip 1, bptr around next 2 sts, fptr around skipped st, skip next 2 unworked sts, fptr around next st, bptr around 2 skipped sts working behind the previous st, fptr around next st, bptr around next 2 sts, [2 dc in marked st, dc in each st to next marker, pm in last st made] 4 times; rep from * once more, bptr around next 2 sts, fptr around next st, skip 1, bptr around next 2 sts, fptr around skipped st, skip next 2 unworked sts, fptr around next st, bptr around 2 skipped sts working behind the previous st, fptr around next st, bptr around next 2 sts, dc in last st. [78 sts]
Row 4: Turn, dch2 in first st, *fptr around next 2 sts, skip 1, fptr around next 2 sts, bptr around skipped st working behind previous 2 sts, bptr around next 2 unworked sts, skip 2, bptr around next st, fptr around 2 skipped sts, fptr around next 2 unworked sts, [2 dc in marked st, dc in each st to next marker, pm in last st made] 4 times; rep from * once more, fptr around next 2 sts, skip 1, fptr around next 2 sts, bptr around skipped st working behind previous 2 sts, bptr around next 2 unworked sts, skip 2, bptr around next st, fptr around 2 skipped sts, fptr around next 2 unworked sts, dc in last st. [86 sts]
Row 5: Turn, dch2 in first st, *bptr around next 4 sts, fptr around next 4 sts, bptr around next 4 sts, [2 dc in marked st, dc in each st to next marker, pm in last st made] 4 times; rep from * once more, bptr around next 4 sts, fptr around next 4 sts, bptr around next 4 sts, dc in last st. [94 sts]
Row 6: Turn, dch2 in first st, *fptr around next 2 sts, skip 2, bptr around next st, fptr around 2 skipped sts, bptr around next 2 unworked sts, skip 1, fptr around next 2 sts, bptr around skipped st working from behind previous 2 sts, fptr around next 2 unworked sts, [2 dc in marked st, dc in each st to next marker, pm in last st made] 4 times; rep from * once more, fptr around next 2 sts, skip 2, bptr around next st, fptr around 2 skipped sts, bptr around next 2 unworked sts, skip 1, fptr around next 2 sts, bptr around skipped st working from behind previous 2 sts, fptr around next 2 unworked sts, dc in last st. [102 sts]
Row 7: Turn, dch2 in first st, *bptr around next 2 sts, fptr around next st, skip 2, fptr around next st, bptr around 2 skipped sts working behind previous st, skip 1, bptr around next 2 sts, fptr around skipped st, fptr around next unworked st, bptr around next 2 sts, [2 dc in marked st, dc in each st to next marker, pm in last st made] 4 times; rep from * once more, bptr around next 2 sts, fptr around next st, skip 2, fptr around next st, bptr around 2 skipped sts working behind previous st, skip 1, bptr around next 2 sts, fptr around skipped st, fptr around next unworked st, bptr around next 2 sts, dc in last st. [110 sts]
Row 8: Turn, dch2 in first st, *fptr around next 2 st, bptr around next 2 sts, skip 2, fptr around next 2 sts, fptr around 2 skipped sts, bptr around next 2 unworked sts, fptr around next 2 sts, [2 dc in marked st, dc in each st to next marker, pm in last st made] 4 times; rep from * once more, fptr around next 2 st, bptr around next 2 sts, skip 2, fptr around next 2 sts, fptr around 2 skipped sts, bptr around next 2 unworked sts, fptr around next 2 sts, dc in last st. [118 sts]
Row 9: Turn, dch2 in first st, *bptr around next 2 sts, fptr around next 2 sts, bptr around next 4 sts, fptr around next 2 sts, bptr around next 2 sts, [2 dc in marked st, dc in each st to next marker, pm in last st made] 4 times; rep from * once more, bptr around next 2 sts, fptr around next 2 sts, bptr around next 4 sts, fptr around next 2 sts, bptr around next 2 sts, dc in last st. [126 sts]
Rows 10-17: Rep Rows 2-9. [190 sts at end of Row 17]
Rows 18-25: Rep Rows 2-9. [254 sts at end of Row 25]
14.25”
Rows 26-33: Rep Rows 2-9. [318 sts at end of Row 33]
Rows 34-41: Rep Rows 2-9. [382 sts at end of Row 41]
23.5”
Rows 42-49: Rep Rows 2-9. [446 sts at end of Row 49]
Rows 50-57: Rep Rows 2-9. [510 sts at end of Row 57]
32.5″
Finishing
- Weave in all ends.
- Cut 12″ of yarn, thread it through the yarn needle and sew through the edge of all the rows of the hood section, gathering up the sl sts. This will gather the sl st sections to finish the hood shaping.
- Weave in all ends.
- Sew cloak clasp to gathered sections of hood.
Happy Stitching!
FAQs
This is crocheted as one piece, the hood section is crocheted first, then you continue on and make the cape section.
Did you enjoy what you found here at Jessie At Home? Then sign up for my newsletter and like my Facebook page, so you’ll get all the updates on new tutorials, other posts, sales, and coming events.
If you have any questions, want to share pictures of your work, or just want to chat with Jessie and other crafty individuals, than join one of our free Zoom Sit & Stitches. Find them on our Events Calendar.

© Copyright 2017 Jessie Rayot / Jessie At Home®, LLC All my videos, patterns, charts, photos and posts are my own work, so you may not copy them in any way. If you want to share this information with someone, then share the link to this post.


It’s pretty. Maybe someday I can learn make myself one.
How delicious!!!
And it’s a free pattern!
Jessie, your a doll!
I just need to clarify that I’m reading it correctly: this is crocheted in one whole piece, and not hood then shawl then sew together, right? Because I have been looking for a single-piece pattern for a hooded shawl for a long time. Thank you!
Yes, it is one piece
Wow Jessie you have out done your self this time! I love this hooded cabled cape! I have made a few of your patterns and they have all come out perfect.. I know this one will as well.
Thank you so much for sharing your talent.
Thanks to you, I now have a pattern for a crocheted cape with hood! that Ive been looking for forever! And if it turns out fairly well,I would love to send you something for it.
Thank you! But I do get paid for the ads on the blog, as long as people come to my blog. So by reading my blog, you are paying me!
Ok I was just wondering if you turn your work with each tow or do you just work one side
You turn each row
Ok thank you
Another thing when you repeat rows 2 thru 9 do you start at 2 and work down
You repeat row 2, then 3, and so on.
This is gorgeous! It is so hard for me to find patterns that I like. I lowly have looked through hundreds of patterns and this is one of a few that are my style. Thank you so much for taking the time to create this pattern and offer it for free. I know it is extremely time consuming. So, again, many thanks. I can’t wait to get started on this!
Lowly=literally Gotta love text prediction ?
Hi Jessie, Thank you for the pattern. I completed the hood and began the cape section. I am not sure that the stitch count/cable parts are lining up. In Row 1 of the cape, do you start the chain 3 and 12 subsequent DC at the first slip stitch of row 9 of the hood section?
yes
This is the point I’m at right now and I’m having the same problem. I even went back and double counted all the stitches just to make sure I didn’t miss one somewhere, but everything is where it should be. First row of the cape I have an extra stitch (dc from last row 9 of hood) after the dc3tog and before the 1st bptr of the cable section. It appears the other side of row after the cable section will end up with an extra (unworked) stitch as well. 🙁
You’re right. The hood ends with 90 sts, but the first row of the cape only worked into 88 sts, I fixed it so it works into 90 sts now.
What is the stitch blo ?
back loop only
Love your pattern,I have completed the cape and hood,unfortunately would like more length,do you have any reccomendationsà?
I haven’t done that, but you should be able to just keep going.
I have finished the cape,but am having trouble finishing the hood and cape is there an easier way to explain it,as I am a novice and it just doesn’t make sense.thanks
I’m out of town for most of the summer. Try asking in my facebook group or other crochet groups for explanation on what you don’t understand. This is an intermediate pattern, so you will probably have a few questions.
The finishing instructions are confusing. A diagram, more pictures, or a quick video would be very helpful.
On the good, when u repeat rows 2 thru 9 twice, are you following instructions for row 2 then 3 then 4 , etc? Or just repeating directions for row 9, 18x ?
2, 3, 4, and so on. 🙂
Do you really use 12” of Yarn for finishing up? It seems too short for the hood…
Well you’re gathering it to about 2″, so that should be enough, but if you need more, use more.
Just curious about an aspect of the pattern. Why do you trade sc for dc in every row only to jump from 4 sc to 11 sc when the pattern repeats? Is this purely for the shape of the hood or is it compensation for the cable stItch? I just find it odd.
It’s been a while since I designed this, but I’m pretty sure it was for shaping.
Hi, out of curiosity, how would you go about creating a longer cape? Would I just need to repeat certain rows?
Yes, just keep repeating so the cable pattern stays intact and the increases keep going at the same pace.
How would you suggest making this knee length with a slit opening on either side for arms to be freed up? I love that it is one piece. The stitches I can manage. But altering a pattern always stymies me. Thank you for the lovely pattern.
Charlotte, by the start of 2022 I will have a crochet community where we can help with things like altering patterns. Be sure to sign up for my newsletter so you know when that happens! You can sign up HERE.
Hello
Sorry for my english (i’m french x))
I don’t understand the row 1 of the cape, I have finish my hood with 90 st but cable section is not together.
The cable section of cape is very earlier to the section of hood
I make it with the site
Thanks
Make sure you do all the dc2tog & dc3tog – those make the decreases to make the row shorter. There are 20 dc2tog and 4 dc3tog, which brings the count down to 62. This should also make the center back cables line up.
Hi so I tried to learn bptr and fptr for this but I am apparently terrible at it and I can’t figure it out. Since the bptr and fptr is what gives it the cable pattern, could I swap these for double or treble to make a cape but without the cable?
You could just do all dc, yes.
Did you try the linked tutorials?
https://www.jessieathome.com/stitchopedia-front-and-back-post-stitch-crochet/
https://www.jessieathome.com/stitchopedia-post-stitch-crochet-cables/
The hood seems like it’s small I just finished the second repeat of 2-9, so three time in total and a up to row 6 of the cape section and it’s only to the back of my head not even at my neck
I’m adding a post with video tutorials and tips today or tomorrow (the videos are uploading right now). This is included. You can just keep repeating and stop at any point that you want, then sl st to the end if there are unworked sts, or you can add a border. Both of those tips will be in the tutorial.
Loving it so far, but what does “skip 2” mean, for example in row 4 in the middle of doing the bptr and fptr stitches. Does that mean skip 2 stitches or skip 2 posts? Whichever one I do, it doesn’t seem to line up to when 16dc starts, theres always a gap left. Thanks!
Both, the posts are on the sts, so you are skipping 2 of them. I’m adding a post with video tutorials and tips today or tomorrow (the videos are uploading right now).
Never mind, I got my answer from the video. Sorry
I’m glad the video helped!
By skipping 2, do I just chain 2 before I fptr around next 2 sts