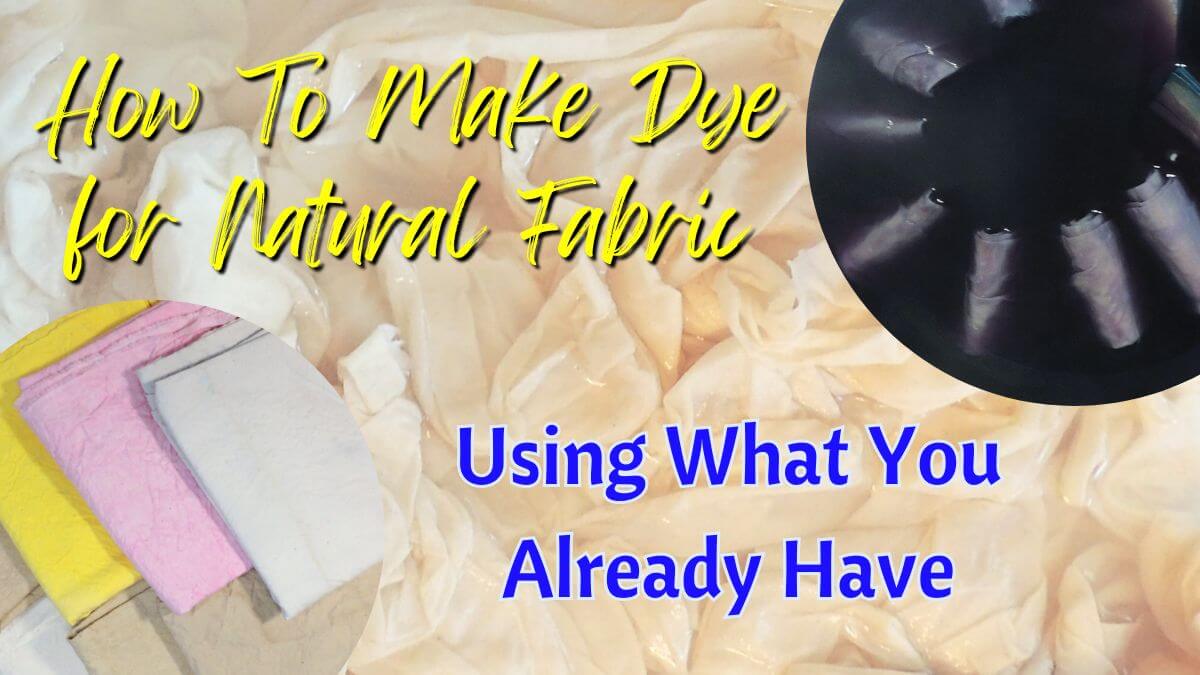
Inside: Learn to make natural dyes and how to dye nature fabric or other fibers at home with household products. In this tutorial you‘ll learn all about natural dyeing; what to use and how to use it. In addition, I will take you through my journey dyeing good quality cotton muslin with products that I have in my home.
Members of Showstopper Creations can find the ad-free version of this article HERE.
Being creative can really take over your life, and your home. It seems like every new craft involves a whole new shopping list. Many of the items on that list only have one use, what if you don’t do that craft often?
By dyeing with household or found goods, you save yourself money as well as shelf space. In addition, you don’t need a chemistry degree to succeed.
Now, let’s delve into the why, what, and how of making natural dyes with items you already have at home.
Some products used in this post were provided by Fabric Wholesale Direct. All opinions are my own.
Why Natural Dye?
Natural dyes are derived from plants, fruits, vegetables, and even kitchen scraps. This makes them environmentally friendly. Unlike synthetic dyes, they don’t harm the environment or you. Additionally, they offer a wide array of colors, each with its unique charm.
Save Money, Use What You Have or Find
You don’t need to spend a lot of money to buy dye. Soon your pantry and fridge will look like a craft store in your eyes. Hiking or taking a walk will soon become a 100% off supply run.
By the end of this tutorial you will be able to use items you already have, and those you find in nature around you, to make dye.
Natural Dyes Are Safer for All
Feel safe eating it? Then you can feel safe dyeing with it. Natural dyes are environmentally friendly. You can use them with pets and little ones around without worry of poison or harmful chemicals.
There can be boiling and simmering used in natural dyeing, so you will want to watch pets and kids at those points. In addition, if anyone is allergic to a food, don’t use it to dye something they will be in contact with. Otherwise, all is good, my friends!
No Supplies With Only One Purpose in Life
Most products and supplies used to make natural fabric dye have other uses, or are grown outside your home. Unused items won’t sit around and take up space waiting until you are ready to dye again. Eat, compost, or put your remaining ingredients in a vase.
O.K. fam, only do that last bit with flowers and other pretty plant-life. Sticking onion peals in a vase will eventually start to smell. 😉
Dye Fabric Without Special Equipment or a Chemistry Degree
With the knowledge you are learning in this blog post, and supplies scavenged in and around your home, you have everything you need to get going. You can start dyeing today. No fancy degree or expensive equipment needed in order to start.
Be the Last Minute Dyeing Emergency Queen (or King)
Save the day with dye in a hurry! When there’s a dye emergency, you’ve got it covered.
If the thought of a dye emergency makes you laugh, you may not have kids in school. I had no idea the amount of random, last-minute request my kids would make once school started.
Literally last week one of them said, “Oh, Mom, I need to wear a tie dye shirt to school the day after tomorrow. Can we make one real quick?”
What is Natural Dye?
Natural dyeing involves using organic materials such as plants, fruits, vegetables, and even food scraps to color textiles. The process taps into the pigments present in these items, creating stunning, eco-friendly hues.
Natural dye has been around since before recorded history. These dyes have been used to add color and character to various textiles, to make paints and to adorn ones hair and body.
What You’ll Need – Essential Tools
Fabric
I used THIS good quality 100% cotton muslin for my samples. Get a discount by following THIS link (it may only work if it’s your first time shopping there)
Natural dyes work best with natural fibers such as:
- silk
- cotton
- linen
- wool (watch your heat levels with this one)
Mordants or Fixatives
Mordants prepare the fiber to take the dye. They aid in the bonding of the dye to the fabric, therefore increasing the colorfastness.
There is a long list of mordants for dying. However, many of them are toxic. Toxic mordants can be used with natural fabric dyes, but the full dyeing process would no longer be natural.
The most common mordant used for natural dying is Alum (Aluminum Potassium Sulphate) and cream of tarter. Find these with bottled herbs and spices in grocery stores.
Salt mordant is great for fruit and berry dyes. Vinegar mordant is best for plant dyes.
Natural Fabric Dye Materials
Dye stuffs! Specific examples are listed later in this article.
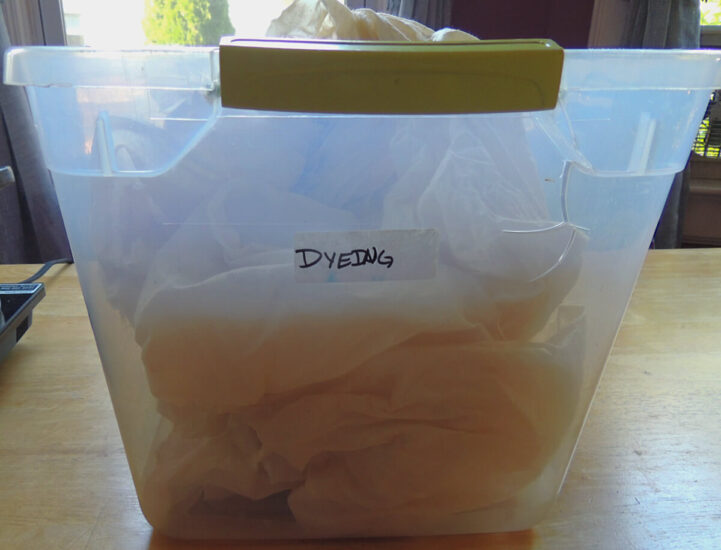
Store food scraps or nature items when you collect them. The best way to do this is to keep them in airtight containers in a freezer. I like using reusable zip-top bags.
Utensils and Other Kitchen Supplies
Some of these items need to be items that will not be used for food. This is because even though the products we are using to make and set the dyes are natural and food safe, the textiles you are dyeing may not be.
Play it safe and hit the thrift store for these items. Most of them will be useful for other crafts.
- Food or postage scale
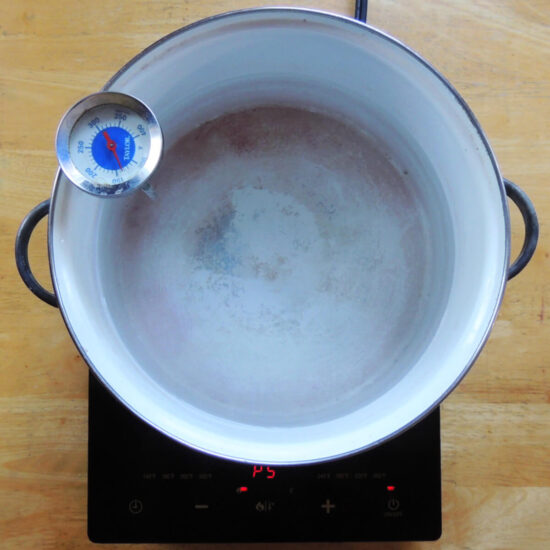
- Large pot that will not be used for food
- Heat source – such as a hotplate or kitchen stove
- Stirring utensil that will not be used for food
- Tongs that will not be used for food
- Bin for rinsing textiles in that will not be used for food
- Cutting board and knife (for cutting food to be made into dye)
- Airtight storage jars with lids for keeping any unused dye
- Fine mesh strainer (or next 2 items)
- Strainer
- Coffee filters, cheesecloth, or fabric scraps
- Gloves – natural or not, it’s still dye
What Can You Use to Make Natural Dyes?
Food Scraps: Give Your Unused Food a Second Life As Dye
The skins or outer layers of many fruits and vegetables are the best parts to use for dyeing. These parts can be kept frozen until needed or until you have enough to make some beautiful dyes.
Keep these scraps for dying:
- avocado pits (pink)
- avocado skins – contain tannins so no mordant is needed (peach/pink)
- onion skins (yellow)
- Purple cabbage outer leaves (indigo)
- Butternut seeds and skins (orange)
- Celery leaves (yellow)
Pantry Foods Used for Dyes
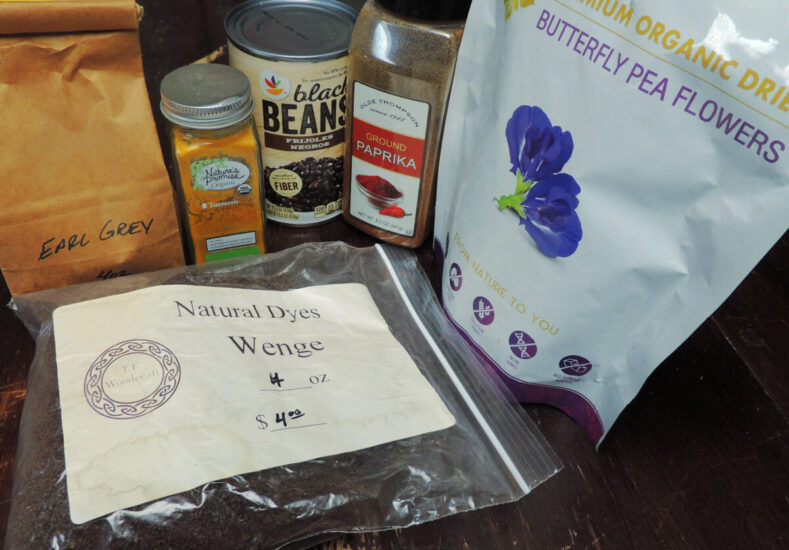
- Tea – full of natural tannins, so you don’t need a mordant (brown)
- Coffee (brown)
- black beans – dry (indigo)
- Turmeric (orange/golden yellow)
- Paprika (yellow)
Fruits and Vegetables Used for Dyes
Sometimes scraps alone are not enough. Here are more fruits and vegetables used to make dyes.
- Spinach (green)
- Blackberries (indigo)
- Blueberries (indigo)
- Beets – fades fast (red/pink)
- Pomegranates (pink)
- Red or pink rose petals (red/pink)
- Carrots – fades fast (orange)
- Artichokes (green)
Dyeing with Flowers and Other Plants
- Marigolds (yellow)
- Sunflower Petals (yellow)
- Mint leaves (green)
- Lilacs (green)
- Acorns (brown)
What Do I Do With Extra Dye?
Don’t discard the extra dye; store it in airtight containers for future use. This way, you’ll always have your own palette of natural colors at your fingertips.
If you don’t want to save it, then it’s perfectly safe to pour down the sink.
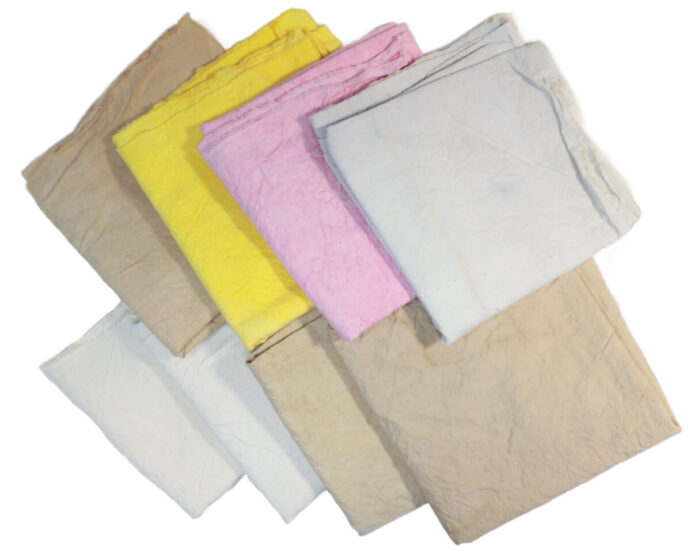
My Muslin Dyeing Experiment
A while back, I was introduced to Fabric Wholesale Direct. They asked me to give try 100% cotton muslin to see what I think.
So, I had them send me 10 yards of the 60″ wide. So far, I’m in love. The muslin has a nice, even weave. I haven’t seen any slubs (when there’s a thick part in the thread the fabric is woven from). It tears nicely on the grain, and it looks and feels beautiful.
I decided to create a series of posts on muslin projects. First is this one about natural fabric dyes, then more will follow.
Over the next several months, I’ll share some fab projects with this muslin. Come along with me on this journey, it’s going to be a blast!
Prepping the Muslin
For this project I started out by pre-washing the whole 10 yards of muslin. Buy yours and get a discount by following THIS link (the discount may only work if it’s your first time shopping there)
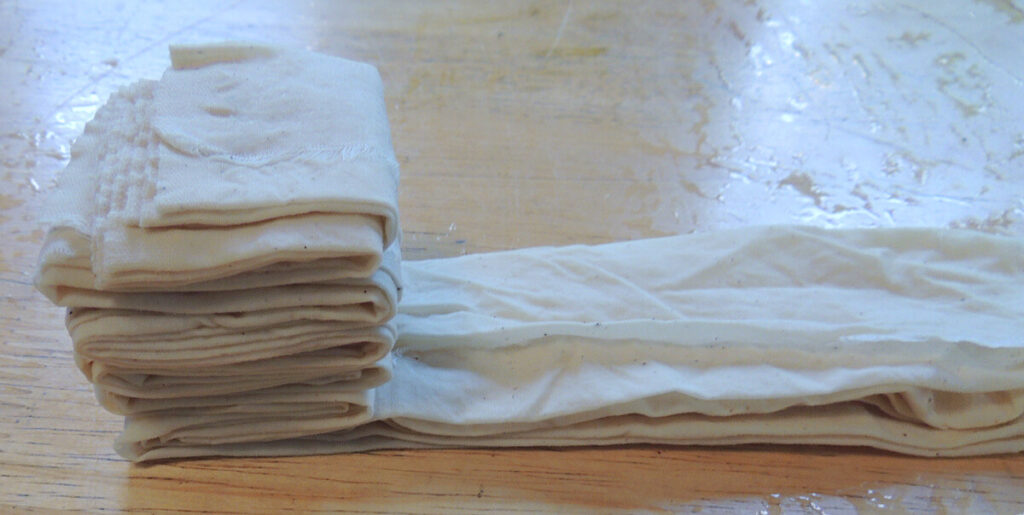
I then measured the width of the muslin as cotton shrinks. Then I marked that measurement along the salvage edge. I clipped the fabric at the mark and tour it to make a square.
I did that one more time to make a second square. Finally I cut each of those squares into quarters to make a total of 8 squares to dye.
I made the alum mordant and prepped the squares, then left them to cool until the next day.
Natural Fabric Dyes I Made From What I Had at Home
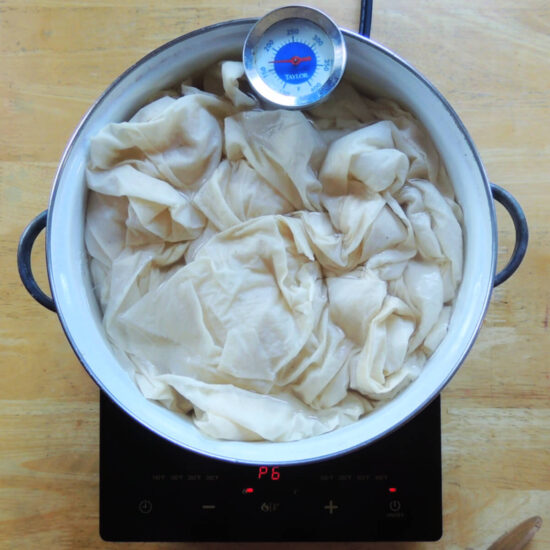
I was able to make 4 dyes at a time because I have 4 burners on my stove. I used food products so I could make the dyes in pots I use for cooking without worry.
Here are my 8 dyes:
- Paprika: this one turned out a lot lighter then I hoped.
- Black Beans: I had canned beans, so that’s what I used. I poured the clear stuff(?) off the top, then dumped the rest in the pot. In hind sight, I think dry beans would have been a better choice.
- Wedge Sawdust: Yes, this a wood. I had a bag of the sawdust from a medieval reenactment vendor who makes beautiful wood pieces. She had been told that wedge sawdust is used for dyeing, so she bagged some up, and I had to try! I treated it the same way I treated the powdered dyestuffs.
- Coffee: Ground coffee, that’s it.
- Tea: I used some loose leaf Earl Gray. You can use any black tea and many herbal teas, loose or in tea bags.
- Turmeric: I never fail to fall madly in love with the color created with turmeric. It’s like pure happiness.
- Butterfly Pea Flower: I have a bag of these dried flowers used for tea and for dyeing food blue. If it dyes food, why not fabric?
- FX Cosplay Paint by Plaid: I know, not food, not natural. I had one square left and I really wanted to try dyeing with the FX paint, so I did.
My Dyeing Process
I strained one dye into my dye pot and added extra water as needed. Then I put in the fabric. I simmered each for an hour, stirring a lot a first, then every 10 or so minutes.
I used that process with 6 of my 8 dyes. The last 2 I did a little different.
For the muslin going into the butterfly pea flower dye, I accordion folded it one direction, then the other. Then I placed a small piece of wood on the top and bottom and wrapped some rubber bands around it.
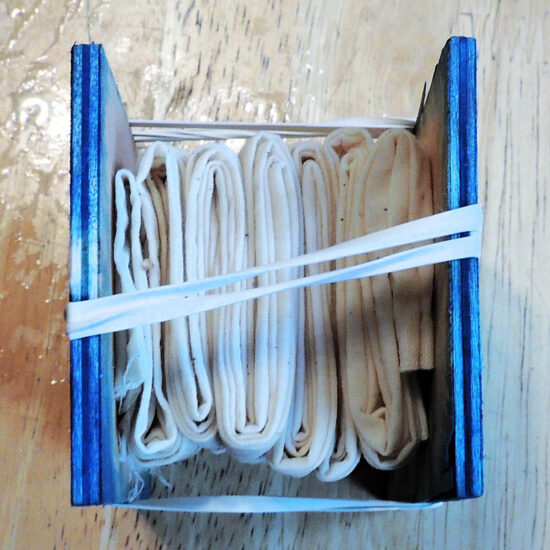
I thought this was going to make a wonderful shibori dye design. It most likely would have if the rubber bands hadn’t snapped. I took a photo of what it looked like after about 10 minutes.
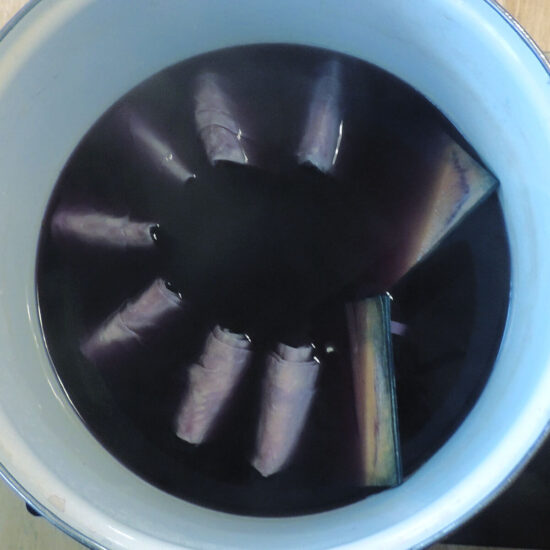
I left it like that for the rest of the time in the hopes that I would get a little bit of a design out of it. A LITTLE bit of a design is just what I got.
The second dye that was different was the paint. To turn the paint into a dye, filled a craft container with enough water to cover my fabric, then poured in about half of the bottle of paint. Then I stirred it until it was well combined. Finally I placed the fabric in and let it soak for several minutes, stirring often.
Finishing My Muslin and Natural Fabric Dye Adventure
I let each piece of muslin cool in carry-out containers I keep for crafts. The next day I gave them each a good rinse in cold water until the water ran clear.
I heat set them by tossing them all in the dryer and drying them on high heat. I wasn’t worrying about my fabric shrinking, so this worked for me.
To make sure I really got an idea of what the colors were, I washed them on delicate with Fiber Wash, and then dried them again.
I know my colors are brown-heavy. That’s because I was trying to get a nice selection of skin tones. I achieved white through medium skin tones. Unfortunately, I didn’t manage to get any nice dark browns. I may try redyeing one or two to see if I can get some good darker skin tones.
You’ll have to be sure to join my newsletter so you will know as each new muslin post comes out and you can see what I create with all these lovelies.
How To Dye Natural Fabrics and Fibers With Homemade Dye in 5 Steps
Now that you know what you need and why you need it, it’s time to put everything together. Here is how to take all you’ve learned and get dyeing
Step 1: Collect Your Dyestuff and Other Essential Tools
Gather all your materials as listed above. What you need will vary depending on what you are using to dye with, and your textile and mordant choices.
Step 2: Prep Your Fabric, Fiber, Yarn or other Textiles
- Weigh: Weigh the textile and write down the weight (this step is only needed with the alum mordant)
- Souring: Clean the textile
- Make the Mordant: Here are the 3 most common mordants for natural dyes
- Alum: Bring a large pot of water to a boil. Add in 10% of the fabric weight in Alum and 8% of the fabric weight in cream of tarter. Stir until it dissolves.
- Salt: Pour 1/2 cup salt into 8 cups water, heat and stir until salt dissolves.
- Vinegar: Equal parts water and vinegar.
Step 3: Make or Extract Your Dye
- Chop dye materials that are bigger than 1/2″ chunks into 1/2″ pieces.
- Add dye materials to pot and cover with twice as much water as dye material.
- Simmer to extract the dye. When the color stops getting more intense, you have extracted as much as you can.
- Strain the dye through a fine mesh sieve or through a strainer lined with a coffee filter or damp scrap of fabric.
Step 4: Dye fabric or fiber
- Pour the dye into a pot that will not be used for food.
- Place textile in dye bath
- Simmer (not boil) in dye bath until the textile is one or two shades darker than the desired color. At a certain point, the color will no longer change which means the textile is as dark as it will get.
no-heat method, great for dyeing with kids
- Pour the dye into a sealable glass container big enough for the dye and the textile
- Place textile in dye bath
- Seal and place in the sunlight for up to a week, or until the textile is one or two shades darker than the desired color.
Step 5: Set
- Allow textile to cool and remove it from the dye bath
- Rinse textile under cool water until water runs clear
- Hang dry or heat set by drying in dryer
- Heat set can also be achieved by ironing

Now what?
After grasping the basics of natural fabric dyes, you can explore further realms of dyeing. There’s tons of info out there!
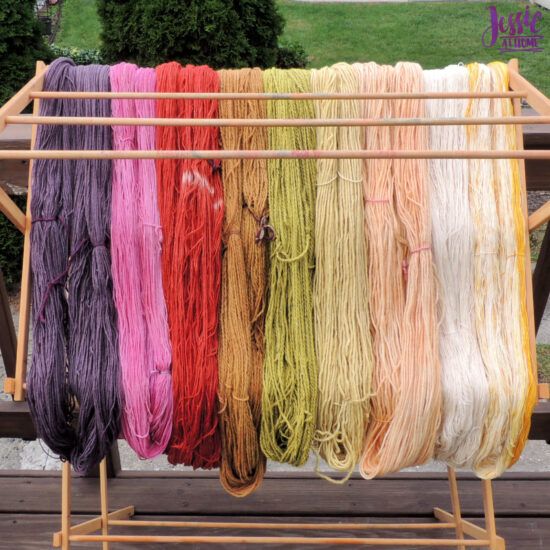
Adventures in Yarn Dyeing
I have a super fun series on dyeing yarn. The dyes and techniques I use can be used for numerous textiles in addition to yarn. You can find the introduction post with links to the whole series HERE.
Go Fourth and Dye
Natural dyeing is not just a craft; it’s a way to connect with nature and history. By learning how to make your own dyes with what you already have, you’re not just adding color to fabrics; you’re weaving stories and sustainable practices into your creations. So, gather your materials, unleash your creativity, and let the colors of nature adorn your textiles in the most beautiful way possible. Happy dyeing!
Like this post? Check out these!
Did you enjoy what you found here at Jessie At Home? Then sign up for my newsletter and like my Facebook page, so you’ll get all the updates on new tutorials, other posts, sales, and coming events.
If you have any questions, want to share pictures of your work, or just want to chat with Jessie and other crafty individuals, than join one of our free Zoom Sit & Stitches. Find them on our Events Calendar.

© Copyright 2023 Jessie Rayot / Jessie At Home LLC All my videos, patterns, charts, photos and posts are my own work, so you may not copy them in any way. If you want to share this information with someone, then share the link to this post.


