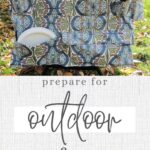
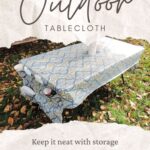
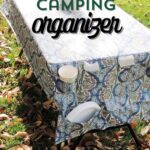
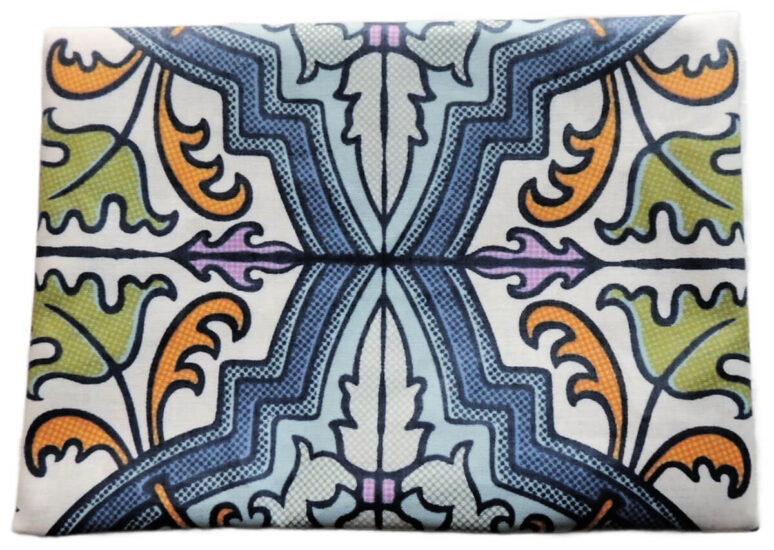
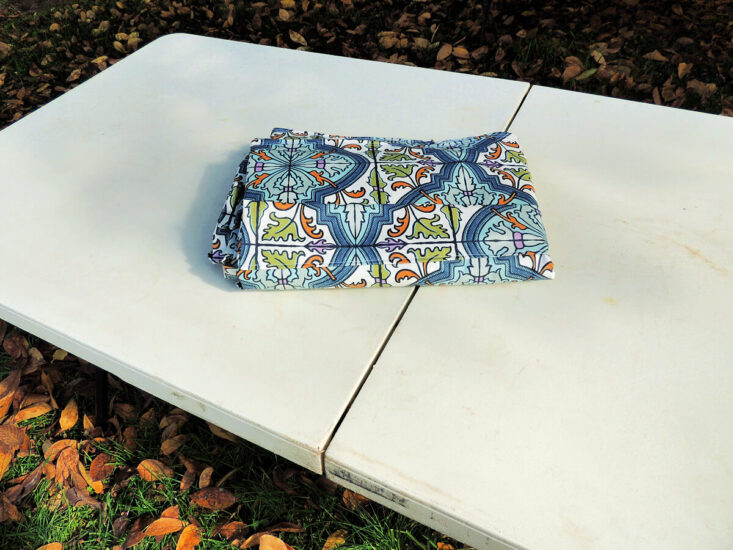
Inside: Here’s a sewing tutorial for a water-resistant outdoor table cover with organizers on the ends. It’s great for storing craft supplies, plates and utensils, and so much more. There are even bottle or cup pockets! I made mine with the Cypress Laminated Cotton from Splash Fabric.
Some products used were provided by Splash Fabric for review, all opinions are my own.
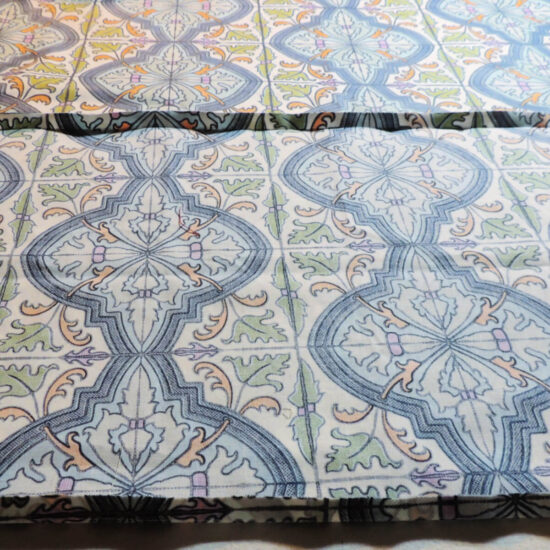
Outdoor fabric will never be the same! Splash Fabric has eco-friendly laminated cotton that’s water-resistant and oh-so-easy to work with. It’s food safe, comes in a nice variety of prints and solids, and can be used in a multitude of sewing projects.
You can find Splash Fabric HERE and use code
JessieAtHome20
To get 20% off your order – I’m not sure what the end date for that coupon code is, so use it quick!
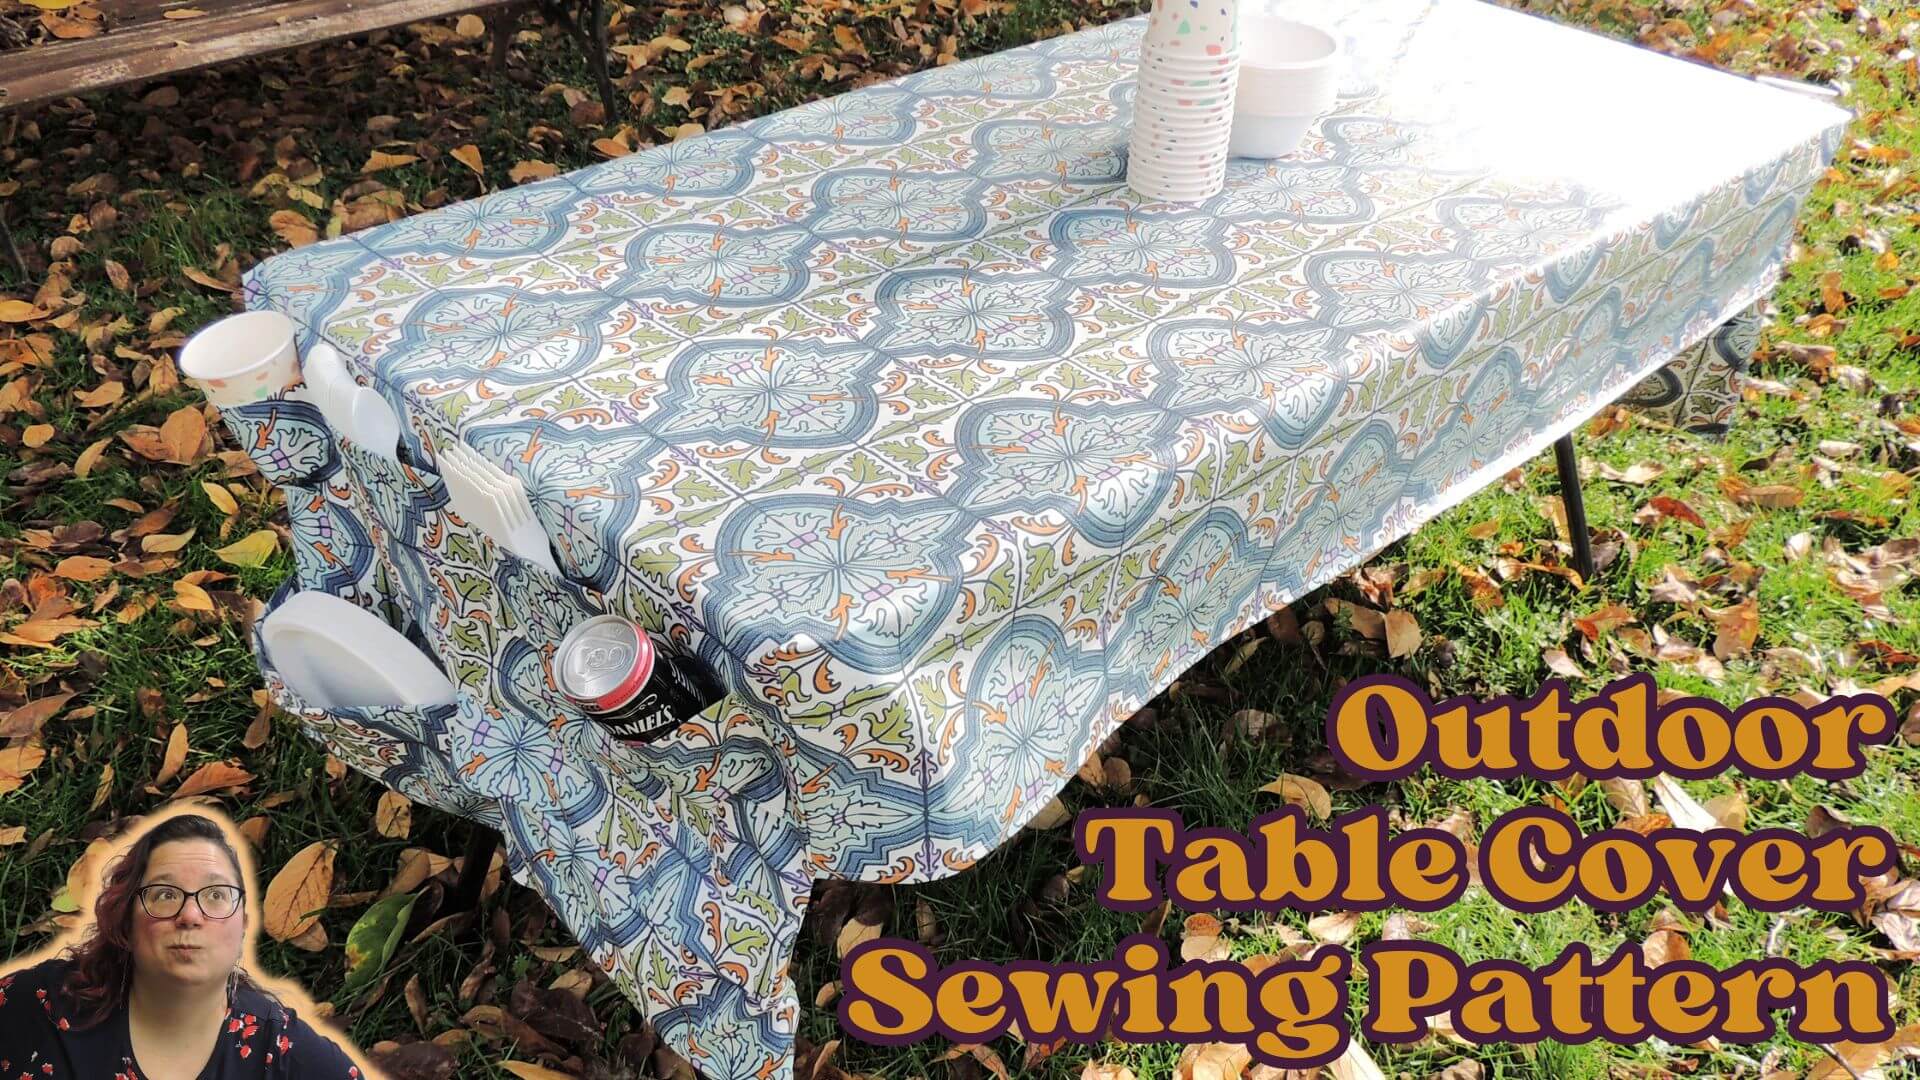
Table of Contents
- Why Put Organizer Panels on the Sides of a Tablecloth?
- Quality Fabric for Outdoor Furniture Covers and Accessories
- Specs, Options, and Supplies
- Measurements To Fit YOUR Table
- Cut List Math
- Cut List
- How to Make the Crafty Outdoor Table Cover
- Show Off Your Splash Fabric Creations
Why Put Organizer Panels on the Sides of a Tablecloth?
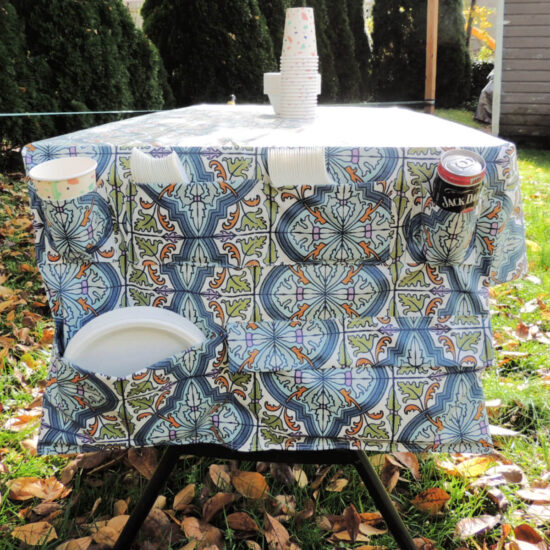
Organizers on the sides of an outdoor tablecloth may seem odd to some people. Us crafty types get it. When it’s time to eat, you need a place to put all those craft supplies you were just using.
Not only are the side pockets great for storing whatever was on the table before meal time, you can also store your plates, utensils, and other kitchen supplies in them.
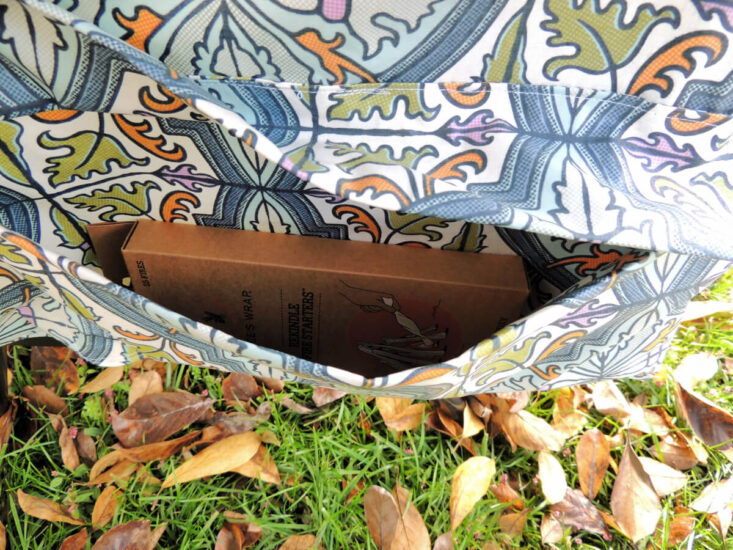
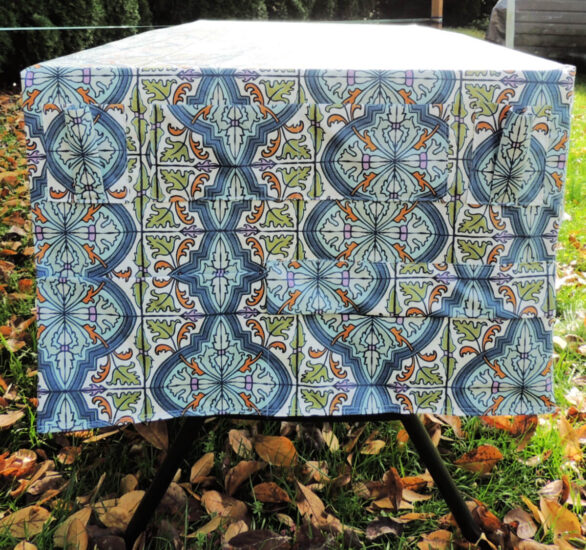
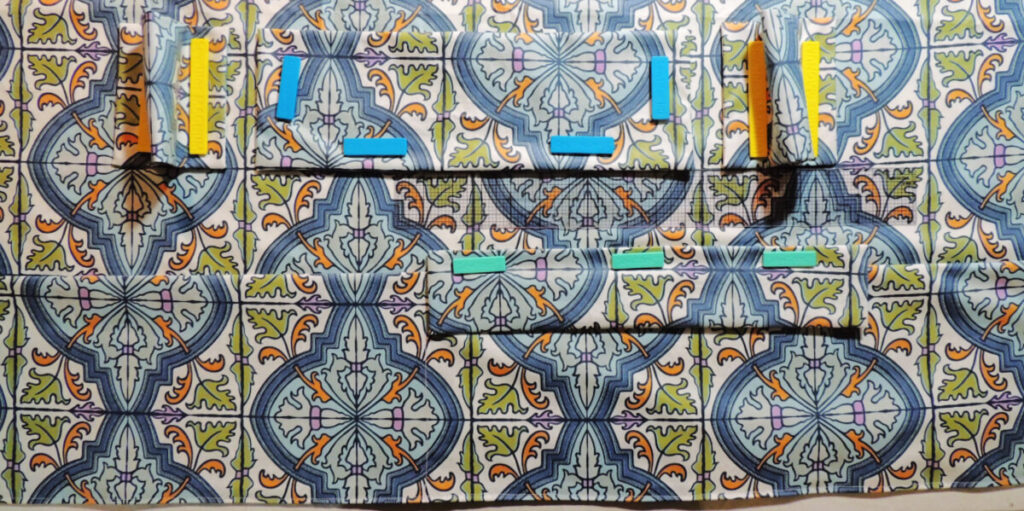
There is a covered pocket on each end that’s perfect for napkins or other items you need to keep dry. You can see in the picture below that I stored some fire starter strips in one.
The main motivation for designing this crafty table top cover for me was to use every summer. For 2 weeks each summer we camp at a mediaeval reenactment event.
At this event I take lots of historical arts classes. This means beads, gold thread, little tools and other supplies and notions all over the place.
Now you’re starting to see the genius of this design, aren’t you?
Now you all want to make your own so you can craft outdoors without all your supplies blowing away, don’t you?
Quality Fabric for Quality Outdoor Furniture Covers and Accessories
When thinking of a waterproof fabric for outdoor table covers, we often think of vinyl material or vinyl covers to stand against foul weather. Cotton tablecloths don’t usually fit that bill.
When I got the Splash Fabric laminated cotton in my hands I was very pleased. Here are some of the qualities that I liked (or loved)
- Promoted as water-resistant, yet I found it to be close enough to waterproof for my needs. I was not able to get water to go through the fabric.
- It’s so lightweight compared to what I’m used to water-resistant or waterproof fabric to be.
- Spill or crumb removal is a breeze – I doubt I could get a stain on this fabric from the top.
- If you do get a stain on it from the bottom (unlaminated side), it’s cotton and washable, so you should have a good chance of getting it out!
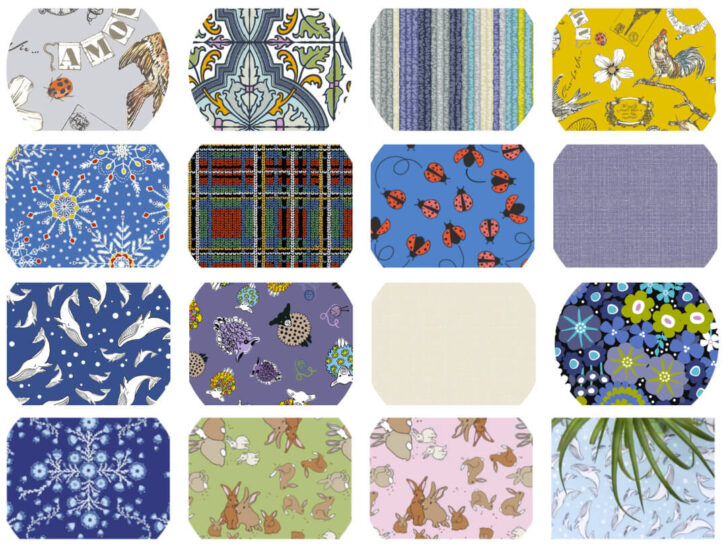
- So many stylish options for prints with a cheery look that’s just what you want in outdoor living spaces.
- You can tear it in a straight line when you need a “cut” that is along the grain (both vertical/warp and horizontal/weft
There’s more, these are the qualities that stand out the most after a couple of days working with the fabric.
In addition to outdoor uses, this fabric can be used for so much more. I would totally make a wind and rain resistant jacket out of it. Aprons, tote bags, oh – maybe some bathroom supply baskets for the kiddos to bring to college!
After completing my nifty outdoor table cover, I have some leftover Cyprus print and am thinking of hanging on to it for book covers. Or maybe the bottom and straps of a knit or crochet bag. Oh, so many ideas for my scraps.
Specs, Options, and Supplies
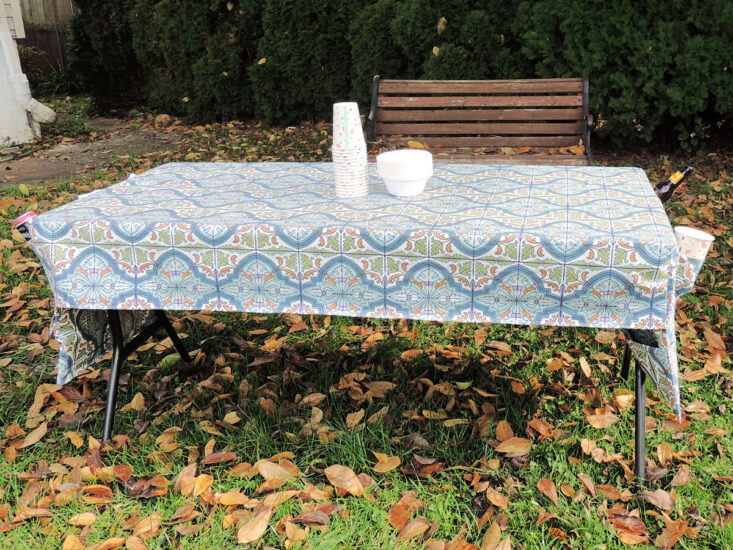
The specs of this table cover will change with the size of your table. You can make a square table cover or a rectangle table cover with this tutorial.
The two long sides (length) of the table cover will have an 8″ hang over. I find that’s a good length to look nice, yet not get in the way of legs when people sit.
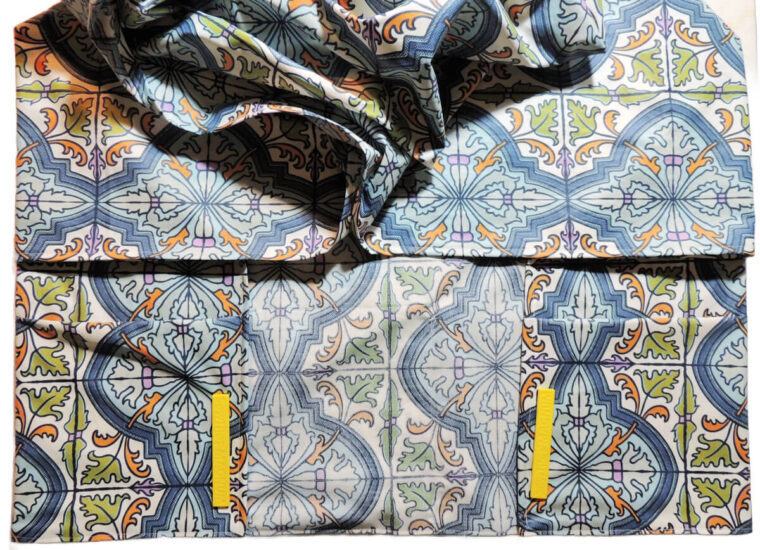
The two short sides (width) have an 18″ long organizer hanging over. This way there’s room for two rows of pockets, and the bottom pockets aren’t so low you have to get on the ground to get to them.
Directions are included for optional tie strings to tie the tablecloth to the table legs if you are worried about lots of wind, heavy items in the pockets, or little ones yanking on the tablecloth.
I would have liked to give you a set of standard outdoor picnic table dimensions. However, I found there isn’t really a standard. So in the next section you will take measurements of your table and make some choices to make your table cover work for the table you have.
Supply List
- Splash Fabric in one or two prints/solids – you will need to determine the amount to buy after doing the math in the sections below for your table.
- One print/solid needed if you are making your pockets in the same fabric as your tablecloth
- Two prints/solids needed if you are using a second fabric for your pockets
- Sewing Thread
- Sewing Machine
- A non-stick needle or sharp denim needle is recommended. I used a regular #16.
- A Teflon Foot may be useful, I used the regular foot on my machine.
- Iron with a low setting
- Paper and pencil for measurement notes
- Fabric Scissors
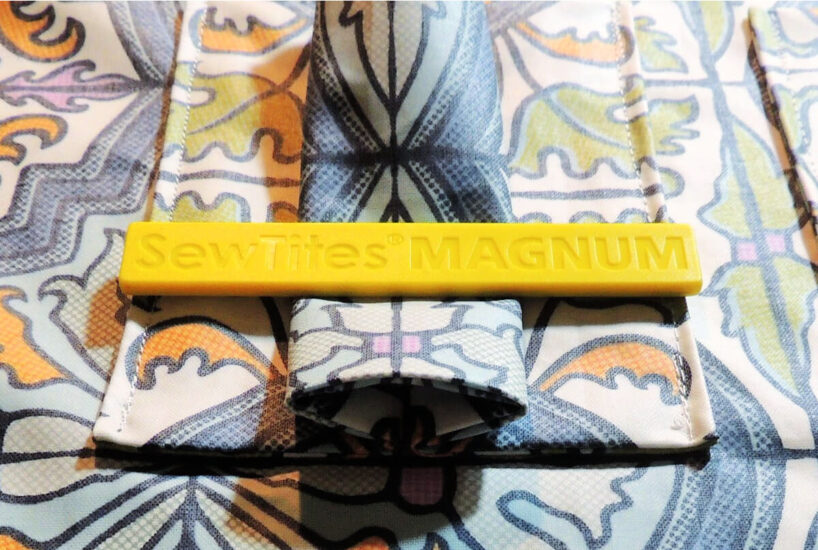
- Pins and/or SewTites Magnetic Sewing Pins™️
- Measuring Tape
- Straight Edge (such as an 18″ ruler)
Measurements To Fit YOUR Table
Table
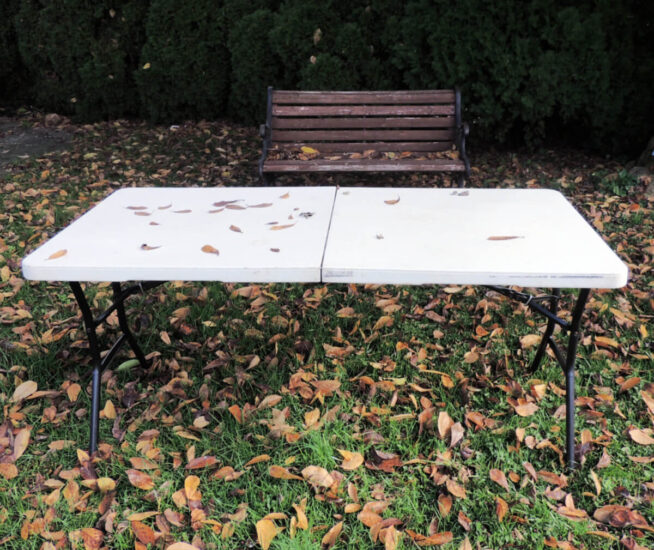
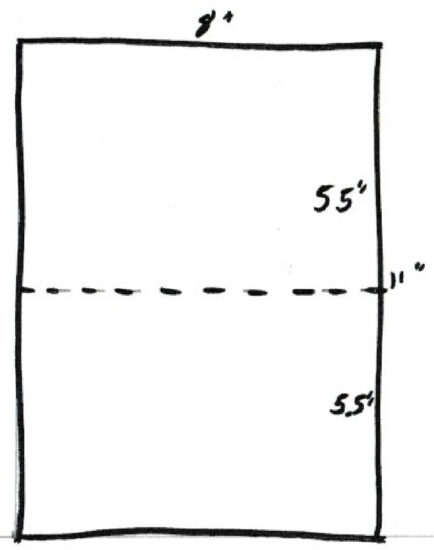
Start by measuring the length and width of your table. Write down the actual measurements. If they are fractions, round them up to the nearest 1/4″
My table measured 60″ long by 27 1/4″ wide. PLEASE remember to change these to YOUR table measurements.
- Table Length (TL) = 60″
- Table Width (TW) = 27.25″
Tablecloth: Finished Size
Each long side of the tablecloth has an 8″ hang over. Each short side has an 18″ organizer hang over.
- Tablecloth Length (TCL) = TL+(18*2) = TL+36
- Mine would be 60+36=96″
- Tablecloth Width (TCW) = TW+(8*2) = TW+16
- Mine would be 27.25+16=43.25″
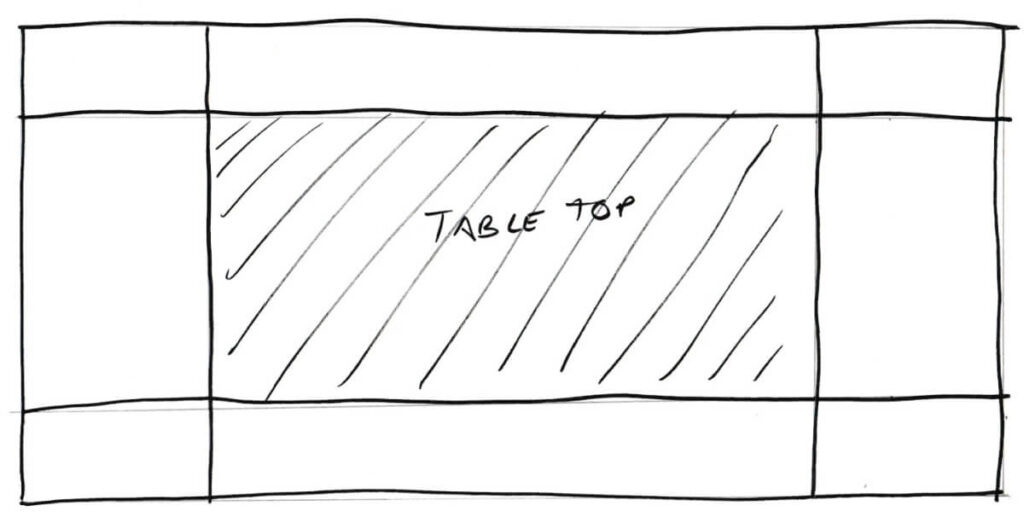
Organizers
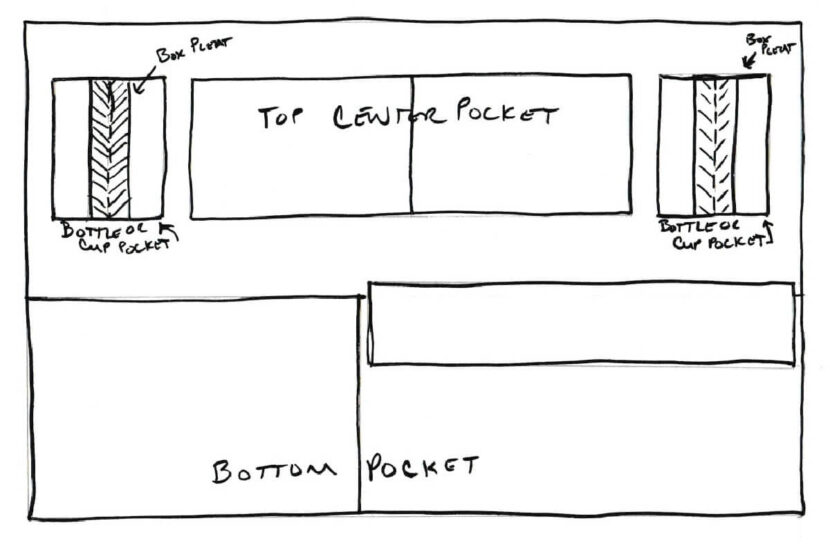
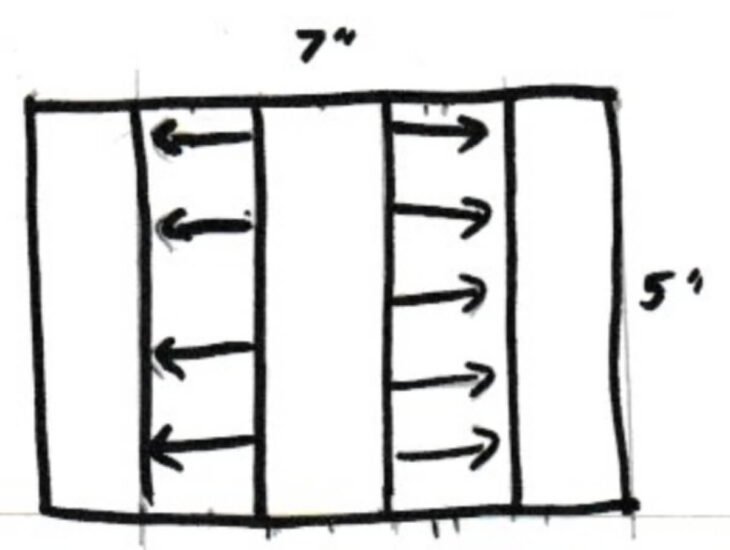
The organizers are 18″ long on both ends of the table, there are 2 rows of pockets on each end organizer.
The bottom row is one long pocket that runs the entire width of the table cloth. There is a stitched divider line going down it 12″ from the left side of the table edge line.
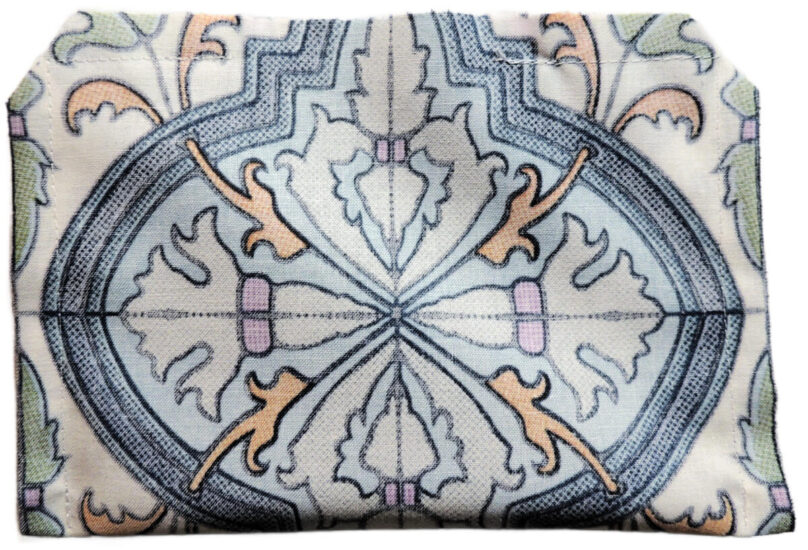
From the stitched divider line to the right side of the table edge line, there is a flap on top of the pocket as a cover.
The top row of pockets has a Bottle or Cup Pocket 1″ from each side, and a center pocket with 1″ between it and both Bottle or Cup Pockets.
Bottom Pocket: Finished Size
The finished Bottom Pocket will be 8″ tall by the width of the tablecloth.
- Bottom Pocket Height (BPH) = 8″
- Bottom Pocket Width (BPW) = same as TCW
- Mine would be 43.25″
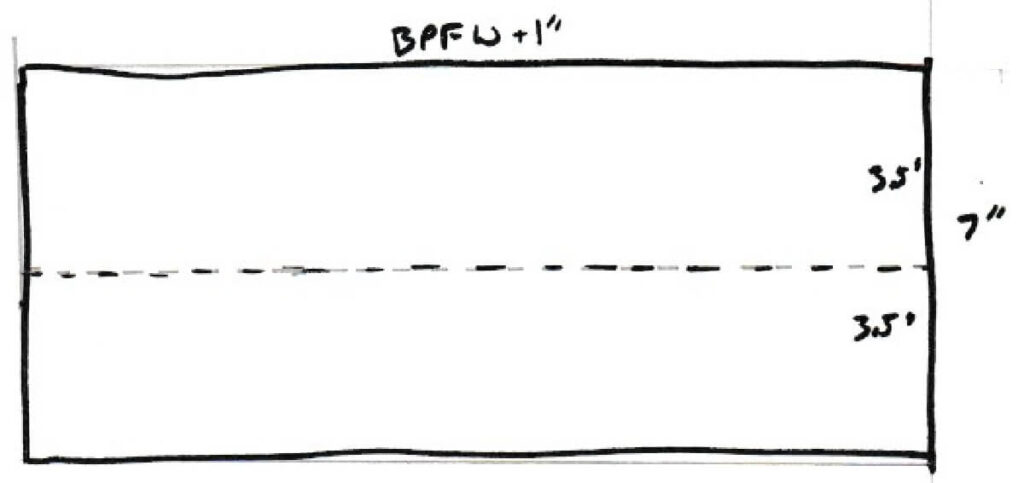
Bottom Pocket Flap: Finished Size
To determine the width of the flap, you will need to subtract 12.25″ from the actual (not rounded up) width of the table.
The finished height is 3″.
- Bottom Pocket Flap Height (BPFH) = 3″
- Bottom Pocket Flap Width (BPFW) = TW-12.25
- Mine would be 27.25-12.25= 15″
Bottle or Cup Pocket: Finished Size
The Bottle or Cup Pocket is 5″ tall and 4″ wide after pleating the bottom.
- Cup Pocket Height (CPH) = 5″
- Cup Pocket Width (CPW) = 4″
Top Center Pocket: Finished Size
The Top Center Pocket is 5″ tall. It sits between two Bottle or Cup Pockets. There is 1″ on either side of both Bottle or cup pockets. This means the Top Center Pocket is 6″ from both edges of the table width.
- Top Center Pocket Height (TCPH) = 5″
- Top Center Pocket Width (TCPW) = TW-(6*2) = TW-12
- Mine would be 27.25-12=15.25″
Cut List Math
Tablecloth
Each long side has a 1″ seam allowance and each short side has a .5″ seam allowance.
Length
- TCL+(.5*2)
- TCL+1
- Mine would be 96+1=97″
Width
- TCW+(1*2)
- TCW+2
- Mine would be 43.25+2=45.25″
My tablecloth cut is 97″ x 45.25″
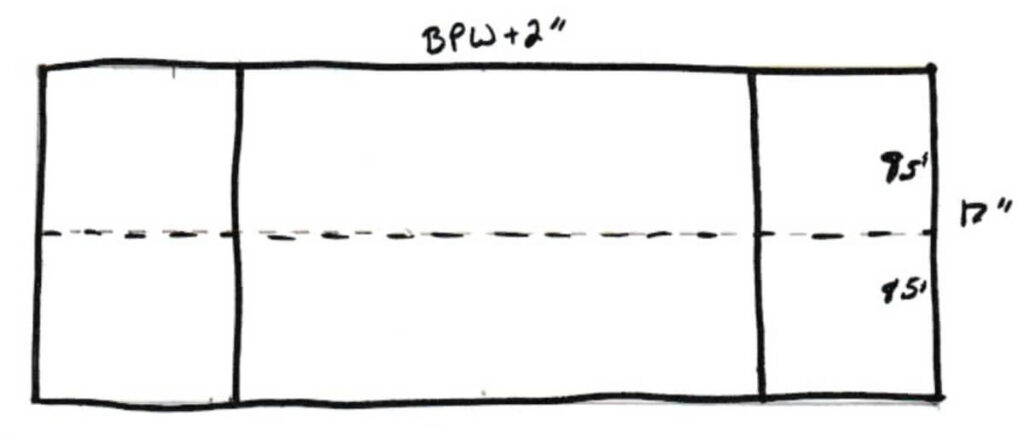
Bottom Pocket
I’m having you cut the bottom pocket as a separate piece. This is in case you want to make your pockets with a different fabric than you tablecloth.
If you are going to make it all in one fabric, you can add 32″ (the same as 16″ on both ends) to the length of your tablecloth cut.
The Bottom Pocket is folded in half so it’s self-lined, and has a .5″ seam allowance on the bottom and 1″ seam allowances on the sides.
Height
- (8+.5)2
- (8.5)2
- 17
Width
- TCW+(1*2)
- TCW+2
- Mine would be 43.25+2=45.25″
My Bottom Pocket cut is 17″ x 45.25″.
Bottom Pocket Flap
The Bottom Pocket Flap is folded in half so it’s self-lined, and has a .5″ seam allowance on both sides and the bottom.
Height
- (3+.5)*2
- 3.5*2
- 7
Width
- BPFW+(.5*2)
- BPFW+1
- Mine would be 15+1=16
My Bottom Pocket Flap cut is 7″ x 16″.
Bottle or Cup Pocket
The box pleat adds 3″ to the width. The pocket is folded in half so it’s self-lined, and has a .5″ seam allowance on both sides and the bottom.
Height
- (5+.5)*2
- 5.5*2
- 11
Width
- 4+3+(.5*2)
- 4+3+1
- 8
My Bottle or Cup Pocket cut is 11″ x 8″.
Top Center Pocket
As with the others, this pocket is folded in half so it’s self-lined, and has a .5″ seam allowance on both sides and the bottom.
Height
- (5+.5)2
- (5.5)2
- 11
Width
- TCPW+(.5)2
- TCPW+1
- Mine would be 15.25+1=16.25
My Top Center Pocket cut is 11″ x 16.25″.
Cut List
- *Tablecloth: Cut 1
- TCL+1 by TCW+2
- *Bottom Pocket: Cut 2
- 17″ by TCW+2
- Bottom Pocket Flap: Cut 2
- 7″ by BPFW+1
- Bottle or Cup Pocket: Cut 4
- 11″ by 8″
- Top Center Pocket: Cut 2
- 11″ by TCPW+1
- Optional Tie Strings: Cut 4
- 30″ by 1.5″
*If you are using the same fabric for the Tablecloth and the Bottom Pocket, use the following math to cut out one piece for them combined.
- TCL+33 by TCW+2
How to Make the Crafty Outdoor Table Cover
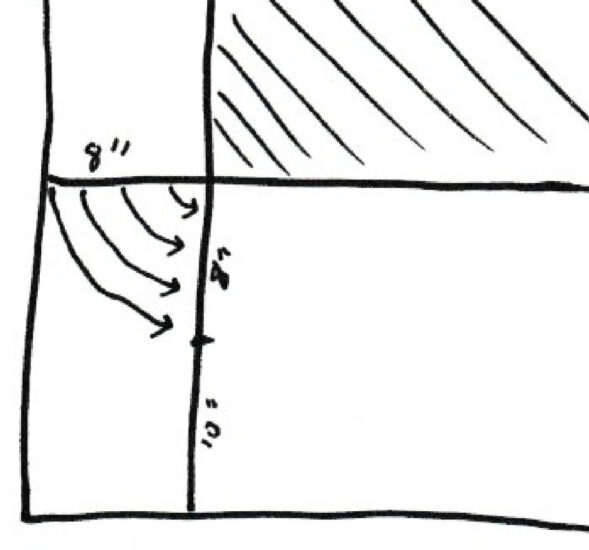
Step 1: Tablecloth Base
- Measure 9″ from the length edges of the Tablecloth piece towards the center and mark every 10-12″ along the length.
- Connect the marks to show the table width along the center of the Tablecloth.
- *Measure 18.5″ from the width edges of the Tablecloth piece towards the center and mark every 10-12″ along the length.
- Connect the marks to show the table length along the center of the Tablecloth.
*If you cut the Bottom Pocket at the same time as the Tablecloth, make this mark 34.5″ from the width edges. Make a second set of marks 16.5″ from the width edges and connect these marks.
Step 2: Bottom Pocket, repeat on both sides
Skip the following set of instructions if you cut the Bottom Pocket along with the Tablecloth as one piece.
- Line up one width edge of the Tablecloth with one width edge of one of the Bottom Pockets, right sides together.
- Pin together.
- Sew with a 1/2″ seam allowance.
Join in here if you cut the Bottom Pocket along with the Tablecloth as one piece.
- Fold the outer width edge 1/2″ with wrong sides together and press.
- If you cut the Bottom Pockets and Tablecloth separately, fold both layers of the seam allowance up over the Bottom Pocket and press.
- If you cut the Bottom Pocket along with the Tablecloth as one piece, fold the width edge at the 18.5″ line so right sides are together.
- Fold the outer width edge of the Bottom Pocket down so the fold line just barely overlaps the fold between the Tablecloth and the Bottom Pocket.
- Pin together.

- Sew 1/4″ up from the edge.
- Measure 21″ from the left edge of the Bottom Pocket towards the center and mark at the top and bottom of the Bottom Pocket.
- Connect the marks on the Bottom Pocket.
- Pin Bottom Pocket to Tablecloth along line just made.
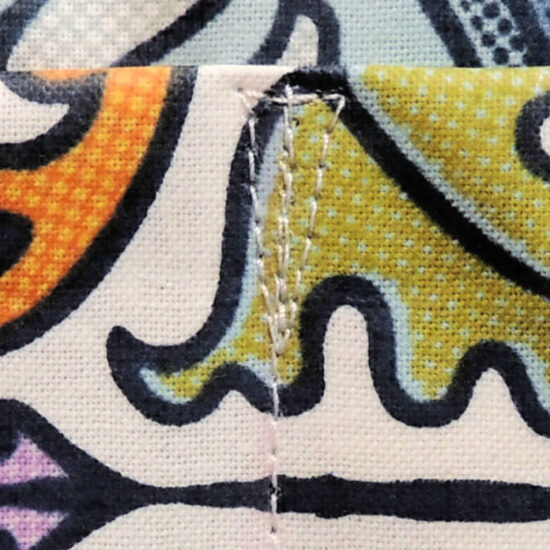
- Topstitch line just made to create a divider in the pocket. Add a small triangle at the top of the stitching line to reduce chances of a tear.

Step 3: Tablecloth Length Hem
- Mark all 4 corners at 3/4″ from the points on both sides and connect to form a triangle.
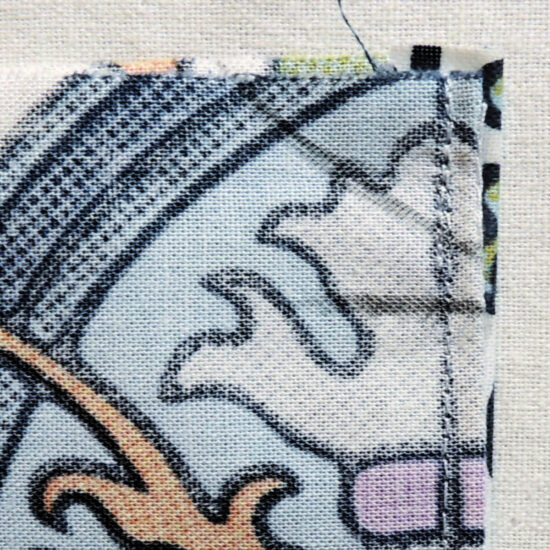
- Cut marked triangle off each corner.
- Fold each length edge of the tablecloth in 1″ wrong sides together. Be sure to include the Bottom Pocket edges in this fold.
- Press.
- Fold the 1″ hem just made inside itself, turning it into a 1/2″ hem, and encasing the cut edge.
- Sew hem down with 3/8″ seam allowance.
- Press.
Step 4: Remaining Pockets
Bottle or Cup Pockets, repeat on both sides
- Fold Pocket in half right sides together so it’s 5.5″ tall.
- Pin together.
- Sew 3 unfolded edges with a 1/2″ seam allowance, leaving a 2-3″ opening on the longer edge.
- Clip corners.
- Turn right side out.
- Press.
- Place the Pocket so the edge opposite the fold is 3″ above the Bottom Pocket and the left side is 9″ from the Tablecloth edge.
- Pin the left edge to the Tablecloth.
- Keeping the bottom of the Pocket 3″ above the Bottom Pocket, pin the right edge of the Pocket so it’s 4″ from the left side.
- Make a box pleat in bottom of the Pocket by pinching the center 3″ together, then smush the center of the pocket straight down so there is a 3/4″ pleat on each side.
- Pin pleat down.
- Stitch around both sides and bottom of Pocket 1/8″ in from edge.
- Press.
- Repeat entire process with second Pocket only this time with the right edge 9″ from the right edge of the Tablecloth.
Top Center Pocket, repeat on both sides
- Fold Pocket in half right sides together so it’s 5.5″ tall.
- Pin together.
- Sew 3 unfolded edges with a 1/2″ seam allowance, leaving a 2-3″ opening on the longer edge.
- Clip corners.
- Turn right side out.
- Press.
- Place Top Center Pocket so side opposite fold is 3″ above the Bottom Pocket and the Top Center Pocket is centered between the two Bottle or Cup Pockets.
- Pin down.
- Stitch around both sides and bottom of Pocket 1/8″ in from edge.
- Press.
- If desired, mark one or two divider lines in Center Pocket, pin them down, and sew in same manner as divider line on Bottom Pocket.
Bottom Pocket Flap, repeat on both sides
- Fold Pocket Flap in half right sides together so it’s 3.5″ tall.
- Pin together.
- Sew 3 unfolded edges with a 1/2″ seam allowance, leaving a 2-3″ opening on the longer edge.
- Clip corners.
- Turn right side out.
- Press.
- Place Flap with the left side lined up next to the divider seam on the Bottom Pocket, with the folded edge on top of the pocket, and the opposite seamed edge 1/2″ above the top of the Bottom Pocket.
- Pin down.
- Sew Flap 1/8-1/4″ down from top edge.
Step 5: Finishing the Tablecloth
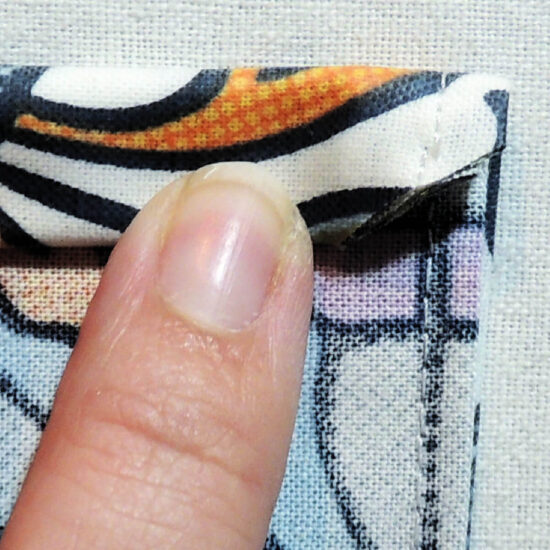
Corner Pleats
- Pin the 8″ marked line coming off one of the corners of the table outline to the top 8″ of the 18″ marked line coming off the same corner.
- Sew together on the 8″ line.
- Fold along the full length of the 18″ line so the pleat just made and the fabric below it are all against the wrong side of the organizer.
- Press
- Repeat this set of instructions on the other 3 corners
Organizer Hem
- Pin the 8″ flaps on each side of the organizer to the organizer.
- Sew 1/4″ from the bottom of the organizer.
Optional Ties: Make 4
- Fold in half lengthwise, right side together and press.
- Fold in half lengthwise right side together again and press.
- Sew close to one long edge, then the other.
- After all 4 are made, sew center 2″ of each tie string to spots on tablecloth next to legs of table.
- The best way to find these spots is to place the tablecloth on the table and mark where the legs are closest to the tablecloth hang over.
Show Off Your Splash Fabric Creations
Now that you’ve finished your crafty outdoor table cover, share some pictures. You can share and tag me on Facebook, Instagram, YouTube, Pinterest, or TikTok. Make sure you also tag Splash Fabric on Facebook, Instagram, YouTube, and Pinterest. Here are hashtags to use: #SplashFabric #LaminatedCotton #MakersGonnaMake #SewistsOfInstagram
Don’t forget, you can find Splash Fabric HERE and use code
JessieAtHome20
To get 20% off your order.
Make other awesomeness with Splash Fabric and share with them and me as well. I’m looking forward to seeing everything you make!
Happy Stitching!
Did you enjoy what you found here at Jessie At Home? Then sign up for my newsletter and like my Facebook page, so you’ll get all the updates on new tutorials, other posts, sales, and coming events.
If you have any questions, want to share pictures of your work, or just want to chat with Jessie and other crafty individuals, than join one of our free Zoom Sit & Stitches. Find them on our Events Calendar.

© Copyright 2023 Jessie Rayot / Jessie At Home LLC All my videos, patterns, charts, photos and posts are my own work, so you may not copy them in any way. If you want to share this information with someone, then share the link to this post.


