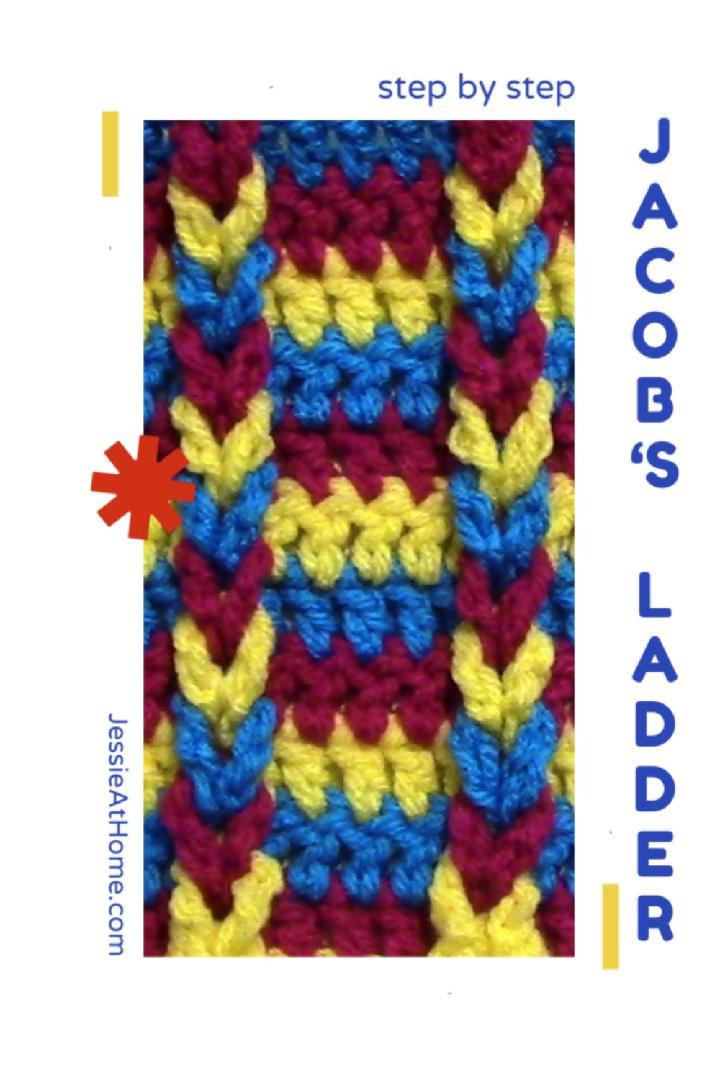
Inside: Learn how to crochet the Jacob’s Ladder stitch with this free crochet tutorial. This unisex, unique crochet stitch creates an attractive raised texture, popular for crochet afghans and more. Avoid common mistakes and get perfect results every time using the video tutorial and tips in this step-by-step tutorial.
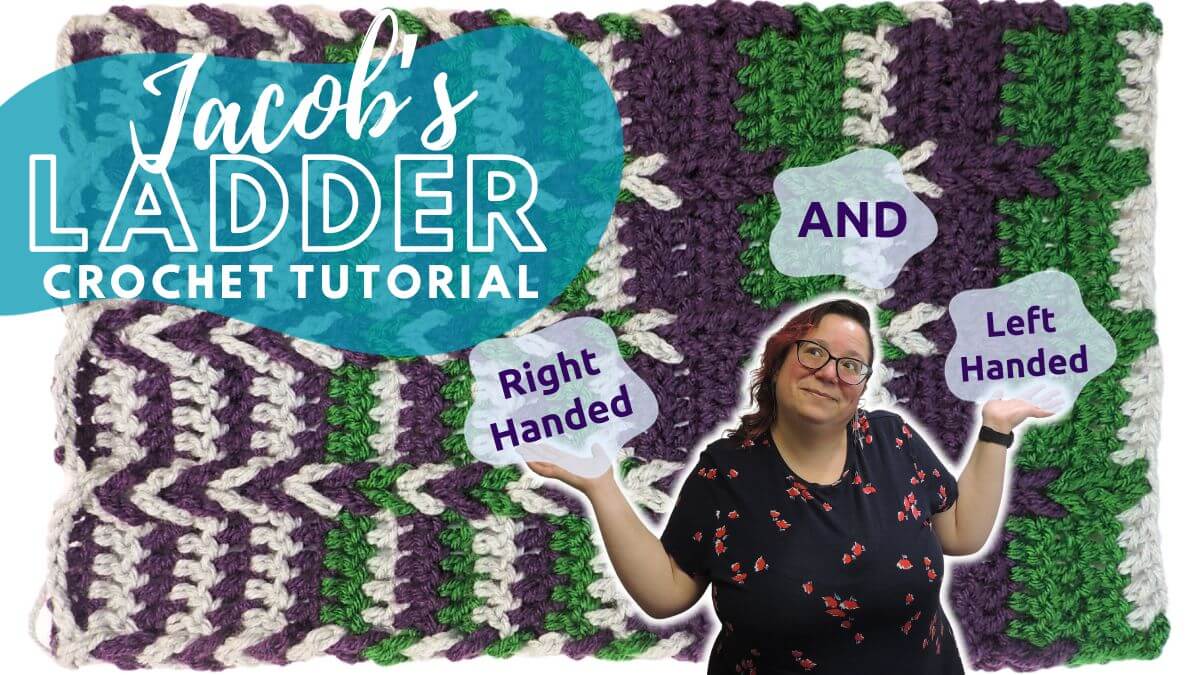
Ready to learn the Jacob’s Ladder crochet stitch?
Elevate your crochet game … conquer raised crochet stitches … and enticing designs with Jacob’s Ladder crochet patterns!
This pattern was originally published on 1/6/2015. The most recent update was made on 10/25/2023.
Members of Showstopper Creations can find an ad-free tutorial with ad-free videos HERE.
Table of Contents
- Crochet Basics To Know Before Learning How To Make Jacobs Ladder
- Why You Need to Add This Crochet Ladder Stitch to Your Repertoire
- Patterns Don’t Explain Jacob’s Ladder Stitch … but This Tutorial Does!
- Crochet Basics To Know Before Learning How To Make Jacob’s Ladder
- Pro Tips and Variations
- Jacob’s Ladder Tutorial – Swatch Pattern
- Jacob’s Ladder Swatch Chart
- Jacob’s Ladder Right and Left-Handed Video Tutorials
- Next Steps: Putting Jacob’s Ladder Into Action
This in-depth Stitchopedia guide walks you through the Jacob’s Ladder crochet technique step by step, including:
- Comprehensive written instructions
- Step-by-step photos
- Right and left-handed video tutorials
- Incorporating Jacob’s Ladder into patterns
- Color pattern ideas
- Pro tips for success
- And more!
With some practice, you’ll be amazed at the beautiful textures you can achieve with Jacob’s Ladder.
Are you ready to become a Jacob’s Ladder pro?
You’ve got this!
Why You Need to Add This Crochet Ladder Stitch to Your Repertoire
Raised crochet stitches are showing up more and more in contemporary crochet patterns.
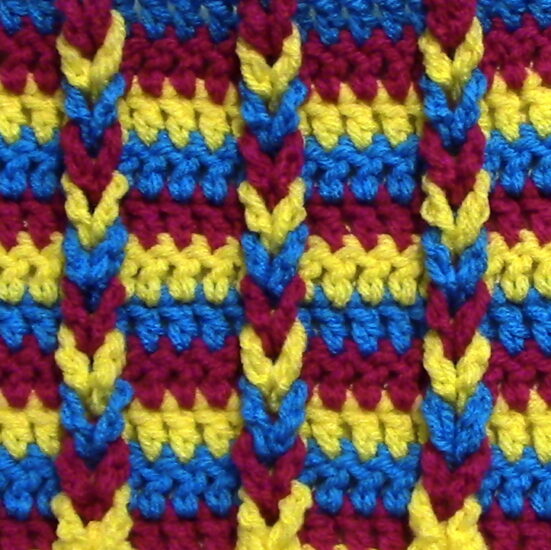
Jacob’s Ladder crochet is re-emerging because it’s one of the easiest raised crochet techniques without using post stitches.
In other words, anyone can learn how to make Jacob’s Ladder, even beginners!
Unisex Stitch Without The Frills
Finding ungendered or masculine crochet stitches is challenging. Jacob’s Ladder is an attractive stitch without being lacy and frilly, perfect for unisex or ungendered projects.
Use One Stitch to Create Structure with Yarn Alone
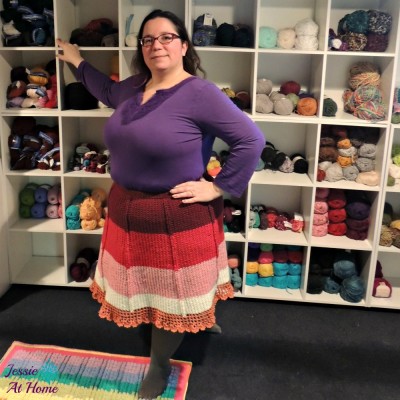
Jacob’s Ladder stitch can add structure to otherwise floppy crochet projects, especially costumes. As a costume designer, I know that getting texture and structure in fabric usually requires top stitching on a trim, adding boning, or some other time-consuming technique.
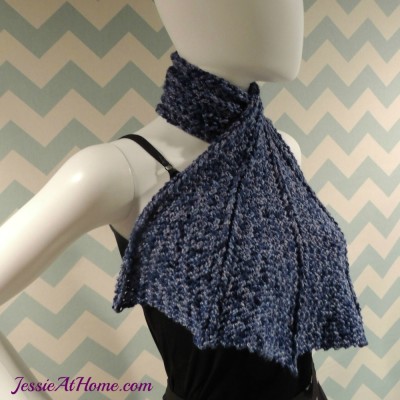
Structure highlights a design and gives it shape, which can greatly increase the interest or creativity of a design, An example of this is my series of Dragon Wing patterns in both crochet and knit that all use the Jacob’s Ladder technique.
With this stitch, the Jacob’s Ladder sections look like the spine of a wing and bring movement to the patterns. And without the Jacob’s Ladder sections, each of these crochet pieces I shared above would be just a plain shawl, cowl, or scarf.
The One Stitch That Gives Defined Shape and Movement
Another beneficial property of Jacob’s Ladder is that it creates movement and helps define a shape. The braided or looped sections draw attention and make the eye follow them.
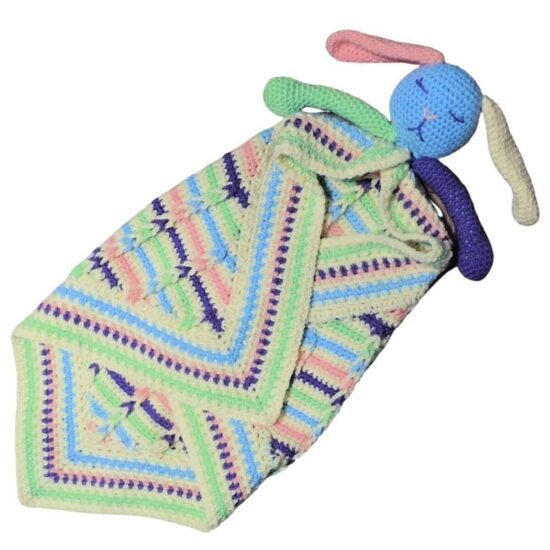
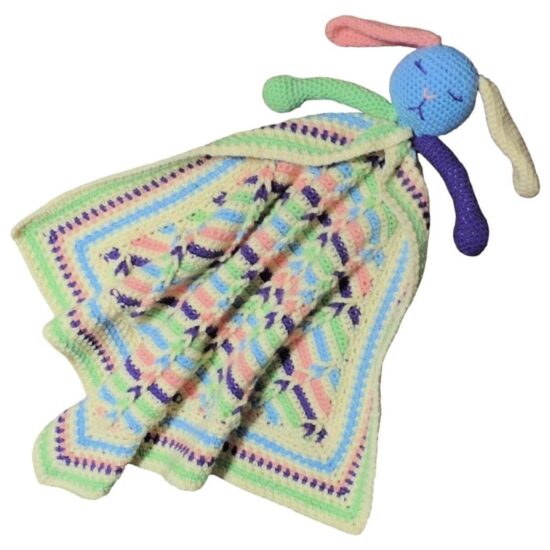
In my Monster Hug Lovie I use this feature to get the imagination going. Not only do the Jacob’s Ladder sections define the lovie as an octagon as opposed to a circle, they also give the look of limbs or tentacles. I often have people commenting on how the Monster Lovie looks like an alien octopus. I love when a piece brings out the creativity of others!
Get Massive Cozy Texture Made Easy with Jacob’s Ladder
Of course, I LOVE texture, and this Ladder stitch crochet technique is full of texture. It also aids in creating warm and cozy accessories.
For example, in my knit Jacob’s Ladder pattern, Dropped and Found, the ridges give it a place to fold so it can bundle around your neck to keep you nice and toasty.
You can find a tutorial for Jacob’s Ladder KNIT, here.
Patterns Don’t Explain Jacob’s Ladder Stitch … but This Tutorial Does!
Jacob’s Ladder crochet patterns don’t explain how to go from chain spaces to the final braided look.
If you’ve ever run into the direction, “Now loop the Ladders/chain spaces” in a pattern and get confused, you’re not alone. Especially if you are just now learning this technique for the first time.
This tutorial, you’re reading right now, is the answer!
You will notice that in my Jacob’s Ladder crochet written patterns I give directions on how to finish the stitch, and I also link back to this tutorial.
I am dedicated to writing patterns that can be successfully made and providing the tutorials and tips needed to achieve that success.
And if you want to add Jacob’s Ladder sections to pre-existing patterns, this tutorial will provide everything you need to know to do that easily and perfectly.
Keep reading to get all the details!
Jacob’s Ladder Crochet: 3D Overlay Braid or Chain
Jacob’s Ladder Crochet is an overlay technique that creates a braid-like texture woven on top of your crochet work.
The Jacobs Ladder stitch traditionally consists of dc and ch stitches. The technique starts with chain spaces that look like ladders and are the source of the technique’s name. The “ladders” are woven or chained together to create a unique 3D effect.
There are some more recent variations that use chain loops instead of chain Ladders or spaces.
Crochet Basics To Know Before Learning How To Make Jacob’s Ladder
Before you get started with Jacob’s Ladder stitch, here’s what you need to know:
- Stitch abbreviations and pattern symbols
- Skills
- Supplies
Crochet Skills Necessary For Jacob’s Ladder Stitch
Jacob’s Labber stitch requires knowledge of:
Each crochet stitch abbreviation above is linked to a tutorial teaching how to do the stitch if you don’t already have this skill.
Abbreviations, Stitches, and Symbols
Below are the standard crochet pattern abbreviations used in this tutorial:
- ch – chain
- sl st – slip stitch
- dc – double crochet
- sp(s) – space(s)
- st(s) – stitch(es)
- ( ) – work step in parentheses in indicated stitch
- [ ] – work step in brackets number of times indicated
Supplies
Choosing supplies is key to successful Jacob’s Ladder crochet. The recommendations below are time-tested after hundreds of hours of stitching.
- Yarn of your choice (3 colors for swatch)
- Number 4 or worsted weight yarn recommended for learning this stitch
- I used Brava Worsted yarn (number 4 or worsted weight yarn) in the video
- You can use yarn of any weight of yarn for this stitch pattern after you’ve learned the pattern successfully
- Appropriate crochet hook size to go with your yarn
- I used a Furls Streamline Resin crochet hook size US H/6 (5.0 mm)
- Learn how to choose the right hook HERE
- Scissors / yarn snips
- Yarn needle
- Removable stitch markers
Pro Tips and Variations
- Tension Matters: Maintain consistent tension to ensure your Ladders are even and neat.
- Practice Makes Perfect: Don’t be discouraged if it takes a few tries to master the technique. Practice makes perfect!
- Experiment with Stitch Height: Play around with different Ladder heights to achieve various textures and styles.
- Have Fun: The most important tip of all – enjoy the process and let your creativity flow!
Getting Rid of Those Pesky Holes at the Start of a Row
Patterns that start a double crochet row with a ch 3 to count as the first stitch leave a little hole at the start of each row, which can look like a mistake.
An easy solution is to start with a double chain 2 (dch2), sometimes called a stacked single crochet. You can find a tutorial HERE.
Make This Awesome Textured Crochet Stitch in the Round
To make the Jacob’s Ladder stitch in the round, follow the same steps as when it’s made in rows.
Loop the ladders before the last round is made. Make sure they are looped on the right or front side. Then catch the top loop of each ladder when completing the last round, the same as when working in rows.
Using the Jacob’s Ladder Stitch Between Different Stitches
Jacob’s Ladder can be made with just about any stitch in between the ladders. I explain a bit about how this works towards the end of the video tutorial.
The basic idea is that you want the ladders to be twice the height of your row, plus one chain. Here are some examples:
- If your row is a hdc, which is the same height as 2 chains, then your ladders will be 2+2+1=5, or 5 chains long
- If your row is treble crochet, which is the same height as 4 chains, then your Ladders will be 4+4=1+9, or 9 chains long
When you have a stitch pattern with various stitches in it, you may need to make a swatch and try out a few lengths to see what works.
You can also see other stitches in use in some of my patterns HERE and HERE.
Identifying and Fixing Ladders That Are Too Tight or Too Loose
The chain spaces that act as the rungs of the ladder in this technique can cause some tension issues. It’s quite common for stitches to make chains tighter or looser than the tension in the rest of their stitching.
This is a very easy problem to solve.
When starting a pattern with Jacob’s Ladder, it’s a good idea to make a swatch of the part with the Ladder. You don’t want to get to the end of your project only to find all your chain spaces are the wrong length.
There will be tears.
Make the swatch.
If after looping the Ladder, the piece is pulled shorter where the braid is, then your chain spaces are too short. To fix this, add another chain to the chain space and see if it’s long enough. You may find you need to add more than one.
If after looping the Ladder the braids are loose or sloppy, or the chain spaces can still be seen on the sides of the braids, then your chain spaces are too long. To fix this, remove a chain from the chain space and see if it’s short enough. You may find you need to remove more than one.
Jacob’s Ladder With Loops on Top of Solid Crochet – No Long Ladder Spaces
The long ladder spaces are the traditional way to start the Jacob’s Ladder stitch. A more recent variation is to make chain loops that sit on top of solid crochet pieces in place of the ladders.
This variation is super easy.
After making the last chain of the ch-space for the ladder, slip stitch to the top of the stitch made BEFORE the ch-space. This will hold that stitch to the next stitch you make, so that the ladder becomes a loop.
Make sure when you make the next row or round the loop is on the front or right side. So:
- Stitch in the last st before the chain loop in the round or row below
- Make the next chain loop
- Sl st to the top of the last st made
- Make sure the previous row loop is on the correct side
- Stitch in the stitch after the chain loop in the round or row below
What to Do To Add Jacob’s Ladder to Pre-Existing Patterns
Find a vertical area in the pattern where you want to add the Jacob’s Ladder. In between two columns of v-stitches in this pattern is a perfect spot to try this.
Then add your ch-7 spaces (or other length, depending on the stitches being used) in between the stitches so that they all line up like in the swatch below.
Be sure to loop them and catch the top loops with the last row as shown in the tutorial below.
Horizontal Ladder Crochet Stitches: Jacob’s Ladder the Other Way
Jacob’s Ladder traditionally runs in columns. It is also possible to make the ladder section in rows, and even in shapes. Here are a few idea:
- To make the ladders in rows, use tall stitches with spaces between them, then loop the stitches. See HERE
- Make the ladders move in one direction or other with increases or decreases on one or both sides of the ladder as seen HERE
- Make shapes by using the loops on top technique above where the ladders are turned into loops with slip stitches. This will allow for them to be looped in any direction without worry of seeing the hole left from the ladder.
Reversible Jacob’s Ladder
Braids on both sides? Easy peasy! There are two techniques I like to use.
- Make 2 Ladders next to each other, with just one stitch in between them (ch-7, dc, ch 7). Then loop one on one side and the other on the other side. You can see that HERE
- Make the loops twice as tall as needed and then loop every other one and one side and the rest on the other. You can see that done HERE
Increasing and Decreasing Techniques
Increases and decreases can have a big impact on Jacob’s ladder stitches.
- Place increases or decreases centered between ladders to have the least effect on the ladders, as seen HERE
- Place increases or decreases right before or after the ladders to make them blend in
- Place increases or decreases evenly on each side of the ladders to keep the ladders in the middle of the shaping as seen HERE
- Place the increases or decreases all on the same side of the ladder to move the ladder in just one direction
Unique Color Ideas for Jacob’s Ladder Stitch
Here are a few ideas for color planning in addition to those in the tutorial swatch pattern at the end of this post.
- Ombre Effect: Use different shades of the same color for a subtle gradient.
- Rainbow Delight: Create a vibrant rainbow effect with a spectrum of colors.
- Contrasting Colors: Choose two highly contrasting colors for a bold and striking design. Change them every two rows or every other round if you don’t want to have a lot of ends to weave in.
- Neutral Elegance: Opt for neutral tones for a timeless and sophisticated look.
- HERE’s a free printable to help you plan your colors!
Jacob’s Ladder Tutorial – Swatch Pattern
Swatch Base
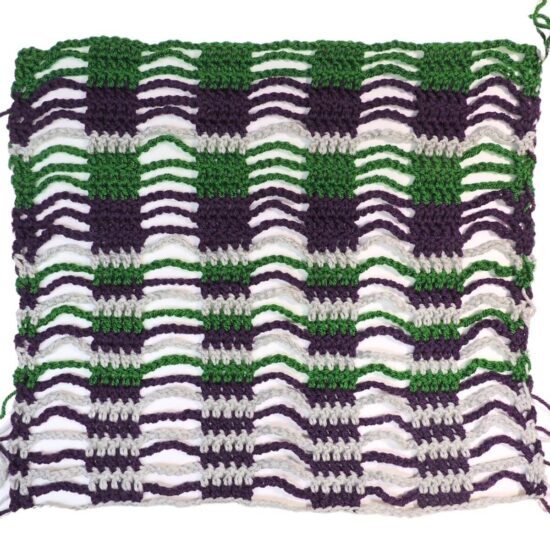
Row 1: With Color A, ch 58, with Color B ch 3 (this makes a total of 61 ch), dc in 4th ch from hook, [ch 7, skip 7, dc in each of next 5 ch] 4 times, ch 7, skip 7, dc in each of last 2 ch. {24 dc}
Row 2: With Color A, ch 3 (counts as first st here and throughout), turn, dc in next st, [ch 7, dc in each of next 5 sts] 4 times, ch 7, dc in each of last 2 sts.
Repeat Row 2 using the following color pattern:
3-6: [1 row Color B, 1 row Color A] 3 times.
7-15: [1 row Color B, 1 row Color C, 1 row Color A] 3 times.
16-22: [3 rows Color B, 3 rows Color C, 1 row Color A] 1 time.
23-28: [3 rows Color B, 3 rows Color C] 1 time.
Braiding or Looping the Ladders
- Whichever side is facing up at this point will be the front / right side of your piece. For the swatch, make sure to turn so that the working yarn loop is on the right side if you are right handed and the left side if you are left handed.
- Twist first ch-7 sp from the foundation ch ½ turn to form a loop
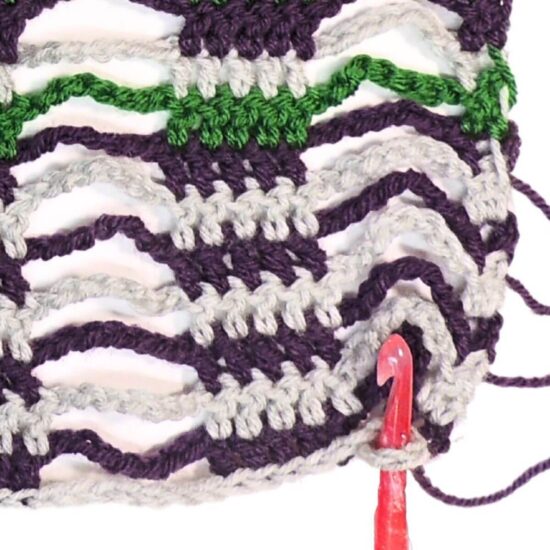
- Pull the ch-7 from the row above up through the loop, creating a new loop (do not twist}
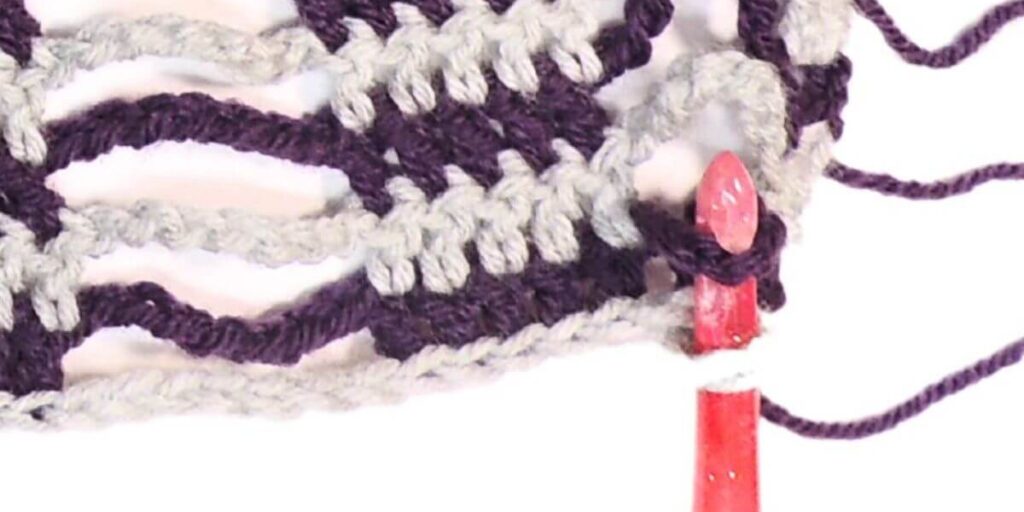
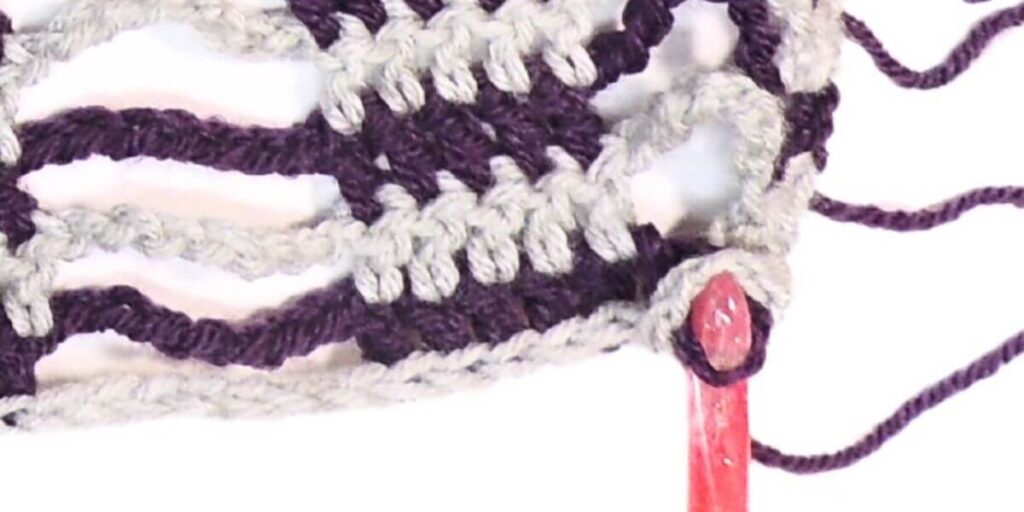
- Repeat last step until all the ch-7s have been pulled through
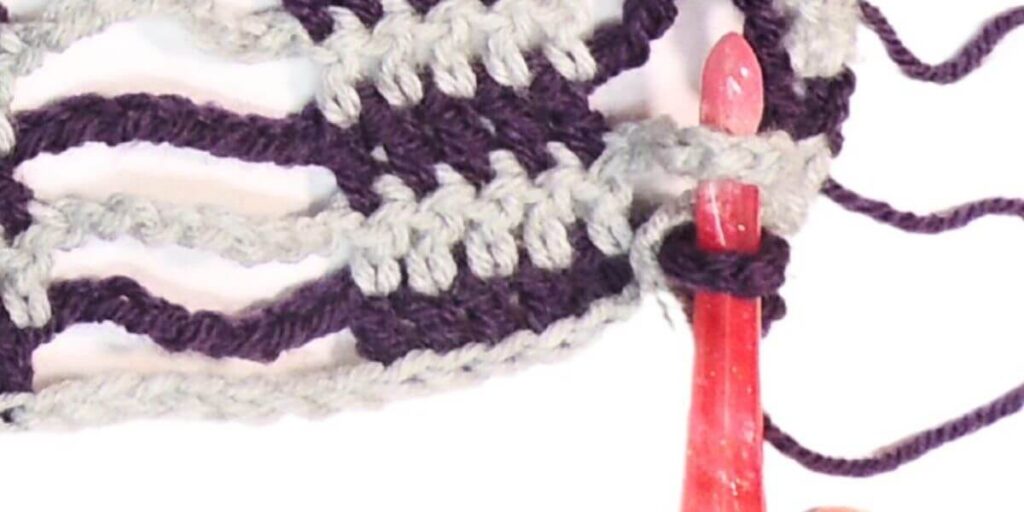
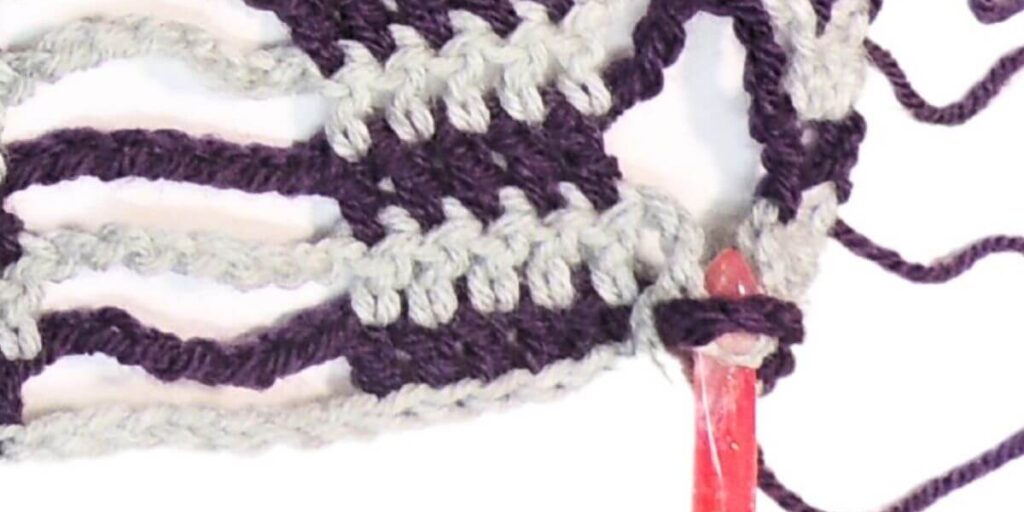
- Use a stitch marker or safely pin to secure the top loop to the stitch next to it so the Ladder will not un-loop.
- Repeat with each Ladder, always taking care to twist the first ch-sp in the same direction.
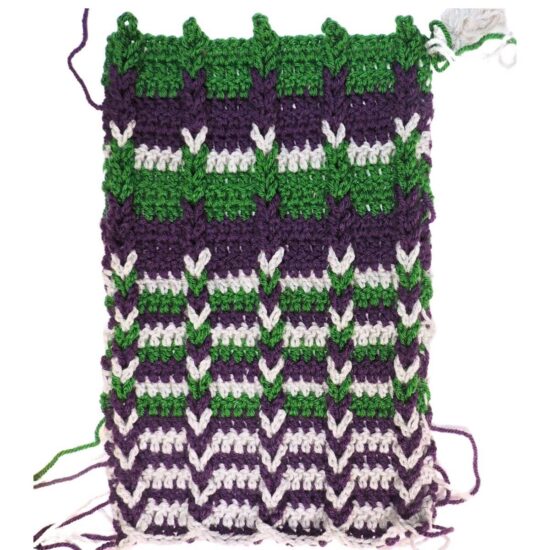
Finishing
Row 1 (Final Row): With Color A, ch 3, dc in next st, [remove marker from top loop of Jacob’s Ladder then sl st in loop, dc in each of next 5 sts] 4 times, remove marker from top loop of Jacob’s Ladder then sl st in loop, dc in each of last 2 sts.
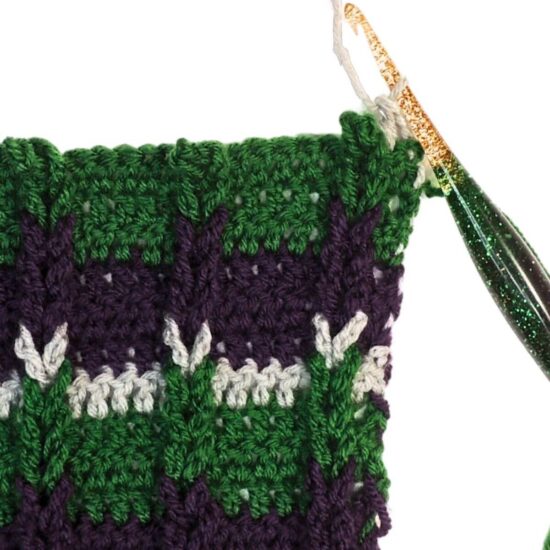
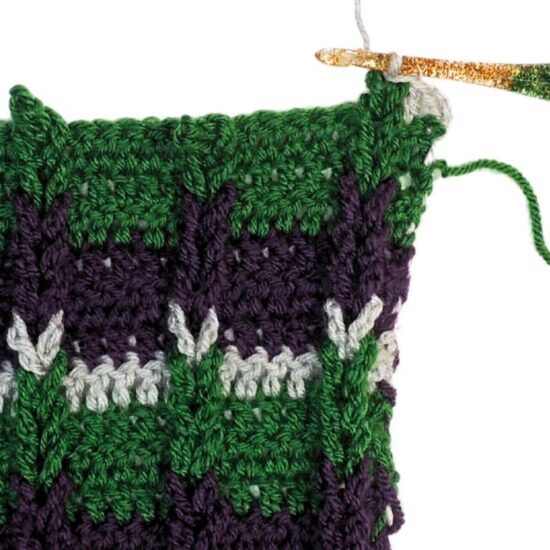
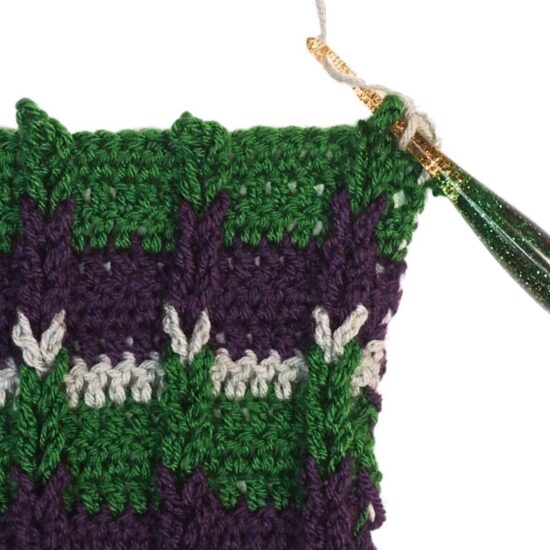
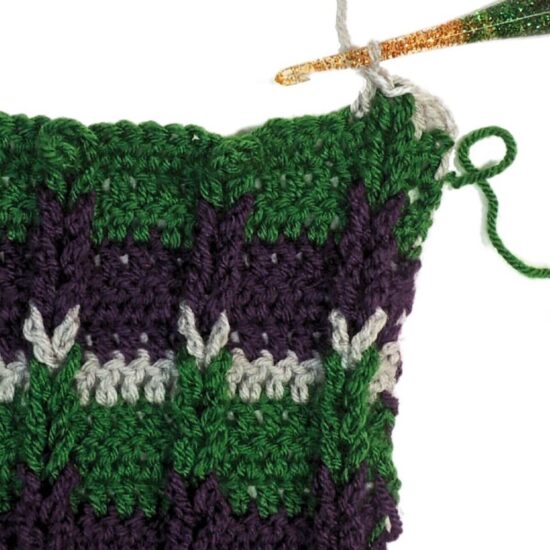
Fasten off and weave in ends.
Block finished swatch.
Jacob’s Ladder Swatch Chart
Jacob’s Ladder Right and Left-Handed Video Tutorials
For a more visual guide, check these video tutorials:
Right Handed Video Tutorial
If you can’t see this video, try watching it on YouTube HERE.
Left Handed Video Tutorial
If you can’t see this video, try watching it on YouTube HERE.
Next Steps: Putting Jacob’s Ladder Into Action
Now that you have all the tools and knowledge you need, it’s time to embark on your Jacob’s Ladder Crochet journey without confusion or fear.
Whether you’re a beginner or an experienced crocheter, this technique offers endless possibilities for creating beautiful, textured projects.
Grab your yarn and hook, watch the video tutorials, and have fun experimenting with color and pattern combinations.
Start with these popular patterns that use Jacob’s Ladder:
- Leo The Lovey
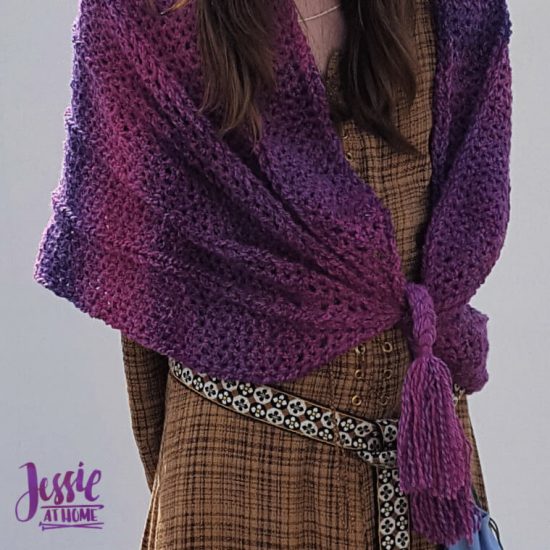
- Twisted Strands Wrap
- Loopy Love
- Dragon Wing Crochet Shawl
- Monster Hug Lovie
- Looped in Love
- Dragon Wing Scarf
- Delia Slouch Hat
- Delia Hat
- Tamara’s Kismet Square
- Kismet 12″ Square
- Jacob’s Square – 6″ afghan square
What questions do you have? What did you learn?
Happy crocheting!
Did you enjoy what you found here at Jessie At Home? Then sign up for my newsletter and like my Facebook page, so you’ll get all the updates on new tutorials, other posts, sales, and coming events.
If you have any questions, want to share pictures of your work, or just want to chat with Jessie and other crafty individuals, than join my Facebook group.

© Copyright 2015 Jessie Rayot / Jessie At Home LLC All my videos, patterns, charts, photos and posts are my own work, so you may not copy them in any way. If you want to share this information with someone, then share the link to this post. If you want to share on your own blog / website, then you may use the first photo in this post and link back to this post. Also, you may not give away printed copies of this post.





Very helpful! Thank you.
This is my first experience with the Jacob’s ladder stitch. Thanks for the great tutorial! I’m sure I’ll have fun with this stitch
My grandma used this stitch and made us a king size afghan over 30 years ago (still use on our bed and survived hundreds of washings).
I always wanted to replicate it because it is such a solid afghan, but did not know the name! Thank you for posting this!!
Yay!!! I am so glad to have helped you find it! Have fun with it. 🙂
I have been looking for how to do this stitch for a long time. Amazing
Obrigada por partilhar
Lindo
Thank you for answering my question about how many chains are required for a single, double or treble stitch. I looked everywhere. You are my hero!!
You are welcome! Glad I helped! 🙂
When working the DC verison. jow.do You Know How Many To chain?
7
Thank you so much for such an awesome pattern tutorial! I am so excited to make this for a friend & his fiancé that are expecting any day. Thank You, Thank You, Thank You!!!
A friend showed me this years ago with her hand written instructions. She never named the pattern. Sadly, she has since died. I am so delighted to see the pattern has a name!! Thank you so much. Is there a way to print this out?
Molly D.
I’m glad I could help. I don’t have this one in PDF form, but you could always copy and paste into a word doc, then print from there.
How would you do this in the round, with increase or decrease. It would make an awesome hat.
Yes, it does make an awesome hat. 😉
https://jessieathome.com/delia-hat/
GREAT demo.
I was so happy to find this, my mother taught me to crochet and knit when I was a child and I have recently gotten back into crocheting. This is such a great stitch for boys I will be working it in all sorts of blues. My only question is what is the finished size of your sample? Then I can judge better how many I need to chain to get a finished project the right size. Thanks again
I’m sorry, I didn’t measure it, and I don’t have it anymore. The best idea would be for you to make a swatch with the yarn and hook you will be using and go from there.
I love this stitch and your tutorial is excellent, and easy to follow! So if I want it longer I would chain in increments of 12 plus 7? Thank you!
You are exactly right! I’m so pleased you like the tutorial. Happy stitching!
Jessie, made your jacob’s ladder blanket, but I did not make it wise enough. I can either make another one and add it on, or make two striped panels and sew one to each side…thoughts?
I would do one on each side, I get that would look cool!
Hello, I luv these patterns and thank you so much . I look forward. To joining. In although I am a fairly new beginner but I am excited to learn.luv and Blessings Gina Quarles