
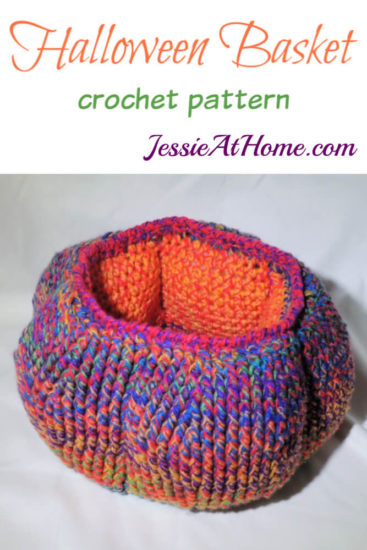
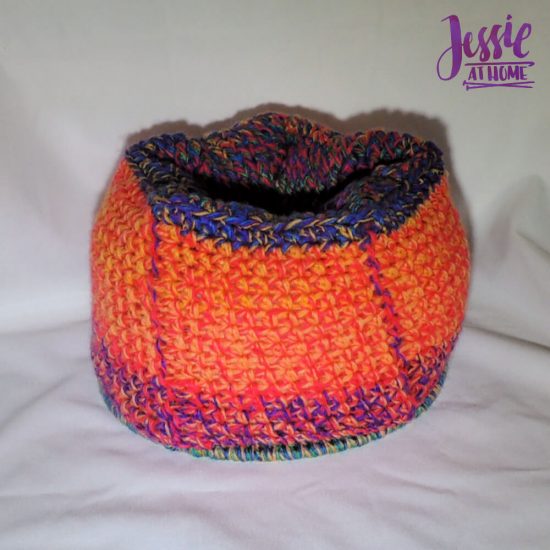
Crochet Halloween Baskets and bags and pumpkins abound right now, however this one is not like the rest. This basket uses a wood or aluminum base and also has stuffed sides to give it a fun, full shape. You could add a strap so you can use it for Trick or Treating as well. When you finish the evening, just tuck the strap in and you have your basket to keep your treats in!
The Halloween Basket is part of the CAL Central 2019 Halloween CAL.

The products for this design were provided by Red Heart and Hooked for Life Publishing. All opinions are my own.

How the 2019 Halloween CAL Works
Every Monday and Thursday from August 29 through September 30, 2019, we’ll share a free crochet pattern for Halloween-themed project. These patterns include decorations, toys, costume elements, and more.
Yarnspirations and Red Heart, Kingfisher Bags, and MorgansMane have provided us with some amazing prizes for our end-of-CAL giveaway. Don’t forget to enter the giveaway in this post on Underground Crafter by 11:59 p.m. on Thursday, October 17, 2019!
How To Join the 2019 Halloween CAL
- You can join in by crocheting the patterns as you have time.
- Share your progress and post pictures of your finished projects. Tag your projects and posts #CALCentral and #HalloweenCAL2019 on all social media.
- If you’d like to chat with other crocheters, join the CAL Central Crochet Facebook group, or visit this thread in the CAL Central Ravelry group.
- By the end of the CAL, you’ll have up to 10 spooky Halloween projects.
Halloween Basket
Crochet Pattern
Intermediate Skill Level
Designed by Jessie Rayot
Size:
11″ across, 5.5 inches tall
Yarn:
Red Heart Roll With It Tweed: 100% Acrylic, (150 g / 296 yds), size 4 (Worsted Weight)
Crayons 9236: 1 skein
Hook:
US-I/9, 5.5mm
Gauge: Learn about gauge HERE
13 sts x 11 rows = 4” [10 cm] in fpdc in the round
Other supplies:
Yarn Needle
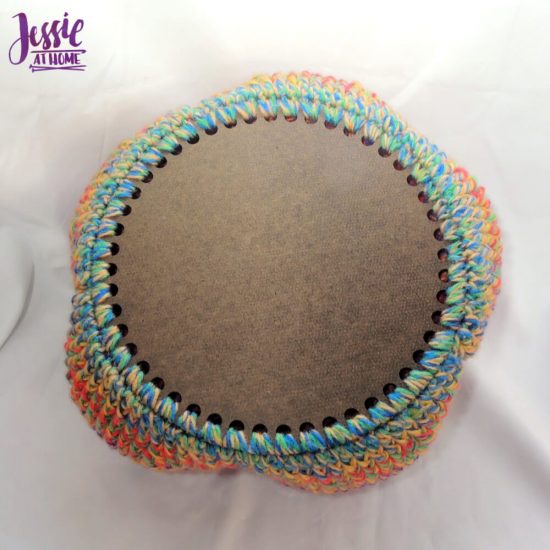
Basket Base, 8″ across with 48 holes – Wood or Aluminum
Poly-fil stuffing
I have AWESOME news for you!! When you order your basket bases from the links in the supply list above, you can get 10% off your entire order (which includes shipping!) with the code:
Jessieathome
So go buy a bunch of awesomeness. The code expires 10/31/19, don’t miss out!
Big news!! This coupon code has been reactivated until 10/31/2020!!
Stitches and Abbreviations: click on highlighted sts for tutorials
ch – chain
bpdc – back post double crochet
dc – double crochet
dc2tog – double crochet 2 together
fpdc – front post double crochet
fpdc2tog – front post double crochet 2 together (work as dc2tog, but with fp)
hdc – half double crochet
rsc – reverse single crochet
sc – single crochet
sc2tog – single crochet 2 together
sl st – slip stitch
sp(s) – space(s)
st(s) – stitch(es)
Getting Started:
Round counts are at the end of each row after the period, if the count has changed from the previous round. – {count here}
Chs and sl sts are not included in Round counts unless specified.
To make pumpkin taller, add a repeat of rows 6, 9, and 12, (and 3, 14, and 16 for even taller) then repeat row 30 three (six) more times. This will require an additional skein of yarn.
If you choose to crochet a strap, you will need a second skein of yarn.
Pattern:
Rnd 1: Sc in first hole of basket base, 2 sc in each remaining hole, sl st to top of first sc to join. – {95 sc}
Rnd 2: Ch 2 (does not count as st here or throughout), dc in each st, sl st to top of first dc to join.
Rnds 3 & 4: Ch 2, [fpdc around each of next 18 sts, bpdc around next st] 5 times, sl st to top of first fpdc to join.
Rnd 5: Ch 2, *[fpdc around each of next 5 sts, 2 fpdc around next st, fpdc around each of next 6 sts, 2 fpdc around next st, fpdc around each of next 5 sts, bpdc around next st] 5 times, sl st to top of first fpdc to join. – {105 sts}
Rnds 6 & 7: Ch 2, [fpdc around each of next 20 sts, bpdc around next st] 5 times, sl st to top of first fpdc to join.
Rnd 8: Ch 2, *[fpdc around each of next 6 sts, 2 fpdc around next st, fpdc around each of next 6 sts, 2 fpdc around next st, fpdc around each of next 6 sts, bpdc around next st] 5 times, sl st to top of first fpdc to join. – {115 sts}
Rnds 9 & 10: Ch 2, [fpdc around each of next 22 sts, bpdc around next st] 5 times, sl st to top of first fpdc to join.
Rnd 11: Ch 2, *[fpdc around each of next 6 sts, fpdc2tog around next 2 sts, fpdc around each of next 6 sts, fpdc2tog around next 2 sts, fpdc around each of next 6 sts, bpdc around next st] 5 times, sl st to top of first fpdc to join. – {105 sts}
Rnd 12: Ch 2, [fpdc around each of next 20 sts, bpdc around next st] 5 times, sl st to top of first fpdc to join.
Rnd 13: Ch 2, *[fpdc around each of next 5 sts, fpdc2tog around next 2 sts, fpdc around each of next 6 sts, fpdc2tog around next 2 sts, fpdc around each of next 5 sts, bpdc around next st] 5 times, sl st to top of first fpdc to join. – {95 sts}
Rnd 14: Ch 2, [fpdc around each of next 18 sts, bpdc around next st] 5 times, sl st to top of first fpdc to join.
Rnd 15: Ch 2, *[fpdc around each of next 5 sts, fpdc2tog around next 2 sts, fpdc around each of next 4 sts, fpdc2tog around next 2 sts, fpdc around each of next 5 sts, bpdc around next st] 5 times, sl st to top of first fpdc to join. – {85 sts}
Rnd 16: Ch 2, [fpdc around each of next 16 sts, bpdc around next st] 5 times, sl st to top of first fpdc to join.
Rnd 17: Ch 2, *[fpdc around each of next 4 sts, fpdc2tog around next 2 sts, fpdc around each of next 4 sts, fpdc2tog around next 2 sts, fpdc around each of next 4 sts, bpdc around next st] 5 times, sl st to top of first fpdc to join. – {75 sts}
Rnd 18: Ch 1 (does not count as a st here or throughout, [sc2tog, sc in next fpdc, hdc in each of next 2 fpdc, dc in next fpdc, dc2tog, dc in next fpdc, hdc in each of next 2 fpdc, sc in next fpdc, sc2tog, sc in bpdc] 5 times, sl st to top of first st to join. – {60 sts}
Rnd 19: Ch 1, *[hdc in back loop only of next 11 sts, ch 1, skip 1] 5 times, sl st to top of first hdc to join. – {55 hdc}
Rnds 20-30: Ch 1, *[hdc in each of next 10 hdc, ch 1] 5 times, sl st to top of first hdc to join. – {55 hdc}
Fasten off and leave a 2 foot long tail to sew the pumpkin together.
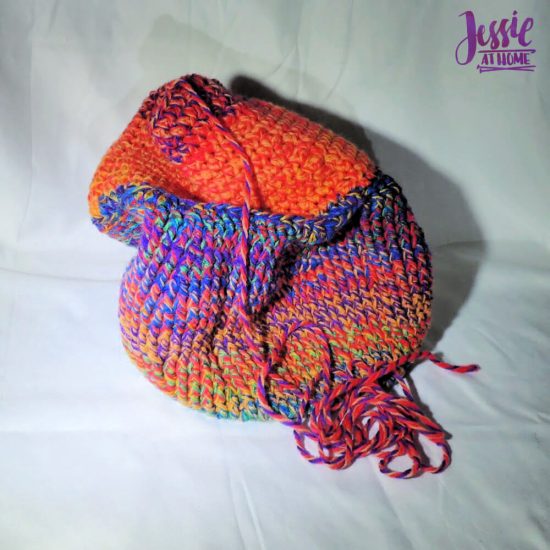
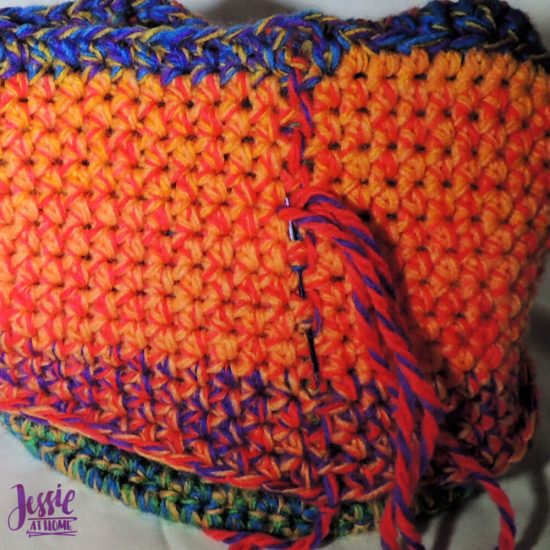
Flip entire piece inside out by pushing the basket base up through the center. Once it is inside out, fold the crochet in half at row 19 with the back loop only stitches. This will place the columns of ch-1 sps on the outside of the piece.
Cut 5 pieces of yarn each 30″ long.
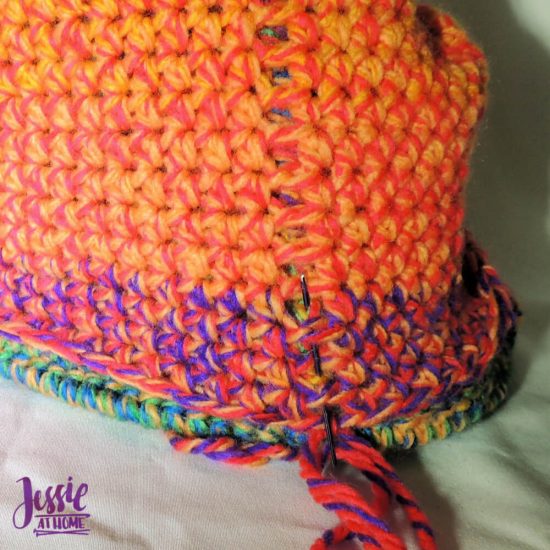
Line up the ch-1 sp columns with the columns of bpdc, there will be 5 sets. Thread 1 piece of 30″ yarn onto yarn needle. Sew the yarn through Rnd 1 beneath one of the bpdc columns and into the ch-1 sp in Rnd 30. Continue to sew the bpdc column to the ch-1 sp column all the way up and then back down. Tie the two ends together and tuck them into the pocket between the work.
Repeat on remaining 4 columns.
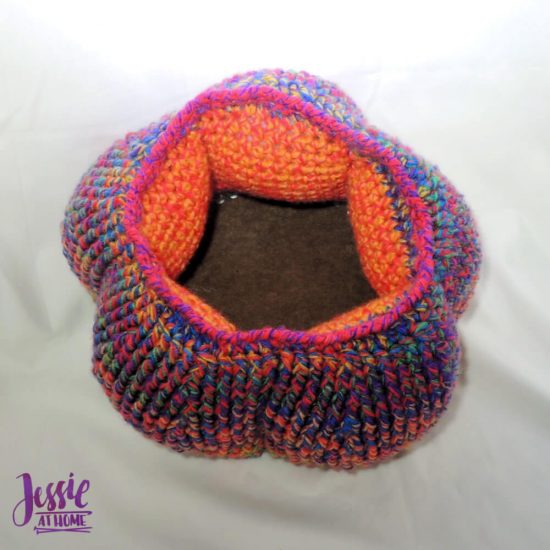
There will now be 5 pockets in the pumpkin. Stuff each pocket so they make the 5 sections of the pumpkin. Use the end tail from Rnd 30 to sew the top of Rnd 30 to Rnd 1 in order to seal in the stuffing.
Flip piece right side out.
To finish off the pumpkin, attach yarn to any unworked front loop from Rnd 19. Rsc around, working into the front loops and catching some of the st below the front loop to secure the sts more, sl st to top of first rsc to join.
Fasten off and then weave in all ends.
Use or give and enjoy!

If you are going to make this crochet creation, then get some supplies from these affiliate links.

©Copyright 2019 Jessie Rayot / Jessie At Home All my videos, patterns, charts, photos and posts are my own work, so you may not copy them in any way. If you want to share this information with someone, then share the link to this post. If you want to share on your own blog / website, then you may use the first photo in this post and link back to this post. Also, you may not give away printed copies of this post.


