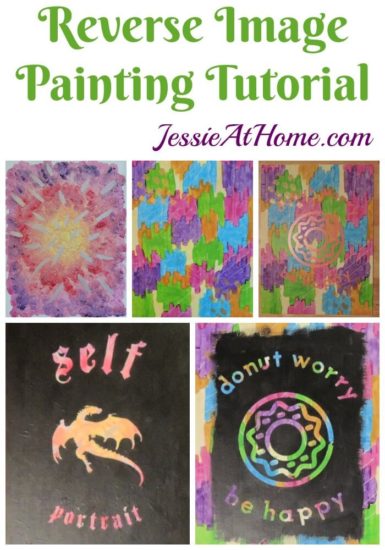
Over the girls’ February break we created lots of art. On day we started painting and ended up with reverse image paintings. It was really nifty. I know I said I would teach you how to make reverse image paintings, so today I will do just that!
Some products used in this tutorial were provided by Cricut, Styletech, and Leisure Arts.
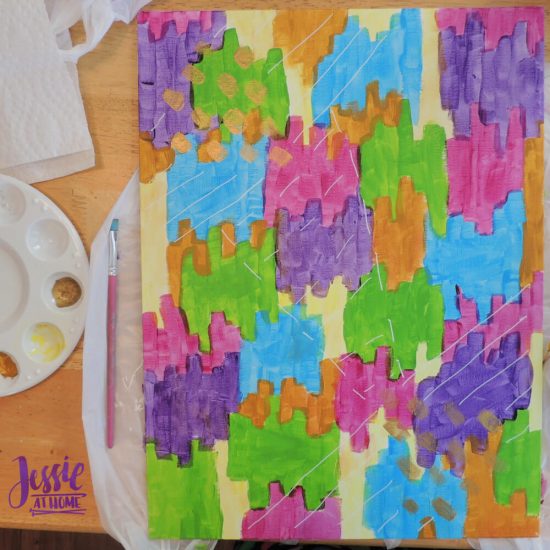
The first step is a background painting. Ours were inspired by Happy Abstracts by EttaVee. You can find my review of the book, and see more about the creation of our background paintings HERE.
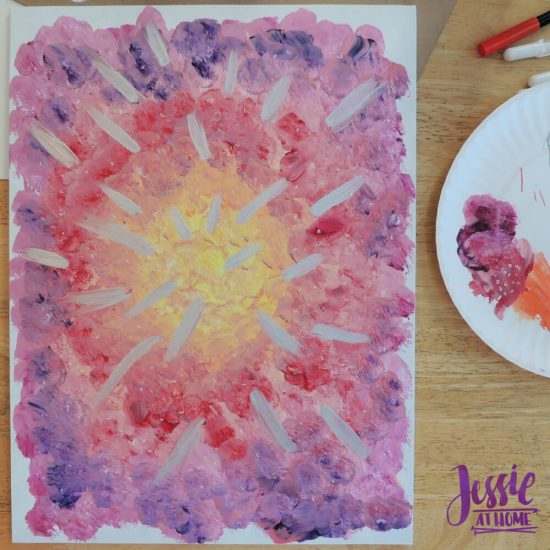
Vada painted all the way to the edge of her canvas board, and I did not. If you want to paint your top color only over your reverse image, and not all the way to the edge, you will need to be sure your background painting goes all the way to the edge. You’ll see what I mean with our finished creations.
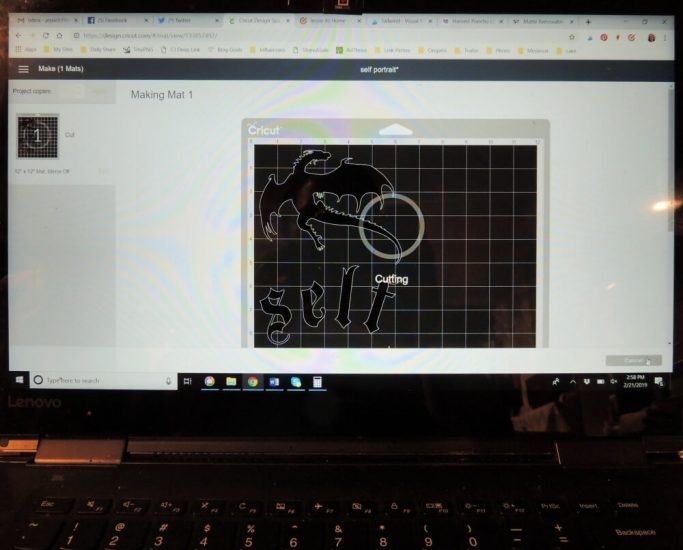
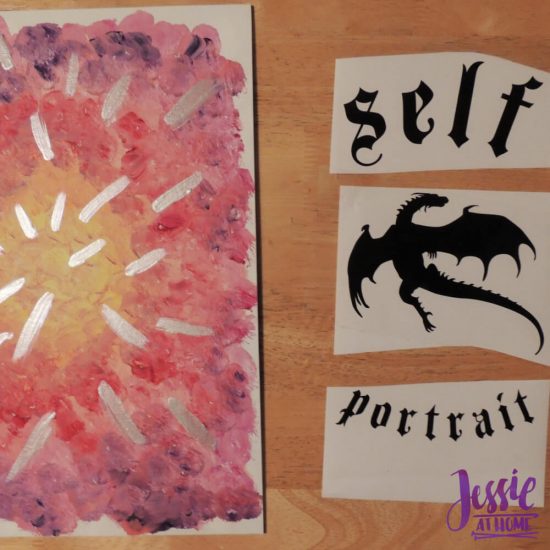
Now it’s time to get your reverse image ready to cut. You can cut it by hand, but I used my Cricut Explore Air 2. You will need to cut your image out of removable vinyl. I used Styletech removable vinyl. You can read about choosing and cutting images in THIS POST.

The color of your removable vinyl doesn’t matter, as it will just be used to mask out your image. Be sure to size your image correctly for your background painting. Just measure your painting and figure it out from there.
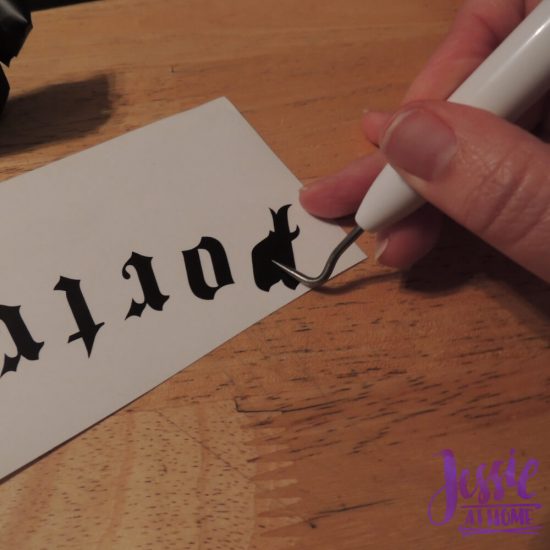
Now you weed your image. Leave the fused image sections together so you don’t mess up your spacing. Even if you are just using one image (no fusing) I still recommend using transfer tape because it will make applying your vinyl easier.
Using transfer tape, apply the removable vinyl to your background painting. Be sure to apply it very firmly so no paint gets under it when you add your top color.
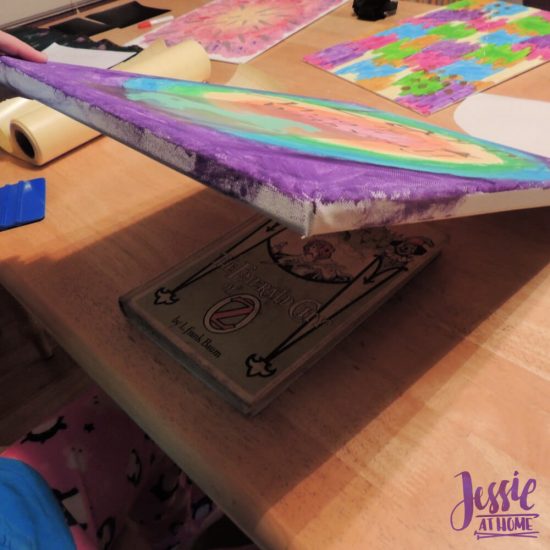
If you are using a stretched canvas, place something hard that is at least as thick as the stretching boards beneath it. You can see in the image above that we used a hard cover book for Kyla’s stretched canvas. If you don’t do this, you may stretch out the canvas more when you apply the vinyl and it will ripple and look bad.
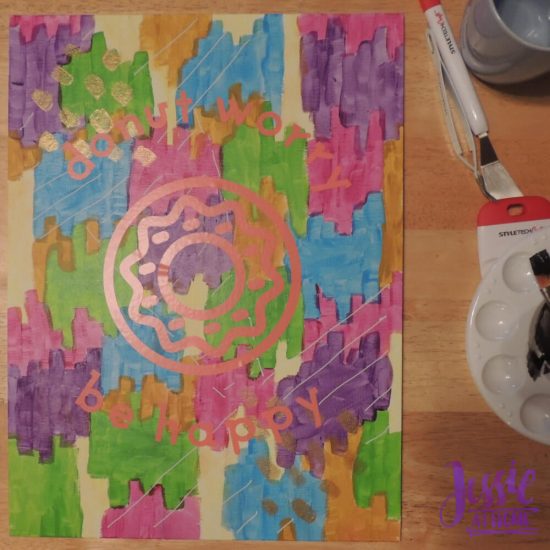
Peel off the transfer tape and get your top color ready. If you have a bubble in your vinyl at an edge (as you can see above) do your best to get it to lay down. You may need to carefully cut a slit in the vinyl to do this. If any of the edges are not sealed down well, paint may get under the vinyl.
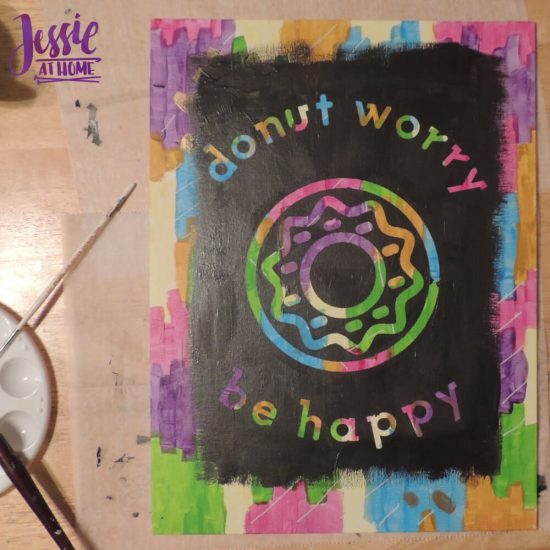
Now paint over your image. If your background painting went all the way to the edge, you can just paint over the vinyl and not all the way to the edge of the painting. I think I want to try this again and spray paint the top coat on like reverse graffiti! That could be really cool for a party banner.
Once you have painted your top coat, let it mostly dry. When it is just about dry, carefully remove the vinyl. You will be able to see the ridges at the edges of the vinyl to find where it is. I used my pick tool and my tweezers for this. Just take your time.
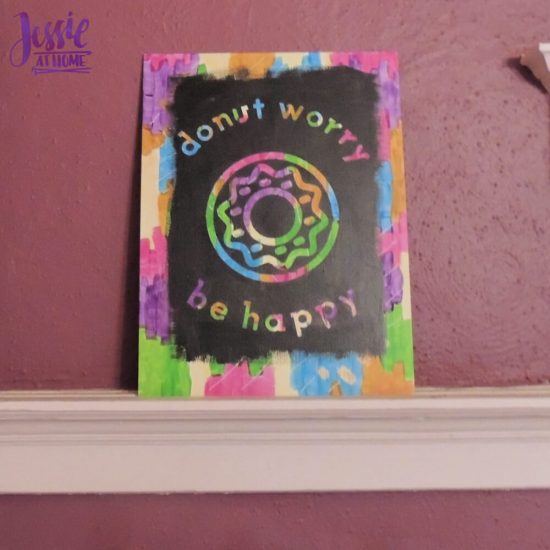
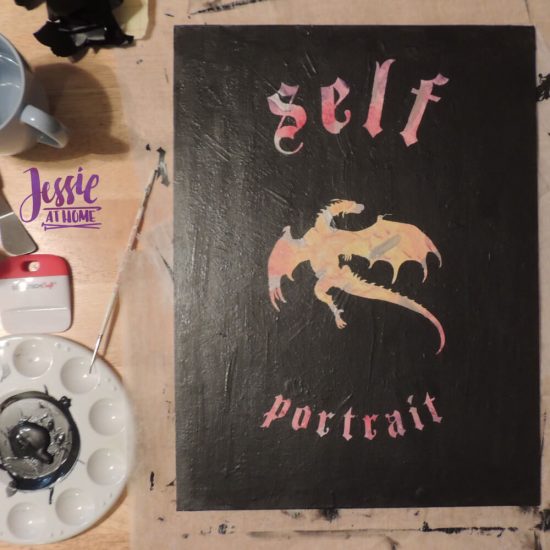
Ta-da!! You have a super fun reverse image painting. Think of all the ways you can use this technique. Have fun creating, my friends!
Find Cricut products HERE.
Find Styletech products HERE.
Find Leisure Arts Products HERE.
Did you enjoy what you found here at Jessie At Home? Then sign up for my newsletter and like my Facebook page, so you’ll get all the updates on new tutorials, other posts, sales, and coming events.
If you have any questions, want to share pictures of your work, or just want to chat with Jessie and other crafty individuals, than join one of our free Zoom Sit & Stitches. Find them on our Events Calendar.

© Copyright 2019 Jessie Rayot / Jessie At Home®, LLC All my videos, patterns, charts, photos and posts are my own work, so you may not copy them in any way. If you want to share this information with someone, then share the link to this post.