This winter I was introduced to Rinea Foiled Paper and it is just the coolest! I’ve been playing around with it and I have a tutorial for you today. You’re going to love this product. Plus, there is a giveaway at the end of this post for some Rinea Foiled Paper of your own.

The products used in this post were provided by Rinea and Cricut. All opinions are my own.
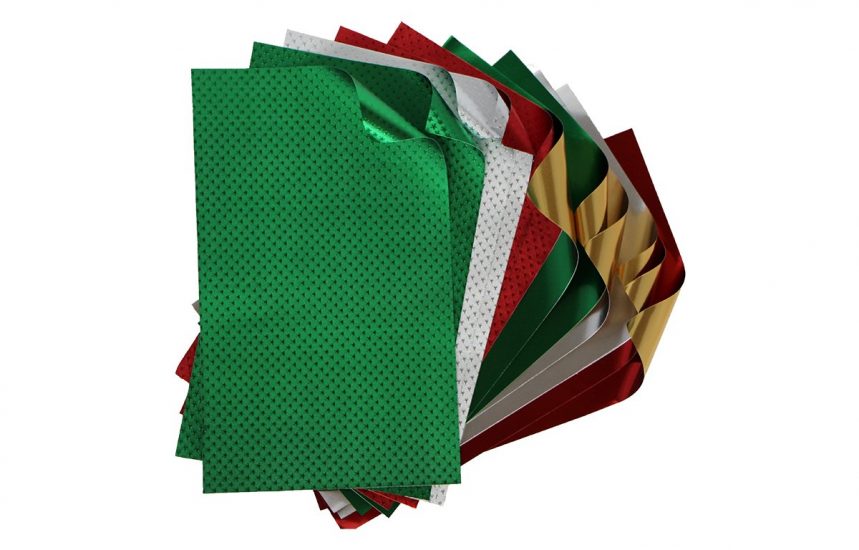
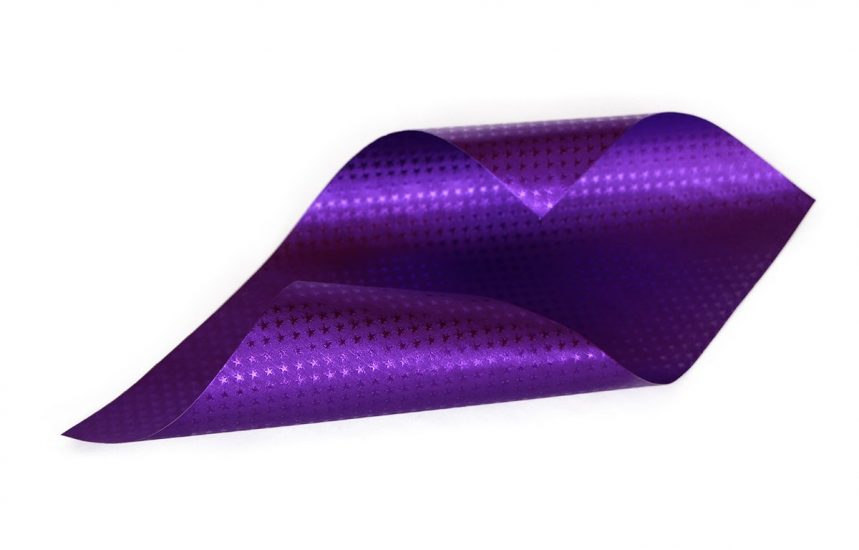
Rinea Foiled Paper is such a brilliant product. It’s a sheet of paper sandwiched between two sheets of foil. This way it has all the awesome properties of foil without being fragile. The sheets can be the same or different on each side.
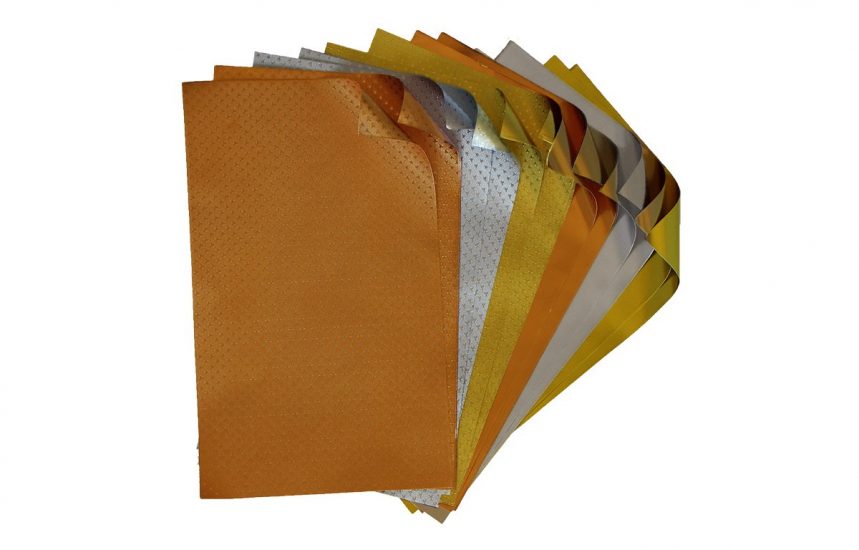
I received the 6 x 12 Jolly Variety pack, a pack of 6 x 12 Violet with stars, and the 4 x 6 metallic pack. I really love that you can shape the foiled paper and it holds the shape. Sure, you can crunch it up and get crinkles, but they don’t just happen from the slightest touch like with traditional foil.
So now, let me tell you about what I did with the Rinea Foiled Paper, and how you can use your Cricut to do the same. Of course, you can use other cutting machines or tools, or even just scissors with this awesome paper. Rinea even offers some design tools of their own; but I’m going to share my project with my Cricut.
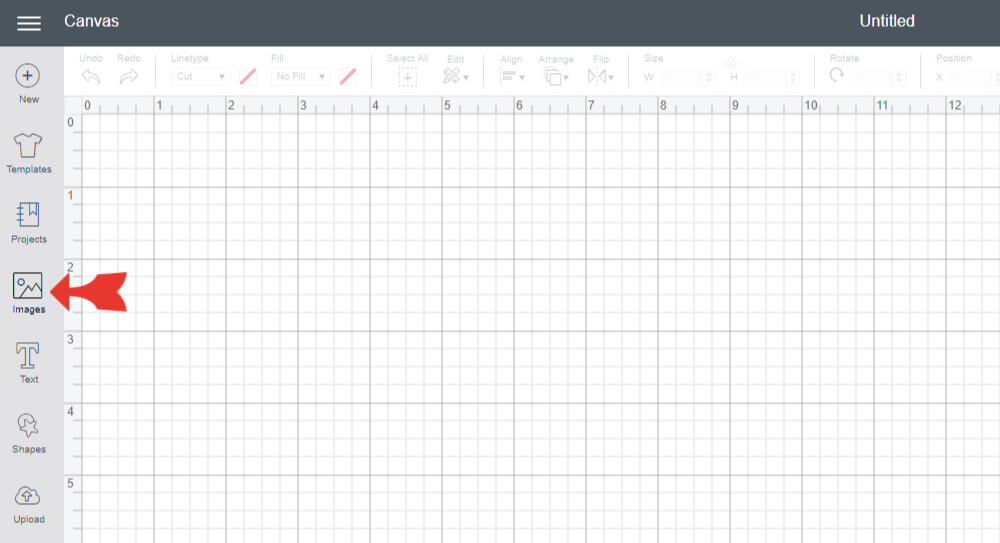
First, open Cricut Design Space and go to canvas by clicking on “new project”. Then click on “Images” in the left menu.
Now you can filter you image search by clicking on the “Filter” link on the top right. I filtered to My Images, Free, Cricut Access, and 3D Objects.
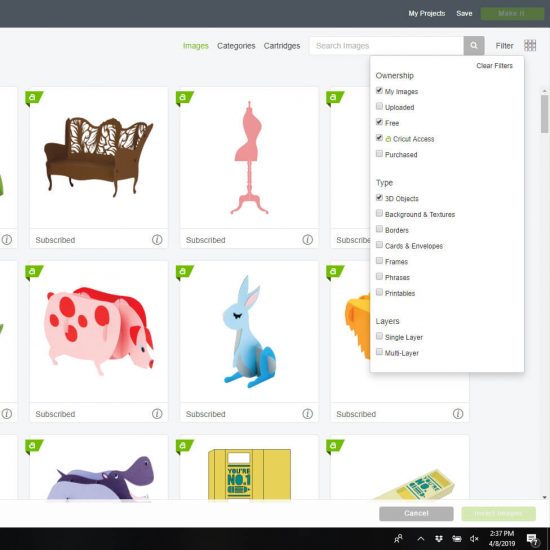
Now scroll through your search results. Find an image you like or kind of like. I liked the look of this heart, but I didn’t want a heart, maybe another shape. Once you find your image, click on the “i” in the bottom right corner.
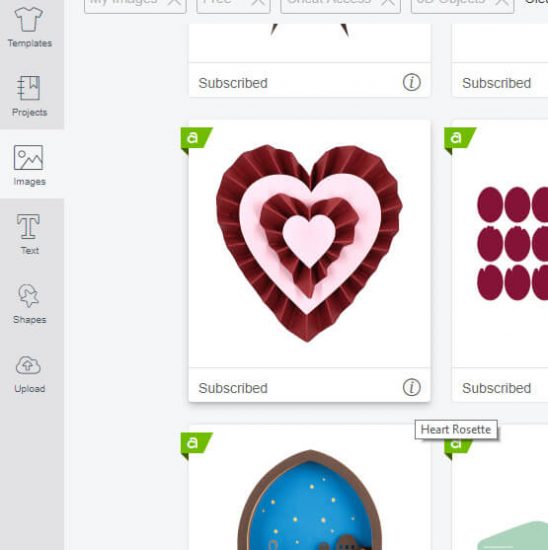
This will switch the image to the info about the image. The cartridge or group that the image is part of will be green. Click on that.

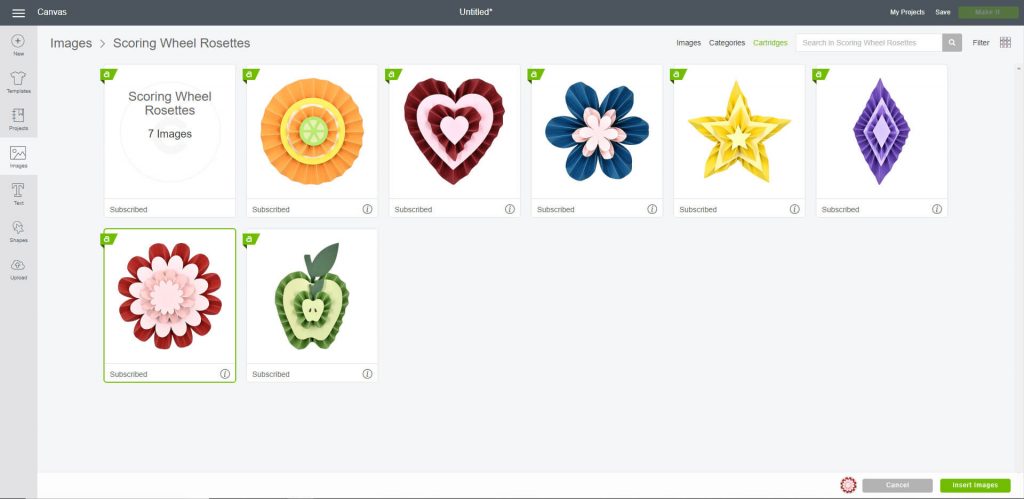
You will now see all the images in that cartridge or group that fit in your filters. This is a great way to find several ideas from just one image you like. I loved the look of the heart, but wanted a different shape, and this trick helped me find other shapes that I liked more.
Click on the image or images you want to use. A small copy of that image will appear in the right side of your bottom bar. Once you are done choosing images, click on “insert images” at the bottom right.
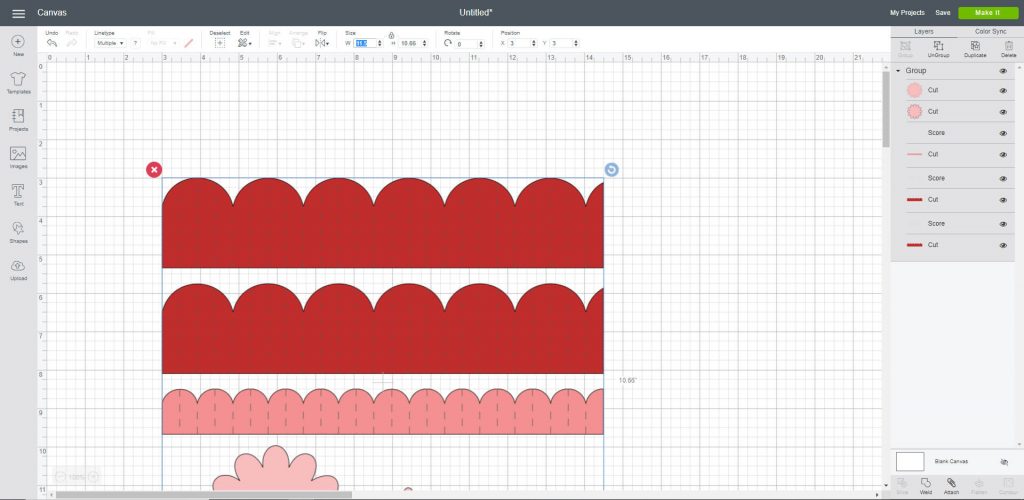
Now your images are on your canvas. If you have multiple images and any of them are layered, the layered images will all be grouped together. To change the size of all the pieces proportionally, click on the title of the image on the right.
My image title happens to be “group”. Some are named group, and some have a real name. I’m not sure why. You can see that when I clicked on “group”, all the parts of the image were selected in a box. Now you can change the size of the entire image by using the size boxes in the top bar.
If you want to change any colors, then choose the layer only that you want to change in the right bar.
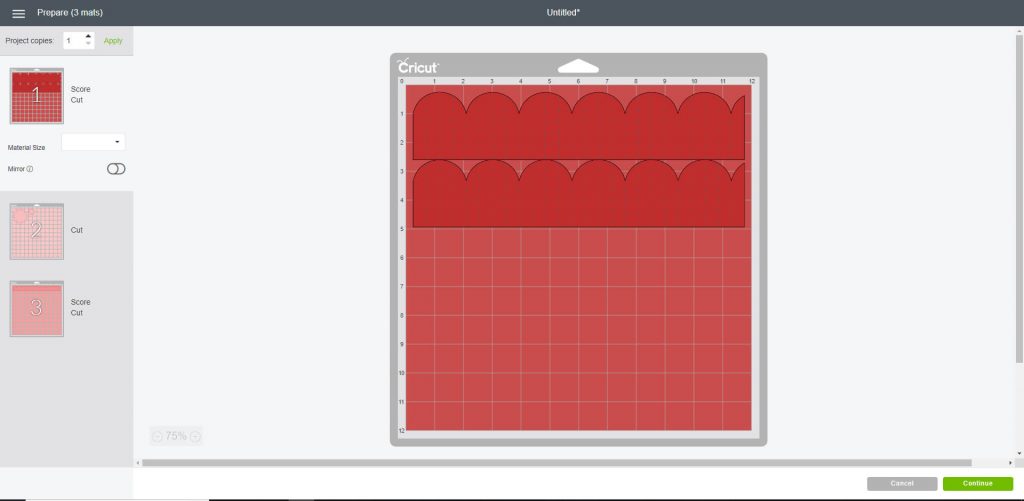
Now click on “make it” in the top right. This will take you to a screen with the various mats you will need to cut. If you are like me and cutting a material that is not one of the standard sizes, or that has something already cut from it, this is where you can check that you are OK. Click on each mat one at a time and make sure your material is big enough for the cutting area.
If your material is too small you have 2 choices. Cut from a larger piece, or go back to the canvas and make your image smaller. Click back on the first mat and choose “continue” in the bottom right.
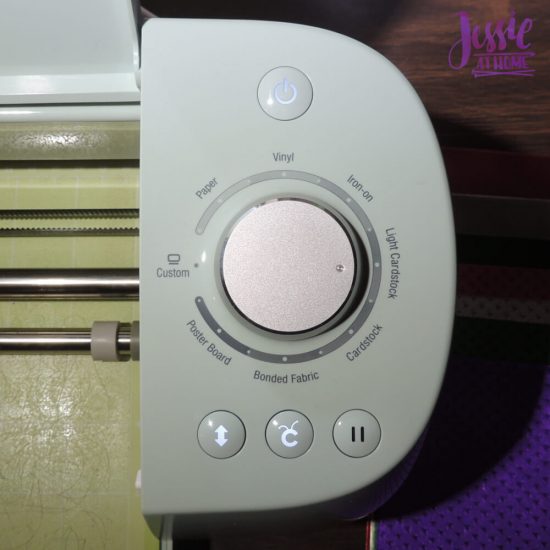
I found that cutting on the “Light Cardstock” setting was just right. There was enough pressure to make the scores needed without tearing the foil top layer, and enough pressure to go all the way through the foiled paper. I do not recommend using the fast setting on the Explore Air 2 with this product.
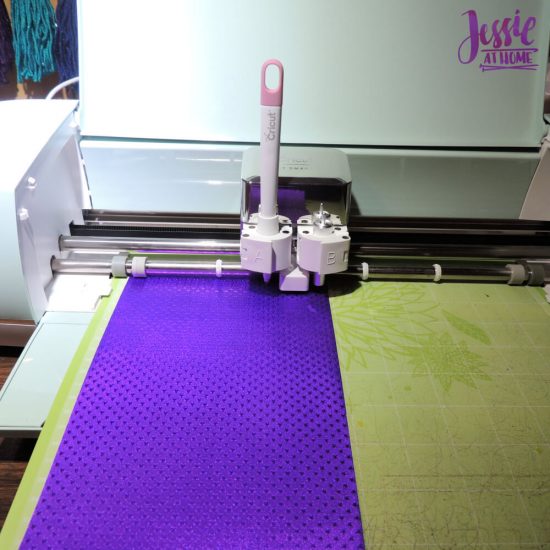
I used a regular mat when cutting. If your mat is new and super sticky, you may need to use the light hold mat. A mat that is too sticky may remove some of the foil from the bottom side of the paper. I happen to have an older regular mat I use when I need a lighter hold, so that worked fine for me.
Once I had all my pieces cut, it was time to assemble. I found the Beacon Multi-Grip glue worked really well with the Rinea Foiled Paper. It holds tight, has a nice tip so you can get just the right amount of glue, and dries enough to continue working quite fast. I was able to hold glued parts together for just 10 or so seconds before moving on.
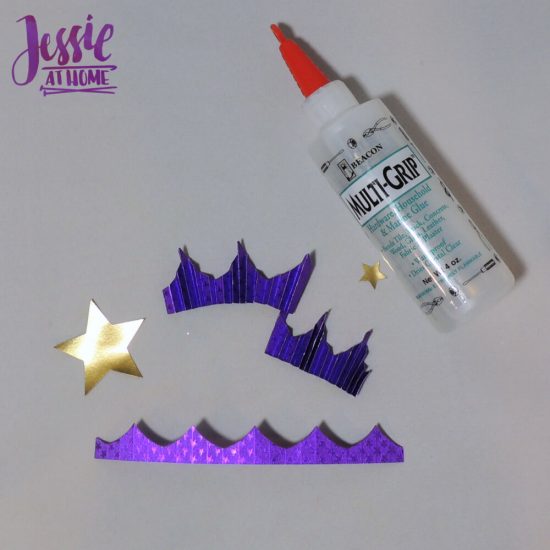
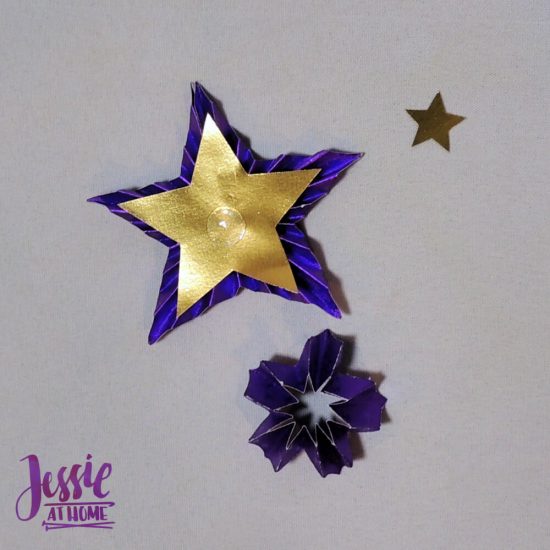
The Rinea Foiled Paper folded on the scored lines very easily and nicely. It took me a bit to decide how to get the folded star sections to stay in a star shape. I eventually realized that glue dots were the way to go.

You can see the glue dot on the gold star below. It worked well.
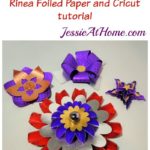
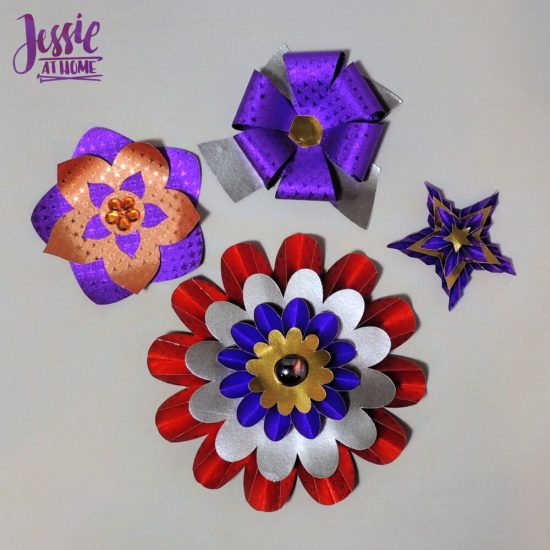
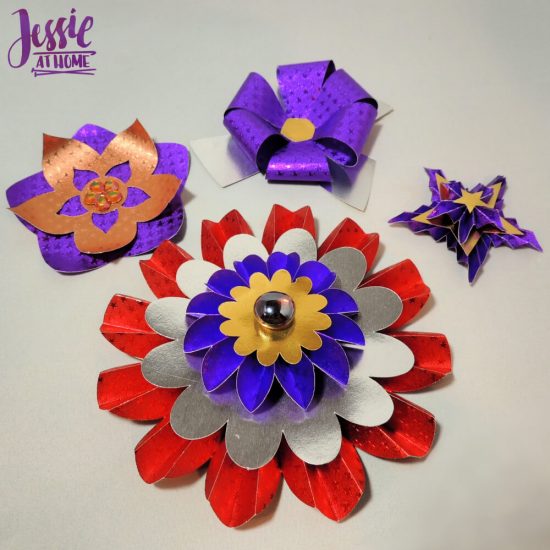
I really like the look of the Rinea Foiled Paper. It’s easy to use and hold it’s shape well. You can see in a few images down that I made a flower and bow that have rounded shapes to them, and the Rinea Foiled Paper is perfect for those items! I added some embellishments and these will all make awesome present toppers.

Find Rinea and their awesome products below.
Now it’s time for a giveaway! The winner will receive one 6×12 variety pack and one 4×6 variety pack. The winner can choose the packs.
To enter the Rinea Foiled Paper Giveaway you must be at least 18 years of age and have a valid shipping address. The giveaway ends at the end of day eastern time on April 22, 2019. Winner will be contacted by email and will have one week to reply with a valid shipping address or a new winner will be chosen. Void where prohibited. Any personal data collected on this entry form will be used solely for the purposes of administering this giveaway. The winner’s contact and mailing information will be provided to Sponsor, for the purposes of coordinating delivery of the prize. Other than that, no personal information collected will be shared with Sponsor.
a Rafflecopter giveaway


WOW! These are awesome!