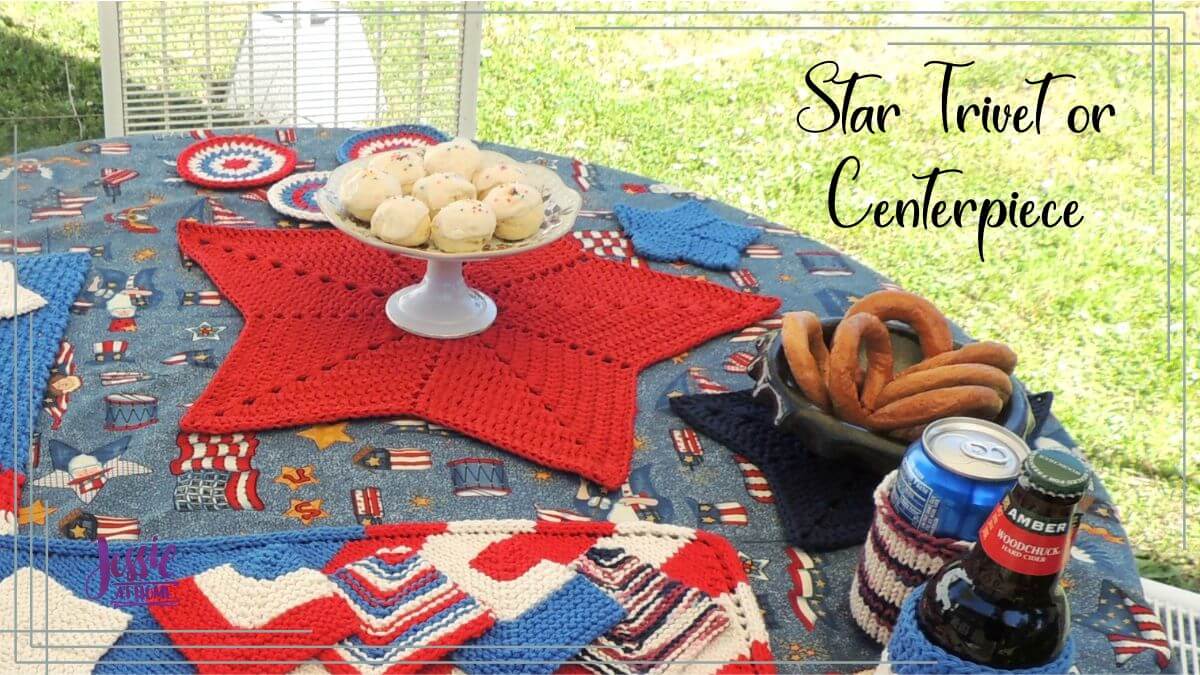
Inside: Create a stunning Star Trivet or Centerpiece with this beginner-friendly crochet pattern. Perfect for summer decor.
This pattern was originally published on 6/11/2015. The most recent update was made on 7/5/2025.
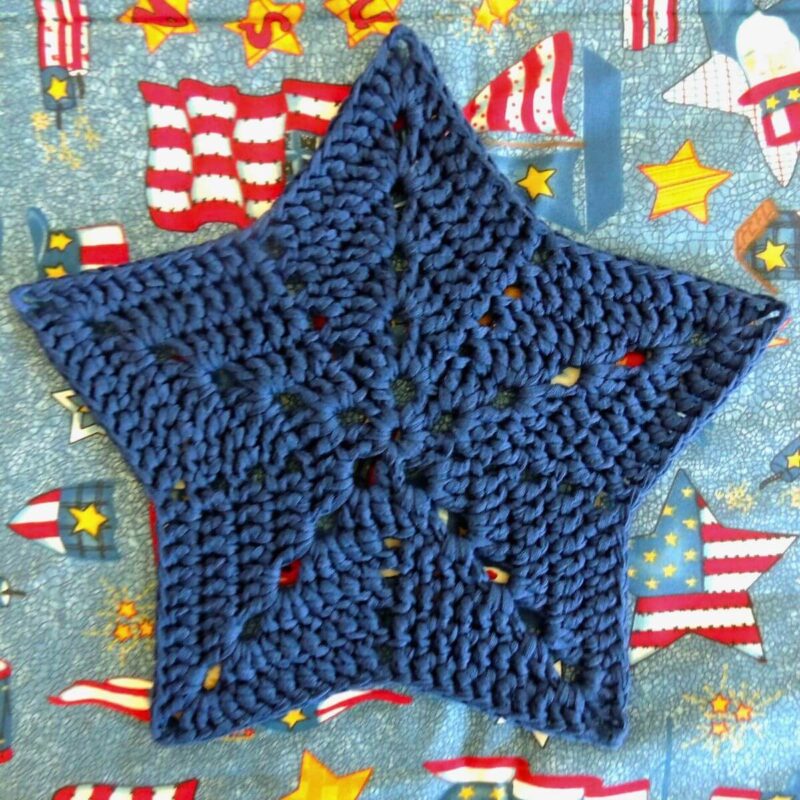
If you’re into simple crochet projects that double as eye-catching home decor and practical kitchen helpers, this star trivet or centerpiece pattern is definitely worth checking out. A handmade crochet star brings next-level cool to a summer table and adds a cheery splash to any cozy kitchen. With just some yarn and your trusty hook, you’ll whip up a piece that serves as a heat-safe trivet or, if you keep going, a statement centerpiece—perfect for parties, thoughtful gifts, or your own dining setup.
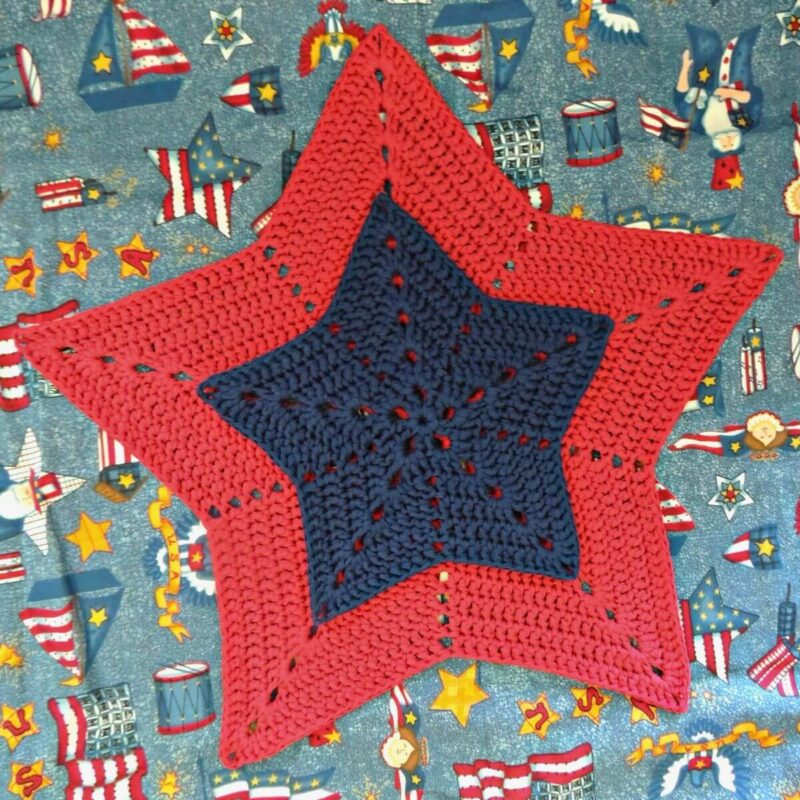
Table of contents
- Materials and Sizing for the Star Trivet or Centerpiece
- Abbreviations & Skills Used
- Before You Start
- Get the Ad-Free Printable PDF at These Sites
- Supplies & Stats
- Pattern Notes
- The Star Crochet Pattern (Trivet or Centerpiece)
- Adjusting the Sizing or Shape
- Crochet Star Care Tips
- Creative Ideas for Using Your Crochet Star
- FAQs and Troubleshooting
- What’s Next? Try Variations!
This pattern is perfectly beginner friendly, and there’s no pressure to match your gauge exactly to mine. Pause partway through for a smaller trivet, or keep building for an eye-catching centerpiece. One key point: if you want to put anything hot on your star, stick with cotton yarn since acrylic and other meltable fibers aren’t safe for direct heat. This isn’t a potholder; it doesn’t have the layered heatproof design to safely grab hot pans.
Materials and Sizing for the Star Trivet or Centerpiece
Picking the right yarn and hook size is straightforward here. My trivet ended up about 10 inches across, while the centerpiece style reached about 18 inches. If your yarn or tension is different, don’t worry—you’ll get a slightly smaller or larger star, but it’ll work just as well. Plus, you can always make more or less rounds to get your perfect size.
- Yarn: Worsted or aran weight cotton. I picked a size 4 cotton—pure cotton is best for handling heat without worry.
- Hook: US H/8 (5.00 mm)
- Gauge (not required): For your info, 14 double crochets and 8 rows = 4 inches, but don’t stress if your stitches are a bit bigger or smaller.
- Other: Yarn needle and scissors for weaving in those yarn tails at the end.
Abbreviations & Skills Used
Stitches in this pattern are classic and approachable:
- ch: chain
- sl st: slip stitch
- dc: double crochet
Never tried increases and quick point shaping in crochet before? You’ll pick up the rhythm quickly. Once you spot the flow between the points and valleys, you can keep expanding your star—just add 2 more stitches between each point and valley.
Before You Start
- No need to worry about exact gauge; your star will be a bit bigger or smaller with different yarns and tension—that’s perfectly fine!
- For a trivet size, stop after round 6 (around 10″ across); to make a centerpiece, keep going through round 11 (around 18″ across) or even more, using the same shape logic.
- Stick with heatproof yarn for a trivet. Cotton is safe, but acrylic and most wool blends can melt or even catch fire under a hot pan.
- This isn’t a potholder—don’t use it to grab hot dishes. Use it under hot dishes or as a showpiece.
Get the Ad-Free Printable PDF at These Sites
- Crochet Foundry (Buy direct from me!)
- Ravelry
- Etsy
- LoveCrafts
Supplies & Stats
Size
Trivet: about 10″ across
Centerpiece: about 18″ across
Yarn
Village Yarn Craft Cotton: (100% cotton), size 4 / worsted weight, 115 yds / 105 m, 2.5 oz / 71 g per skein
Trivet: 80 yds / 75 m, 50 g / 1.8 oz
Centerpiece: 260 yds / 240 m, 160 g / 5.6 oz
Tahki Yarns Chat used for original sample. This yarn is now discontinued.
Crochet Hook
US H/8/5.00mm
Gauge
Learn about gauge HERE
14 sts and 8 rows in dc in a 4″ square
Other Supplies
Stitches and Abbreviations
click on highlighted sts for tutorials
ch: chain
sl st: slip stitch
dc: double crochet
st(s): stitch(es)
Pattern Notes
- Read through all instructions before beginning.
- The stitch count is at the end of each rnd after the period, usually only if the count has changed from the previous rnd. [count here]
- Chs and sl sts are not included in stitch counts unless specified.
The Star Crochet Pattern (Trivet or Centerpiece)
Easy Crochet Pattern
Designed by Jessie Rayot
Star Trivet or Centerpiece
Rnd 1: Ch 3, sl st in first ch made to form a ring, ch 5 (counts as first dc and ch 2 here and throughout), [2 dc, ch 2] 4 times, dc, sl st in 3rd ch of beginning ch-5 to join. [10 sts]
Rnd 2: Sl st into ch-2 sp, ch 5, 3 dc in same ch-2 sp, *(3 dc, ch 2, 3 dc) in next ch-2 sp; repeat from * 3 more times, 2 dc in next ch-2 sp, sl st in 3rd ch of beginning ch-5 to join. [15 sts]
Rnd 3: Sl st into ch-2 sp, ch 5, 3 dc in same ch-2 sp, *dc in each of the next 2 sts, skip 2 sts, dc in each of next 2 sts, (3 dc, ch 2, 3 dc) in next ch-2 sp; repeat from * 3 more times, dc in each of the next 2 sts, skip 2 sts, dc in each of next 2 sts, 2 dc in next ch-2 sp, sl st in 3rd ch of beginning ch-5 to join. [5 sts on each side]
Rnd 4: Sl st into ch-2 sp, ch 5, 3 dc in same ch-2 sp, *dc in each of the next 4 sts, skip 2 sts, dc in each of next 4 sts, (3 dc, ch 2, 3 dc) in next ch-2 sp; repeat from * 3 more times, dc in each of the next 4 sts, skip 2 sts, dc in each of next 4 sts, 2 dc in next ch-2 sp, sl st in 3rd ch of beginning ch-5 to join. [7 sts on each side]
Rnd 5: Sl st into ch-2 sp, ch 5, 3 dc in same ch-2 sp, *dc in each of the next 6 sts, skip 2 sts, dc in each of next 6 sts, (3 dc, ch 2, 3 dc) in next ch-2 sp; repeat from * 3 more times, dc in each of the next 6 sts, skip 2 sts, dc in each of next 6 sts, 2 dc in next ch-2 sp, sl st in 3rd ch of beginning ch-5 to join. [9 sts on each side]
Rnd 6: Sl st into ch-2 sp, ch 5, 3 dc in same ch-2 sp, *dc in each of the next 8 sts, skip 2 sts, dc in each of next 8 sts, (3 dc, ch 2, 3 dc) in next ch-2 sp; repeat from * 3 more times, dc in each of the next 8 sts, skip 2 sts, dc in each of next 8 sts, 2 dc in next ch-2 sp, sl st in 3rd ch of beginning ch-5 to join. [11 sts on each side]
Trivet: Move onto Finishing.
Centerpiece Continuation
Rnd 7: Sl st into ch-2 sp, ch 5, 3 dc in same ch-2 sp, *dc in each of the next 10 sts, skip 2 sts, dc in each of next 10 sts, (3 dc, ch 2, 3 dc) in next ch-2 sp; repeat from * 3 more times, dc in each of the next 10 sts, skip 2 sts, dc in each of next 10 sts, 2 dc in next ch-2 sp, sl st in 3rd ch of beginning ch-5 to join. [13 sts on each side]
Rnd 8: Sl st into ch-2 sp, ch 5, 3 dc in same ch-2 sp, *dc in each of the next 12 sts, skip 2 sts, dc in each of next 12 sts, (3 dc, ch 2, 3 dc) in next ch-2 sp; repeat from * 3 more times, dc in each of the next 12 sts, skip 2 sts, dc in each of next 12 sts, 2 dc in next ch-2 sp, sl st in 3rd ch of beginning ch-5 to join. [15 sts on each side]
Rnd 9: Sl st into ch-2 sp, ch 5, 3 dc in same ch-2 sp, *dc in each of the next 14 sts, skip 2 sts, dc in each of next 14 sts, (3 dc, ch 2, 3 dc) in next ch-2 sp; repeat from * 3 more times, dc in each of the next 14 sts, skip 2 sts, dc in each of next 14 sts, 2 dc in next ch-2 sp, sl st in 3rd ch of beginning ch-5 to join. [17 sts on each side]
Rnd 10: Sl st into ch-2 sp, ch 5, 3 dc in same ch-2 sp, *dc in each of the next 16 sts, skip 2 sts, dc in each of next 16 sts, (3 dc, ch 2, 3 dc) in next ch-2 sp; repeat from * 3 more times, dc in each of the next 16 sts, skip 2 sts, dc in each of next 16 sts, 2 dc in next ch-2 sp, sl st in 3rd ch of beginning ch-5 to join. [19 sts on each side]
Rnd 11: Sl st into ch-2 sp, ch 5, 3 dc in same ch-2 sp, *dc in each of the next 18 sts, skip 2 sts, dc in each of next 18 sts, (3 dc, ch 2, 3 dc) in next ch-2 sp; repeat from * 3 more times, dc in each of the next 18 sts, skip 2 sts, dc in each of next 18 sts, 2 dc in next ch-2 sp, sl st in 3rd ch of beginning ch-5 to join. [21 sts on each side]
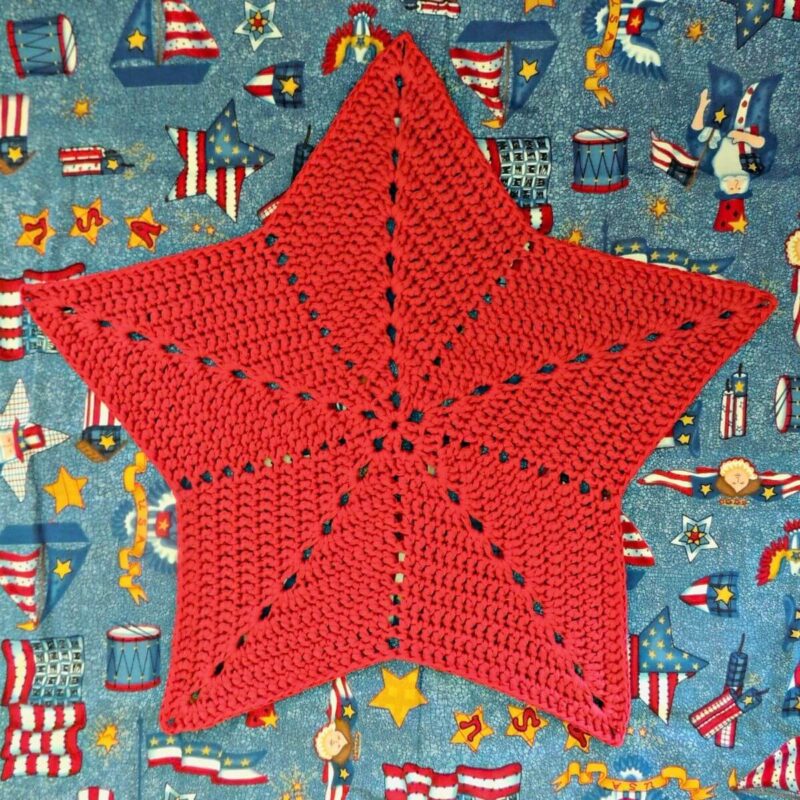
Finishing
- Fasten off
- Weave in ends
- Block the star (especially with cotton, it helps crisp up those points) to shape it perfectly
Adjusting the Sizing or Shape
This star is charming in any size. Here’s how to tweak it:
- For a Mini Accent: Finish after round 3 or 4 for a small accent or coaster.
- Bigger Centerpiece, Rug, or Blanket: Add additional rounds—stick with the setup of working evenly up each point and skipping two stitches for the valleys. Your star remains balanced and grows smoothly every round. Each section of dc will increase by 2 sts per round.
- Yarn Choices: Try chunky or sport weight cotton for different vibes. If you opt for a thinner yarn, your star will end up smaller unless you add extra rounds. Chunky is an awesome choice to make a rug!
Crochet Star Care Tips
- Spot Clean for Best Results: Wash cotton gently with mild soap if you get food stains.
- Blocking Keeps It Sharp: A wet block makes those star tips snap into place—super helpful for a display piece.
- Keep Away from Open Flame: Don’t put your trivet directly on a burner or under a broiler. Heat resistance doesn’t equal flameproof!
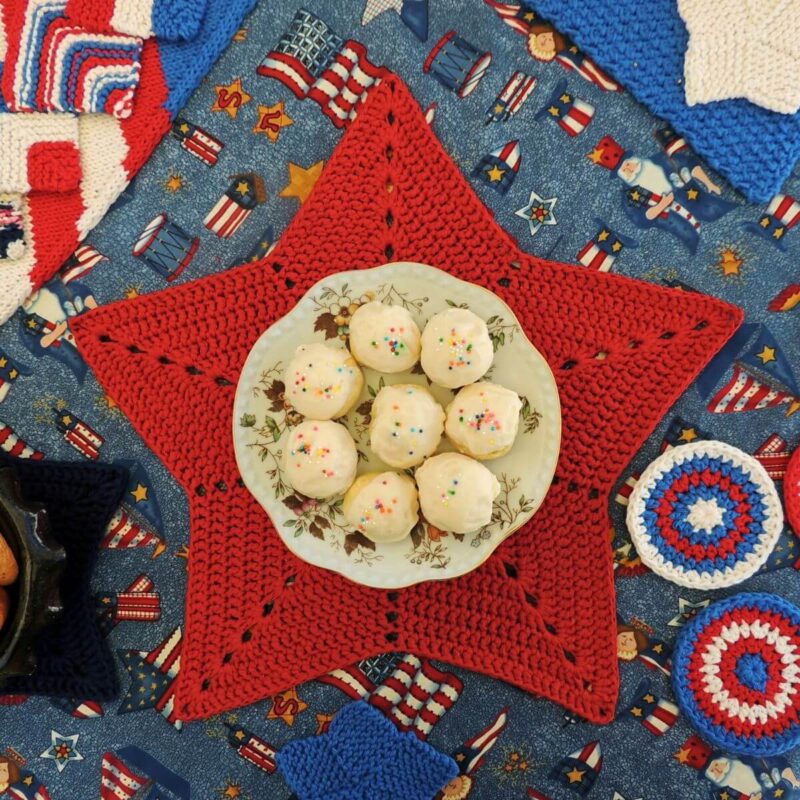
Creative Ideas for Using Your Crochet Star
- Trivet for Hot Dishes: Place it under a teapot, bowl, or hot pan to shield your table.
- Festive Centerpiece: Use it as a base for candles, small glass bowls, or flower jars at your next gathering.
- Wall or Window Hanging: Stiffen your star with starch or diluted glue, add a hanging loop, and display it for instant, seasonal style.
- Gift Wrap Topper: Drape a homemade star on a jar of preserves or a mug for a unique, handmade gift idea.
FAQs and Troubleshooting
My star isn’t totally flat. What should I do?
Keeping your tension even and sticking to the pattern’s stitch count so the valleys are in the correct spot is key for a flat star. If yours ripples or curls, try blocking—use steam or dampen the piece, pin those points, and let it dry.
How do I make my star really big?
Keep going with more rounds, following the same shaping routine. If the edges start ruffling, double-check you aren’t sneaking in extra increases or missing the skipped stitches at the valleys—it’s all about keeping your rows in rhythm. You’ll notice in the pattern that the number of dc between the points and the valleys increases by 2 every round. Use this formula to check your stitch counts.
What’s Next? Try Variations!
Once you’ve finished your first star, things get interesting when you mix in some variety. How about changing yarn colors each round for a rainbow style? You could also hold two shades together for a cool marbled twist, or blend scraps from your stash for an unexpected, personal touch.
- Think about making a coordinated set—they make lively kitchen accents or thoughtful presents and are an easy way to showcase your crochet skills.
- Need more help picking yarn? Try asking other makers in our Discord community!
Give this pattern a try, and if you run into neat ideas or creative uses for your finished star, I’d love to hear about it. Your version could inspire more crafters out there!
Did you enjoy what you found here at Jessie At Home? Then sign up for my newsletter and like my Facebook page, so you’ll get all the updates on new tutorials, other posts, sales, and coming events.
If you have any questions, want to share pictures of your work, or just want to chat with Jessie and other crafty individuals, than join one of our free Zoom Sit & Stitches. Find them on our Events Calendar.

© Copyright 2015 Jessie Rayot / Jessie At Home®, LLC All my videos, patterns, charts, photos and posts are my own work, so you may not copy them in any way. If you want to share this information with someone, then share the link to this post.


I plan to use the star as part of a Dallas Cowboy blanket