
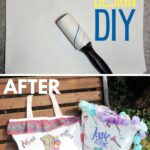
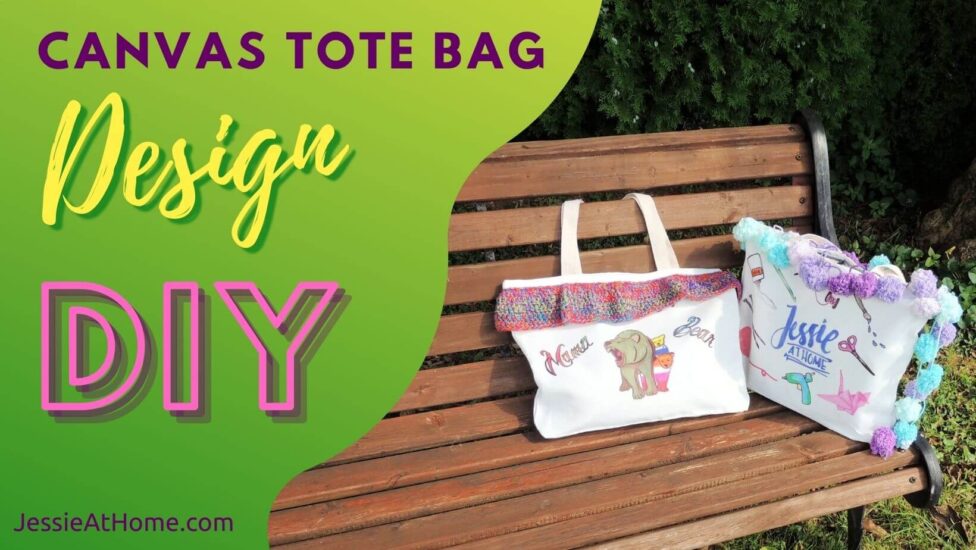
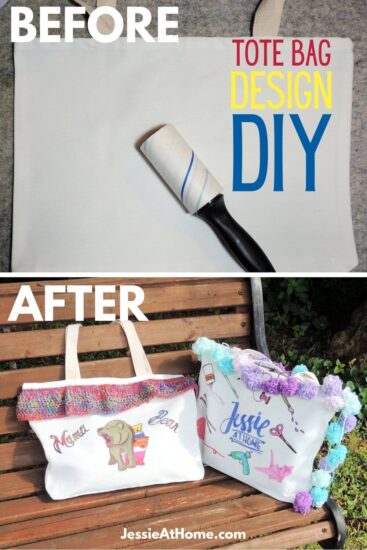
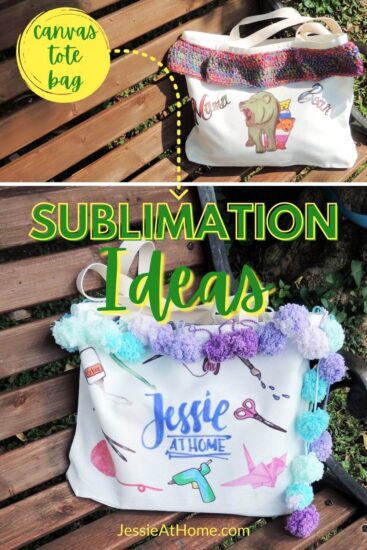
With this quick and easy canvas tote bag design DIY you can change your plain tote bag into a customized gift or craft fair product.
Some products in this tutorial were provided by Artesprix. All opinions are my own.
Create cool tote bags for the whole team. Use this personalized tote bag DIY to inspire your creativity for yourself or for bag to give or sell. Learn how to trim a tote bag, with or without a sewing machine. Make custom tote bags for everyone and have a blast making them!
September 2021 Blank of the Month: Poly Canvas Tote Bag; use code Jessie10 to get 10% off your entire purchase with the exception of the Heat Press.
Canvas Tote Bag Design DIY Supplies
Use code Jessie10 to get 10% off your Artesprix order – not valid on the Heat Press
- Poly Canvas Tote Bag – this is no longer the Artesprix blank of the month. You can find similar blanks on Etsy HERE, or on Amazon HERE.
- Sublimation Markers
- Heat Tape
- Protective Paper (silicon)
- EasyPress, Heat Press, Iron, or Similar
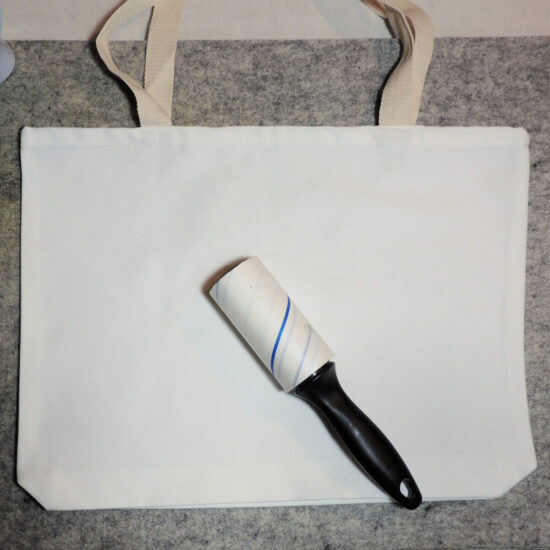
- Lint Roller
- Heat Safe Surface
- Image to color and sublimate
- Yarn and hook or needles or other trim to add to tote
- Sewing machine or glue gun to attach trim
Canvas Tote Bag Design DIY Tutorial
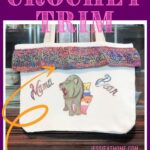
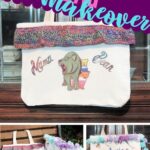
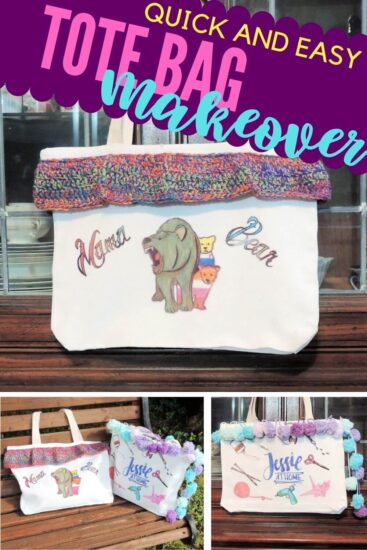
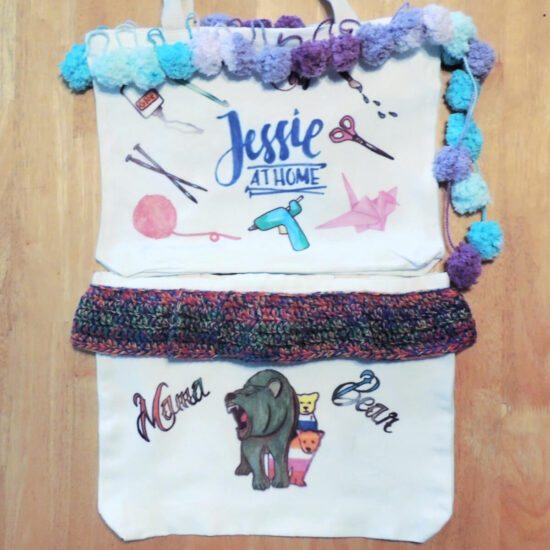
Step one is to decide WHAT you want to sublimate onto your tote bag. I thought long and hard about the two tote bags I have. I finally decided I needed one for school functions so it should be a Mama Bear bag, and the other for business trips so it should be a Jessie At Home bag.
Once you know what you want, draw or find your images and text. I searched and searched to find a great Mama Bear image (it had 3 cubs, but I just only colored 1). Next I made the text I wanted. For the Jessie At Home bag I already had all my brand graphics.
Once you have your images chosen, print them out. If you’re drawing them, then do that. Now it’s time to color with your Artesprix Sublimation Markers! Remember that whatever you color will end up mirror imaged on the final product. This actually works great because you don’t want anything but the sublimation marker on the side of the paper your putting on your blank. All you do is take your image, flip it over, and trace and color it with your markers on the back so it’s reversed.
Watch Me Color!
If you can’t see this video, try watching it on YouTube HERE.
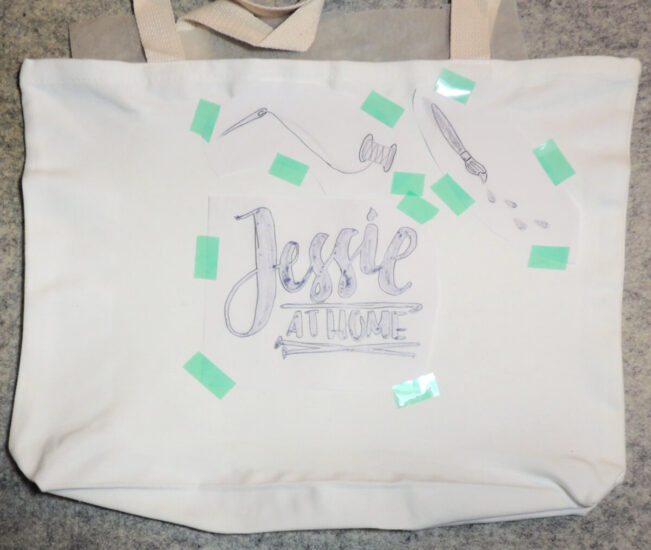
Now it’s time to sublimate! First you are going to want to run a lint roller over your bag, you want the ink to be on the bag, not the lint on the bag! Preheat your heat source to the temperature you blank requires. Times and temps are listed on the Artesprix site. In this case, it was 450.
Make your sublimation sandwich on top of your heat safe surface. On your heat safe surface, place a piece of Protective Paper, then your tote bag with the side you’re sublimating facing up, then your colored image with the colored side facing down, and attached with plenty of Heat Tape, and lastly another place a piece of Protective Paper.
A Few Tips
- Remember the heat tape will not transfer as much heat, so be sure you do not have any tape over any part of the colored parts of your image, or that part will not transfer as well.
- If you make any mistakes while coloring, you can cover them with heat tape. This only works if you don’t need to color over them. For example, I started to color a stripe that was supposed to be white on one of my bear cubs. So I cut a small piece of heat tape and placed it over the part I shouldn’t have colored. When I transferred the image, the mistake didn’t show because the ink couldn’t go though the tape.
- Plan your full project before you tape. You don’t want to be half way through and realize you forgot to leave room for the second image you were going to add, or for the trim on the bag.
- Be sure your top piece of protective paper is completely between your blank and your heat source. For small blanks like key chains, this could mean the paper is just bigger than the key chain, but for the tote, it means your paper will need to be bigger than your heat source, even if your image is tiny. The reason for this is that you don’t want to accidently transfer anything that may be on your heat source onto your blank.
Trim Time!
For my bags I used 2 different trims. My Jessie At Home bag was trimmed with pom pom yarn. It has small pom poms seperated by about 6″ of string. I sewed around the top of the bag, right were the stitching line already was, and just pulled the string sections up so they made little loops above the stitch line and the pom poms were below the line. Then I added a few extra pieces to dangle on one side. You could do the same using hot glue if you don’t want to sew.
The Mama Bear bag has crochet trim made the following way:
- Crochet a chain that wraps all the way around the top of your bag where the stitching line is, plus a few inches.
- Slip stitch into the first chain made, taking care not to twist.
- First Round: Ch 3, dc in the same ch, [dc in each of the next 2 ch, 2 dc in next ch] around, sl st to the top of the beginning ch 3. {If you want your trim to have more ruffle, then put 2 dc in every other ch, instead of every third ch}
- Second Round: Ch 3, dc in each st around, sl st to the top of the beginning ch 3.
- Repeat the Second Round until your trim is as long as you want it.
- Fasten off and weave in ends.
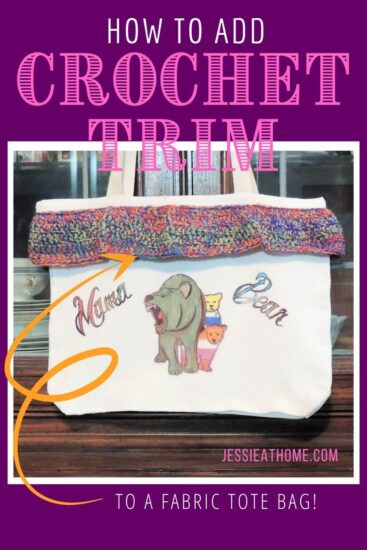
To attach your trim, place it around your bag and use pins to hold it in place evenly around, so the top is just touching the stitching line at the top of the bag. Now top stitch with a sewing machine between the starting chains and the bottom of the first round. If you don’t want to sew, then use hot glue and glue it close to the top of the trim a few inches at a time. You will still want to pin it first to be sure it’s even.
No go fourth and show of your crafty awesomeness!! Or give the bag to someone and spread some crafty love!
Don’t forget to use code Jessie10 to get 10% off your Artesprix order – not valid on the Heat Press or sale items.
Happy sublimating my crafty friends!
Did you enjoy what you found here at Jessie At Home? Then sign up for my newsletter and like my Facebook page, so you’ll get all the updates on new tutorials, other posts, sales, and coming events.
If you have any questions, want to share pictures of your work, or just want to chat with Jessie and other crafty individuals, than join one of our free Zoom Sit & Stitches. Find them on our Events Calendar.

© Copyright 2021 Jessie Rayot / Jessie At Home®, LLC All my videos, patterns, charts, photos and posts are my own work, so you may not copy them in any way. If you want to share this information with someone, then share the link to this post.