


Inside: This Free Knitted Poncho With Hood Pattern Will Keep You Warm and Cozy on Cool Days
The yarn for this design was provided by Red Heart Yarns. All opinions are my own.
This pattern was originally published on 3/4/2016. The most recent update was made on 12/18/2022.
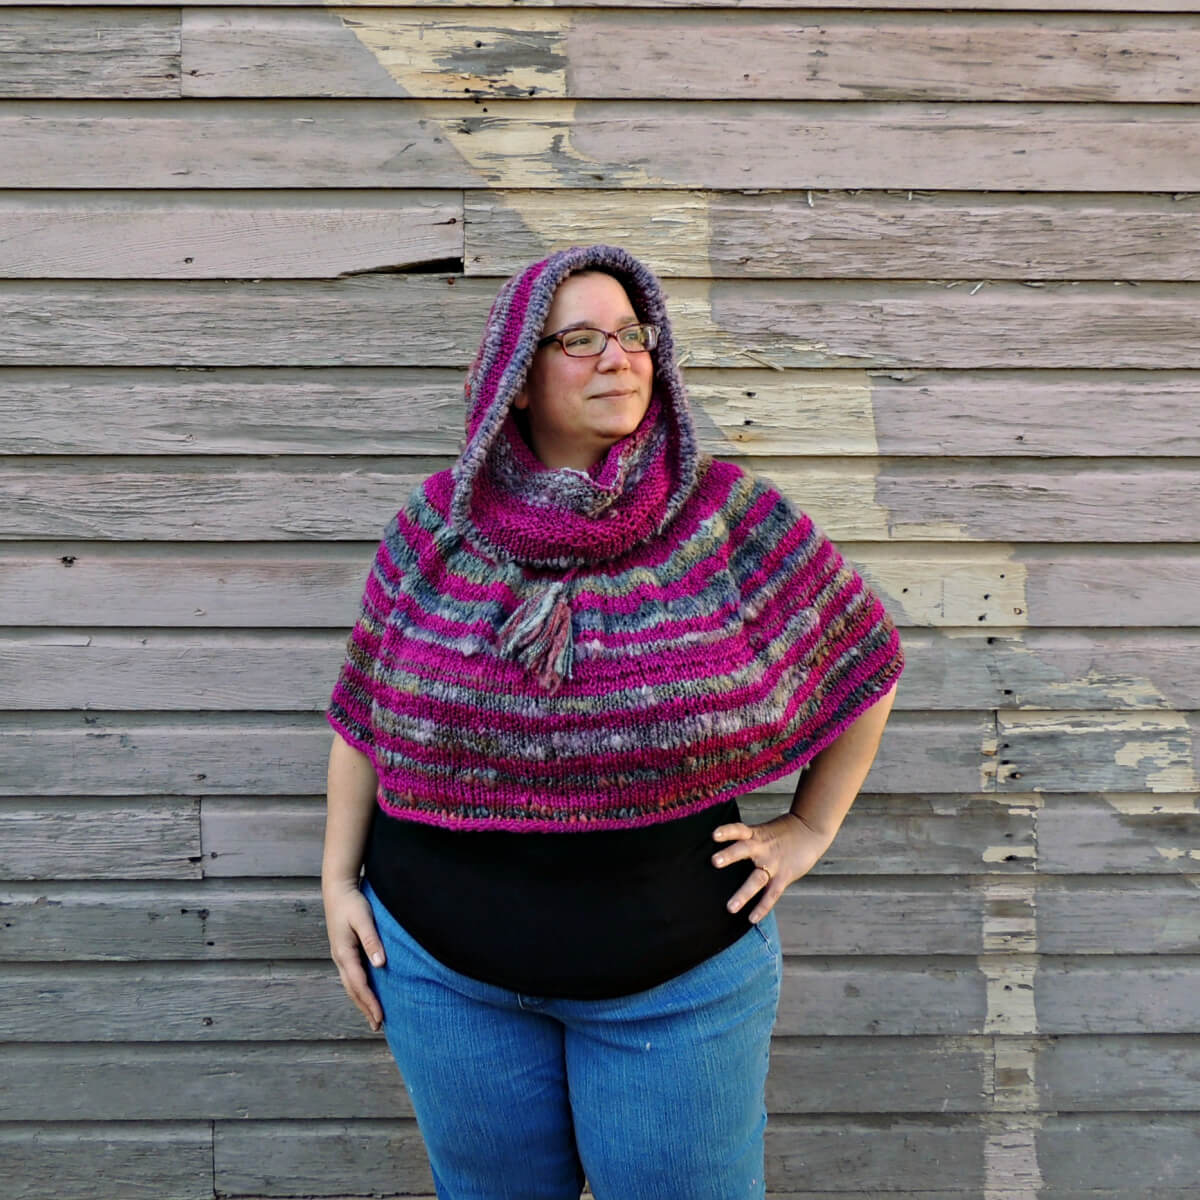
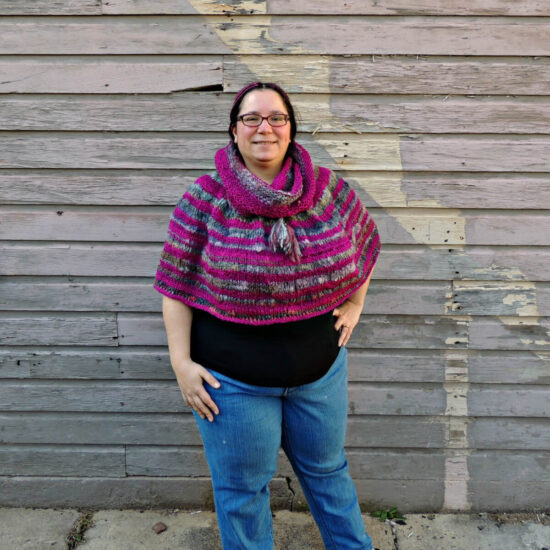
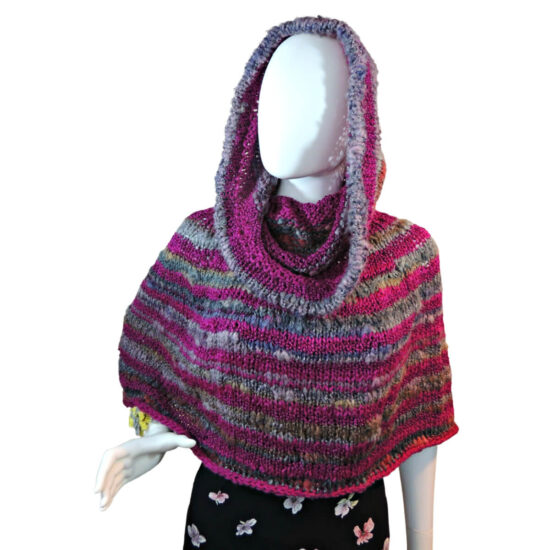
You’ll feel like a woodland princess in this stunning poncho made of Red Heart Boutique Magical yarn. Made with larger needles, the poncho drapes and moves with grace. In addition, the oversized turtleneck doubles as both a cowl or a hood.
Table of contents
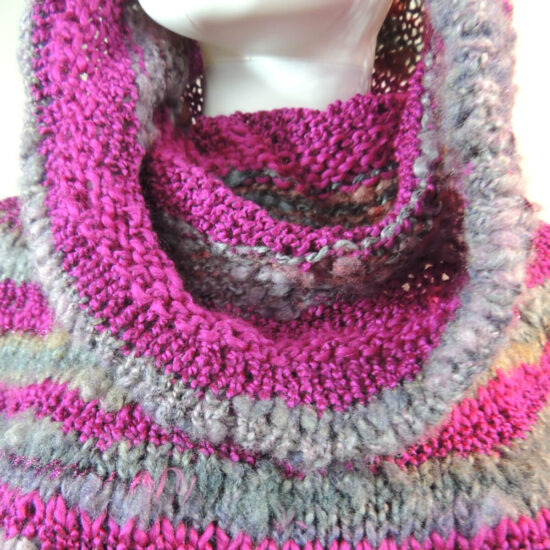
Embrace your inner bohemian goddess with this magical hooded poncho. The design features a beautiful cowl or hood that’s perfect for wrapping up in cozy comfort. Create a beautiful piece of wearable art with this free pattern and turn heads wherever you go.
Magical Hooded Poncho
Knit Pattern
Intermediate Skill Level
Designed by Jessie Rayot
Supplies
Size
S (M, L, 1-2x, 3x, 4-5x)
Yarn
Red Heart Boutique Magical Yarn 2 (3, 3, 3, 4, 4) skeins
Color #: X skein, (X yds / X g)
Knitting Needles
US 15, (10.0 mm) – 25″ circulars
Gauge
Learn about gauge HERE
11 sts x 18 rows = 4″ [10 cm] in stockinette
Other Supplies
Yarn Needle
1 Large Stitch Marker
Stitches and Abbreviations
click on highlighted sts for tutorials
inc – increase
k – knit
p – purl
pco – provisional cast on
sp(s) – space(s)
st(s) – stitch(es)
Get the Ad-Free Printable PDF at These Sites
- Crochet Foundry – You can get bonus printables here!
- Ravelry
- Etsy
- LoveCrafts
Pattern Notes
- Read through all instructions before beginning.
- The stitch count is at the end of each rnd after the period, usually only if the count has changed from the previous rnd. {count here}
- To determine your size, measure around the widest part of the wearer’s chest over the arms (the poncho will not fit if you do not measure the arms with the chest). The measurements for the sizes are as follows:
S (M, L, 1-2x, 3x, 4-5x)
40 (46, 54, 60, 68, 76)
The actual garment measurements are 4″ wider than the measurements listed, the extra 4″ is for movement. - You can find a tutorial for the provisional cast on here. However, if you still do not want to use the provisional cast on, you can use a traditional cast on of your choice, and whip stitch the cast on edge to the round 3″ into the hood where the provisional cast on would have been joined.
- For the increase sts, use the increase st of your choice.
Knitted Poncho With Hood Pattern
Pco 60 (60, 70, 70, 80, 80)
Hood Edge
Work in rounds, taking care not to twist the cast on
Rnd 1: K to end.
Repeat round 1 until piece measures 4″ from cast on edge.
Fold cast on edge up to needles so that the knit side is on the outside and the purl side is inside the fold.
Hemming rnd: *Slip 1 from pco to left needle, k2tog, repeat from * to end.
Hood
Rnd 1: K to end.
Repeat round 1 until piece measures 17″ long
Neck
Rnds 1-3: (K1, p1) to end.
Continue with increases section, being sure to start at the proper round for your size.
Increases
Not all sizes start with round 1, be sure to start at the proper round
Rnd 1: (Sizes S (M) ONLY) K3, inc1 [k3, inc1] 9 times, k4. {70 sts}
Rnd 2: K to end.
Rnd 3: (Sizes S (M, L, 1-2x) ONLY) [K9, inc1] 10 times. {80 sts}
Rnd 4: K to end.
Rnd 5: (ALL SIZES) K4, inc1 [k8, inc1] 9 times, k4. {90 sts}
Rnd 6 and all even rnds: K to end.
Rnd 7: [K9, inc1] 10 times. {100 sts}
Rnd 9: K5, inc1 [k10, inc1] 9 times, k5. {110 sts}
Rnd 11: [K11, inc1] 10 times. {120 sts} 44″
Size small move onto Body.
Rnd 13: K6, inc1 [k12, inc1] 9 times, k6. {130 sts}
Rnd 15: [K13, inc1] 10 times. {140 sts} 51″
Size medium move onto Body.
Rnd 17: K7, inc1 [k14, inc1] 9 times, k7. {150 sts}
Rnd 19: [K15, inc1] 10 times. {160 sts} 58″
Size large move onto Body.
Rnd 21: K8, inc1 [k16, inc1] 9 times, k8. {170 sts}
Rnd 23: [K17, inc1] 10 times. {180 sts} 65″
Size 1-2XL move onto Body.
Rnd 25: K9, inc1 [k18, inc1] 9 times, k9. {190 sts}
Rnd 27: [K19, inc1] 10 times. {200 sts} 72″
Size 3X move onto Body.
Rnd 29: K10, inc1 [k20, inc1] 9 times, k10. {210 sts}
Rnd 31: [K21, inc1] 10 times. {220 sts} 80″
Size 4-5X move onto Body.
Body
Rnd 1: K to end.
Repeat round 1 to desired length. ***If you are working until you have just enough to bind off, be sure to leave enough for the draw string and tassels as well! The bind off takes enough yarn for 3 rounds, each round takes as much yarn as about 3 times the circumference of the round.
Bind Off (i-cord bind off)
Cast on 3 sts in the following manner: [insert right needle between first 2 sts on the left needle, wrap yarn around the right needle and pull it through, place this loop on the left needle] 3 times.
*K2, k2tog, slip last 3 sts from right needle to left needle without twisting sts, repeat from * until there are only 3 sts left, cut yarn, run it through all 3 loops, and use end to seam the bind off start and end together.
Draw String
Make a crochet chain or a knit i-cord long enough to string through round 2 of neck and with enough to tie a bow. Thread draw string through round 2 of neck, under the knits and over the purls. Add tassels to the ends of the draw strings. Find a tutorial for tassels here.
Finishing
- Weave in ends
- Block if needed
Happy Stitching!

FAQs
It keeps the edge of the hood from rolling, however, if you want to do garter stitch or some other stitch for a couple of inches instead of the hood edge as written, you can try that.
Did you enjoy what you found here at Jessie At Home? Then sign up for my newsletter and like my Facebook page, so you’ll get all the updates on new tutorials, other posts, sales, and coming events.
If you have any questions, want to share pictures of your work, or just want to chat with Jessie and other crafty individuals, than join one of our free Zoom Sit & Stitches. Find them on our Events Calendar.

© Copyright 2016 Jessie Rayot / Jessie At Home®, LLC All my videos, patterns, charts, photos and posts are my own work, so you may not copy them in any way. If you want to share this information with someone, then share the link to this post.


Is it alright if I don’t do the hood edge? Thank you!
The knit police will not come for you. It is made from the top down, though; so keep that in mind when you figure out your alterations. – wait, you just mean to remove the edge from the hood, not the whole hood? You can do that, but the edge will roll. You will need to block it well.
In the very beginning rnd 1 (Hood) can I ASSUME that the stitches are being connected in a circle? Based on the next statement to continue “knitting” until pieces measures 4″ or is this worked as a “flat piece” = KNIT – TURN – PURL – TURN ETC. I have been knitting for 40 plus years have to admit the beginning is a little confusing.
Because it is written in rounds, not rows, yes, you do work in the round, not in rows.
Tks, btw love the “short cut Pco”.
What type of yarn would you recommend for someone who wants to make this in a solid color?
There is not a solid color that changes textures like this – that I know of. So I would say whatever moves nicely and gives you the correct gauge.
I used a “Red Heart” Black but it did have ‘speckles’ of color and looks gorgeous even if I say so myself. But any color would work.
Hi thank you for the pattern. Do you join the pco? Or do you join the first round after the pco. beginner here! Not too bright!
You join the PCO. 🙂
yea thank you
Do you have instruction on how to join PCO?
just keep going in the round, same as any other stitch when you start to work in the round
I love this poncho!!
Thank you! Vada has claimed this one as her own. She wore it today. 🙂
This is in reference to a comment and answer.
In the very beginning rnd 1 (Hood) can I ASSUME that the stitches are being connected in a circle? Based on the next statement to continue “knitting” until pieces measures 4″ or is this worked as a “flat piece” = KNIT – TURN – PURL – TURN ETC. I have been knitting for 40 plus years have to admit the beginning is a little confusing.
Reply
Jessie says:
July 22, 2016 at 9:01 pm
Because it is written in rounds, not rows, yes, you do work in the round, not in rows.
In the instructions, it says
Rnd 1: K to end.
Repeat round 1 until piece measures 4″ from cast on edge.
Fold cast on edge up to needles so that the knit side is on the outside and the purl side is inside the fold.
Joining rnd: *Slip 1 from pco to left needle, k2tog, repeat from * to end.
To me, (not super experienced) I’m reading to join after the four inches is completed as the joining round says to s1 from pco to left needle, k2tog and repeat this for the round?
Thanks for your help!
All the rounds are worked as rounds, not rows. You start with the PCO (provisional cast one), after working in rounds for 4″ you join the PCO to the current round to make a hem, this gives a nice 2″ doubled edge to the hood to give it more body. You can find help with the PCO and picking up the stitches from the PCO here: https://www.jessieathome.com/stitchopedia/provisional-cast-on-videos-with-a-shortcut/
Any way of getting directions in a pdf to download?
My 2022 to-do list includes PDFs for all patterns that don’t have them. It’s something I do now, but my older patterns don’t all have them.