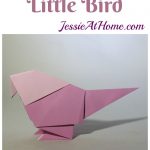
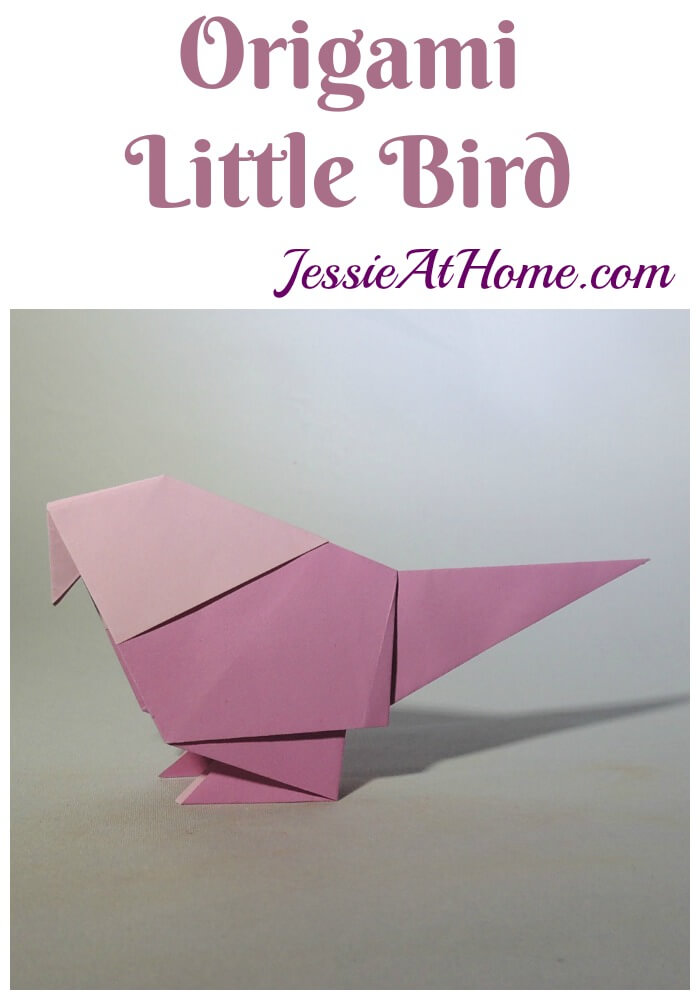
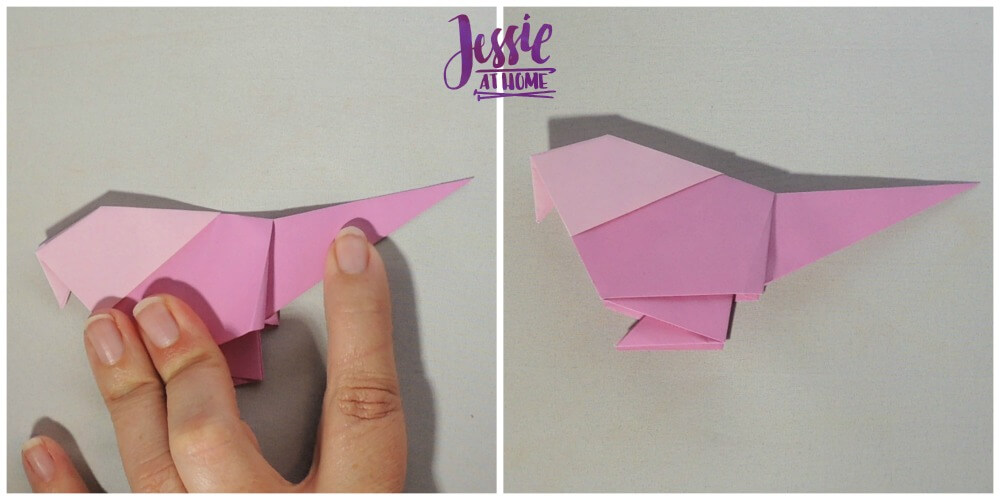
The Origami Little Bird is just so sweet. Make them in a variety of colors and place them in your houseplants for a little whimsy! Try making them in various sizes to create a whole little family.
Stick around to the end of this post for a chance to win THIS awesome Art Bin storage container for your origami paper! Giveaway has ended.
The Origami Little Bird looks best when made with paper that is a different color or pattern on both sides. Be sure to crease well after each fold.
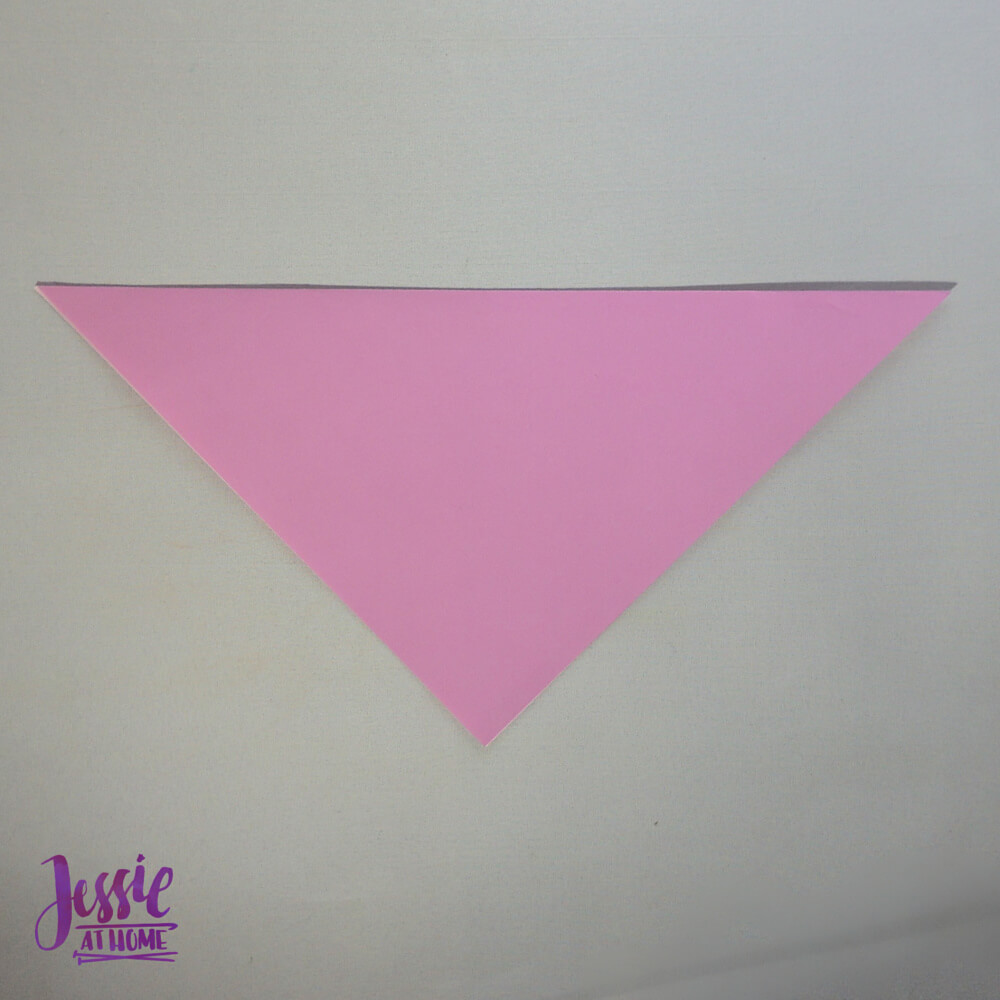
Start by folding the paper in half diagonally.
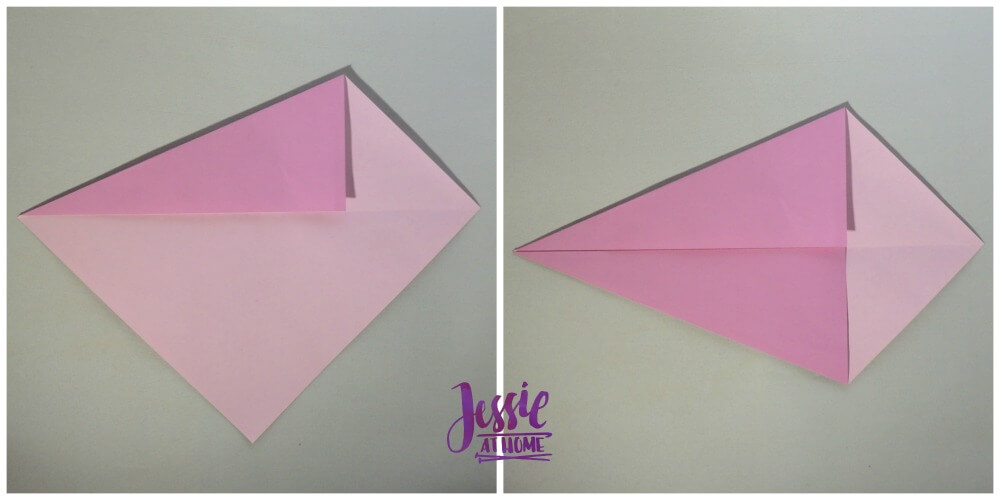
Open the paper and then fold 2 adjoining sides in to the center fold line.
Turn over and fold the flap down at the points.
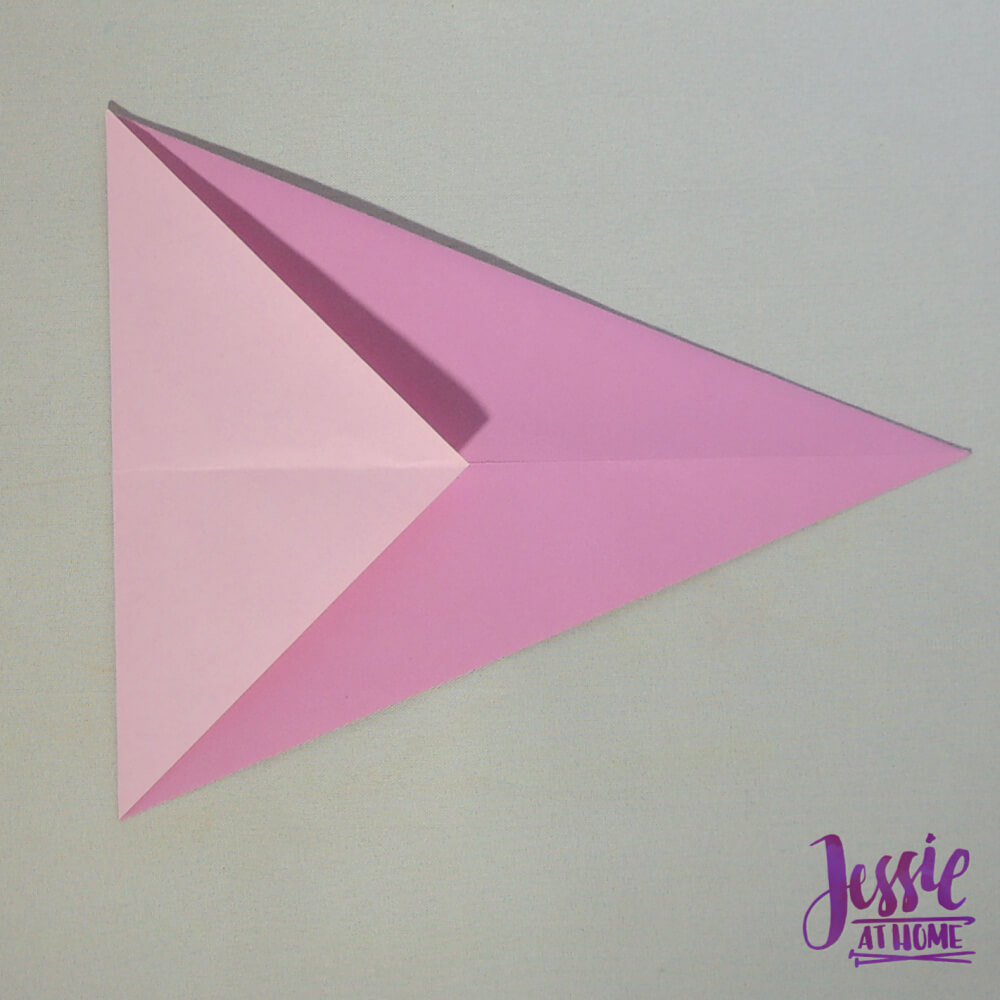
Turn over and fold the two corners in to the center line.
Open the 2 corners back up.
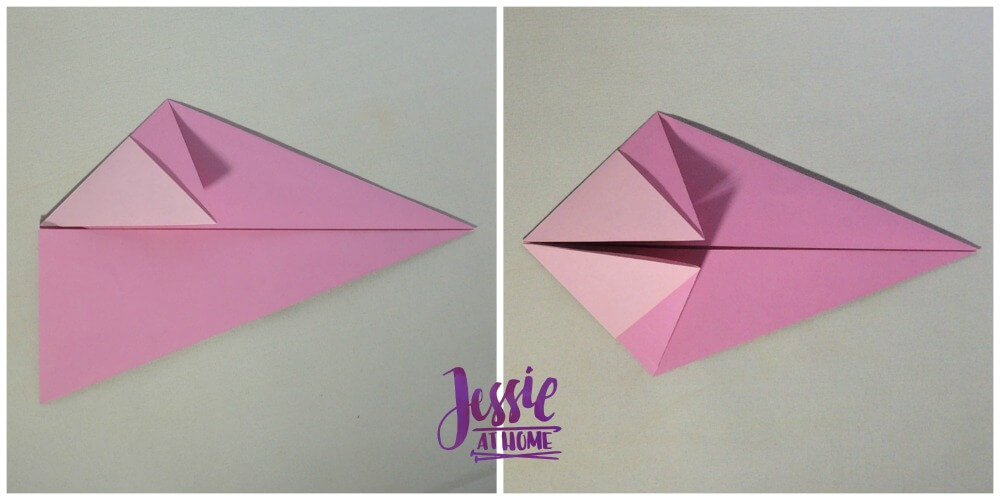
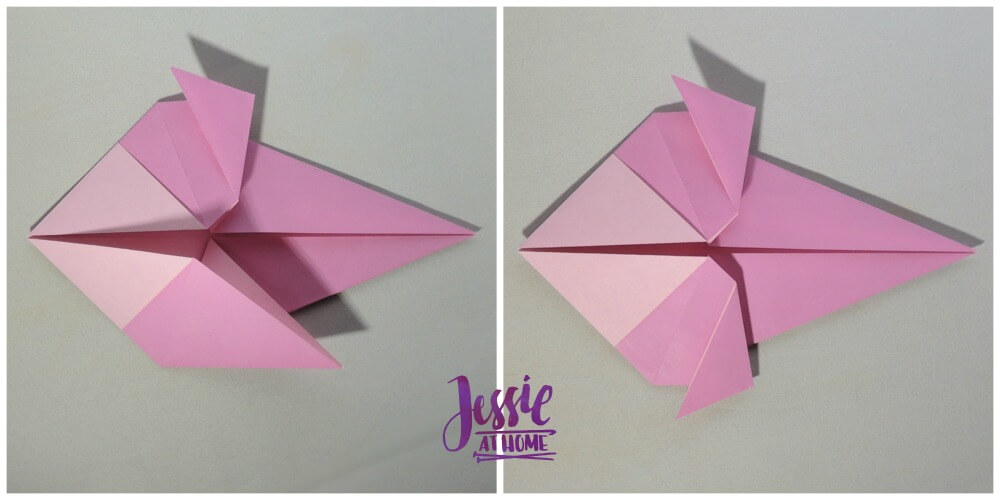
Push the corners inside and fold along creased lines as shown.
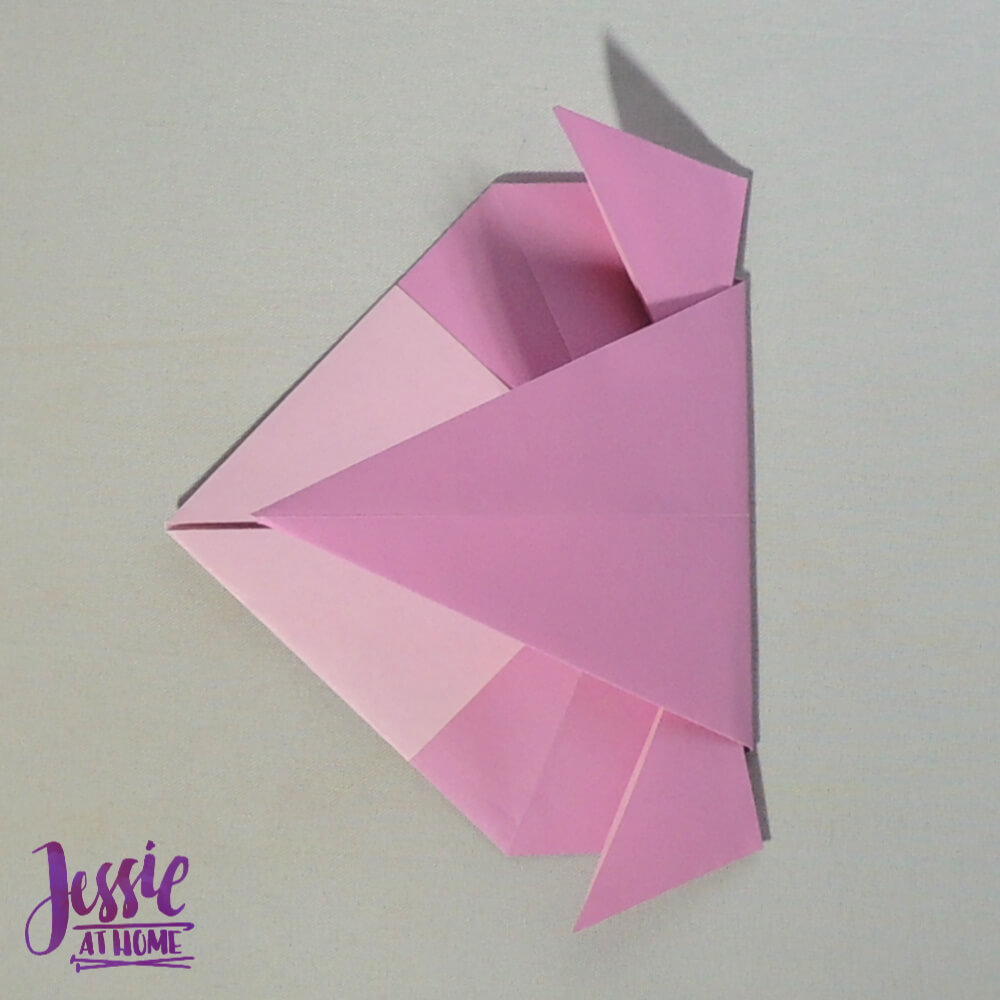
Fold points back part way up.
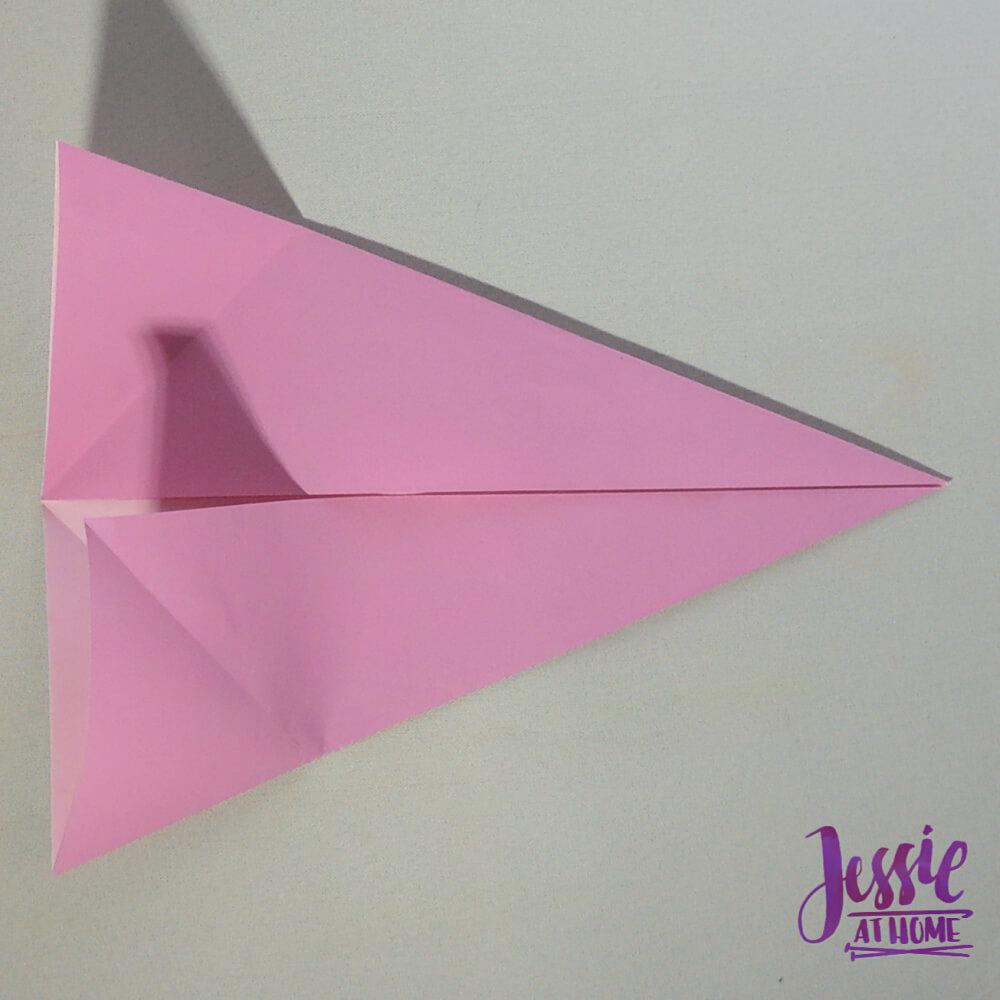
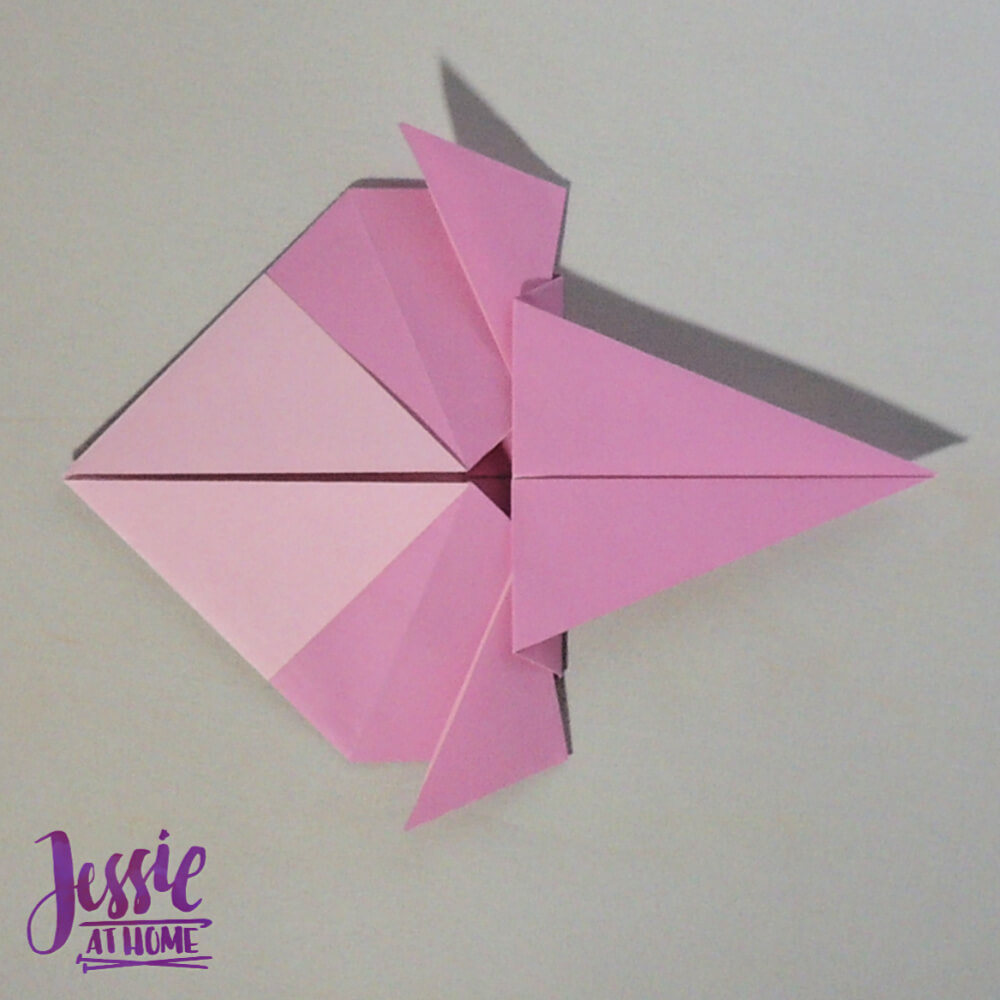
Fold point up.
Fold point back done a small amount up from the last fold.
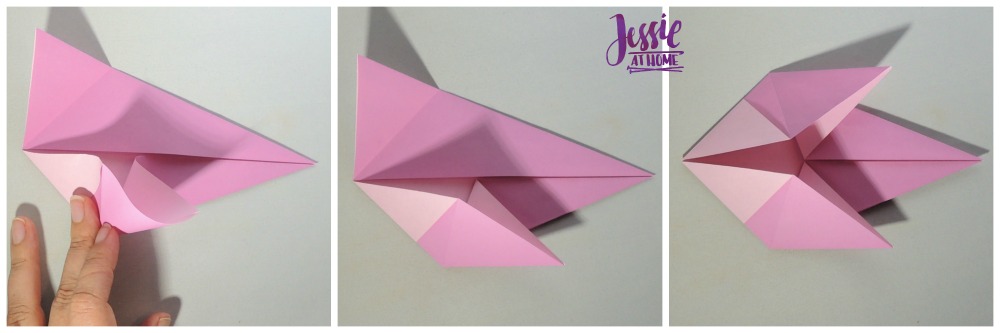
Fold in half.
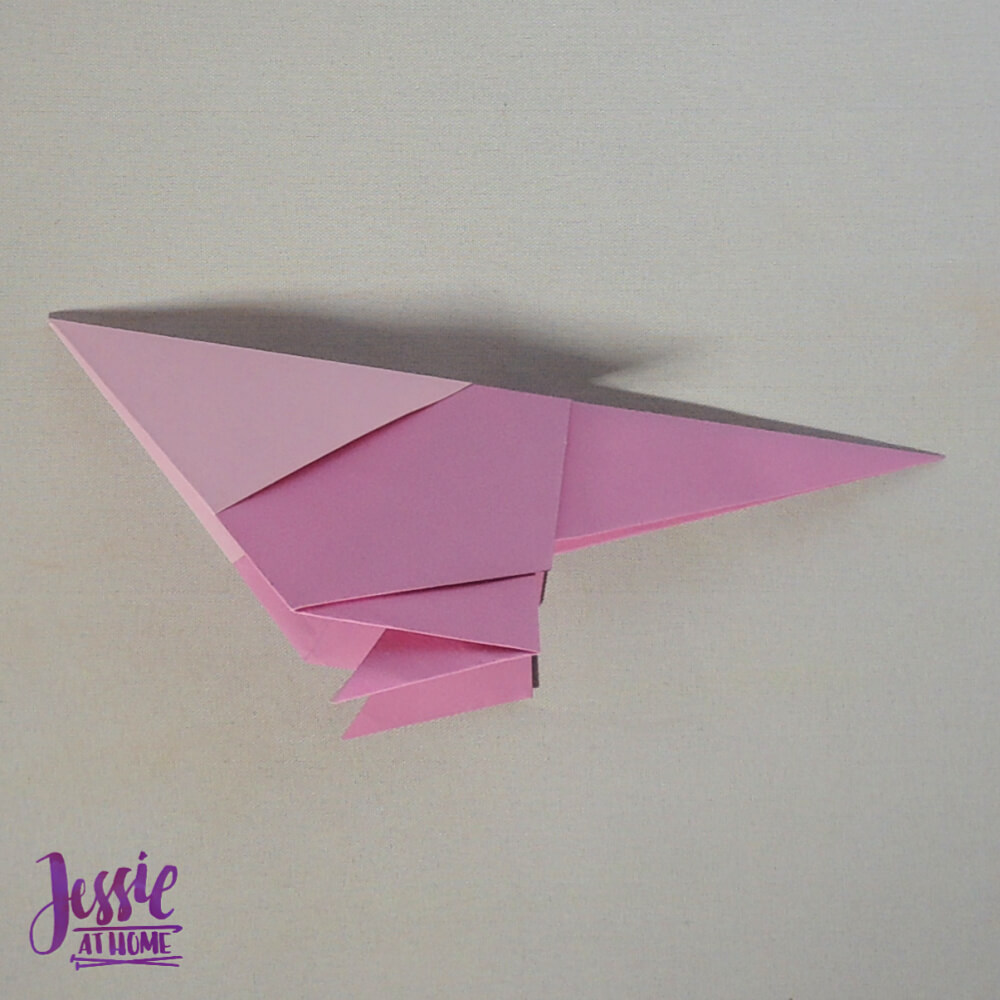
Fold the front point inside to make beak.
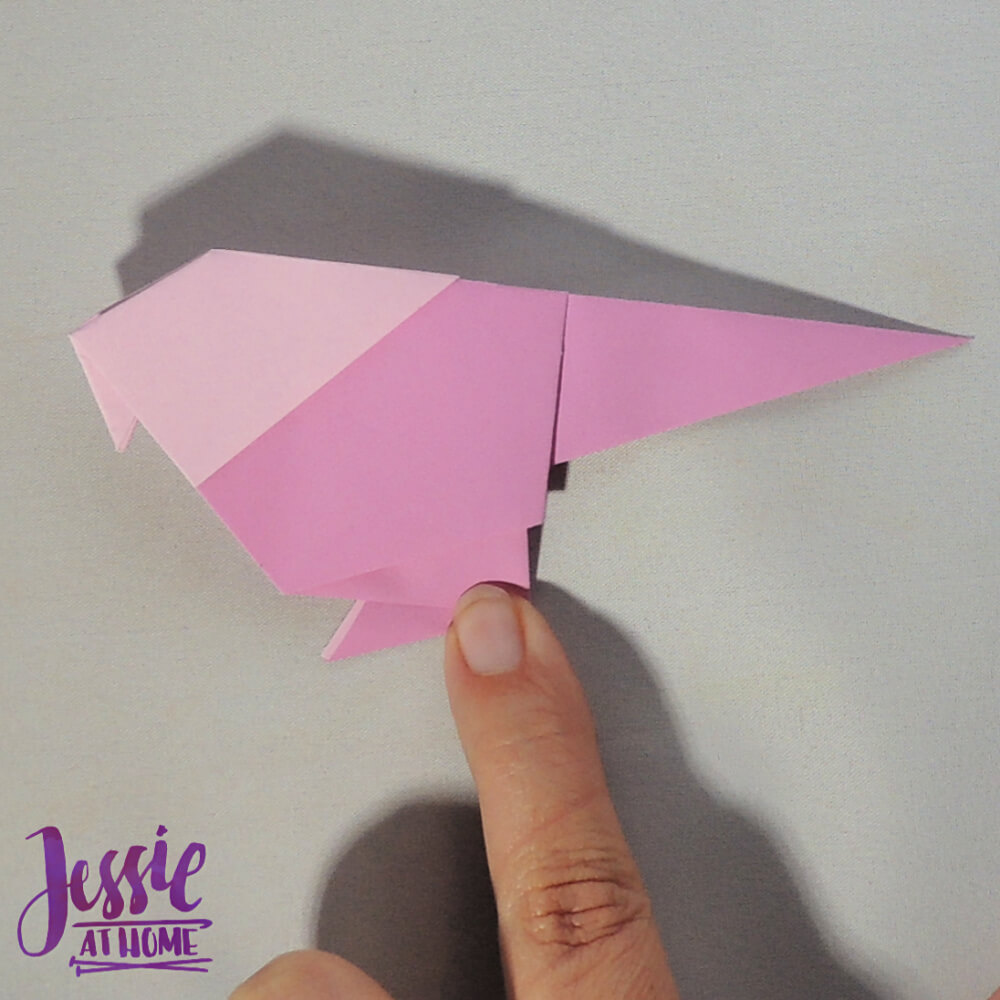
Pull tail up to an angle and refold.
Find more Origami creations at: https://jessieathome.com/origami/
Now here is your chance to win one of 3 Art Bin Semi-Satchels. Giveaway has ended. You can learn more about the Art Bin Semi-Satchel HERE.

©Copyright 2019 Jessie Rayot / Jessie At Home All my videos, patterns, charts, photos and posts are my own work. Do not copy them in any way. If you want to share this information with someone, share the link to this post. If you want to share on your own blog / website, then you may use the first photo in this post and link back to this post. You may not give away printed copies of this post. Thank you.


No one can see the bird, how they can do a bird is a mystery! Maybe I am dumb ? I tried but failed! Love Fredrik
Do you mean it doesn’t look like a bird? Or is your houseplant so healthy that it’s hiding the bird? Maybe you should have a scavenger hunt. 🙂