Inside: Pony Bead Kits are a fun, low-stress craft for all ages. Read my review of one kit and get fab tips and tricks for your pony bead adventures.
If you’re new to the world of pony bead crafts and thinking about picking up your first kit, you’re in for a treat – and even some tricks of the good variety! Pony bead crafting is fun for crafters of all ages, not just the kiddos. Starting out with a kit is honestly the easiest way to build skills, experiment a little, and end up with a nifty finished creation. Kits are also perfect if you are trying not to add to an ever-growing craft supply stash, as you don’t end up with 97 leftover pink beads because you only needed 3 and the smallest bag you could find was 100.
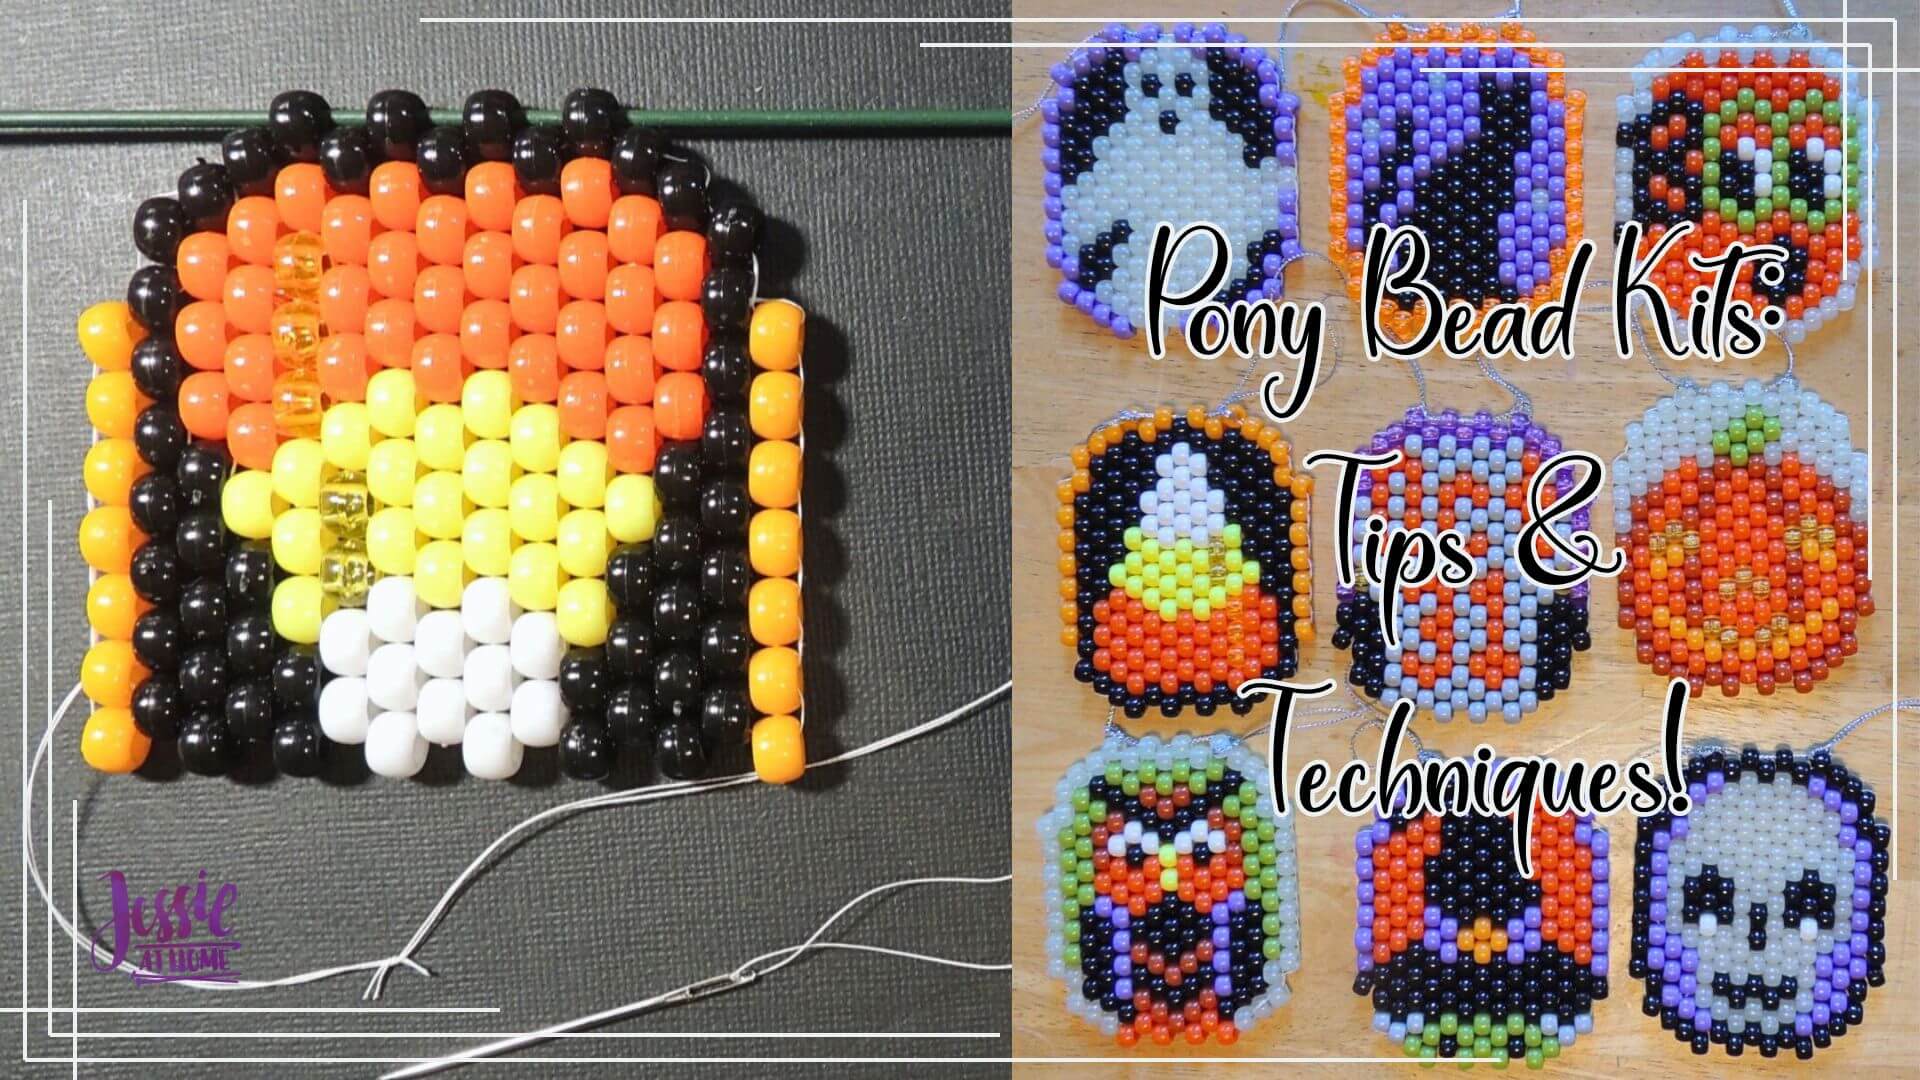
I tried out the Herrschners Haunted Halloween Pony Bead Kit and now I’m sharing with you what I thought, as well as giving you some of my tips, techniques, and clever tricks for getting the most out of any pony bead project. I know Halloween is fast approaching, so I’ll also share some of the super cool pony bead kits from Herrschners that work for other upcoming holidays and seasons. Whether you want to make festive decorations, yard signs, or just have a relaxing afternoon, this article will help you get started confidently.
Herrschners Haunted Halloween Pony Bead Kit Review
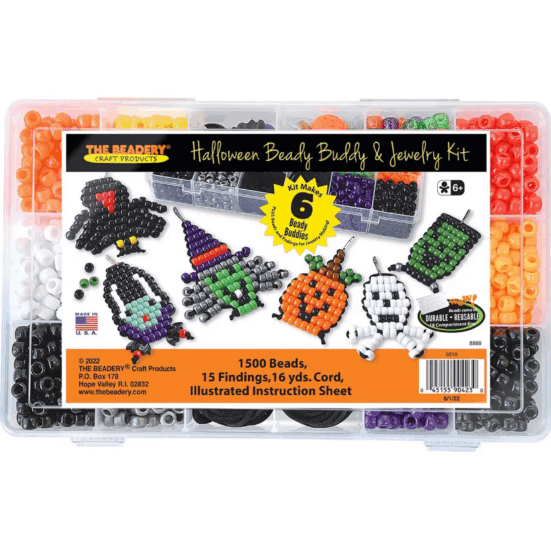
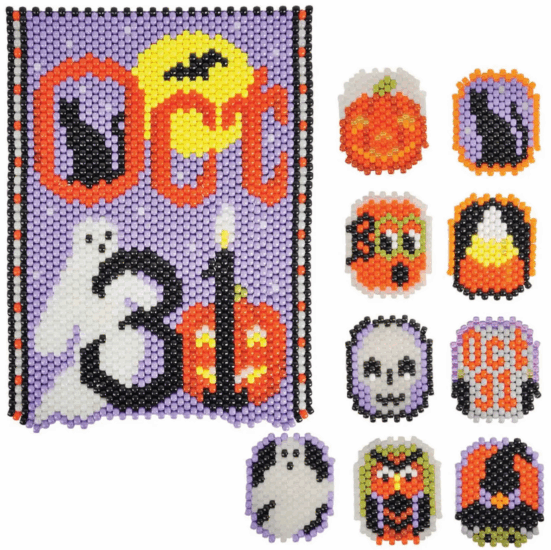
This particular kit from Herrschners is themed perfectly for Halloween, offering that seasonal vibe for crafters who want to make something fitting for the spooky season. Included in the kit are all the beads you need, thread, needle, vinyl-coated stem (this is such a neat tool I never would have thought of on my own!), and instructions with full-color chart.
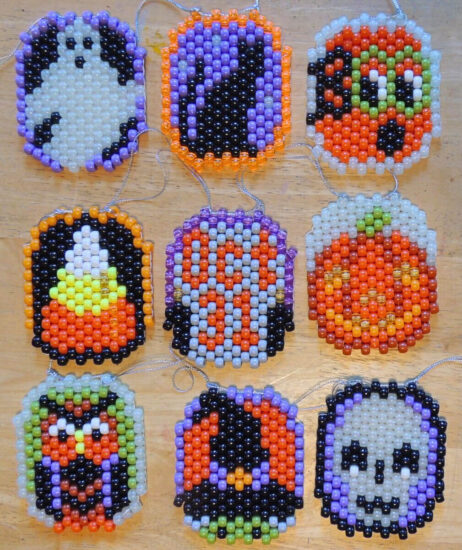
This is a set of 9 pony bead ornaments feature a pumpkin with the word “BOO,” a black cat, an owl, the date Oct 31 on a tombstone, a witch, a jack-o’-lantern, a skull, a ghost, and piece of candy corn. The finished ornaments measure 3¾ x 4½” (9.5 x 11.4cm). While the kit says it’s intended for people ages 13 and older, those a bit younger could still complete it, though they may need a hand for some parts.
Everything is presorted and organized, which is really helpful if you get overwhelmed easily. The designs are just the right amount of cute and spooky, and they’re great for decorating your home or for giving as gifts.
Pony Bead Basics: Materials
As with most kits, the majority of what you need is provided in the kit. There are a few items you’ll need to provide yourself, these are usually tools that you most likely already have and wouldn’t want or need to get them with every kit you buy.
What you will need or may want to provide yourself for this kit:
- Scissors
- Tape
- Pencil
- Straight edge or highlighter tape
- Small bowls or trays to pour beads into – muffin tins work awesome! THIS or THIS are also the bee’s knees!
- Glue (I didn’t use any, but some people like to put a bit of glue at the knots)
- Extra needles – in case you loose the one from the kit
- Mood music
That’s it, you don’t need fancy tools, special adhesives, or a complicated workspace.
Pony Bead Basics: Getting Started
For pony bead kits, the biggest thing to wrap your head around is how to read a pony bead pattern. The instructions will usually show you how to lay out the beads row by row, and what color goes where. The Halloween kit gives you clear color design images along with the written instructions. If you do any cross-stitch or needle point, you’ll find the instruction/pattern layout to be familiar.
My tips for getting started and reading the pattern:
- Always lay out your beads ahead of time in the order you’ll string them. It’s easy to loose your place when you look away from the pattern to string a bead, and this will save you from that fate.
- Use a ruler or other straight edge to underline the row you are on. Highlighter tape also works.
- Put a dot or arrow on the side of the row where you start, as you alternate from working right to left and left to right.
- You may want to use your straight edge and a pencil to make a line through each row as you finish.
- If you make a mistake, just slide the beads off and start again. Pony bead projects are super forgiving. If you notice a wrong color or a missed bead, take them off the cord and try again. No harm, no foul.
- If you get confused, don’t be afraid to take a break and make a cup of cocoa or tea. Sometimes a step away followed by fresh look helps it click.
Beading Away
As I created my ornaments, I came up with some techniques that made each ornament easier and faster. I took a bunch of process photos on my last ornament so I could share those tips and techniques with you.
Please note that in these photos I’m using doubled quilting thread, not the thread that came with the kit. That’s because I used the wrong orange on the cat ornament, and after cutting it apart and re-doing it, I didn’t have enough thread for the last ornament. When using the thread that comes with the kit, DO NOT double it. One strand is all you need.
If you want a quick look at what making one of these ornaments looks like, here’s a video for you:
For more details, here are the photos along with the tips and techniques I have for you. This is meant to be used along with the instructions from the kit.
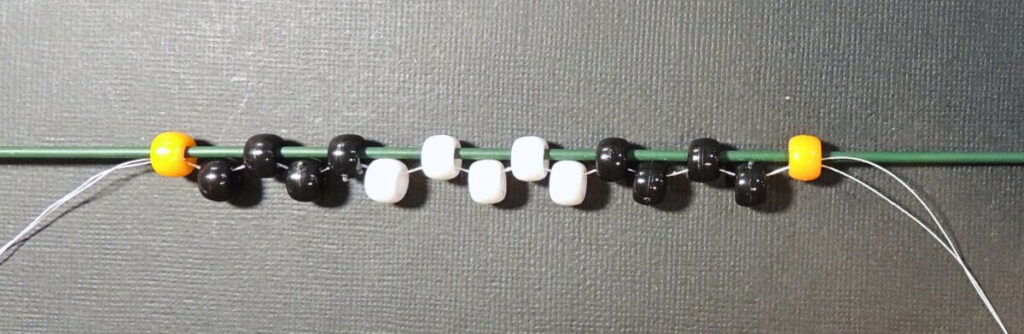
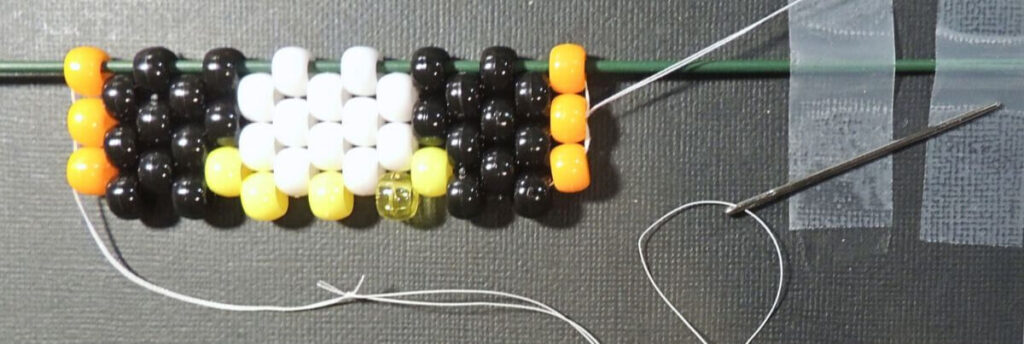
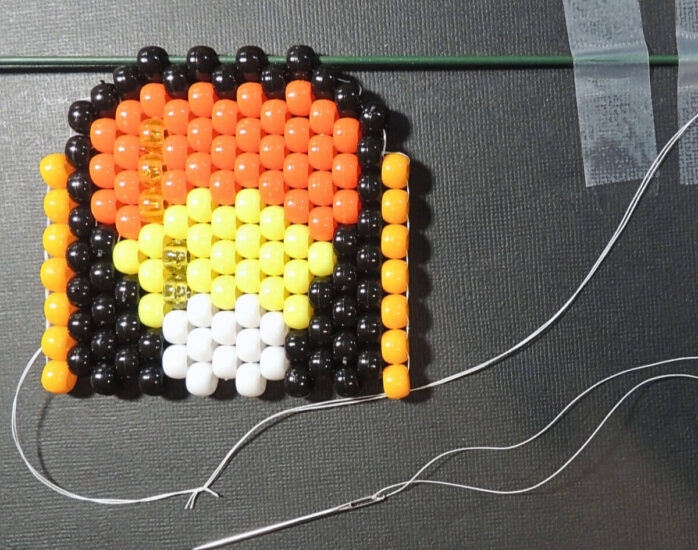
- Tape one end of the stem (green wire) down. This will help hold your work steady.
- Be sure to start where the diagram tells you to. Lay out rows 1 and 2 at the same time. I like to stager them (see picture) so I can clearly see the order to string them in.

- Open each bag of beads as you need them and pour them into a bowl or tray.
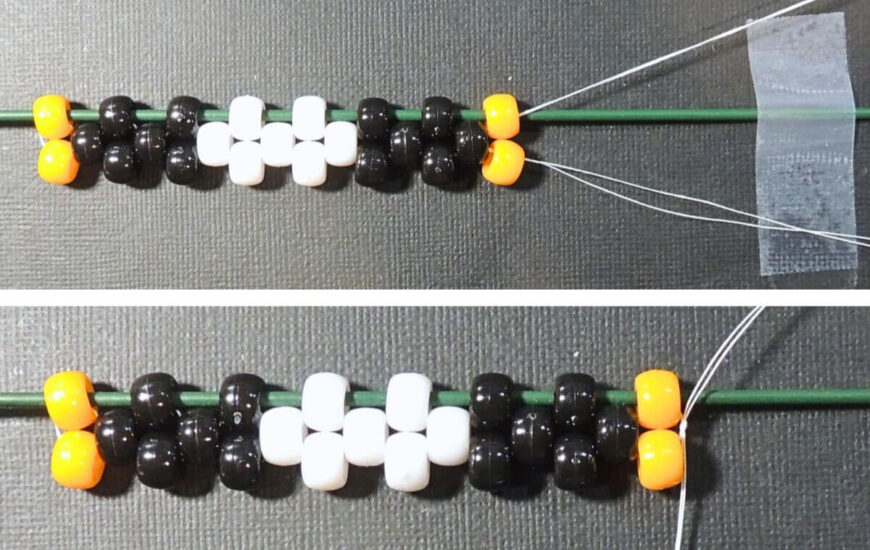
- Here you see what it looks like after stringing rows 1 & 2, then sliding row 1 onto the stem. You may want to tape the other end of the stem down at this point.
- Tape the starting end of the cord down, leaving about a 6-8″ (15-20 cm) tail.
- String Row 3.
- After stringing row 3, tie the working thread and the tail together with a square knot. Then re-tape the tail down.
- The instructions only have you secure the thread on the side with your starting tail, because it‘s needed there. I secured it on both sides because it helps keep the work tight. Doing this is optional. If you only secure on the starting side, then be sure to pull the thread snug as you are working, and make sure it’s snug before you secure it.
- The instructions have you secure by threading up through the loop on the side of your work, as seen in the second photo in the image below. I did that, and then passed the needle through the loop it created as I was pulling the thread tight. This creates a knot for added security. While the knot is not necessary, I like to do it so if the ornament gets broken at any point, I have less beads to restring.
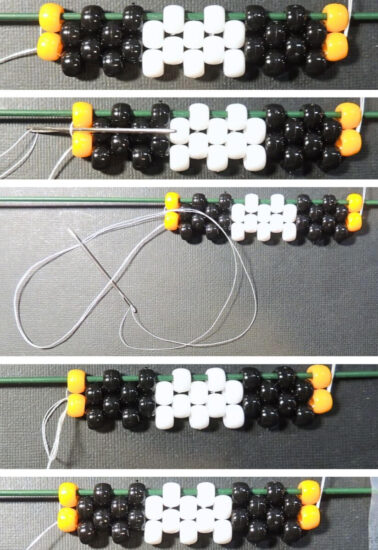
- You do need to secure the thread on the starting side, as the directions say, because you end one row and start the next through the same bead. If you don’t secure the thread, you’ll unstring that bead when you start the next row.

- The way I start a new piece of thread is a little different than what the instructions say. There’s no reason why you can’t follow the instructions here, I just like my way a bit better. It’s all about preference.
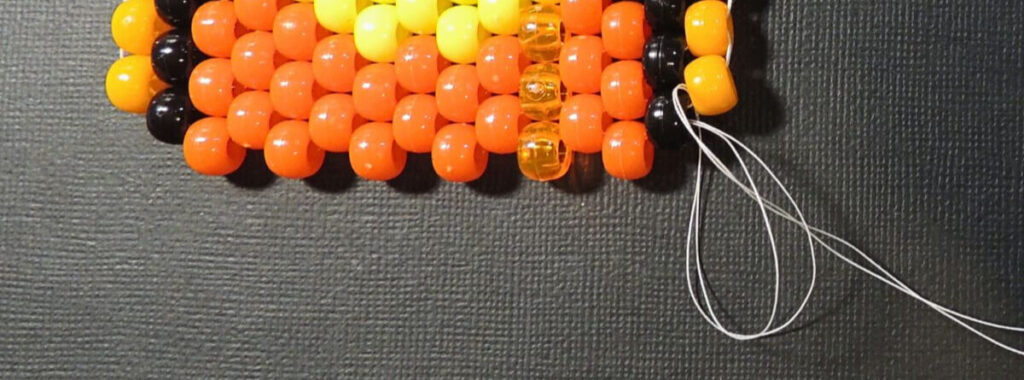
- When you don’t have enough yarn left for another row or two, remove the needle from the thread, then thread a new piece through the needle.
- Now use a magic knot (find a tutorial HERE) to join the two ends together at a point that will fall in the middle of the next row. Clip the ends leaving about 1/8 – 1/4″ (1/2 cm) ends, these will get hidden inside the beads of the next row.
- When you get to the shorter rows, you will want to secure the thread below the last bead of the previous row to make it look neater.
- I also do the finishing knot a bit different than the instructions. Again, the instructions work fine, this is just the way I like. Follow along in the photos below.
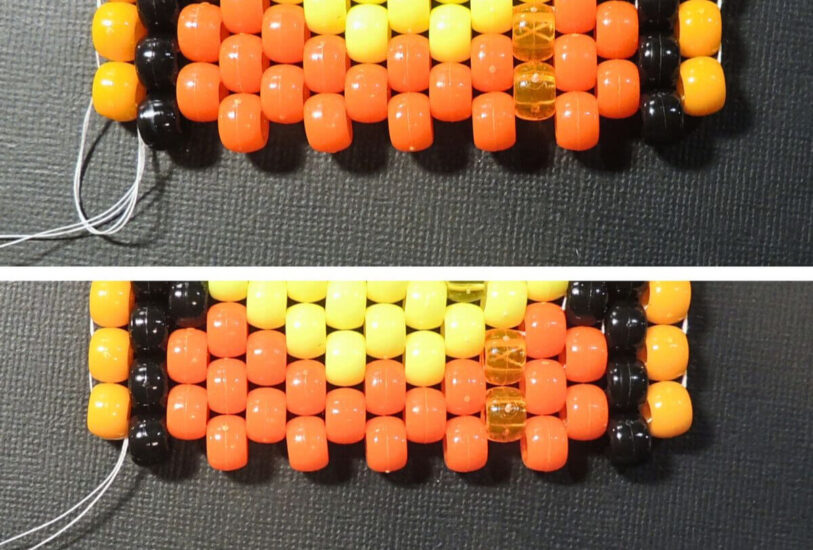
- After finishing the last row thread the needle through the bead above the last bead in the opposite direction.
- Continuing in same direction, sew through the bead up one and over one.
- Repeat the last step.
- Curl your work and run the needle under the tread coming out of the bead you just passed through.
- As you pull the thread, grab the loop. Pass the needle through the loop 2-3 times and slowly pull tight to create a knot.
- Continuing in same direction, sew through the bead up one and over one. Clip the end of the thread.
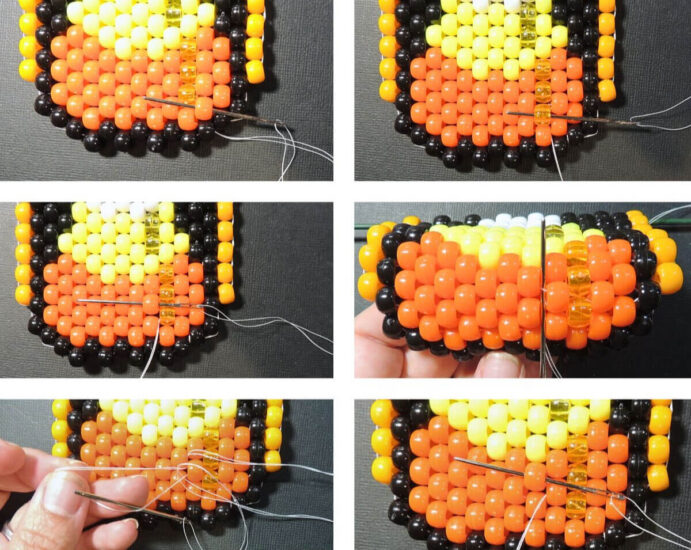
- Now it’s time to finish the top of your piece. Slide the piece off the steam. Rotate the piece so the bottom row is at the top. You want to rotate it, NOT flip it. This way you can rotate the diagram as well, and everything will line up. Now thread the stem through the bottom row of the piece.
- Join your thread to the starting tail in the same way you add on a new piece of thread.
- Finish the top the same way you finished the bottom.

Taking the time to implement these tips and techniques can really make the difference between fun crafting and a session that leaves you frustrated with beads everywhere.
Troubleshooting Common Pony Bead Problems
Most of the time, things go smoothly with pony bead kits, but there are a couple pitfalls that you may run across. Here’s a short list of things to look out for and quick ways to handle them:
- Beads don’t stay in place: Always check that you’re pulling the cord snug after each row. Loose beads make the shape look floppy and can tangle more easily. This is also a sign that you may want to secure at both sides of the piece, not just one.
- Thread starts to fray: Cut a fresh end. You can even roll it between your fingers to reshape it before continuing.
- Ran out of a specific bead color: Usually the kit is packed with extras, so the first thing you want to do is make sure you are using the correct colors. After making this mistake, I taped one bead of each color next to the symbol in the color key so I wouldn’t make the same mistake again. If you run out, you can give Herrschners a call, they are always super helpful, and the support phone number is in every kit.
Most mistakes are easy to fix by backing up a step and rethreading. There’s no need to stress if something goes awry; half the fun is just working with your hands and figuring out what works for you. Making mistakes and finding solutions is part of the creative process.
Creative Ideas: Using Your Finished Projects Around the House
The Haunted Halloween kit creates some really fun Halloween ornaments with character. Once you finish the individual pieces, you can use them in multiple ways. Some ideas I like:
- Make a garland by stringing multiple ornaments onto the long cord provided instead of cutting it and making individual ornaments.
- Add a clasp or split ring to turn your creations into keychains or backpack charms.
- Tie finished figures onto treat bags for parties or school.
- Glue magnets or pin backs to the backs for fridge decorations or spooky brooches during Halloween season.
- Hang them in your window or off light fixtures.
- Decorate your houseplants or a tree in front of your house – who says trees are just for Christmas!?
- Give as treats for kids with allergies.

This kit makes it easy for beginners to finish several projects that actually look good and have a use, so it’s perfect for getting in the holiday spirit or making small gifts for friends and family. Try arranging them into a centerpiece, attaching to baskets, or even using them as special party favors to spread a little handmade cheer. Your creativity is the only limit here.
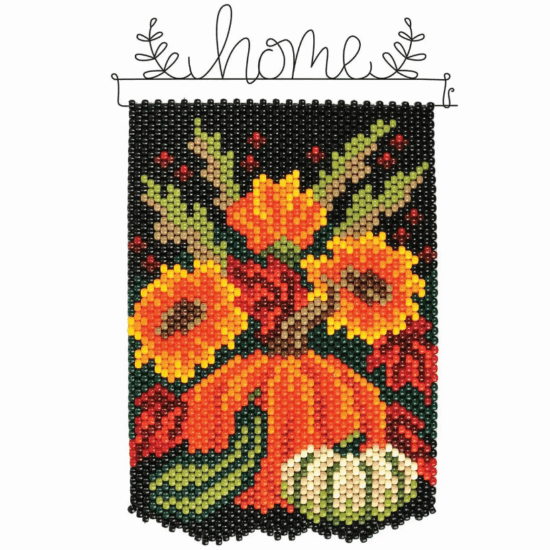
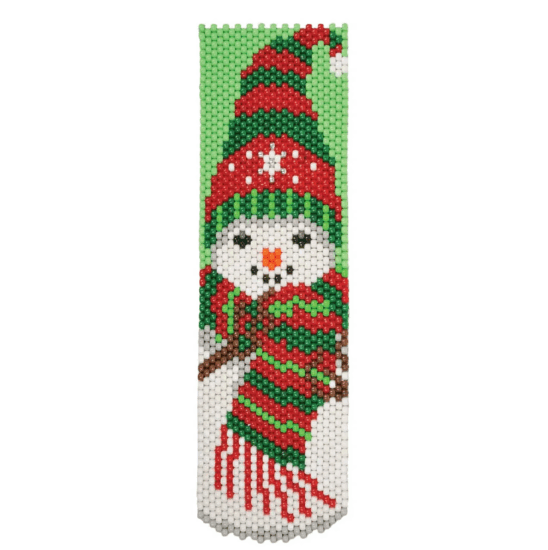
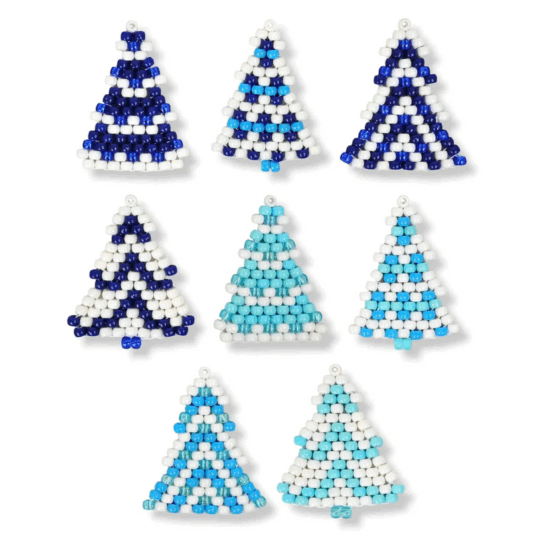
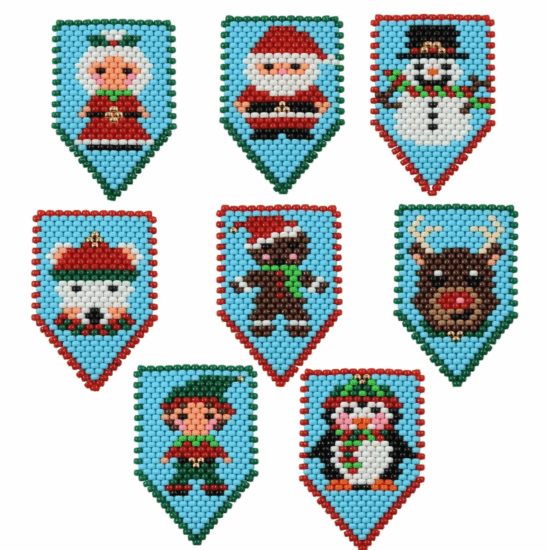
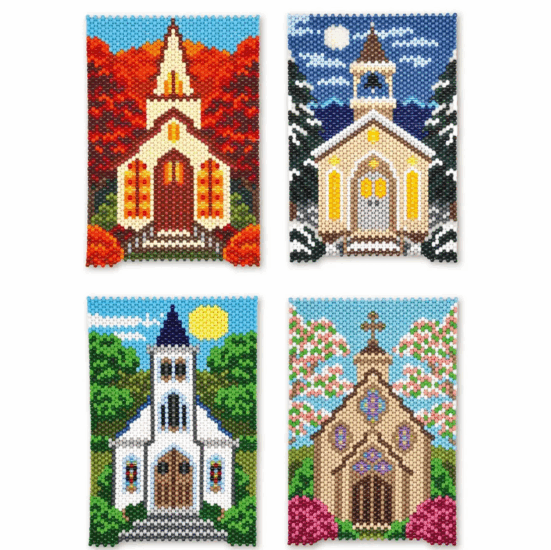
Seasonal Kits and Beyond: Finding More Pony Bead Ideas
If you catch the bug for pony bead crafts, there are so many kits out there for pretty much every holiday and occasion. Herrschners comes out with themed kits for Christmas, Easter, winter, summer, and loads more. It’s a super low-stress and fun way to freshen up your decorations all year long. Here are some kits for Halloween and upcoming holidays and seasons. Click on the name of each to go to the listing.

Once you’re done with a kit, save the pattern sheet. Many times, you can use your leftover beads or extra supplies from other kits to make more of the same pattern or switch up the colors for a new look. Pony beads are affordable and easy to stock up on, making the most of your crafting budget. You can even organize exchange meetups with friends or online groups to share new patterns and swap supplies.
Storing Pony Beads & Keeping Supplies Organized
Once you’ve finished your kit or started to collect extra beads, keeping everything organized helps a lot the next time you feel like crafting. Here are some of my favorite ways to keep things neat:
- Use a plastic organizer box with small compartments. You can find several wonderful options HERE. OR – use zipper bags and store the bags in a container like a plastic shoe box.
- Keep project supplies together in project bags or storage boxes, especially if you’re working on more than one at a time.
- For bigger bead stashes, old muffin tins, ice cube trays, or small jars are great for sorting by color.
Having your pony bead stash organized means you can get right into crafting any time without searching for missing pieces or spending half your afternoon untangling cord. The more organized you stay, the more enjoyable your projects will be in the long run.
Fun Variations & Custom Ideas: Going Beyond the Kit
Even with a set kit like the Herrschners Haunted Halloween, you can put your personal spin on things by mixing bead colors, switching up patterns, or adding accessories. Here are fun tweaks:
- Add glitter glue or puffy paint details to finished shapes for more sparkle.
- String finished figures together for a mobile or wall hanging,
- Mix pony beads with alphabet beads to spell out names or holiday phrases on your project.
- Use colored hemp cord or wire for a totally different look and feel.
- Make matching sets—like a pumpkin keychain, necklace, and bag charm—by scaling down or adjusting the original pattern.
Pony bead projects are all about having fun and being creative, so don’t be afraid to experiment. Once you’ve built up confidence, you’ll find yourself coming up with new ideas every time you sit down to craft. Try coming up with group projects, hosting a craft exchange, or even collaborating with friends on themed decorations for special events.
Wrap Up
I’d say pony bead crafting is affordable, accessible, and just plain fun. Whether you’re crafting during holiday season or making personalized gifts, you’ll find pony bead projects to be satisfying and worth your time. If you have questions or want to show off your finished projects, join the Jessie At Home community on Discord or Facebook. We love welcoming newcomers. Don’t be shy; pick up a kit and give it a try. You might be surprised at how much you enjoy it!
Did you enjoy what you found here at Jessie At Home? Then sign up for my newsletter and like my Facebook page, so you’ll get all the updates on new tutorials, other posts, sales, and coming events.
If you have any questions, want to share pictures of your work, or just want to chat with Jessie and other crafty individuals, than join one of our free Zoom Sit & Stitches. Find them on our Events Calendar.

© Copyright 2025 Jessie Rayot / Jessie At Home®, LLC All my videos, patterns, charts, photos and posts are my own work, so you may not copy them in any way. If you want to share this information with someone, then share the link to this post.


