
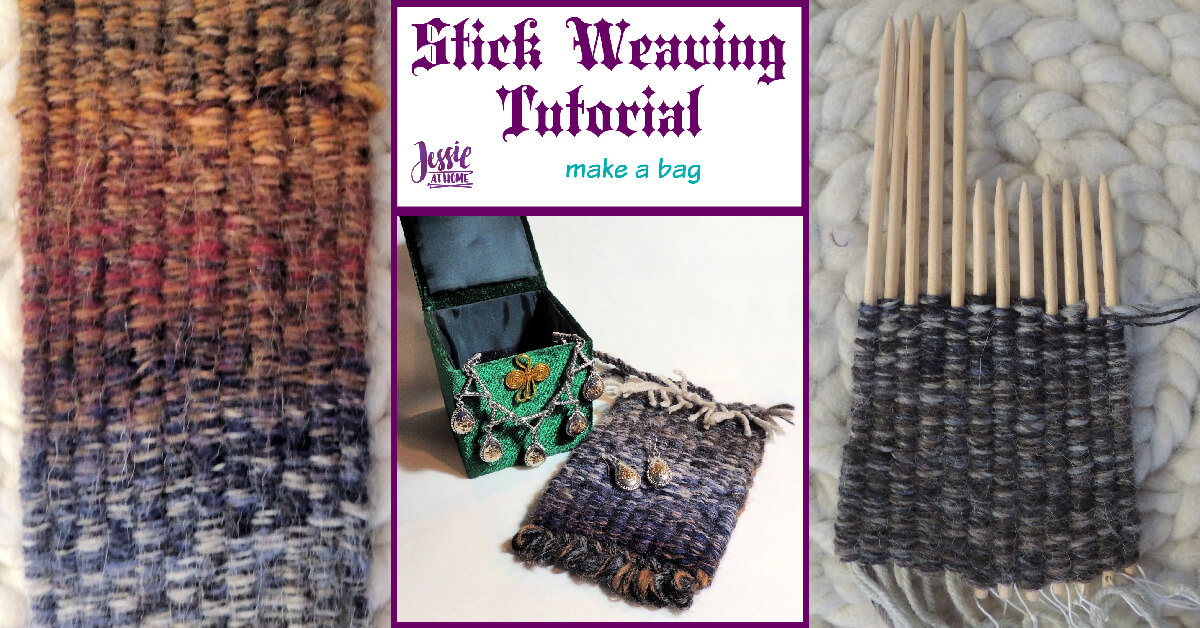
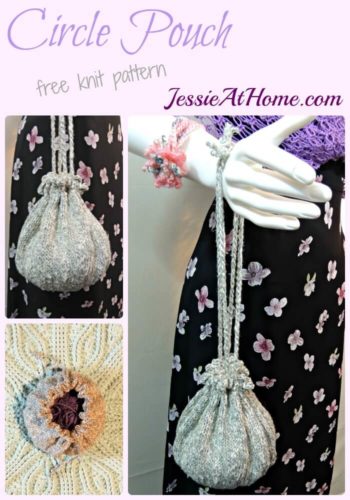
This stick weaving tutorial will show you how to make a pouch as your first project. Stick weaving makes thin strips of woven fabric. These thin strips can then be used as is, or even joined side by side to make them wider.
One thing I love about stick weaving is there is no loom or even a shuttle, just the sticks, yarn, and your hands. Sometimes a clamp is used, but it’s not needed. A tapestry needle, ruler or measuring tape, and some scissors may come in handy as well.
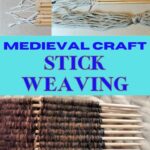
The sticks for stick weaving can be of various thicknesses, most often about ¼ to ½ inch. I haven’t seen any examples done with thick sticks, and I think it could get a little unwieldy!
One end of the stick is tapered to a dull point. The other end has a hole through it. Stick weaving is done over 2 or more sticks usually held in the hand. The result is a strip of woven fabric.
I’ve known weavers to make their own weaving sticks by sharpening a 6-8” dowel to a blunt point. I’ve known people to do this with a pencil sharpener! Then they drill a small hole (about 1/16”) on the other end up about ¼” from the bottom.
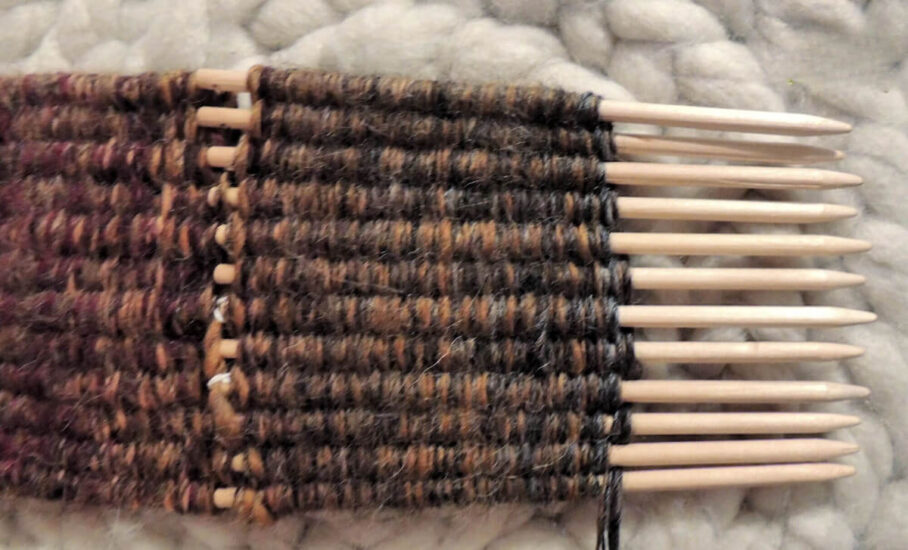
The sticks I have actually have a holder so that you can weave with 12 sticks. Usually you are limited by how many sticks you can hold next to each other in your hand. There is some question about whether the holders are period, but the technique is essentially the same regardless of whether you hold the sticks in your hand or in a holder.
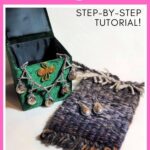
I’ve had a hard time finding good research on this craft, but I still wanted to share it with you. I did take a class several years ago and was told that remnants of woven strips that seemed to be from stick weaving were found in middle age finds. They were used as trim or strapping, or sewn together to make blankets or shawls. Today I’m going to show you how to make a little stick woven pouch.
Stick Weaving Tutorial
Warps
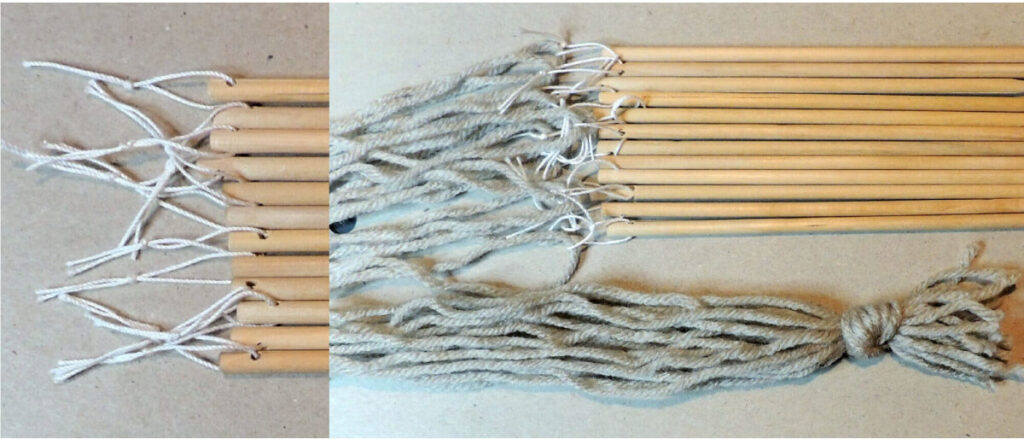
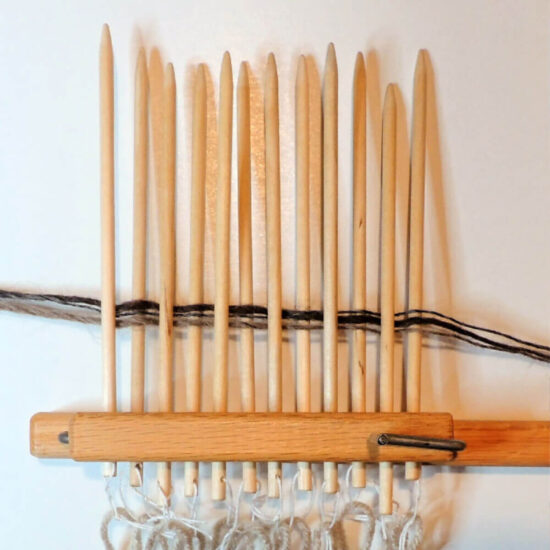
Tie loops of cord or embroidery thread through the holes of each weaving stick. Cut warp yarns each twice the desired length of your finished piece, plus an additional 12”. Thread each warp yarn through a loop on a stick. Thread all the warps, then tie all the ends together.
Now line up your sticks. If you have a holder, great; if not, that’s what your non-dominant hand is for! Hold them all lined up in a row. Time to start weaving!
Wefts
I used 3 strands of medium weight yarn. You may want thicker or thinner, just try out what looks good to you and adjust if needed. To begin weaving, hold the end of your weaving yarn in the hand holding the sticks. Leave at least a 10″ tail, just so you don’t drive yourself batty when you are finishing things off.
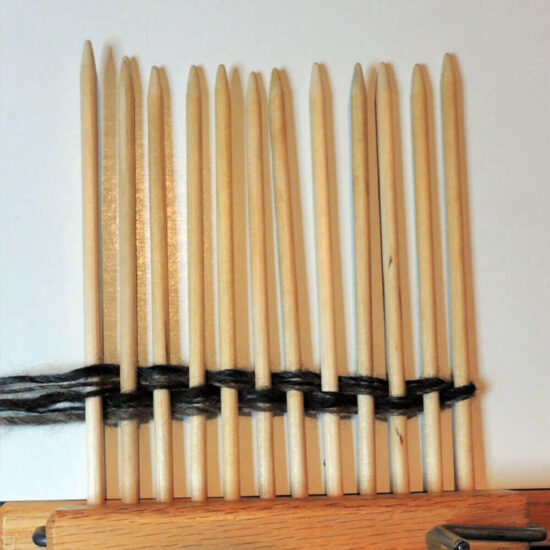
Now take the end of the yarn still attached to the yarn ball and start weaving. Over one stick, under the next, over, under, and so on. When you get to the end, weave the other way going over the sticks you want under in your last pass, and under the overs. Repeat!
After each weft (pass), tamp the yarn down. Don’t pull it too tight or your work will get thinner when the sticks aren’t holding it anymore. Pull the yarn just tight enough so there’s no loops hanging. Try not to pull the sticks together with the wefts.

Once your weaving starts to get close enough the points of the sticks that you feel you need more stick, it’s time to slide. Remove the holder if you have one. Starting at one side, slowly slide the sticks up so that just and inch or two is still in the weaving. You may find that rolling the sticks back and fourth a bit helps. You may also find that you want to pull all the sticks up about half way, then go back and pull them up the rest of the way. Do what feels comfortable.
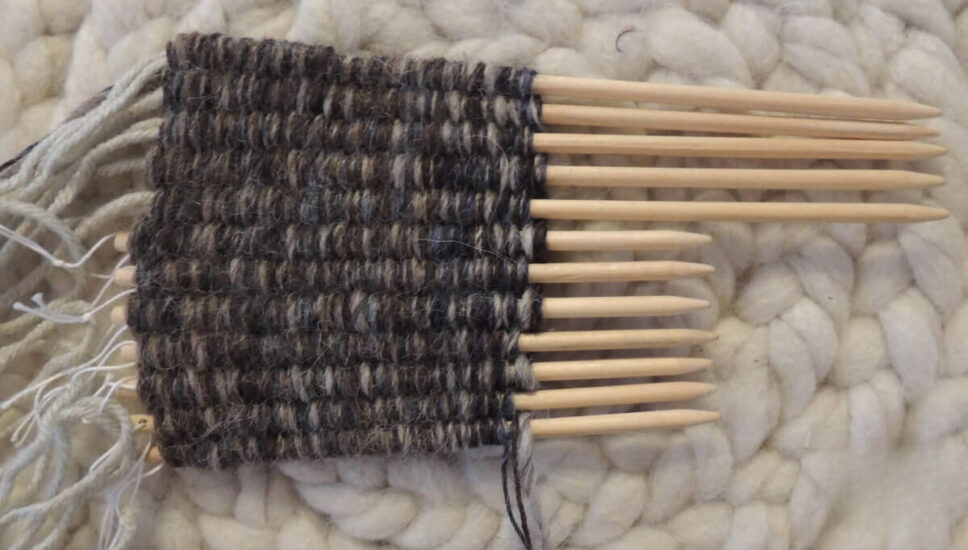
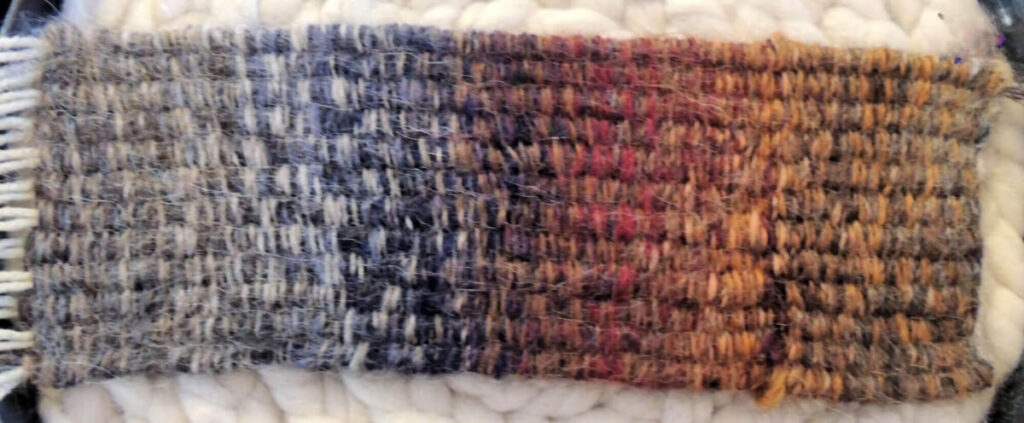
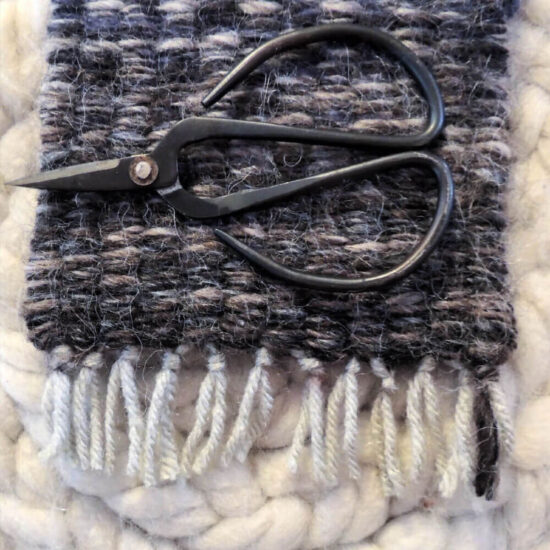
Keep going to your desired length. You can see here that my work off the sticks is the same width as the work on the sticks. This is because I did not pull too tight. Not only does that mean my work didn’t shrink, but it also makes everything so much easier. See the space between the sticks? The wefts are not yanking them together. I did not have to fight to pull the sticks up, either. Of course, this is not my first time stick weaving. I’ve had a bit of practice.
Stick Weaving Tutorial: Finishing
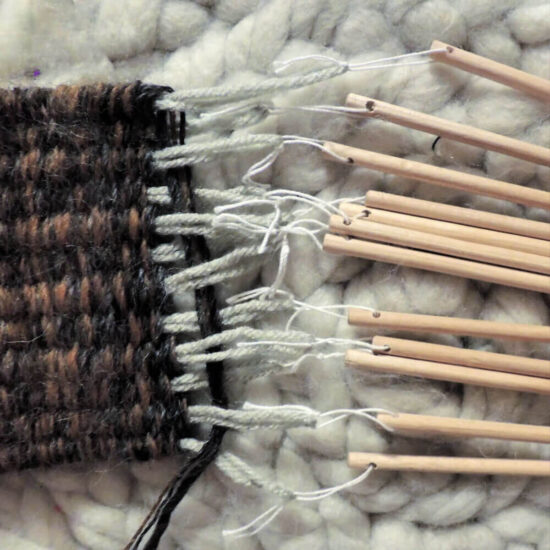
Now that your weaving is done, pull the sticks all the way out. Cut the weft yarn leaving at least a 10″ tail. You can tie the tops the same way I will teach you to tie the bottoms, but if you want a bit of a fancy top, try this.
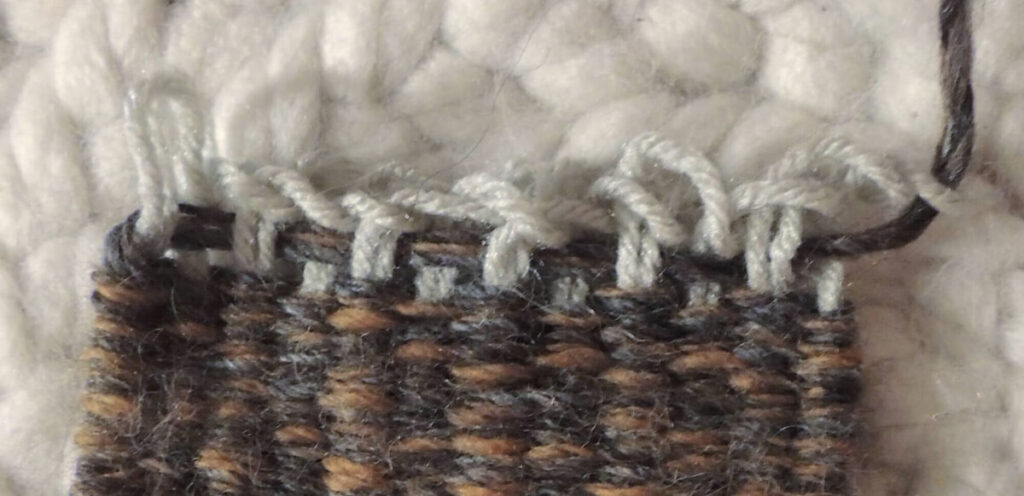
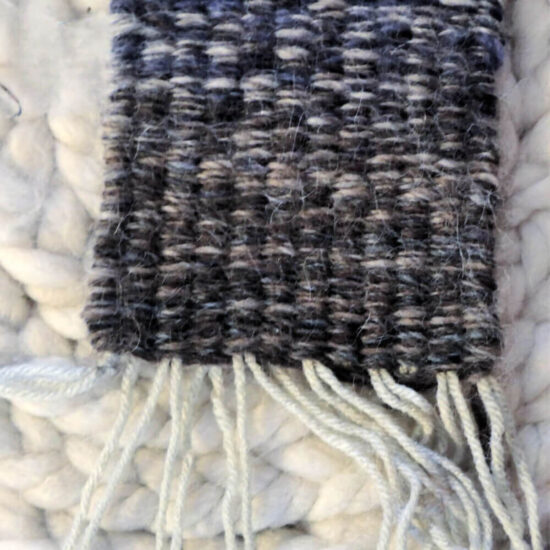
Pull the sticks so that just an inch or two of the warp is out. Cut the threads that connect the warps to the sticks, do not cut the warps. You will have a bunch of loops sticking up from your work.
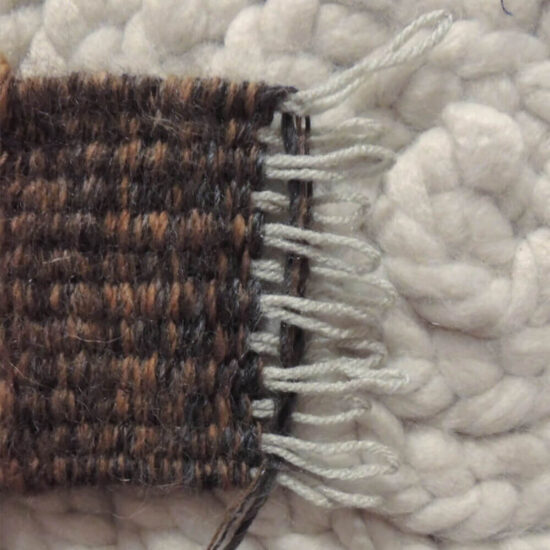
Starting at the side opposite of the end of the weft tail, take the second loop and pull it through the first loop. Then take the third loop and pull it through the second loop. Continue in this manner until the last loop has been pulled through the second to last.
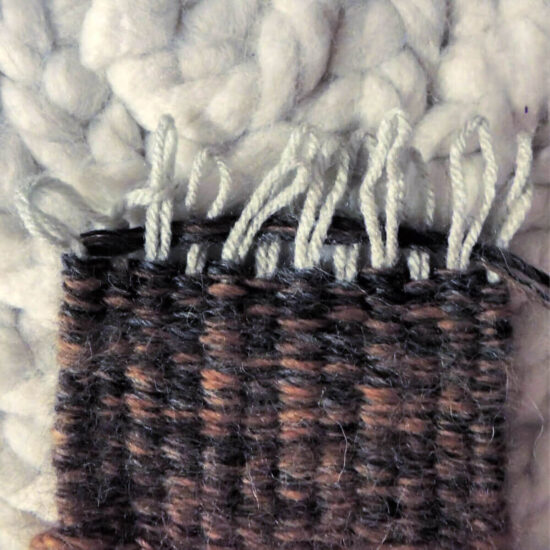
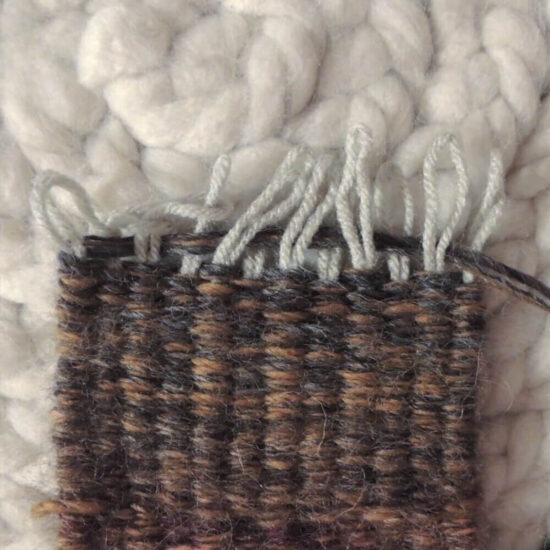
Thread the end of the weft yarn through the last loop. Gently pull the bottom of each warp thread so that the tops lay neatly on the top of your work.
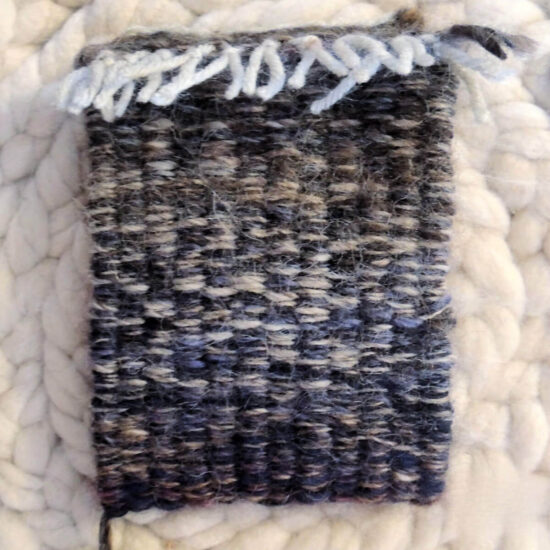
Lay your weaving on a flat surface. Use your hands to pat the piece into a nice, even, flat strip. If your piece is bubbling, then your warp needs to tightened. However, if the weft threads are all smushed together, then you need to pat the work towards the bottom so that it will slide down the warps a bit.
If you don’t use the fancy top finishing I showed you, then you can pull the warps even longer before cutting them off the sticks. This does make flattening things our a bit easier, as you can adjust on both ends.
The warp threads will all be in sets of 2. Tie the first 3 together snug to the weft. Then continue tying the warps together 2 at a time, until 3 are left. Tie the last 3 together. Now you can use a yarn needle and bury the ends of the warp back into your piece. Or you can trim the ends even for some fringe.
Making the Bag
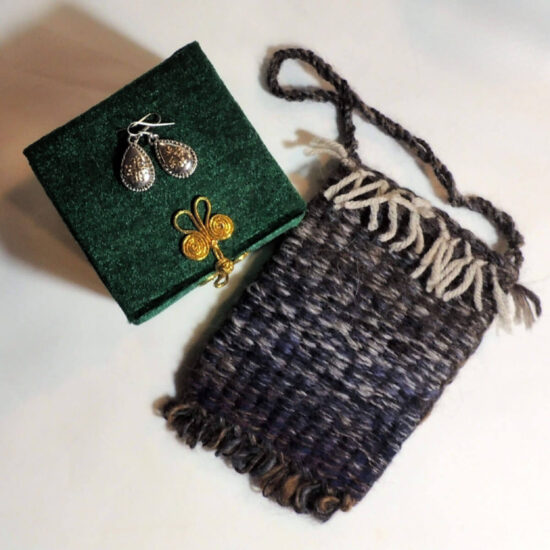
At this point I was ready to make my bag. First I folded the fringe over and stitched it down with some extra weft yarn and a yarn needle. Then I folded the strip in half and sewed a whip stitch around the 2 long sides. Be sure to catch the warp thread at the edges of the piece or your stitching will just slide off and your bag won’t hold much!
To finish up my bag I sewed some decorative little loops on the bottom. Then I twisted up some cord from the yarn to make the strap. You can braid the strap as well. Or even make a fingerloop strap!
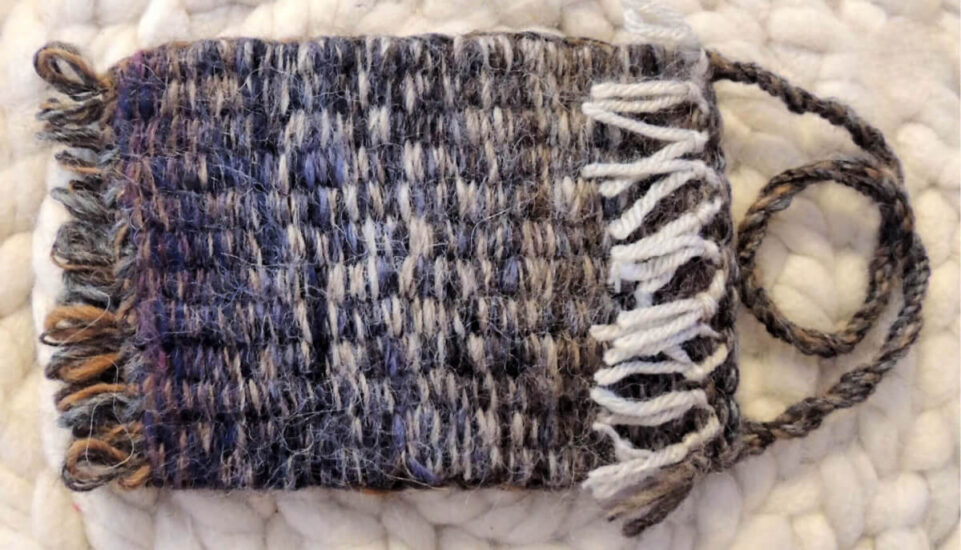
There you are. All done. I think the little bit of different yarn fringe is fun, but you do you! Have a good time with it.

Did you enjoy what you found here at Jessie At Home? Then sign up for my newsletter and like my Facebook page, so you’ll get all the updates on new tutorials, other posts, sales, and coming events.
If you have any questions, want to share pictures of your work, or just want to chat with Jessie and other crafty individuals, than join one of our free Zoom Sit & Stitches. Find them on our Events Calendar.

© Copyright 2020 Jessie Rayot / Jessie At Home®, LLC All my videos, patterns, charts, photos and posts are my own work, so you may not copy them in any way. If you want to share this information with someone, then share the link to this post.


Thank you so much for your very clear instructions. I was able to find the weaving sticks online, but could not find the holder/lock anywhere. Can you suggest a store or online site and can purchase one from? Thank you. Mrs. Seaneen Wilson
I got them about 8 or 10 years ago, and I just search for the sticks online and came across one with the holders as well. I haven’t seen the holders for sale in years. Most of the time I just hold the sticks in my hand, which is the traditional way to do it.
Sorry I couldn’t be more help.
Goggle Anoka Fiber Works, I saw a vendor at that Minnesota fiber shop have peg looms. I know they ship as I live in Arizona 😊
Thank you, Dawn!!
Hi there, did you line your bag?
No, I did not. But you can if you want. 🙂
Miss Jessie!
SO happy I found you here! I do have some questions for you, as I am totally new to this and a disabled crafter. What type of needle do you recommend to tuck the strings into the tubes? Bent? Straight? And WHERE, I meant…WHERE did you get your holder!?!?! I really think this would help me a great deal! Do you have additional videos on these weaving sticks? I bought the thin ones from another site. I just may have found a craft I can continue to do before I leave this world! You’re a good instructor for me! Thank you!
I don’t remember where the holder came from, but I got it like 10 years ago. I just googled for a while until I found what I was looking for. Sorry I’m not more help.
I just use a yarn needle, if bent works better for you, then go for it. It’s really just about what works best for you.