Inside: Wondering what to do with swatches? Discover creative ways to utilize swatches from your crochet & knit projects without wasting them.
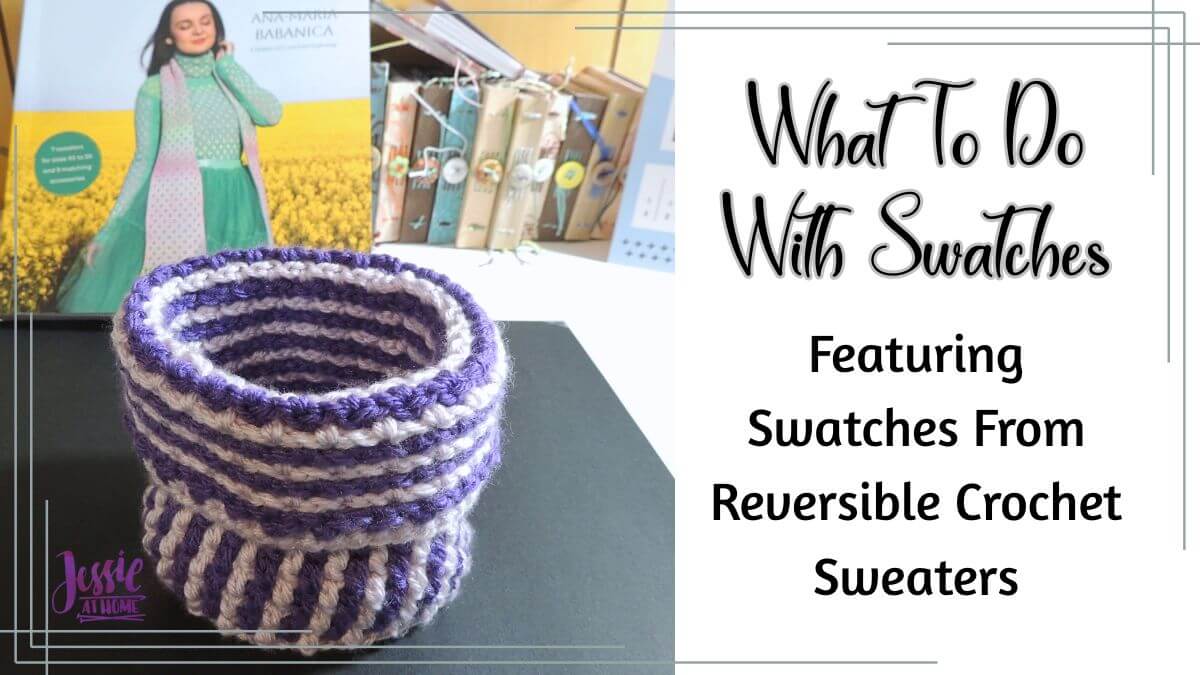
Let’s put aside “do you swatch?” and move on to “what do you do with your swatches?”
I know some of you pull out the swatch and use the yarn in your project, but if you’ve washed or blocked it, then that’s not the best idea. Plus, I like having the swatch to refer back to while I’m creating my project. It helps me make sure my stitches are looking the same and I haven’t changed my tension because I’m feeling more chill or more stressed today.
So, I’ve put together some ideas of what you can do with those finished swatches. Other than fill boxes and bins with them, that is.
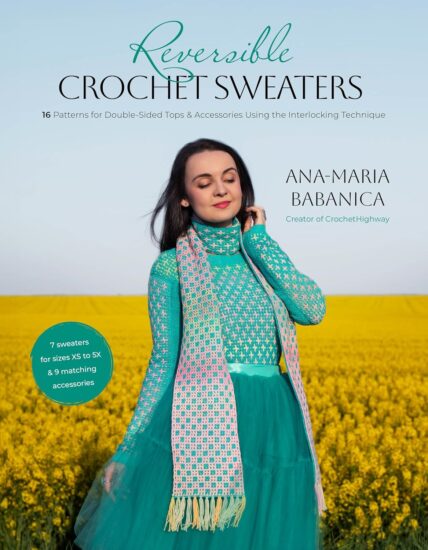
I’ve used swatches I made from Reversible Crochet Sweaters: 16 Pattern for Double-Sided Tops & Accessories Using the Interlocking Technique, by Ana-Maria Babanica.
Before we get to the ideas for using swatches, I want to give you a review of Ana-Maria’s book.
Before the Patterns
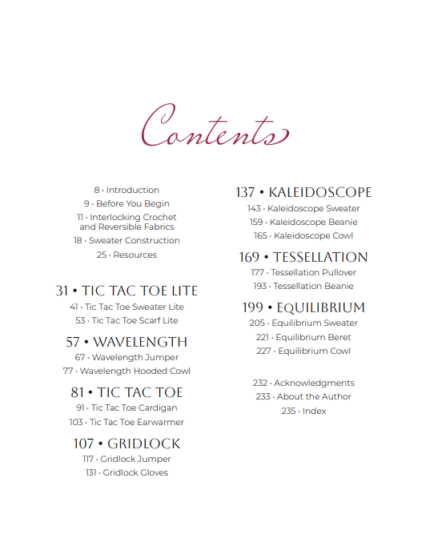
There are 30 pages before the first pattern. Though it’s a lot less of actual text, when you take out the copyright page, title page, full photo pages, and all the photos within the text. However you choose to count it, I highly recommend you read everything up to the first pattern before starting any of the projects.
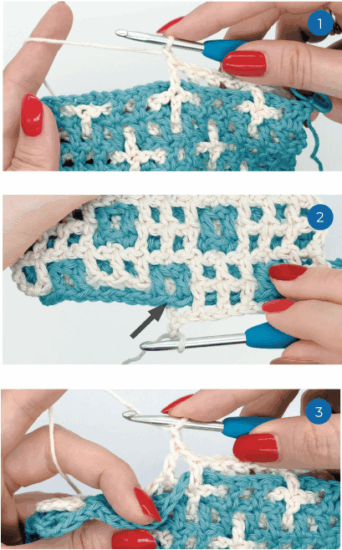
Ana-Maria is an extremely skilled designer and pattern writer. She explains how to read the patterns in this book and how to crochet with this technique in a way that is so much easier to follow than anything I have seen before. The directions are friendly, approachable, and full of descriptions and photos that make success achievable.
In addition to these how-to pages, Ana-Maria has several pages on her blog (the links are in the book) where you can find tutorials for some of the techniques, including the mattress stitch for seaming.
After I read these pages I felt empowered, and couldn’t wait to get stitching!
7 Sets of REVESIBLE Patterns
Inside the book you will find 7 reversible sweater (or cardigan) patterns, each with one or two coordinating reversible accessories. Reversible does not mean it’s the same look on the other side, just with the colors reversed, the design created by the stitches is different on each side!
The designs are mesmerizing and the patterns are expertly written. You’ll find schematics and other useful graphics as well as photos to help you along the way. Ana-Maria has made sure you will have every bit of aid you need to be able to hook up these lovely creations. It’s like she’s right there with you, encouraging you as you go.
I don’t think I could be more impressed with this book. If you want to learn or grow your interlocking mosaic skills, or just want to make some seriously stunning and impressive sweaters and accessories, you need this book!
Where to get the Book
What I Made
I went through my yarn stash and made all 7 swatches. Then I turned those swatches into other creations. Now I’ll show you the 7 creations I made with my 7 swatches. Then I’ll share some lists of those and additional ideas for what to do with finished swatches.
Tic Tac Toe Sweater Lite
Yarn Used: Herrschners 2-Ply Classic Afghan Yarn – 100% acrylic, #2 (fine/sport weight yarn), 558 yd (510 m), 5 oz (142 g) per skein – Colors: Cream 0025, Guava 0055
Hook: Knitter’s Pride Dreamz Crochet Hook – US E/4 (3.5 mm)
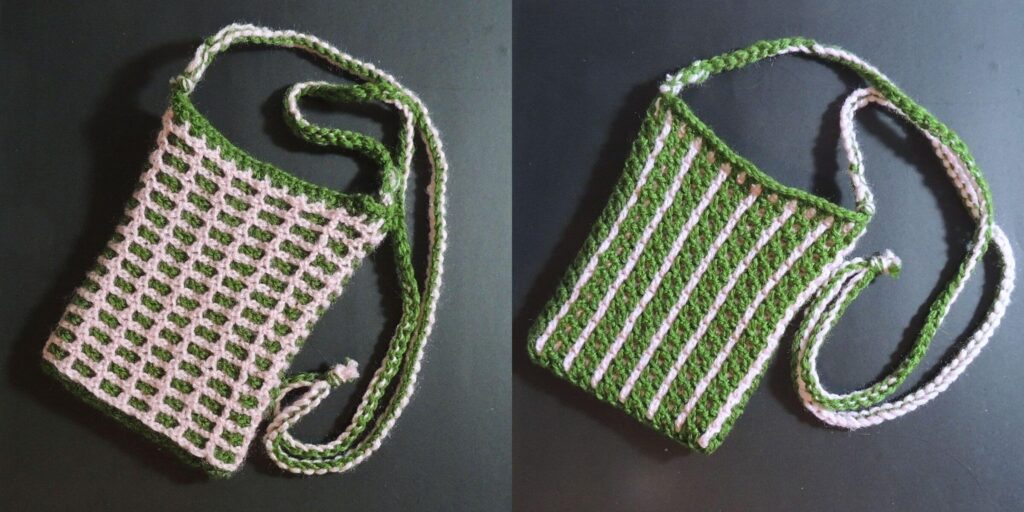
Creation: Reversible Small Bag
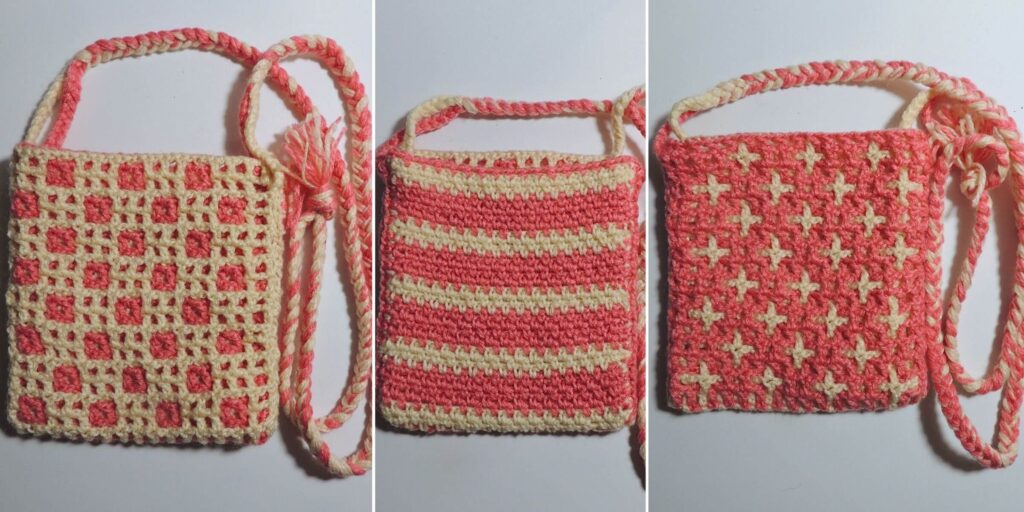
This was a fun, fast, and relatively easy little bag to stitch up. I started by joining the cream yarn to the starting foundation chain of the swatch, I then made a row of :
- Sc, [ch 1, skip 1, sc in next ch] across.
From there I continued in the linen stitch (AKA moss stitch), making 3 rows of cream then 5 rows of guava, and repeating the stipe pattern until the linen st section was the same length as the Tic Tac Toe Lite swatch.
I added a border around the 3 open edges of the linen stitch section, folded the bag in half, and seamed the two sides as explained in Ana-Maria’s book. Lastly I made a braided strap.
Wavelength Jumper
Yarn Used: Universal Yarn Deluxe DK Tweed Superwash – 90% superwash wool / 7% acrylic / 3% viscose, Size 3 (Light/DK), 284 yds (259 m), 3.5 oz (100 g) per skein – Colors:
Hook: Furls Onyx Streamline Metal Crochet Hook – US G/6 (4.0 mm)
Creation: Reversible Mug Rug
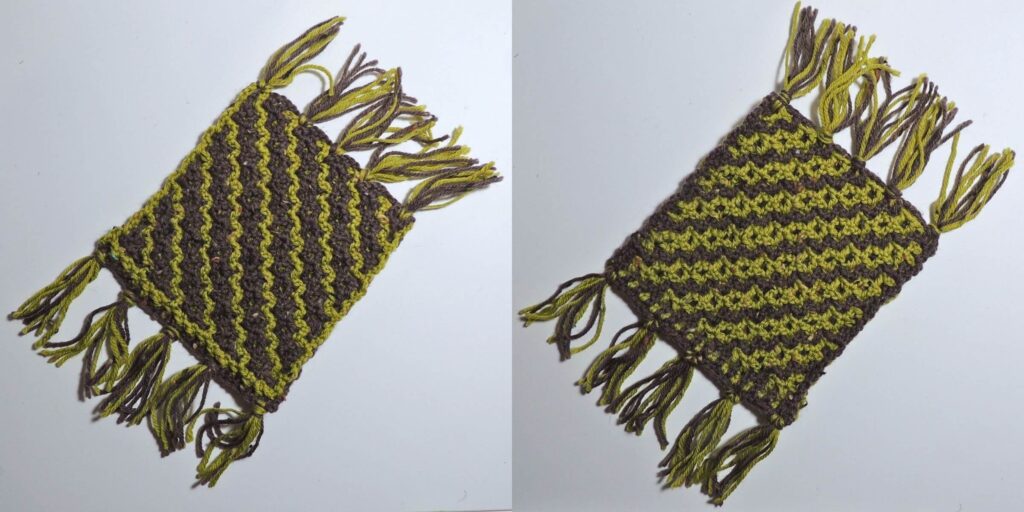
The Wavelength Swatch was already a nice size for a mug rug. I gave it a playful finish by adding tassels on two opposite sides.
Tic Tac Toe Cardigan
Yarn Used: Wool and the Gang Buddy Hemp Yarn – 45% Organic Cotton / 55% Hemp, Size 3 (DK), 190 yd (174 m), # oz (100 g)
Hook: Furls Onyx Streamline Metal Crochet Hook – US G/6 (4.0 mm)
Creation: Reversible Wash Cloth
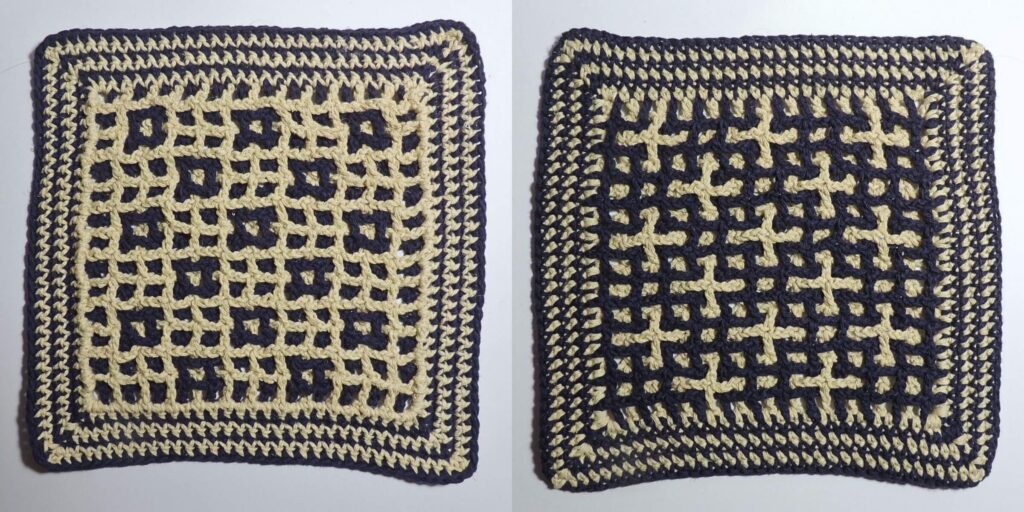
Cotton and hemp yarns are both wonderful for wash cloths. Hemp is antibacterial, and softens with washing. The Tic Tac Toe swatch was just a bit smaller than I like for a good washcloth for my face, so I added 6 rounds of single crochet, alternating colors for each round.
Gridlock Jumper
Yarn Used: Kraemer Yarns Perfection DK – 30% Domestic Merino / 70% Acrylic, Size 3 (DK), 260 yd (238 m), 3.5 oz (100 g)
Hook: Furls Onyx Streamline Metal Crochet Hook – US G/6 (4.0 mm)
Creation: Reversable Pull-through Cowl
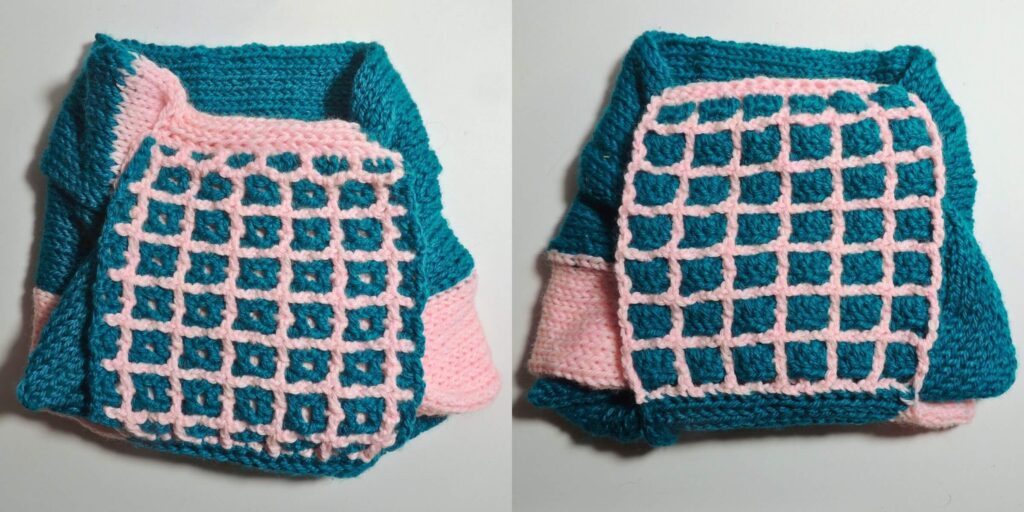
I used up the rest of the two colors of yarn – which were already partial skeins when I made the swatch – by running them through my smaller round yarn machine. I then folded that piece in thirds and stitched it together to make a wider and shorter piece to be a cowl.
Finally, I seamed the swatch close to one of the ends to make a tunnel to pull the other end through. The finished creation is cute and playful, and I think I may have to come up with a design or three based off this look.
Kaleidoscope Sweater
Yarn Used: Herrschners 2-Ply Classic Afghan Yarn – 100% acrylic, #2 (fine/sport weight yarn), 558 yd (510 m), 5 oz (142 g) per skein – Colors: Olive 0048, Blossom 0041
Hook: Furls Onyx Streamline Metal Crochet Hook – US G/6 (4.0 mm)
Creation: Reversable Phone Bag
I laid the swatch tube flat and seamed the bottom (starting chain) together to make the base of the bag. Then I stitched a long-tail chain cord on both sides of the top and tied them together to make the shoulder strap.
Tessellation Pullover
Yarn Used: Universal Cotton Supreme Waves (100% cotton), Size 3 (DK), 230 yds (210 m), 3.5 oz (100 g) – Colors: Autumn Apple 902, Prism 909
Hook: Furls Gold Streamline Metal Crochet Hook – US G+/7 (4.5 mm)
Creation: Reversable Baby Hat
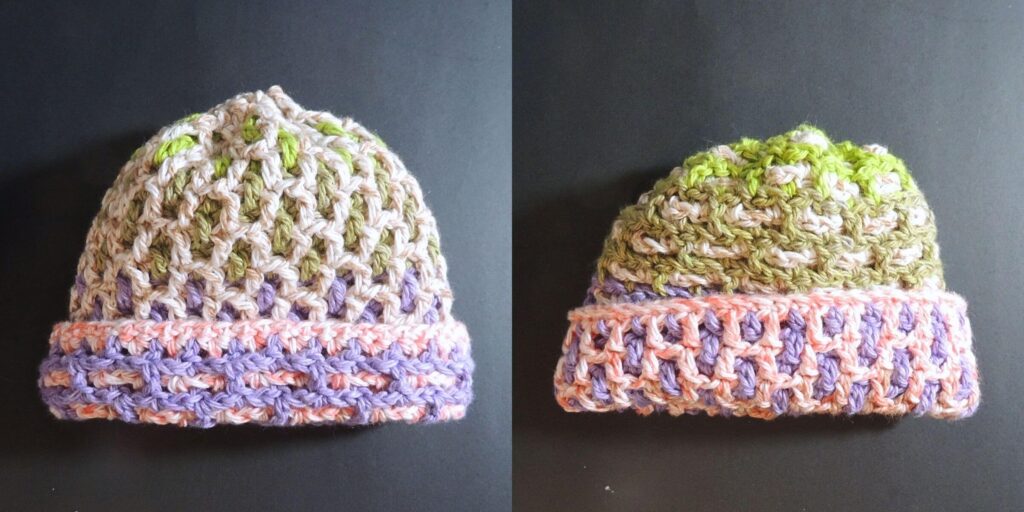
I ran MC yarn through the last MC round and CC through the last CC round, then pulled them each tight and wove in an cut the ends. That’s all it took.
Equilibrium Sweater
Yarn Used: Universal Uptown DK (100% anti-pilling acrylic), Size 3 (DK), 273 yds (250 m), 3.5 oz (100 g) – Colors: Pale Orchid 148, Purple Iris 147
Hook: Furls Onyx Streamline Metal Crochet Hook – US G/6 (4.0 mm)
Creation: Can Cozy or Small Basket
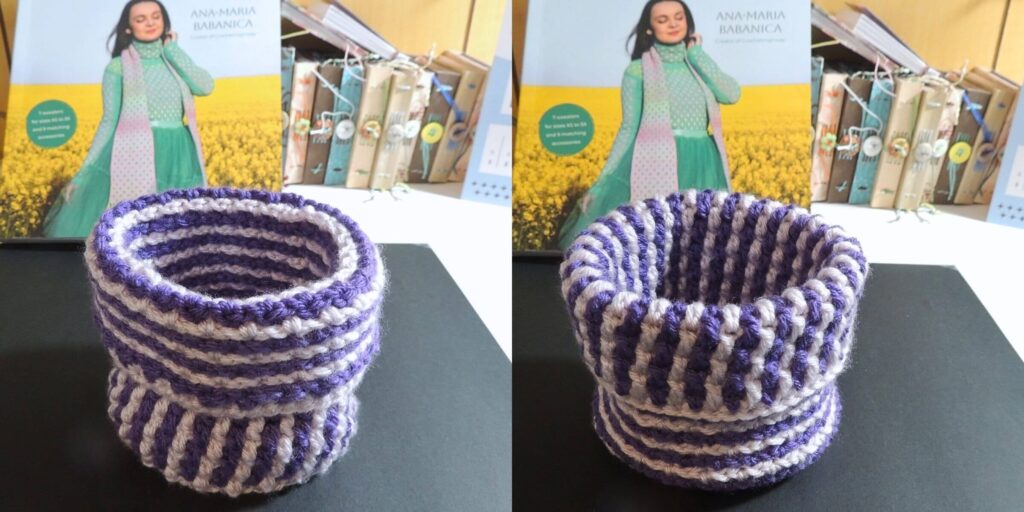
I crocheted a hdc flat circle, using THIS pattern, for 6 rounds then stitched one loop of the stitches on the last round to the top of the last MC round of the swatch, flipped the piece, and stitched the other top loop of the circle to the top CC round of the swatch. Leave the swatch at full height for a can cozy, or fold it over to make a useful basket for yarn cuttings or other small items.
I’m Done With My Swatch, Now What?
Gauge and practice swatches have a way of piling up, and after the work you put into them, why not turn them into something useful? If you have a swatch collection, or you’re curious how to give leftover swatches new life, I’ve got loads of ideas to try out. By making the most of what you’ve got, you also help cut down on fiber waste and get extra practice working with different patterns and yarns.
Swatches You Want to Keep
Sometimes you have swatches that you want to keep for reference or some other reason. Here are some suggestions for what to do with those beyond just tossing them in a bin.
- Zip Bags in Binders: Get a 3-ring binder and some zip pockets for them, or use zip bags and punch holes in them so they can fit in the binder. In each bag place a swatch and a notecard with all the important info you need about the swatch.
- Round Office Clips: Grab a few 2″ or larger round office clips. Attach each swatch to a notecard with the important info you need about the swatch on it. Punch a hole in the card and slide each card onto a clip. With several clips you can have one clip for different categories of swatches, such as crochet, knit, colorwork, or whatever you need.
- Frames: If you don’t need to be able to touch the swatch or see both sides, then you can frame them. Sometimes a swatch is just too pretty to hide, or maybe it’s exactly the right colors to work with your living room. Find a frame that works well with your swatch, and show off your beautiful creation. Bonus points for finding your frames at a thrift store or garage sale and saving money and the environment!
- Mini Wall Art: Frame a pretty swatch in a small embroidery hoop. You’ll have instant fiber art that adds cozy vibes to your wall or makes a thoughtful present for crafty friends. Displaying swatches is a great way to remember favorite yarns and stitches you’ve tried. This is especially good for round swatches.
Flat Square or Rectangle Swatches
Most swatches fall into this category. They are also usually around 6″. This makes them very versatile for future uses.
Home Decor
- Coasters: An easy starting point. Just block your swatch, trim loose ends, and maybe add a crocheted or blanket stitch edge. Instant drink coaster in your favorite yarn.
- Mug Rugs: Slightly bigger than a coaster, these are great for snacks alongside your coffee or tea. Try adding fringe to opposite sides – the short sides if your swatch is rectangular but not square.
- Patchwork Blanket: Collect a bunch of swatches, sew them together, and now you’ve got a memory-filled patchwork throw. It’s best to use swatches with similar washing methods, and to pre-wash the swatches in the same way you will wash the blanket before joining. This is a great way to use up practice pieces that show off different yarns and patterns. Plus, every square tells part of your crafting adventure!
Wearables & Bags
- Pockets: Everything’s better with pockets! Sew a swatch to a bag, skirt, pants, sleeve, whatever needs a pocket, swatches with more solid stitches work best, though you can always line the pocket with a piece of fabric to make sure nothing falls through a hole.
- Scarf: Join a bunch of swatches in a row and make a scarf. Add a border before or after joining. If your swatches are different sizes, adding a border first will allow you to make sure they are all the same size in at least one direction so you can join them into a scarf with an even width. Then add a border around the joined pieces.
- Small Bag: Join two swatches of the same size along 3 sides, then add a strap to make a small bag. HERE’s a tutorial for turning 3 swatches into a bag.
- Medium or Large Bag: Join several swatches together to make a larger bag. There are many joining options, such as HERE, HERE, or HERE.
Kitchen & Bath
- Soap Sacks: Start the same was as a pincushion: fold a swatch in half and sew 2 sides. Stitch up a quick crochet chain or braid some yarn together and thread it through the opening to make a drawstring. Slip in a bar of soap and pull the drawstring tight. These make lathering in the shower easier and can be a thoughtful gift with a handmade touch. You can even personalize the colors and closure for friends or family.
- Face Scrubbies: Cotton swatches in soft stitches can turn into washable face cleansing pads. Just weave in the ends, and maybe add a loop for hanging. These are ecofriendly and feel gentle on your skin, perfect for a quick spa moment at home.
- Trivets: Double up two thicker swatches, seam around or stitch on a border to join. These are perfect for placing under hot dishes, just be sure the yarn won’t melt under high heat.
- Potholders: While I don’t recommend entirely yarn potholders, you can get some inexpensive potholders and use your swatches to re-cover the decorative side. You will still want to be sure to use a yarn that can handle high heat.
- Cleaning: Swatches made with absorbent and washable yarn are great for cleaning. Keep using and washing them and help save the planet and your wallet.
Craft Supplies
- Pincushions: Fold the swatch in half, sew up two sides, and stuff with fiberfill or yarn scraps. Seal the last edge, and you’ve got a handy little pincushion that’s perfect for sewing projects.
- Felt & Cut: If your swatch is made with a feltable yarn, you can felt it and then cut out shapes for appliques, broaches, or even cute little gift tags or key chains.
Gifts
- Doll Blanket: Add a decorative border and give to a little one with a favorite doll that needs a blankie. You can even embroider the kiddo or doll’s name onto the blanket. This is a good use for larger or rectangular swatches.
- Bunny: Easily turn a square swatch into a bunny with this tutorial. They make cute gifts or spring decor.
- Texture Book: Stack several swatches with fun textures together and sew one side of them all together to make a texture book. These are great for babies and for kids who like sensory items to touch. Be sure to pre-wash all the swatches in the same way the finished book will get washed if it gets dirty. Remember these may end up getting chewed on, so be aware of what you wash them in; we recommend Unicorn Clean Beyond Clean.
Flat Non-Rectangular Swatches
- Mini Doilies: Turn a lacy round swatch into a decorative touch on a table. These mini mats add a little old school charm wherever you place them.
- Magnets or Broaches: Attach a plain magnet to the back of a small, decorative round swatch and now you can brighten up your fridge with crochet. Add a pin back for a unique handmade accessory. Starch the swatch or back it with felt if it’s not sturdy enough to keep its shape.
- Mandalas: Find a metal, wood, or other decorative ring just a bit larger than the swatch and stitch the swatch inside the ring for a lovely piece of wall decor.
- Bag Charms: If your swatch is made with a feltable yarn, then felt it! Add a loop or tassel, maybe even some beads, and attach the swatch to a bag or backpack for a crafty pop of color. These also make fun friendship tokens.
Tubular Swatches Made In-The-Round
- Pincushions: Sew one end together, stuff fiberfill or yarn scraps, then sew the other end together. Tada – easy-peasy pincushion!
- Cat Toys: Sew two small circles together, add a bit of stuffing and catnip, then toss to your favorite feline. Watch them go wild as they enjoy a homemade toy (and you make good use of leftovers)!
- Wrist Warmers: If your swatch makes a tube big enough to fit your wrist, just finish the top and bottom edges. It can slide right on as a cozy wristlet. A touch of ribbing helps with fit. Make a second swatch for the other wrist, or use two different swatches for a fun. miss-matched set.
- Coffee Cup Sleeve: Stretchy, tubular swatches make great cup cozies for hot drinks. This means no more burnt fingers, and it’s a cute way to show off different stitch patterns. Plus, these reusable sleeves make great small gifts for friends.
- Mini Pouch: Sew one end closed, add a drawstring to the open end, and you get a mini pouch. Perfect for storing stitch markers, earbuds, lip balm, or using as a tiny gift bag. Embellish with buttons or a patch for a unique look.
- Little Plant Pot Covers: Slide the tube over a small plant pot to add handmade style to your home. Experiment with colorful yarns or stripes to liven up plain planters and add personality to your space.
- Cable Organizers: A tube swatch can be sewn flat across one end and finished with a button or snap for a cord cozy. Tidy up headphone cables or phone chargers, and use up those pretty leftovers from your scrap yarn stash!
Quick Tips for Making the Most of Gauge Swatches
- Always block swatches before using them for coasters, art, or accessories. This helps them lay flat and gives a finished look.
- If combining swatches into one big project (like a blanket), aim for consistent size and fiber type for best results. Mixing fiber content can cause stretching or shrinking, so keep an eye out for this issue.
- Label swatches if you want to remember the yarn and hook or needle size. These notes are super helpful for future planning, troubleshooting, and sharing project details online. You can keep an online journal with photos of swatches used in projects and add this info with each photo.
- Don’t be afraid to mix colors, textures, or shapes. A patchwork project can be as bold or simple as your own style. Make it truly yours by including special swatches that remind you of favorite projects or loved ones.
- Keep a small bin or drawer just for swatches so they’re easy to find when you want to put together a quick project, check your previous work, or show off your yarn collection to curious friends. When it starts to overflow, it’s time to refer back to this article for ideas of what to do with those swatches!
Turning gauge swatches into finished items is a great way to cut down waste, show off your favorite yarns, and give a practical twist to something that’s usually tossed aside. Next time you finish a swatch, stash it away for a future mini make—or better yet, turn it into something useful right away.
Yarn swatches don’t need to be boring or wasted; with a little imagination, they can become the best part of your project pile. So, check out your swatch stash and get inspired. You might just track down a new favorite mini project today!
Did you enjoy what you found here at Jessie At Home? Then sign up for my newsletter and like my Facebook page, so you’ll get all the updates on new tutorials, other posts, sales, and coming events.
If you have any questions, want to share pictures of your work, or just want to chat with Jessie and other crafty individuals, than join one of our free Zoom Sit & Stitches. Find them on our Events Calendar.

© Copyright 2025 Jessie Rayot / Jessie At Home®, LLC All my videos, patterns, charts, photos and posts are my own work, so you may not copy them in any way. If you want to share this information with someone, then share the link to this post.


