Inside: This beautiful and asymmetrical design is an easy one skein crochet wrap pattern that’s perfect even for beginners.
This pattern was originally published on 3/19/2015. The most recent update was made on 12/22/2022.
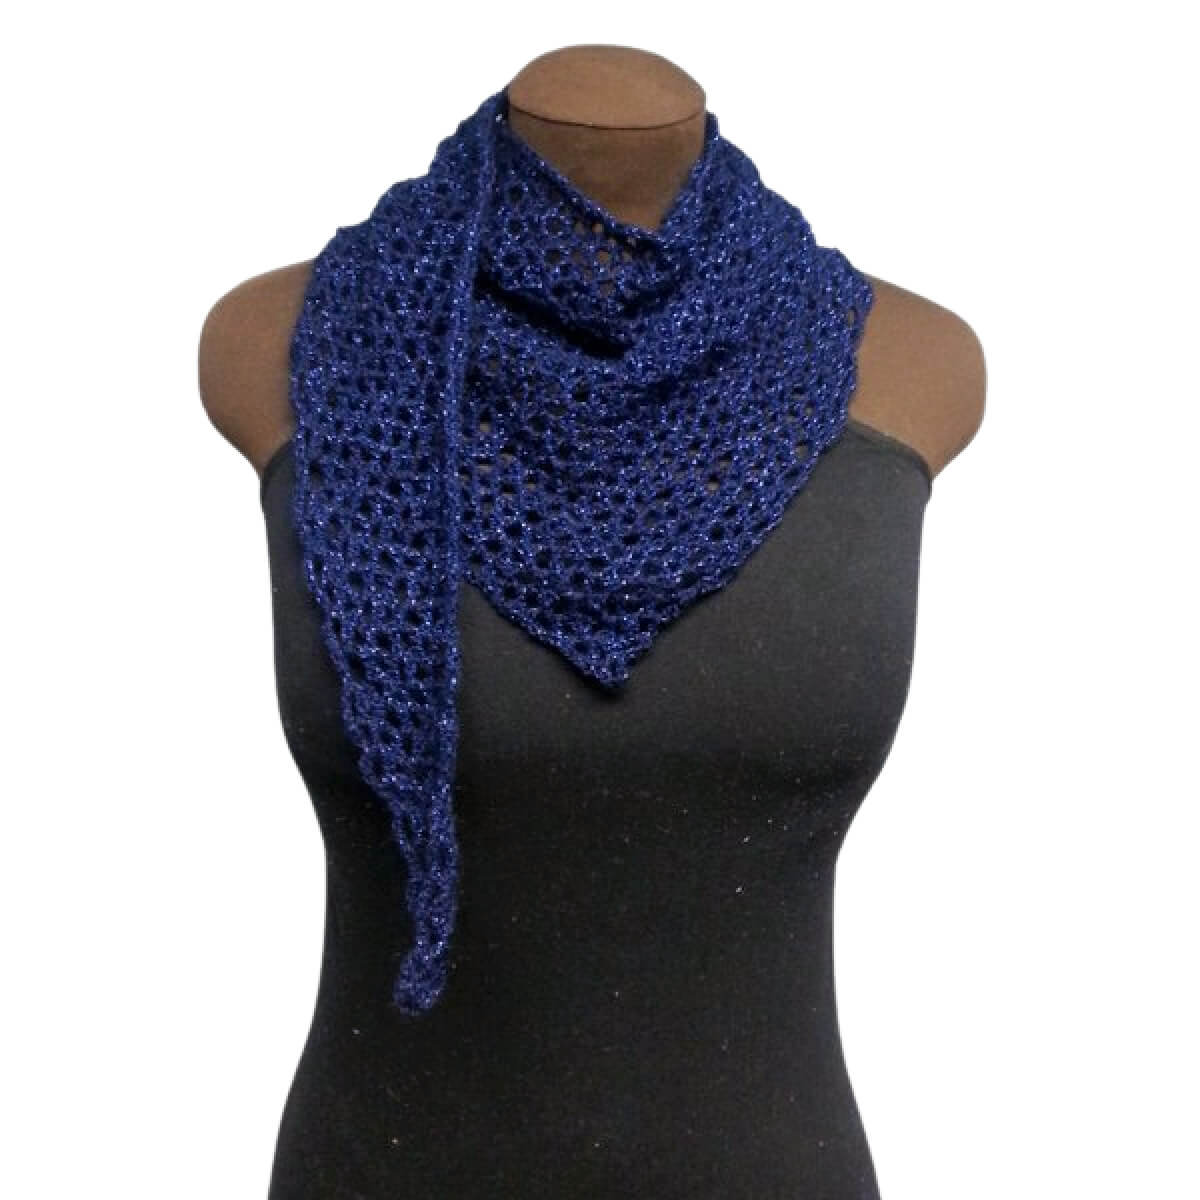
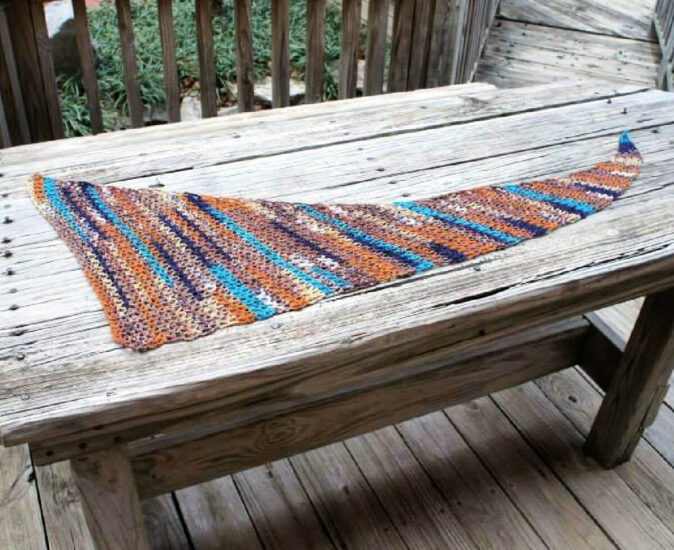
Get ready to wrap yourself in a beautiful and unique crochet wrap with our Wrapped in Blue pattern! This easy one skein project is perfect for beginners and the asymmetrical pattern creates a unique look that will make any outfit stand out. You don’t need to be an experienced crocheter to make this wrap – just follow our simple instructions and you’ll be ready to show off your masterpiece in no time!
Table of contents
This off kilter wrap is simple to make and uses just one skein of yarn! You can make it larger by using more yarn, but it is a great size for a spring mini wrap/scarf with just one skein of Lion Brand Vanna’s Glamour yarn.
Wrapped in Blue
Crochet Pattern
Easy Skill Level
Designed by Jessie Rayot
Supplies
Size
Sample is 40″ long and 14″ at its widest point
Yarn
Lion Brand Vanna’s Glamour: (96% Acrylic, 4% Other), Size 2 – Fine/Sport, 202 yds / 50 g, (4.04 yds/g) – this yarn is discontinued, nearly any other size 2 yarn will work just fine
One skein used for sample
Crochet Hook
US G/6, (4.0 mm)
Gauge
Learn about gauge HERE
7 sets of (dc, ch-2, dc) across, and 8 rows (placing the (dc, ch 2, dc) in the ch-2 sps of the row before) in a 4” square.
However, it’s a wrap, gauge isn’t that important. If you tend to crochet tight, you may want to move up to a 4.5mm hook.
Other Supplies
Stitches and Abbreviations
click on highlighted sts for tutorials
ch – chain
dc – double crochet
sp(s) – space(s)
st(s) – stitch(es)
( ) – work step in parentheses in indicated stitch
Get the Ad-Free Printable PDF at These Sites
- Showstopper Creations – You can get bonus printables here!
- Ravelry
- Etsy
- LoveCrafts
Pattern Notes
- Read through all instructions before beginning.
- The stitch count is at the end of each row after the period, usually only if the count has changed from the previous row. {count here}
- If you make a gauge swatch, DO NOT clip your yarn. You will need to undo the swatch and use the yarn to make the wrap or you will not have enough yarn.
- Chs and sl sts are not included in stitch counts unless specified.
One Skein Crochet Wrap Pattern
Row 1: Ch 3, (dc, ch 2, dc) in third ch from hook. {1 (dc, ch-2, dc)}
Row 2: Turn, ch 4 (counts as dc, ch 2, here and throughout), dc in same st, (dc, ch 2, dc) in ch-2 sp. {2 (dc, ch-2, dc)}
Row 3: Turn, ch 4, dc in ch-2 sp, (dc, ch 2, dc) in next ch-2 sp. {2 (dc, ch-2, dc)}
Row 4: Turn, ch 4, dc in same st, (dc, ch 2, dc) in each ch-2 sp across. {3 (dc, ch-2, dc)}
Row 5: Turn, ch 4, dc in ch-2 sp, (dc, ch 2, dc) in each remaining ch-2 sp across. {3 (dc, ch-2, dc)}
Row 6: Turn, ch 4, dc in same st, (dc, ch 2, dc) in next ch-2 sp, dc in next ch-2 sp, ch 2, dc in last ch-2 sp. {3 (dc, ch-2, dc)}
Row 7: Turn, ch 4, dc in ch-2 sp, (dc, ch 2, dc) in next 2 ch-2 sps. {3 (dc, ch-2, dc)}
Row 8: Turn, ch 4, dc in same st, (dc, ch 2, dc) in next 3 ch-2 sps. {4 (dc, ch-2, dc)}
Row 9: Turn, ch 4, dc in ch-2 sp, (dc, ch 2, dc) in next 3 ch-2 sps. {4 (dc, ch-2, dc)}
Row 10: Turn, ch 4, dc in same st, (dc, ch 2, dc) in next 4 ch-2 sps. {5 (dc, ch-2, dc)}
Row 11: Turn, ch 4, dc in ch-2 sp, (dc, ch 2, dc) in next 4 ch-2 sps. {5 (dc, ch-2, dc)}
Row 12: Turn, ch 4, dc in same st, (dc, ch 2, dc) in each ch-2 sp until 2 remain, dc in next ch-2 sp, ch 2, dc in last ch-2 sp. {5 (dc, ch-2, dc)}
Row 13, 15, 17: Turn, ch 4, dc in ch-2 sp, (dc, ch 2, dc) in each remaining ch-2 sp across.
Row 14, 16: Turn, ch 4, dc in same st, (dc, ch 2, dc) in each remaining ch-2 sp across.
Row 18: Turn, ch 4, dc in same st, (dc, ch 2, dc) in each ch-2 sp until 2 remain, dc in next ch-2 sp, ch 2, dc in last ch-2 sp.
Repeat rows 13 – 18: 9 more times (112 rows total) OR until there is not enough yarn to make another row (this means you may not end on row 12) OR until desired length is reached if you are using more/another yarn.
Finishing
- Weave in ends
- Block
Happy Stitching!
FAQs
Suggestion from Leah (tester): place a stitch marker on row 13 each time you start a new repeat, that way if you put your work down it is easier to remember where you were.
Did you enjoy what you found here at Jessie At Home? Then sign up for my newsletter and like my Facebook page, so you’ll get all the updates on new tutorials, other posts, sales, and coming events.
If you have any questions, want to share pictures of your work, or just want to chat with Jessie and other crafty individuals, than join one of our free Zoom Sit & Stitches. Find them on our Events Calendar.

© Copyright 2015 Jessie Rayot / Jessie At Home®, LLC All my videos, patterns, charts, photos and posts are my own work, so you may not copy them in any way. If you want to share this information with someone, then share the link to this post.


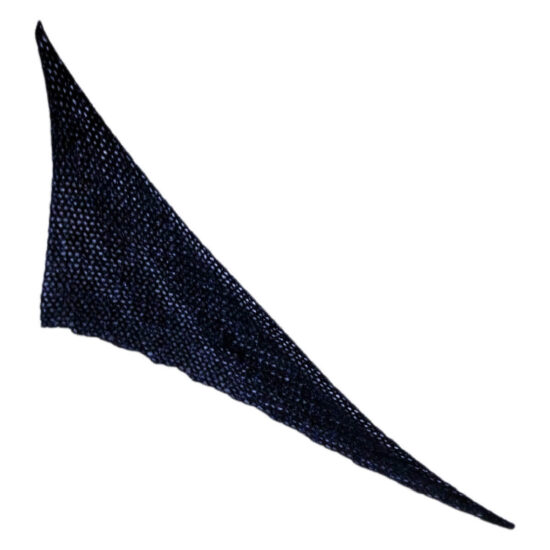
Jessie – I’m having lots of trouble with this scarf. Between my ADD and new puppies in the house, I know I am butchering this. What does it look like laid flat on a table or on the floor?
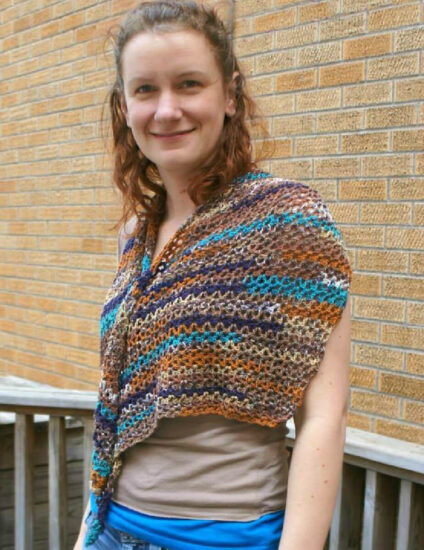
in the top set of pictures there is a full picture. You start at the tip (in that picture it is the part pointed down) and work from there. You can also click on the Ravelry link to see more photos. Leah has a full shot of hers as well (the multi~color one).
Jessie – I found the picture of it earlier today and wow – mine looks like that! Should be done sometimes tomorrow. Can’t wait to post the photo..
Yay!! I look forward to seeing it! <3
You are very kind to take the time to type up, photograph, and post all of these free patterns.
God bless you each and every day!!
Thank you! I really enjoy doing this, so I do feel very blessed. <3
Can’t figures out what I am doing wrong … have frogged this more times than I care to admit to & still cannot get it right …. my rows dont seen to increase! Row 8 & 9 I still only have 3 of (dc, ch-2, dc) …where does the increase come in!??? (Hope this makes sense!!??) Is there a graph or tutorial??
I have no idea what you are doing wrong. The best way to figure it out would be to join the facebook group linked in the bottom of the pattern and post some pictures there so maybe we can figure it all out.
I want to thank you for the free pattern Wrapped in Blue, I think I will really enjoy this pattern. To find it free is a special surprise.
I know this is supposed to be a very simple pattern. I have crocheted for many years, but I am having a great deal of trouble with this pattern.
I don’t understand starting with row 2. It says to turn and chain 4. Do you attach the chain 4 going back to the other way? It really is confusing me.
I hope you can help me and explain it so I can understand. I had planned on doing 5 for Christmas gifts, but that isn’t going to happen now.
Thank you.
After finishing a row, start the next row by turning the work, ch 4 (which counts as your first dc and the ch 2), then work a dc in the first st ~ so the ch 4 and the dc count as (dc, ch 2, dc). It’s just a turning chain, they are in most patterns, so I’m not sure what is unclear.
I have tried and tried to figure this pattern out…it looks very little like the finished product. I am so frustrated I have to put it down for a while. I don’t know what I am doing wrong…It doesn’t seem to “grow” except in length. Maybe there is something easier for me to try. I have crocheted for many years, and i feel like a beginner with this.
There is a link to a facebook group at the end of the pattern. If you join that group you can post photos and explain what you’ve done and what seems to be wrong. Please be sure to provide the link to the pattern so people don’t have to search for it to help. Sometimes posting a photo makes it a lot easier for people to see what is wrong. There are a lot of people in the group who can help, including myself.
I think I might have it this time 🙂 Just needed to have some time to clear my head
I finally finished it 🙂
Yay!!!
I have a questrong. For row 13, the 1st dc, should it be in the ch-1 space, or I skip that, and that the 1st dc in the 1St ch-2 sp?
work in the ch-2
I’m not seeing how there are 112 rows total. You do 18 and then 13-18 9 more times. 13-18 is 6. 6*9=54. 54+18 = 72. Am I missing something here?
You’re right, that does equal 72. Not sure how I came up with 112, maybe not enough coffee? 😉
Just go until you can’t finish another row, or to your desired length.
Thanks so much. I’m loving this and wanted to make sure I was doing it right. Thanks for sharing this pattern
Do you have a chart of this pattern? I don’t understand the {} part. I am stuck on row two. What do you do after the dc ch2 dc?
Make sure to read the notes at the beginning of the pattern. The {} are the stitch count for the row so you can be sure you did it right.
For the wrapped in blue pattern, In Row 13 when you are
“(dc ch2 dc)in all the chain 2 spaces,” do you count the last ch1 space of the previous row as a ch2 space and (dc ch2 dc) in that space?
yes, it should be a ch 2, I just fixed it.
Thanks! I can now proceed. Love this pattern.
Hi Jessie,
I have been having a bit of trouble with this scarf. So I went through the pattern a few times and revised it in terms that made sense to me. I’ve saved it in a Word doc (docx) and if you are interested in seeing my changes, I am more than happy to either email the doc to you directly, or copy and paste it here, in your comment section.
Hopefully, I haven’t screwed it up, I’m going to give it another go tomorrow (with fresh eyes), so fingers crossed.
I hope I haven’t offended with my revision.
This pattern is rather old and on my list of patterns to update. If you have specific questions, you can always ask in my Facebook Group or join ShowstopperCreations.com for lots of help and education.