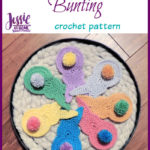
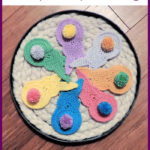
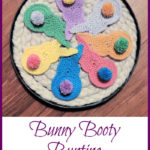
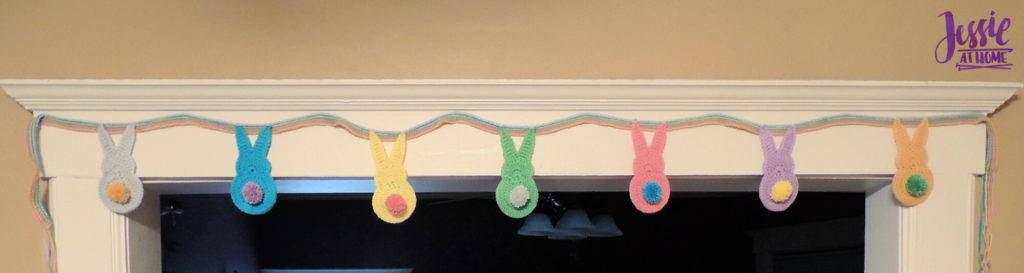
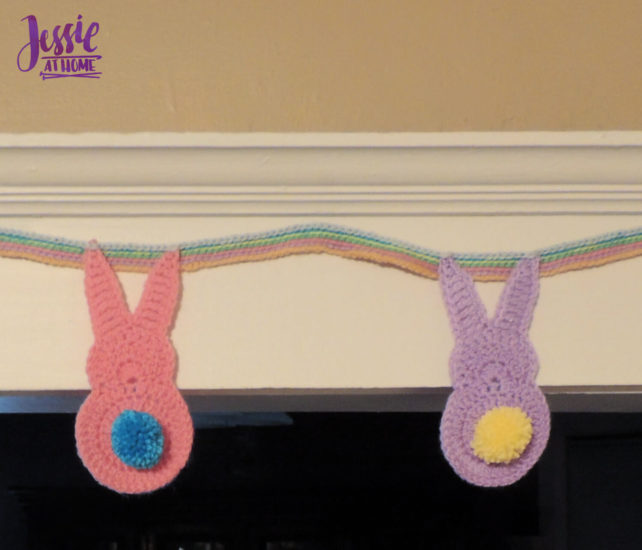
Bunny Booty Bunting is a great way to decorate with a giggle for the Easter season. It’s adorable and fun and can be made as long or short as you like. The bunnies are crocheted in one piece (other than the pom pom tail). They are then joined onto the crochet ribbon as it’s made. This project is a great way to use up leftover yarn from other projects if you aren’t able to get the suggested yarn. 🙂
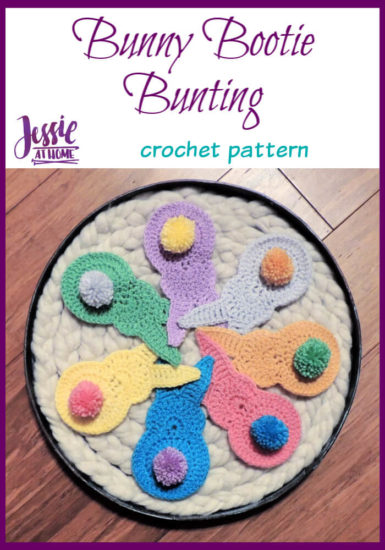

Bunny Booty Bunting
Crochet Pattern
Easy Skill Level
Designed by Jessie Rayot
Bunny Booty Bunting Supplies
Size:
Bunnies: 6.5″ x 3″
Bunting: 90″
Yarn:
Paintbox Yarns Simply DK: (100% Acrylic), Size 3 (11 wpi, DK weight), 302 yds / 100 g, (yds/g = 3.02)
Melon Sorbet 116
Tea Rose 142
Bubblegum Pink 150
Spearmint Green 125
Daffodil Yellow 121
Marine Blue 133
Stormy Grey 104
Hook:
US – G/6, 4.0 mm
Gauge: Learn about gauge HERE
17 sts x 10 rows = 4” [10 cm] in dc
Other supplies:
yarn needle
small pom pom maker
Stitches and Abbreviations: click on highlighted sts for tutorials
ch – chain
dc – double crochet
hdc – half double crochet
sc – single crochet
sl st – slip stitch
sp(s) – space(s)
st(s) – stitch(es)
Getting Started:
- Round/Row counts are at the end of each row after the period, if the count has changed from the previous round. – {count here}
- Chs and sl sts are not included in Round/Row counts unless specified.
- This pattern is started by working in rounds, then switches to rows.
Bunny Booty Bunting Pattern:
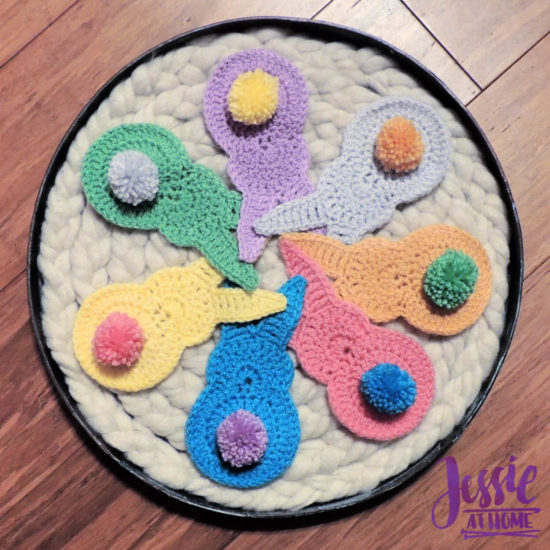
Bunny Booty
Rnd 1: Ch 4, sl st into first ch made to form a loop, st2sc, 12 dc into loop, sl st to top of st2sc. – {13 sts}
Rnd 2: St2sc, dc in same st, 2 dc in each remaining st around, sl st to top of st2sc. – {26 sts}
Rnd 3: St2sc, dc in same st, dc in next st, [2 dc in next st, dc in next st] 12 times, sl st to top of st2sc. – {39 sts}
Do not cut or fasten yarn, begin working in rows.
Bunny Head
Row 1: 5 Dc in next st, sl st in each of next 2 sts. – {5 sts}
Row 2: Turn, 2 dc in each st of Row 1, sl st in each of next 2 sts of Rnd 3. – {10 sts}
Row 3: Turn, [2 dc in next st of Row 2, dc in next st] 5 times, sl st in next st of Rnd 3. – {15 sts}
Do not cut or fasten yarn.
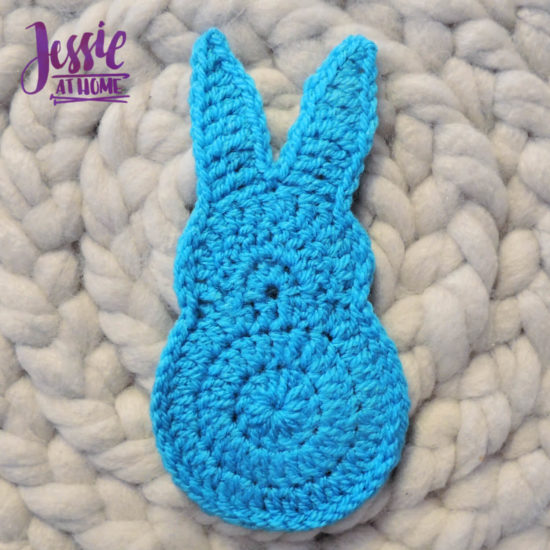
Bunny Finishing and Ears
Rnd 1: Sl st in each st of Rnd 3 until first st of Row 3 is reached, sl st in each of next 5 sts of Row 3, ch 10, sc in 2nd ch from hook, hdc in next ch, dc in next ch, tr in each of next 6 chs, skip 2 sts of Row 3, sl st in next st of Row 3, ch 10, sc in 2nd ch from hook, hdc in next ch, dc in next ch, tr in each of next 6 chs, skip 2 st of Row 3, sl st in each of next 6 sts of Row 3.
Fasten off, then weave in ends.
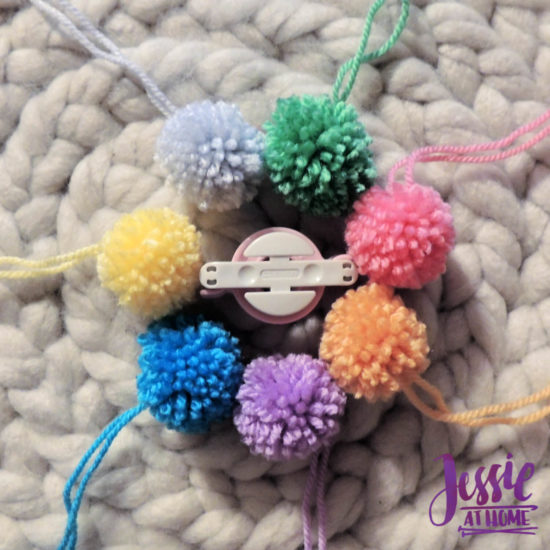
Bunny Tail
Make a 1″ pom pom for each bunny. Use the ends of the tie string from the pom pom to tie through the center of the Bunny Bootie.
Ribbon
- Cut yarn at the end of each Row.
- Make each Row starting from the same end.
- Make each Row in a new color.
Row 1: Ch 450.
Rows 2 – 6: Sl st in back loop only of each st across.
Row 7: Sl st in back loop only of each of firstt 48 sts, [sl st through top of right ear of bunny and back loop only of next st, sl st in back loop only of each of next 11 sts, sl st through top of left ear of bunny and back loop only of next st, sl st in back loop only of each of next 40 sts] 6 times, sl st through top of right ear of bunny and back loop only of next st, sl st in back loop only of each of next 11 sts, sl st through top of left ear of bunny and back loop only of next st, sl st in back loop only of each remaining st.
Hang and enjoy!

If you are going to make this creation then get some supplies from these affiliate links.


