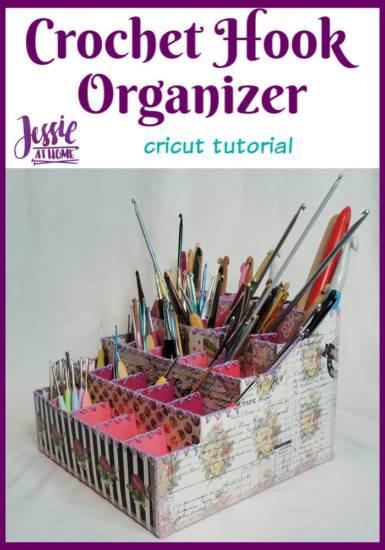
I made a crochet hook organizer with some Dress My Craft cardstock and my Cricut. Then I shared the project on Cricut Design Space. I’m posting the instructions here so you can make one of your own. This would also make a great paint brush or marker organizer. It’s actually pretty easy to put together with just a glue runner or some glue dots and some Mod Podge or glue. Add a little thin yarn or crochet thread for a decorative look and to really lock everything in place, then you’re good to go!
Some materials for this project were provided by Dress My Craft. All opinions are my own.
In January I met some of the creative individuals behind Dress My Craft and they gave me a bag of awesome to try out. One of the items was a 24 pack pad of heavy card stock that I immediately fell in love with!
I’ve been wanting some sort of crochet hook organizer for a while, and when I saw the Dress My Crafts review on my calendar, suddenly everything fit together.
I spent the better part of an entire day designing the organizer in Cricut Design Space, and I’m super happy with the results! You can find the project HERE, and then follow the instructions are below.
I was VERY impressed with the Dress My Crafts paper. It’s a very sturdy cardstock that cuts beautifully. It folds sharply on score lines and holds its shape well. The finish is pleasing to look at and doesn’t get spotted from fingers. It’s also acid & lignin free which is always a bonus!
Crochet Hook Organizer Supplies
- Crochet Hook Organizer Cricut Project
- Cricut (with regular blade and scorer)
- 15 sheets of 12×12 cardstock
- Mod Podge or white glue
- Tape runner or glue dots
- Thin yarn or crochet thread
- Yarn needle
- 1/2″ Washi tape *optional
- 1/8″ hole punch *optional
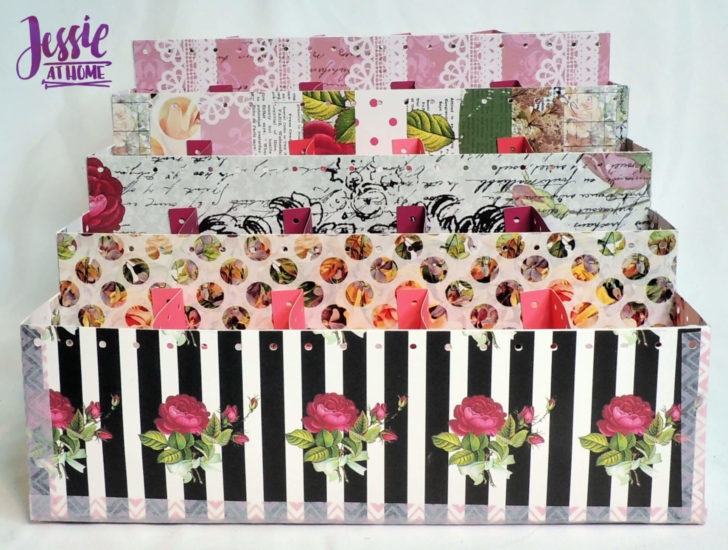
Now let’s get making!! I’ve color coded the various parts in the Cricut project so you can decide what paper to use for each and know which part is which.
- Red – top bin (1 sheet)
- Orange – remaining 4 bins (1 sheet each)
- Yellow – bin dividers (3 sheets, you may want these to be a solid color or double sided)
- Green – sides (2 sheets)
- Blue – front and back (1 sheet)
- Purple – bottom (1 sheet, this could be cardboard if you have a deep cut blade)
- Pink – braces (3 sheets, any cardstock will work, these will not be seen)
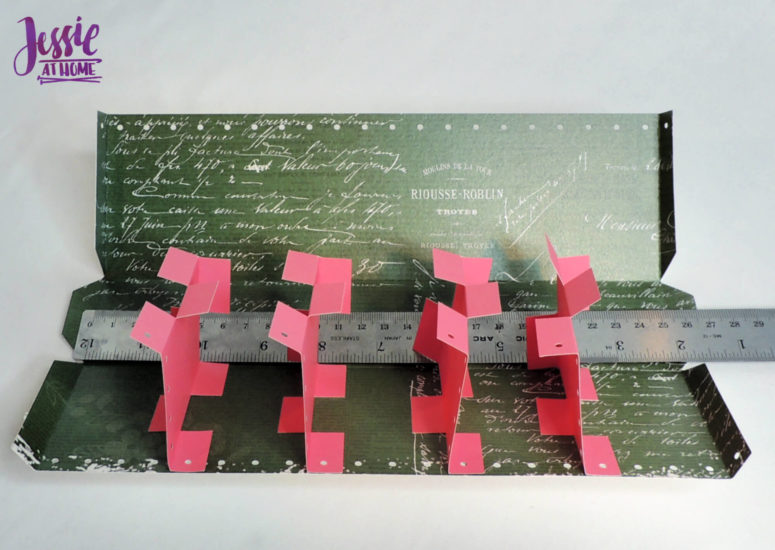
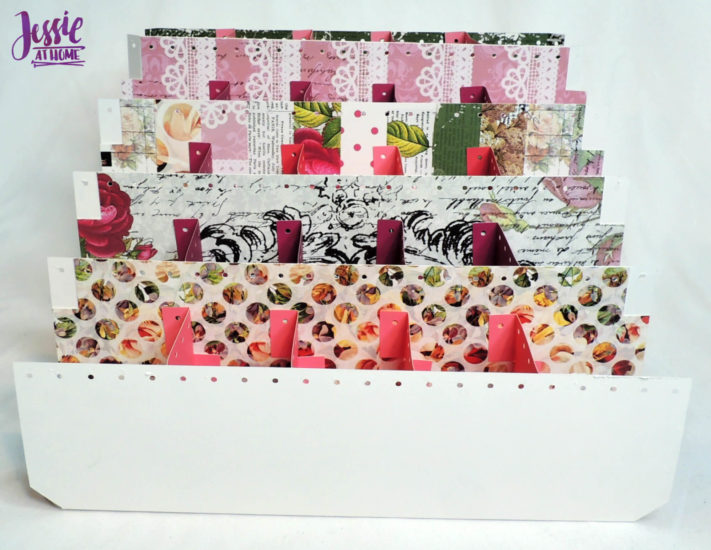
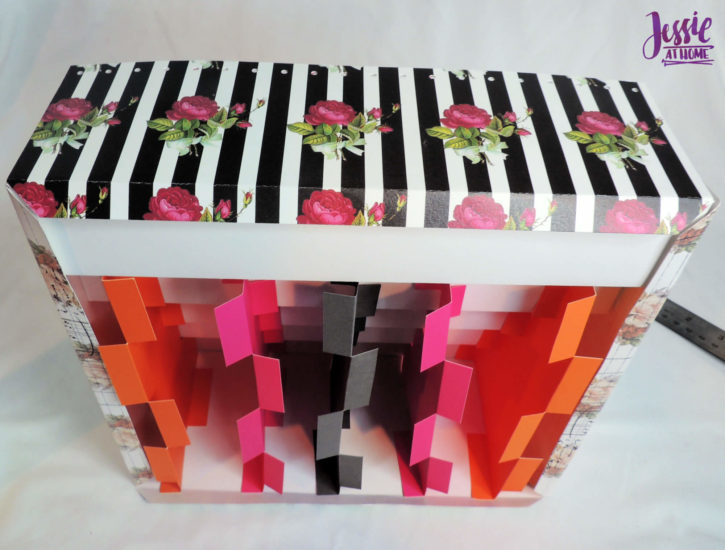
Start with the top bin (Red). Four of the dividers (Yellow) have holes on both top flaps, take those 4 and fold the flaps in opposite directions. Use the tape runner to tape the dividers every 2″ inside the bin.
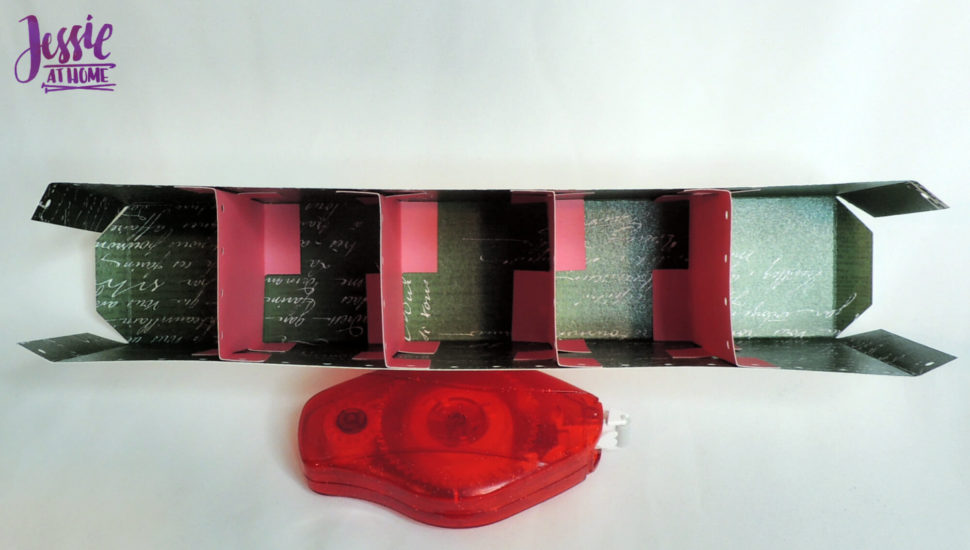
Repeat this step with the other 4 bins (Orange) and the rest of the dividers (Yellow), only one side of each of these bins is 1″ taller then the dividers. Put the divider flap that has the hole in it on the shorter side so it lines up with the hole in the front of the bin.
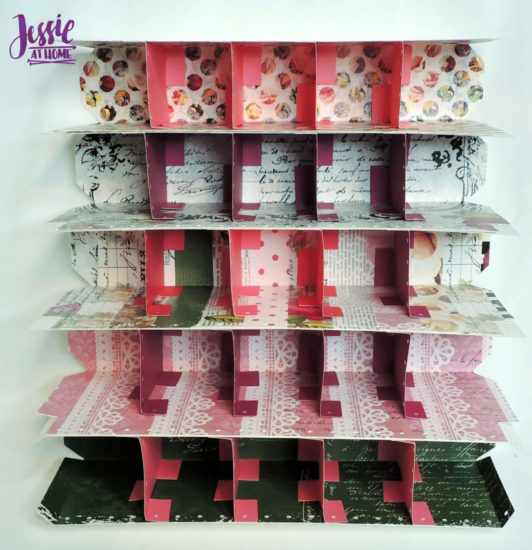
Glue the short front of each bin to the tall back of each bin, placing the short bin (Red) at the top. Line up the holes. This will create a step out of the bins.
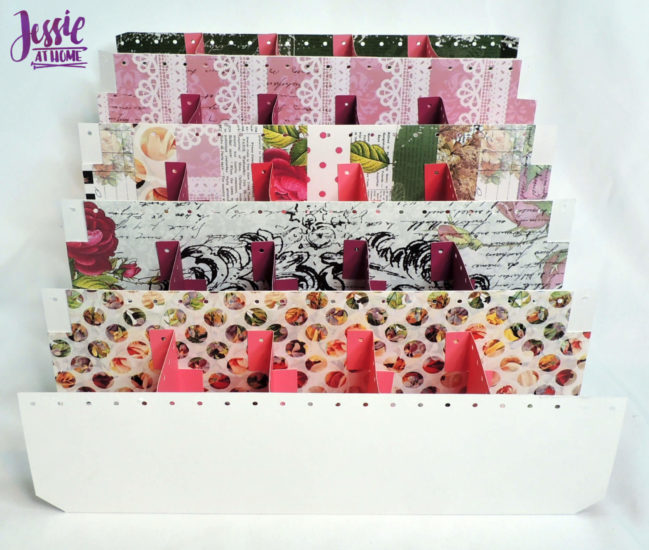
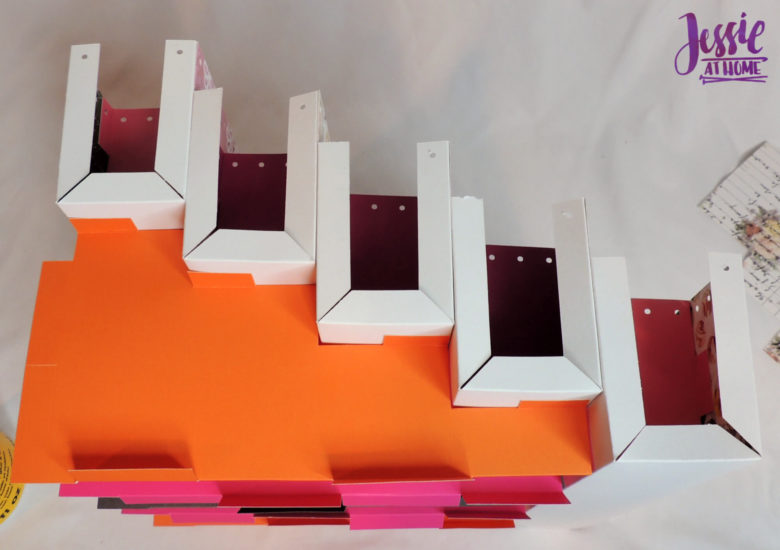
Flip the bins over so the bottom is showing. Take the braces (Pink) and fold all the flaps in opposite directions. Then use the tape runner to tape the top of the steps of the braces to the bottom of the bins. The long side of the braces will line up with the top (Red) bin. The bottom of the braces will line up with the bottom of the lowest bin.
Flip piece over and be sure it stands flat and level.
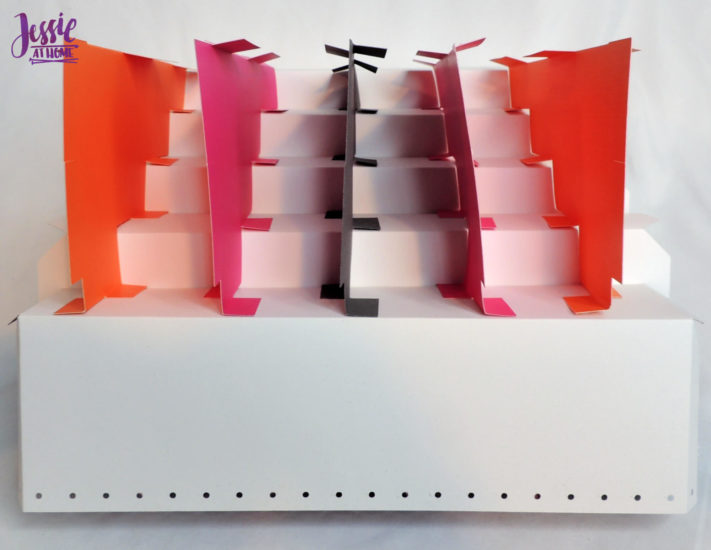
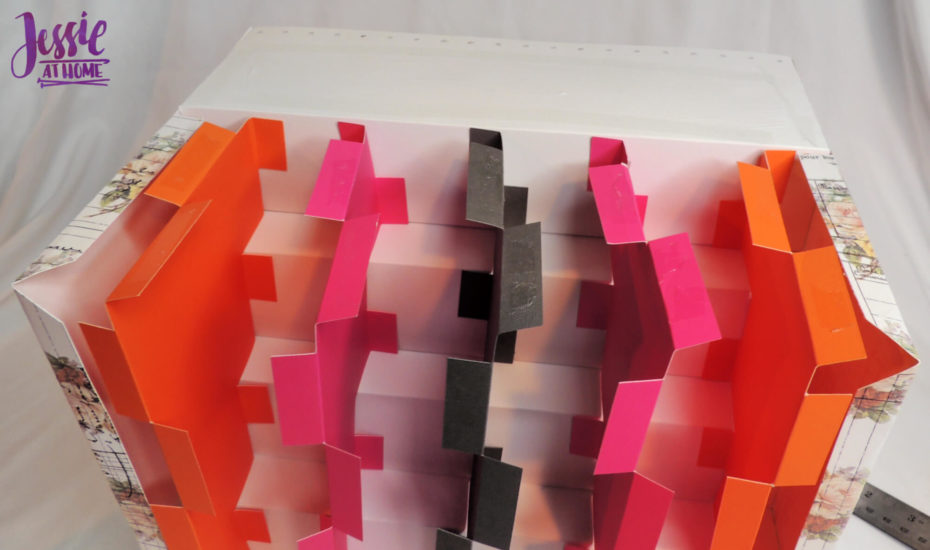
Flip piece to one side and fold all side flaps from the bins to the inside of the bins. Fold the flaps on the side piece (Green) towards the inside. Then use the tape runner on the bin flaps to attach the side piece. Line up the holes.
Repeat on the other side.
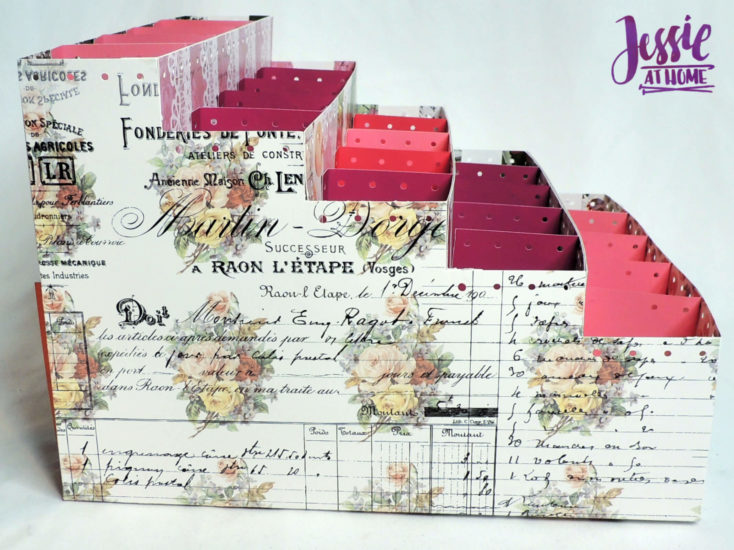
Flip piece so the back is facing up (this may require propping the piece against something). Use the tape runner on all the flaps on the back, then fill in the back of the top bin with Mod Podge or glue. Fold the flap on the back (Blue) then attach it to the back of the piece. Line up the holes.
Fold the flap on the front to the inside. Flip the piece so the front is facing up. Use the tape runner around the edges of the front bin, then fill in the center with Mod Podge or glue. Then attach the front (Blue) to the front bin. Line up the holes.
Use the tape runner along all four sides of the bottom (Purple), then fill in the entire bottom with Mod Podge or glue. Attach the bottom to the bottom of the piece.

Use the Washi tape to seal the edges of the bottom and the sides.
Use the 1/8″ hole punch to punch holes in the Washi tape where it overlaps the holes, or just poke the holes with a yarn needle.
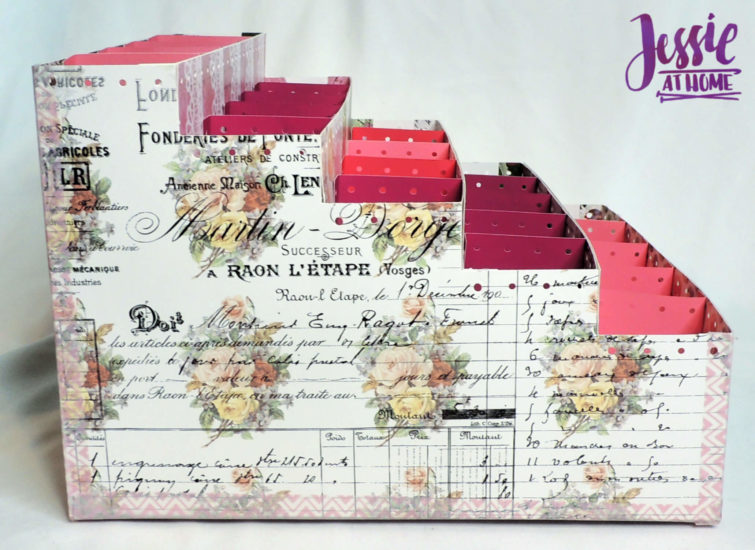
Now use some thin yarn or crochet thread to make a mattress stitch around the tops of the bins and dividers. This will help keep your organizer sturdy, also, it looks pretty!

Ta-da!! Isn’t it just awesome!
[signature]
If you liked this Crochet Hook Organizer tutorial, then take a look at these.