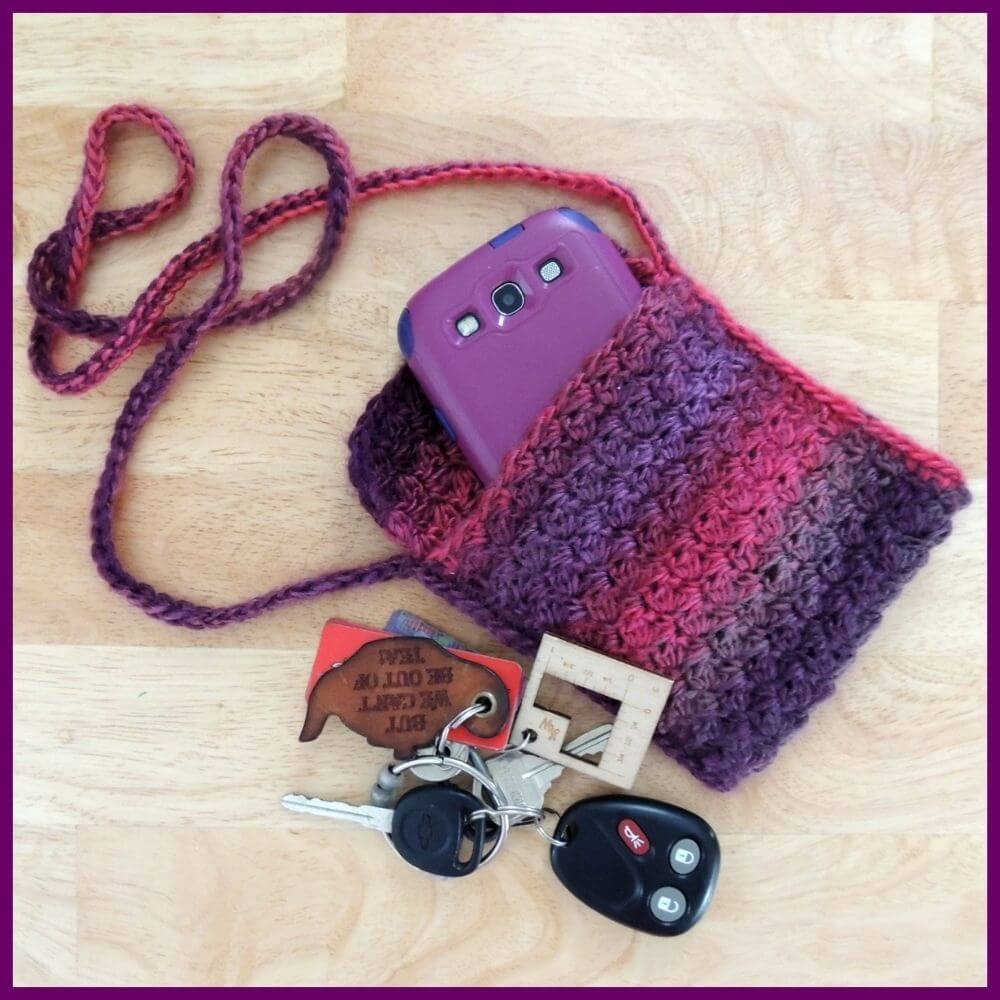
Inside: Quickly & easily complete this little crochet bag for a night out or as a lovely gift. It’s great for the little ones in your life as well.

This Quick Little Bag is just that, and it came about due to a lack of pockets! I was at a trade show and realized most of my outfits for the long weekend had no pockets. I had a big shoulder bag, but my phone and business cards kept getting lost in it.
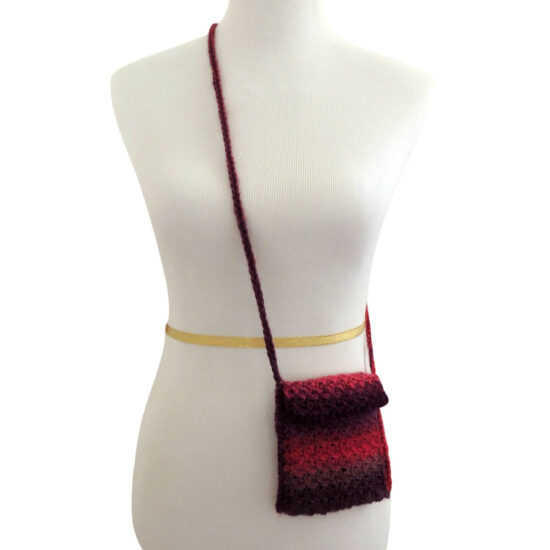
So I grabbed some Red Heart Unforgettable and a crochet hook and whipped up a simple crochet pouch that was the perfect size. Problem solved! I made a new sample for the crochet bag pattern that is a little thinner, longer, and has a flap.
Table of contents
This is a fast project and a wonderful beginner crochet project. In one evening you can create this durable accessory with less than one skein of yarn.
Not only is it great for keeping the items that you need quick access to from getting lost a a big bucket bag or tote, it’s also perfect when you are running errands or heading out and just want to take the essentials.
Make a few to use all that leftover yarn you have from various other projects.
Add a button and toss it in your full size handbag so when you just want to take a few items with you and lock the rest in your car, you are all ready to go.
Quick Little Bag
Crochet Pattern
Easy Skill Level
Designed by Jessie Rayot
Supplies & Stats
Size
5″ square
Yarn
Red Heart Unforgettable: (100% acrylic), Size 4 – Medium/Worsted/Aran, 270 yds / 100 g, (2.7 yds/g)
Partial Skein of Winery (discontinued color) used in sample
Crochet Hook
5.5mm (US I/9)
Gauge
Learn about gauge HERE
16 sts x 16 rows = 4″ in pattern
However, gauge is not incredibly important as it is a bag, not a fitted item.
Other Supplies
Yarn Needle
Yarn Pins or Safety Pins
Stitches and Abbreviations
click on highlighted sts for tutorials
ch – chain
dc – double crochet
sc – single crochet
sl st – slip stitch
st(s) – stitch(es)
( ) – work step in parentheses in indicated stitch
[ ] – work step in brackets number of times indicated
Pattern Notes
- Read through all instructions before beginning.
- From row 2 on, there is no starting chain. Just follow the pattern, it will work out fine.
- The stitch count is at the end of each rnd/row after the period, usually only if the count has changed from the previous rnd/row. {count here}
- Chs and sl sts are not included in stitch counts unless specified.
Pattern
Bag Pattern
Row 1: Ch 19, sc in second ch from hook and each remaining ch across. {18 sc}
Row 2: Turn, * skip 1 sc, (sc, dc) in next sc, repeat from * across. {18 sts}
Rows 3-44: Turn, (sc, dc) in each sc across.
Fasten off then weave in ends.
Finishing
- Fold piece so the bottom of piece (row 44) lays over between rows 6 and 7, leaving a 6 row flap outside the folded section. Place a pin or two on each side to keep it in place.
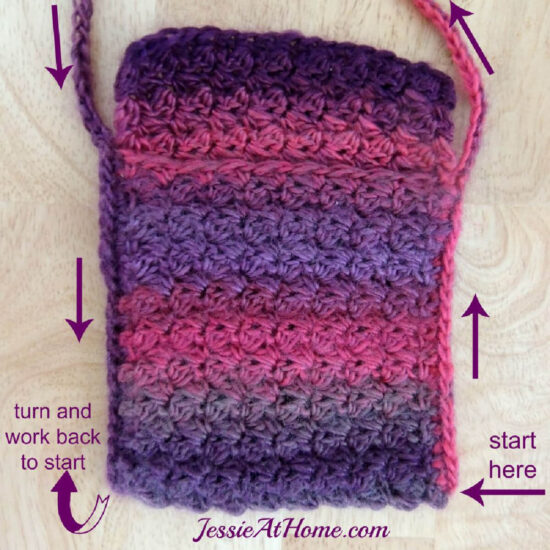
- Attach yarn to one of the folded corners on the bottom of the bag, 20 sc evenly up the side of the folded section of the bag do not place any sc on the unfolded flap sections, ch 150, 20 sc evenly down the other side of the folded section of the bag. See the image below for clarification. {190 sts}
- Turn, ch 1, sl st in each st made in previous step
- Fasten off then weave in ends.

Enjoy!

If you enjoy this free crochet pattern, please consider buying some of your supplies from one of these affiliate links. Thank you.
Did you enjoy what you found here at Jessie At Home? Then sign up for my newsletter and like my Facebook page, so you’ll get all the updates on new tutorials, other posts, sales, and coming events.
If you have any questions, want to share pictures of your work, or just want to chat with Jessie and other crafty individuals, than join my Facebook group.

© Copyright 2015 Jessie Rayot / Jessie At Home LLC All my videos, patterns, charts, photos and posts are my own work, so you may not copy them in any way. If you want to share this information with someone, then share the link to this post. If you want to share on your own blog / website, then you may use the first photo in this post and link back to this post. Also, you may not give away printed copies of this post.


Cute little bag- love the stitch you used. Pinned to my crochet board.
I don’t understand this pattern. How do you start with 18 stitches, then put a sc and dc in each and still have 18 stitches? Can you please clarify?
The repeat starts from the * so you skip one, then put a sc and dc in the next and repeat all of that. You still end with 18 sts.
Because your putting 2 stitches in every other stitch so it still ends up being 18 stitches in the end.
You skip the dc and put 1sc and 1dc in each sc.
are we supposed to chain one and turn or at least turn for each row of the base piece??? or is it worked in a spiral around or what? very confusing! thanks
The pattern is worked in rows, so you turn at the start of each row. There is no starting chain, it’s not needed when the first st is a sc.
Thanks Jessie. I’m making a few of these for stocking stuffers this year. My original bag gets so many compliments and questions about the pattern that I know the gifts will be a big hit.
Keep sharing your great work!
I understand the repeat from row 2, but rows 3-44 don’t have an *. It just says “(sc, dc) in each sc across” which would be two stitches in each sc. That is going to increase a lot of stitches. I just really don’t understand this.
You (sc, dc) in each SC (Single Crochet) across, so that’s every other st.
I forgot to ask about the picture with the arrows indicating where you start the row of sc along the folded edge of the bag: It looks like you have embroidered 9 or 10 stitches along the row where you have folded the flap. Am I right or just seeing things?
There is no embroidery in this bag, so I think you may be seeing things.
Call me geri-atric then =)
I made this handy little bag and it came out well. I had a little “portable pocket” at my condo and wanted one for at home. So many of my clothes seem to have no pockets, and I need something for my phone and.. whatever. If I can figure out how to attach a picture of my finished bag I will do so. Thank you Jessie! :0)
There’s no way to attach a picture here, but you can make a project page on Ravelry and link it to the pattern, or you can join my Facebook group linked at the bottom of all my patterns and post a picture there. I’m so glad you liked the pattern and it worked out well for you! 🙂
Just finished this for a gift for a good friend. Super happy with how it turned out! I used a larger hook and two strands of yarn, one light purple and the other a bit darker. It’s so cute! Thanks for the pattern and your hard work!
I modified your pattern and made it into a Quick Little Twin Compartment Bag! My BF asked if I could make a bag like one I showed her (your pattern) and she wondered if I could add another compartment–one for her phone and the other for a notepad and pen. I made the pattern and crocheted a separate square in the same yarn and whip stitched that square to the front of the bag. Looks seamless and my BF loves it like crazy. Just make sure the measurements are the same for both the separate square and the front half of the bag (do not include the flap).
Sounds cool!!
Thank you so much for the fun and easy pattern, especially thank you for posting it directly to your site and not just as a downloadable PDF since I can’t download PDF on my phone and just wanted access to a pattern easily on the go. You now have another follower!
Hi love the pattern, will like to make it double, can you tell me how many stitches to start with, not very good at doubling patterns. Thanks.
Just start with twice as many stitches.
thank you!
Hi Jessie, your little bag is so cute! I wondered if you would mind if I made some of your bags to sell at a local craft fair? Of course I would give credit to you for the pattern! Thanks in advance 🙂
Sure! Good luck!
Thankyou jessie.
Thanks for the pattern. I made one with tweed wool and it looks good.
I have made many of these for gifts thanks for the pattern
several years ago I dreamed up the phone pouch for a friend because she kept losing her phone. I’ve made a ton of them and now phones are getting bigger I’m doing that too. Great way to use up left over yarn.
Does this bag need a liner? I have made pocketbooks in the past, and they stretch. Just was curious if this pattern is different.
I just put my phone and my keys in it and maybe some money or a debit card, so it’s not full of a lot of heavy stuff. I haven’t had a problem with no liner. It stretches a little, but not enough to bother me. Of course, you can put a liner in it if you would like.
Hi Chery I’ve made half a dozen of these little beauties and none has a liner nor needed one. I’ve used cotton blends and acrylic worsted weight yarns and haven’t had any issue with stretching. Just use a hook that gives a tight close stitch pattern and you’ll love the result!
Your row 3-44 needs to be corrected to read better. Maybe skip 1st st (dc from previous row). Then do pattern stitch in each sc. Once I read the other comments it finally made since. Jean
This a great pattern thank you. I have made several of these bags with different wool and needles. I love the stitch and its so easy to make. I have added my own touches to this bag. Thank you so much for a cute little bag and easy instruction.
Awesome! Thank you. 🙂
Thank you for this pattern! I just made one yesterday….it is just what I was looking for! I needed something for the same reason you created this. These work up so fast and are so cute I am going to be making several for gifts and for the little girl Operation Christmas Child boxes! I may add a flower or button to dress it up a bit. ?
I have almost finished this for my daughter. I just love it! But I’m really confused by the very end. I understand single crocheting along the edge, chaining to make the strap and single crocheting down the other edge; but my question is on the very last instruction, why do I need to slip stitch up the second edge? Didn’t I just finish that side with single crochet? Shouldn’t I just clip it and weave in the end?
You slip stitch ALL the way around, that includes over the strap, it makes the strap thicker and more sturdy.
Help please, during Fold & Join, how do I “Attach yarn to one of the folded corners”? Do I just tie a knot at the corner?
I usually make a slip knot and pull it through.
saved this awhile ago and now that I am retired I wan’t to make a few of these and give them as gifts. First I had to find the “directions”, I only had part of the page, I did find “I am here lol” then reading all the comments I conquered my question on the count of the stitch, thanks.
I’m glad you found it! Have fun with it. Feel free to join my Facebook group linked at the bottom of the pattern and show off you pictures! We love seeing what you make, even if it’s not with one of my patterns. 🙂
I have been crocheting all my life, I am 71, and I just can’t figure out how to stop the rows from curling. The fist row is a chain but when you start adding stiches the bottom is real tight and you just get a ripple or curl and the bottom does NOT stretch to make it lay flat. What am I doing wrong??? HELP!
Try making the starting chain with a larger hook if it’s too tight.
Thank you! Is there another place that the pictures of this are posted? It just tells me pictures cannot be loaded. Thanks again!
I’m in the process of updating old patterns and this is in my current batch, so it should be good in the next few days, but in the meantime, you can check in the Ravelry listing.