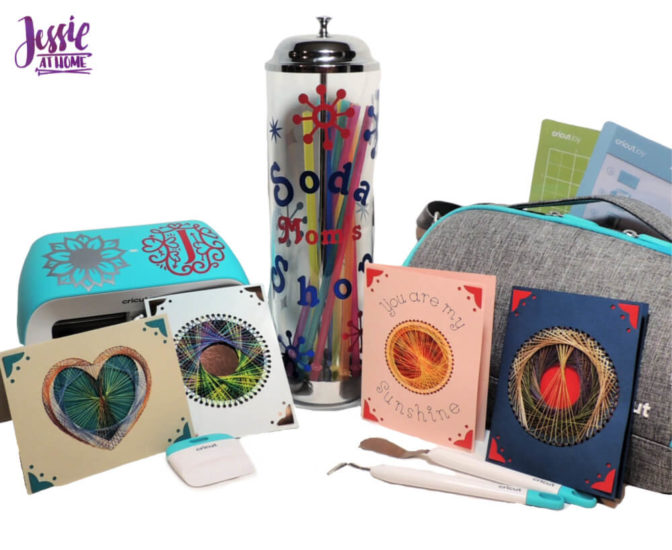
When I opened my Cricut Joy and all the goodies that came with it, I was inspired the most by the insert card sets. I wanted to make cool “Jessie” style greeting cards, and string art greeting cards eventually come into my head. Then I also remembered my straw holder I keep saying needs some love. And the little Joy itself, it wanted some personalization too! I see miles of crafting in my future.
This is a sponsored post written by me on behalf of Cricut. All opinions are 100% mine.
OK, this is really a post about THREE things I’ve made with my Cricut Joy in the short amount of time since I first plug the little cutie in! However, I may have gotten a bit carried away with one of those things (string art greeting cards…) and gone a little overboard.
So, before I get to the wonders of the string art greeting cards, let me tell you a bit about my new Cricut Joy and some of its super cool qualities!
Why I fell in love with the Cricut Joy.
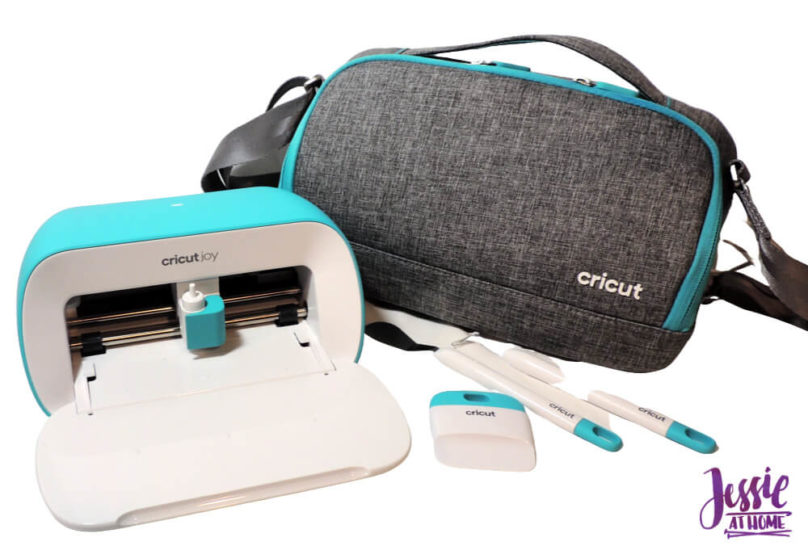
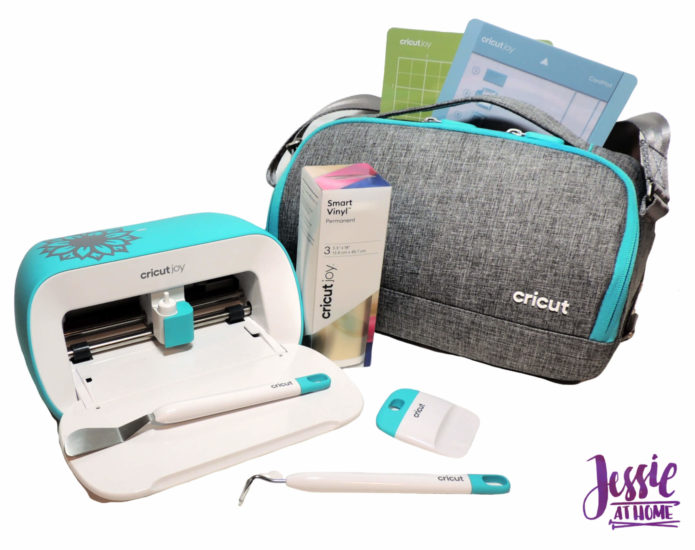
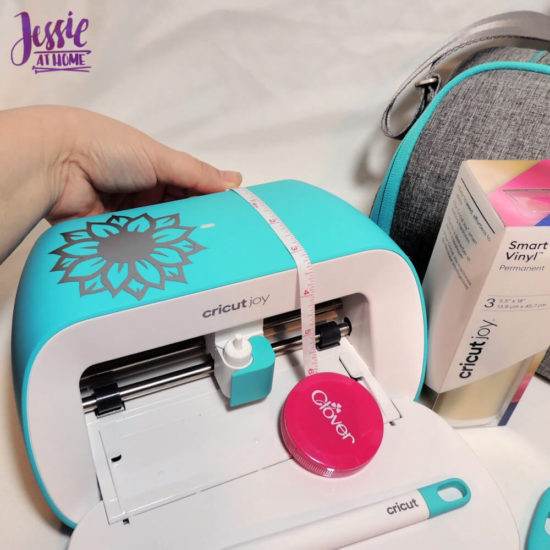
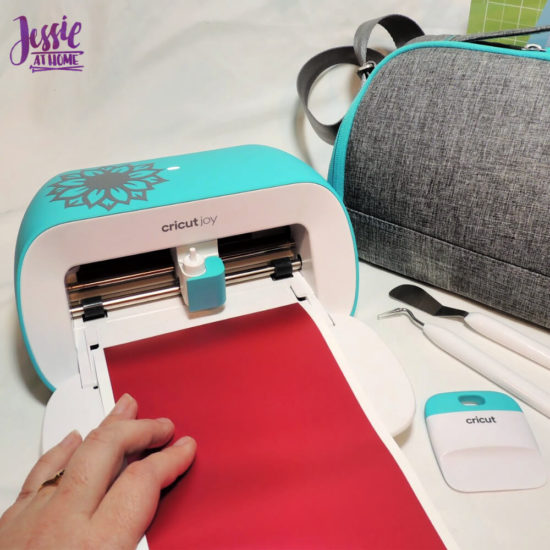
The Cricut Joy is the smallest smart cutting machine ever! I have the carrying case for it, and it’s smaller then my purse. It’s super light as well. I can take my Joy with me to all the various rooms in my house, and if I ever leave my house again, I can easily take the Cricut Joy to craft groups and play dates.
It doesn’t even NEED a mat for so many of the amazing creations it can make. There’s a full suite of brand-new materials that do not require a mat, meaning less to buy, fewer steps, and faster results. Do you want to hear something super-nifty? The Cricut Joy Smart vinyl comes in extended sizes, with up to 20’ repeated cut capability, with NO mat! I wish those decorative wall borders were still in style!
Just like the rest of the Cricut family of cutting machines, the Cricut Joy can use a variety of tools. You can quickly and easily switch from a cutting blade to a pen meaning you can quickly and easily personalize anything with one cut and one color, in 15 minutes or less. My mind is racing with ideas. I want to make All. The. Things! And with the Cricut Joy, I can do it in record time.
So, let’s get making!
Personalize it!!
As with other Cricut machines, the Cricut Joy comes with a small “Getting Started” booklet that guides you through your first project. In this case I had a piece of silver Smart Vinyl and there were a few images to choose from. I chose a lovely flower.
My first Cricut Joy cut was super simple, and I loved that I didn’t need to use a mat. Once I made the cut, I removed the outer vinyl and then weeded the inside pieces with my Cricut weeding tool.
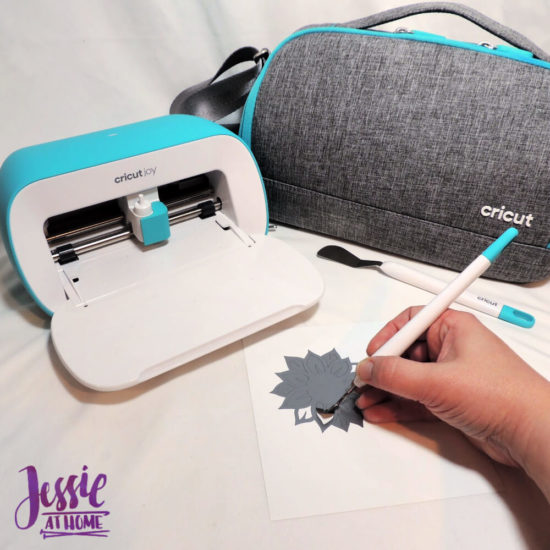
Transfer tape is your best friend when working with vinyl. Cut a piece just a bit bigger then your design and press it firmly on top of the design. Then peel the backing off so the vinyl design is attached to the transfer tape.
Carefully place the design where you want it and then press it firmly. Slowly pull the transfer tape off parallel to the surface. This will help assure the design stays on the surface, not the tape.
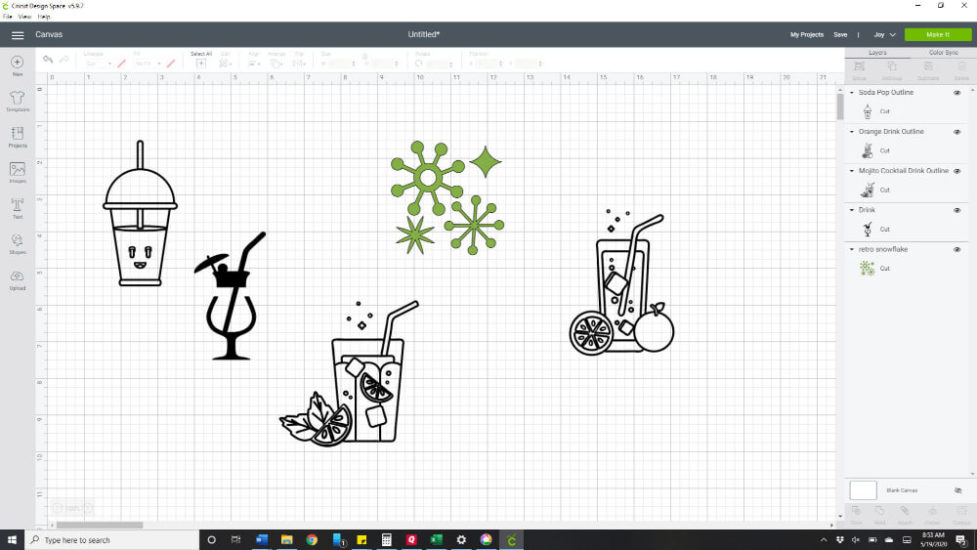
Now I wanted to add an initial on the other side of my machine. So let’s talk about how to use Cricut Design Space with your Cricut Joy. First sign in to Design Space, then choose your machine in the top right corner.
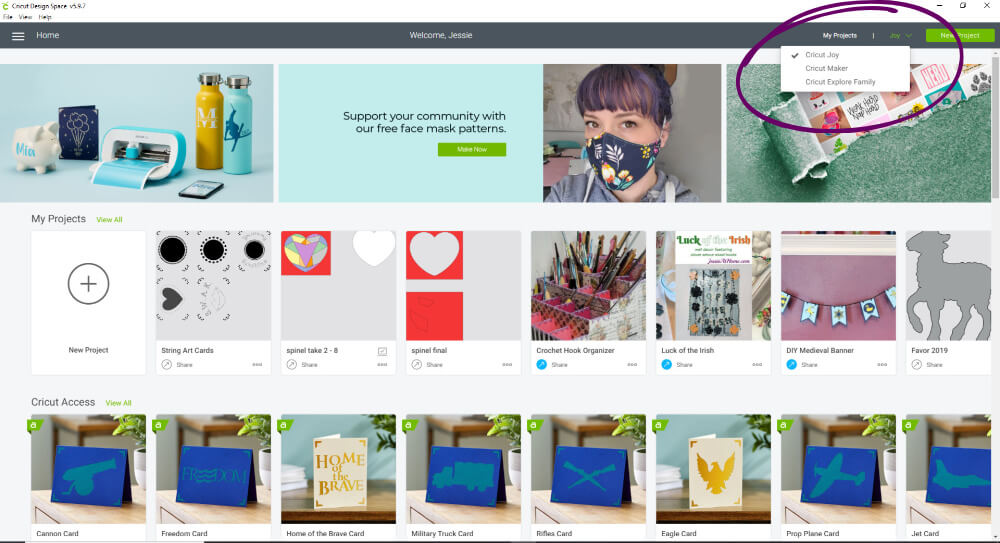
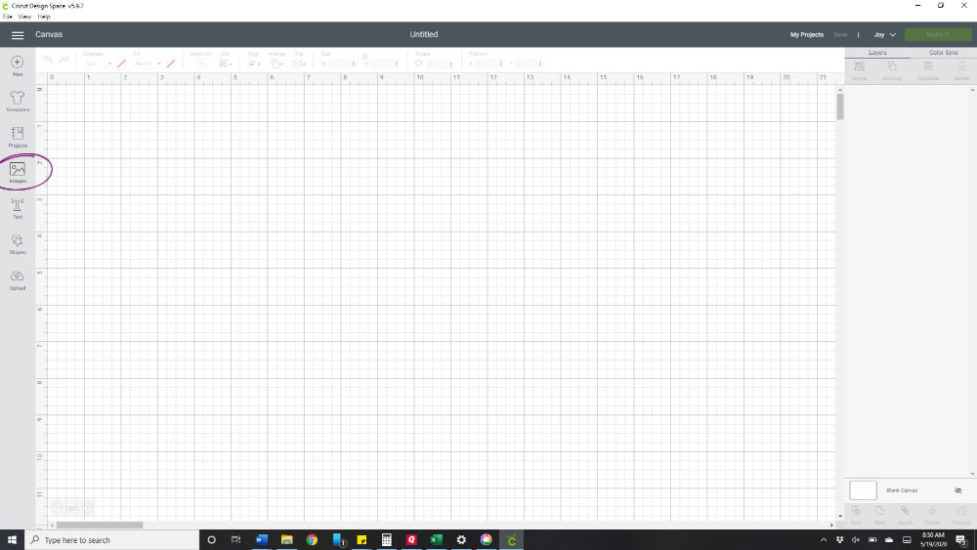
Start a new project, then choose “image” from the left side.
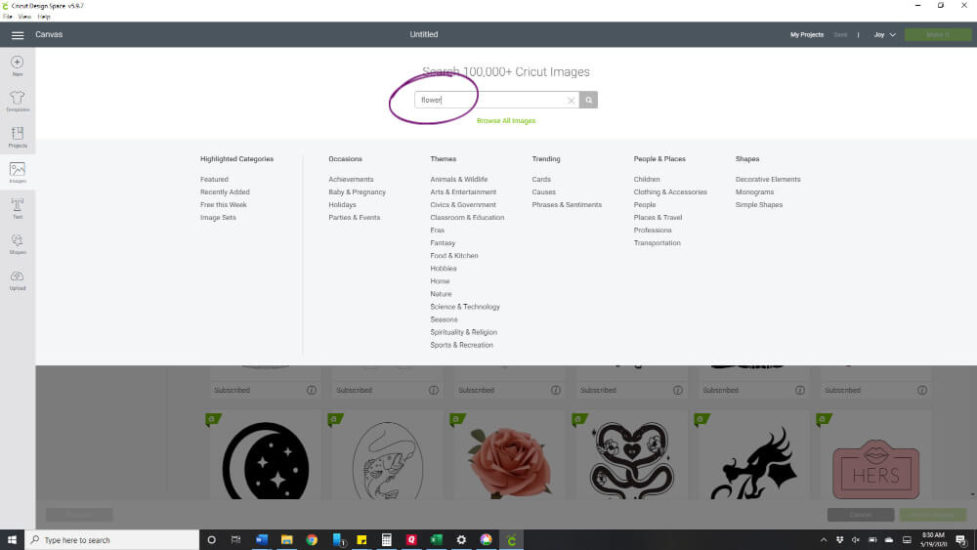
Type in your search. I started with “flower” to show you how to find the first image I used.
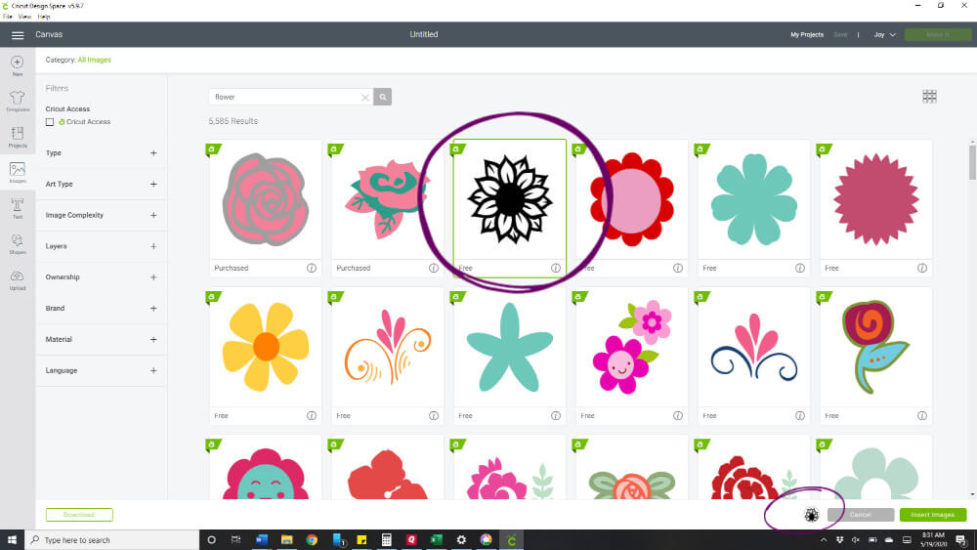
Click on the images you may want. They will appear in the bottom bar.
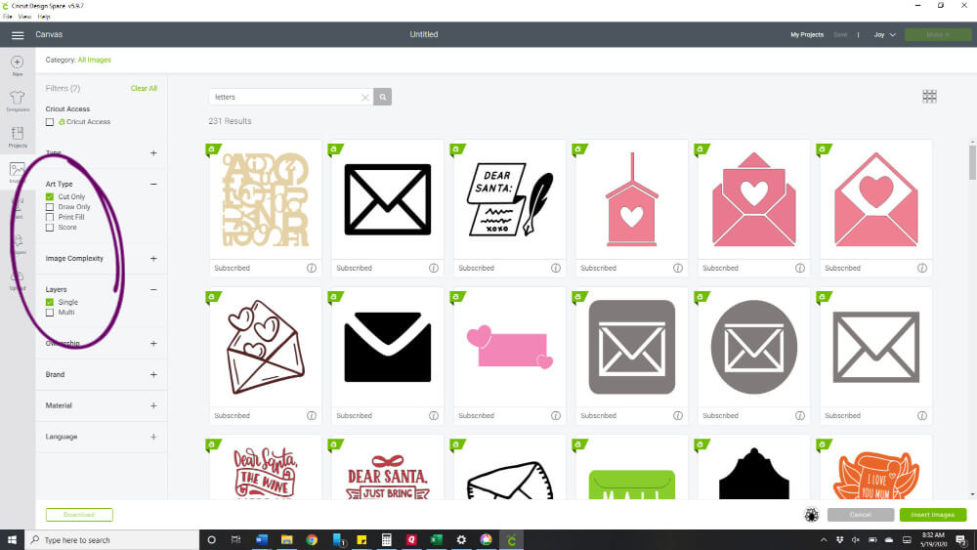
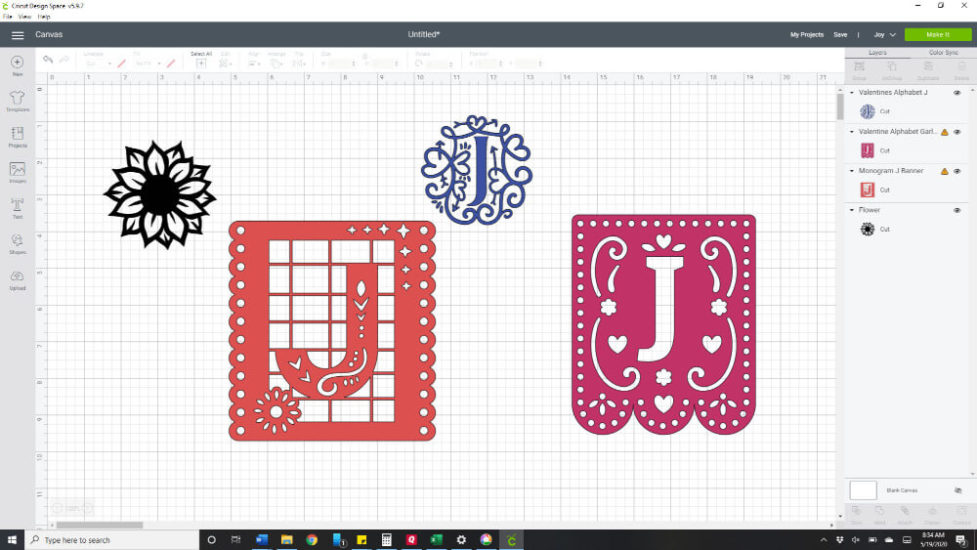
Filter your search on the left menu. I switched my search to “letters” and then chose single layer and cut files on the left menu, as that fit what I was looking for.
Keep clicking on images that you like and they will continue to show in the bottom bar. Then click “insert images” at the right end of the bottom bar. Now it’s time to choose which image fits your needs.
As you can see below, I picked several “J”s. I stared at the screen for a bit before choosing my favorite. To get rid of those you don’t want, you can either click on the images on the canvas or in the list on the right. Once you’ve selected an image you don’t want, you can choose to delete it from the top of the right menu.
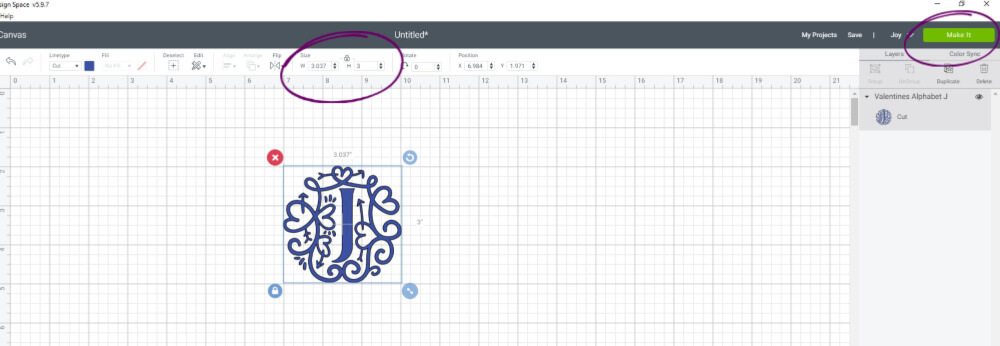
Don’t forget to measure the surface you’re applying your image to!
Click on your image, then adjust the size of your image as needed in the top bar. Once you have the size as you want it, click on “make it” in the top right corner.
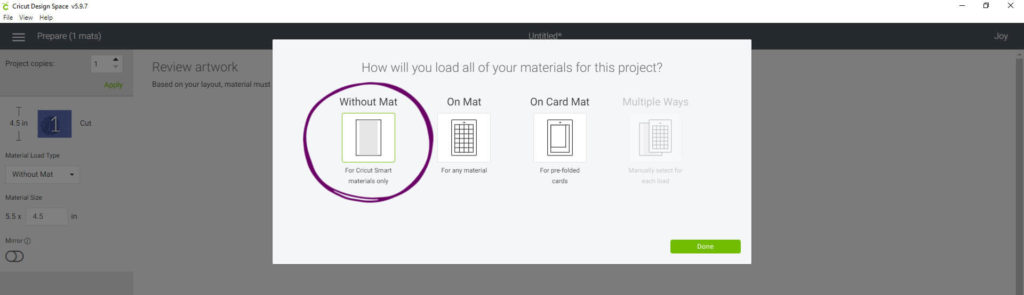
From here you just keep following the prompts, it’s super easy! With the Cricut Joy you have to choose your mat (or no mat) as you’re getting ready to make your cut.
Check this out! It even tells you how long the cut will be, isn’t that the coolest?
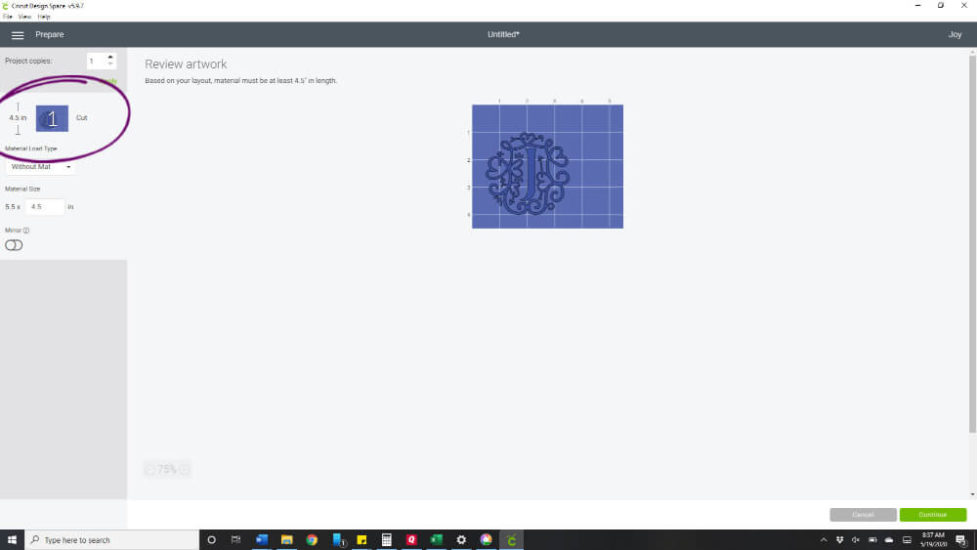
Be sure to choose the material you’re using. Usually the material will be on the first screen, but sometimes Design Space doesn’t guess correctly. In that case you can choose “browse all materials” to the top left of the screen and find your material.
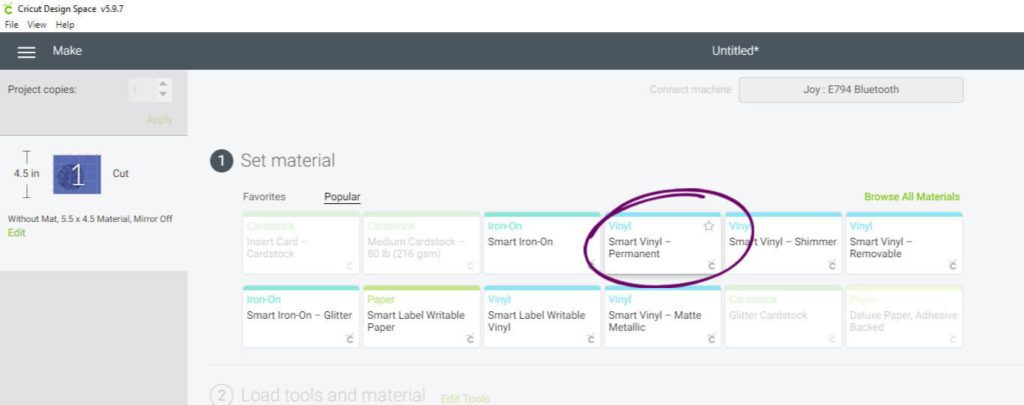
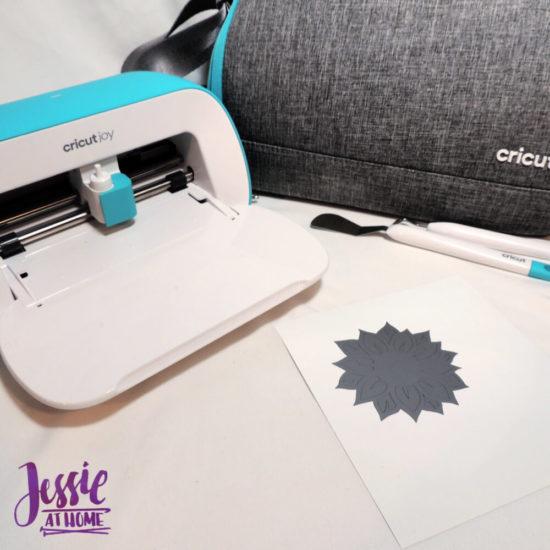
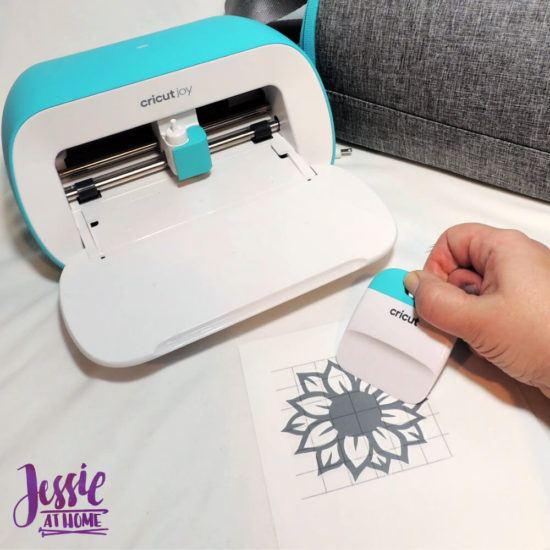
Look! No mat!
Once the cut is done, cut it off the end of the vinyl. Peel outside vinyl then weed image.
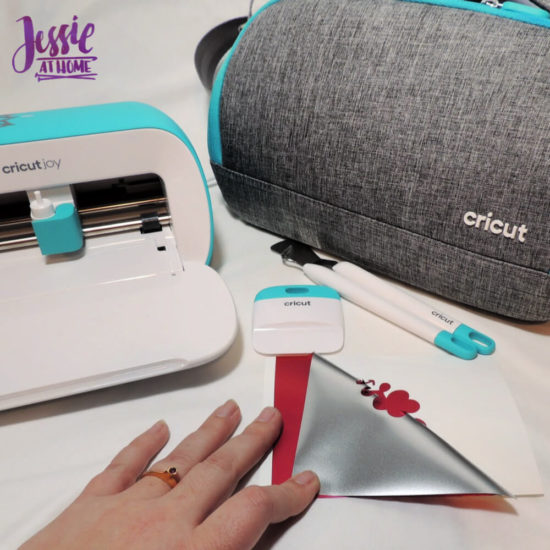
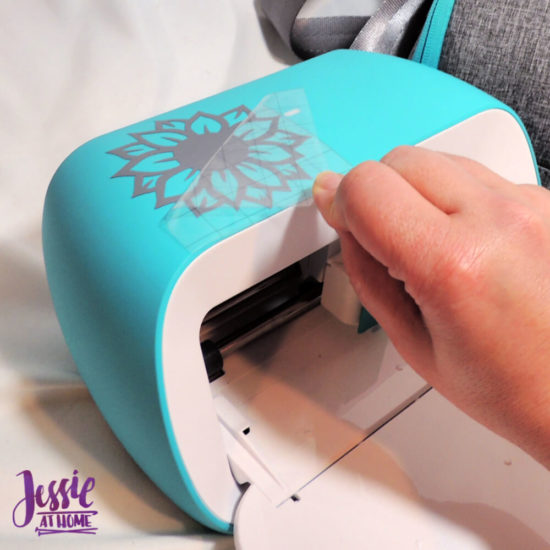
Use transfer tape once again to apply the image. Did you know you can use transfer tape several times over? Keep the backing when you peel it off, then stick it back onto the backing after you’ve used it. Just keep using it until it isn’t sticky enough anymore. Nifty!
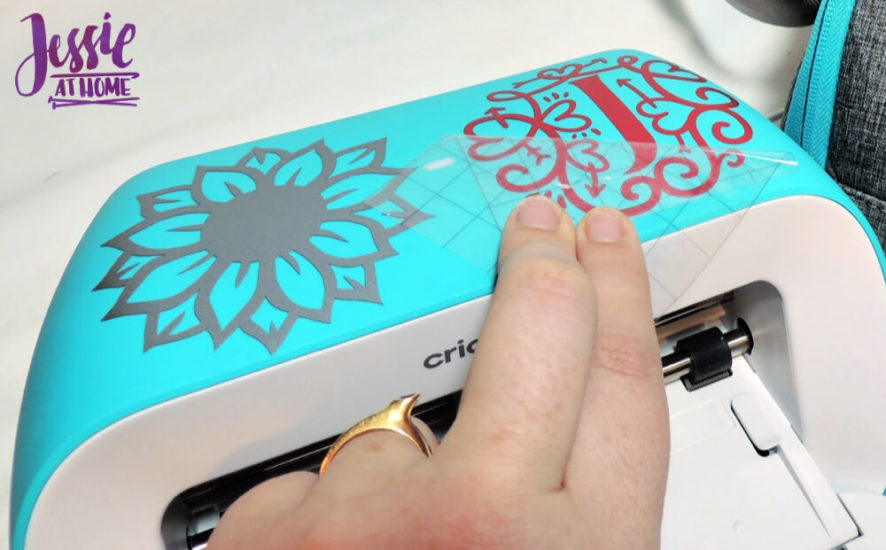
Isn’t my little Cricut Joy even more adorable now?
From plain to perfect!
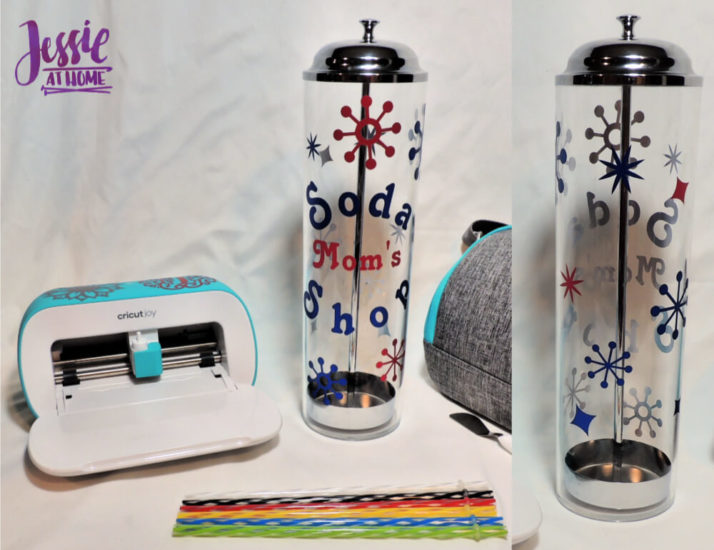
So quite some time ago I bought an old-fashioned straw dispenser and some reusable straws. The girls and I love making fruit and yogurt smoothies, so the straws get lots of use. I’ve been meaning to decorate the straw dispenser, but I hadn’t gotten to it yet.
So many ideas to type into the search bar – drinks, soda, retro.
I decided on the retro stars. I love the duplicate button. I duplicated the stars 2 times, and changed the sizes so that I’d have a variety. Then I choose “text” in the left bar and made 3 separate lines of text. I used the arch tool to round the top and bottom words.
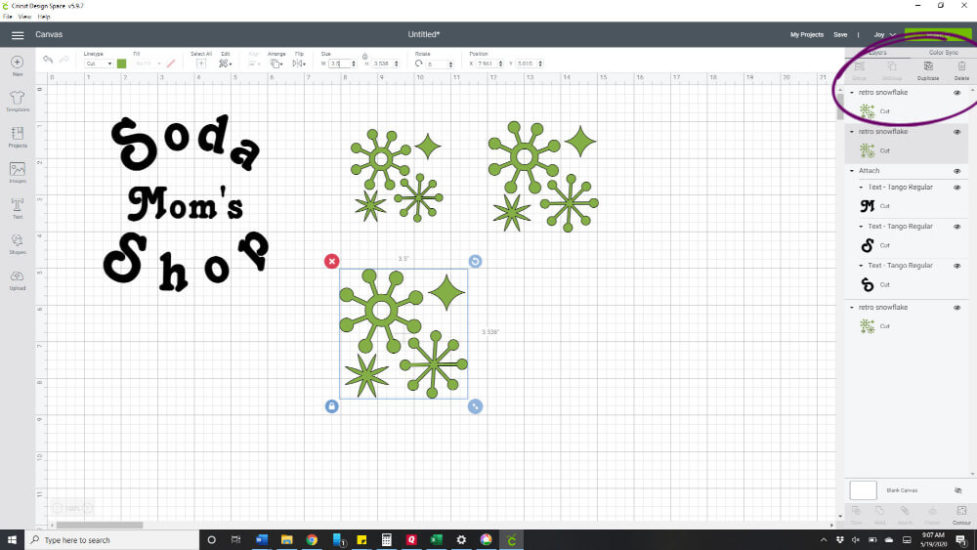
I wanted “Soda” and “Shop” to be the same color, and I didn’t want to have to try to line them up, so I attached them. It’s easy. First just click outside the images you want to attach and then drag a box around all the images. Once you’ve done this they will be places in a neat box (middle image below), then you can choose “attach” in the bottom of the right bar. Now they will all cut out together with the proper spacing.
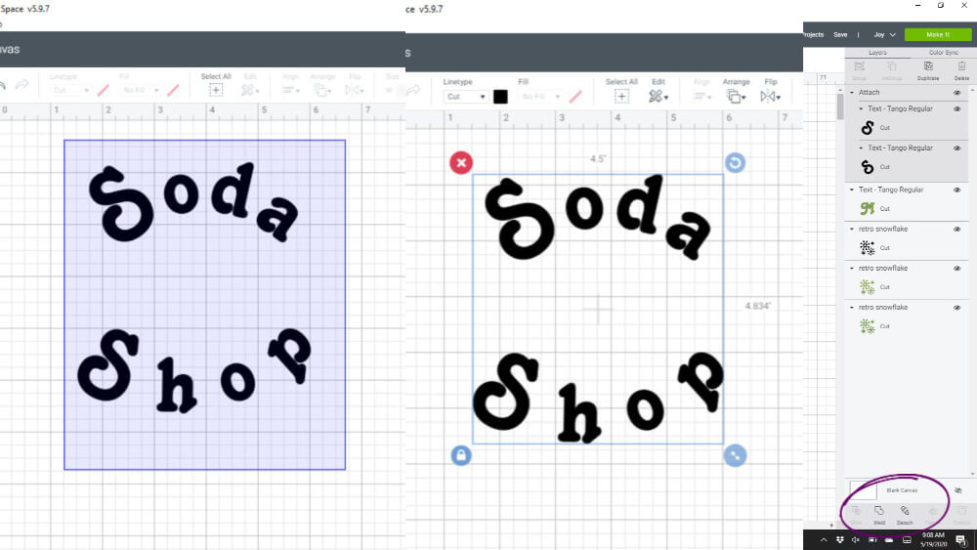
I used 2 colors of Smart Vinyl for my creation. I made the images and text in Design Space 2 colors as well so that they would cut properly. If you have an image or text in multiple cuts, it’s always a good idea to layer images before applying. I had to do that for “Mom’s Soda Shop. I used transfer tape to remove “Mom’s” from its backing and then stuck it to the “Soda Shop” backing. Then I removed the transfer tape so I could use a bigger piece for the entire image.
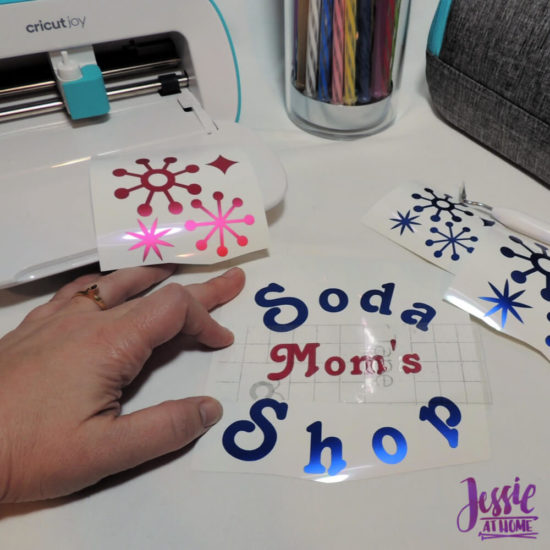
Now I used transfer tape and applied all the designs to the straw dispenser. If your kids are anything like mine, you understand why I decorated it all the way around. I’d like to say I live in the picture-perfect Insta-ready blogger house, but reality is, nothing stays where or how it should. So rather then fighting it, I made sure my straw dispenser would be fabulous even if the kiddos put it away backwards.
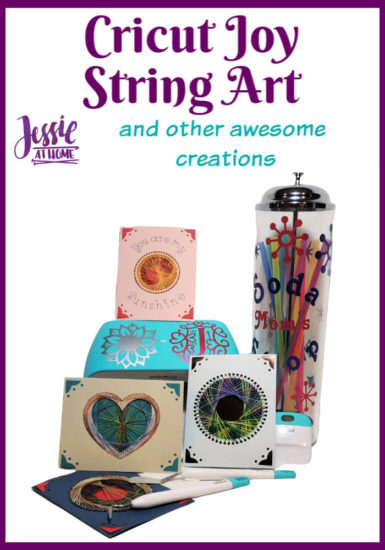
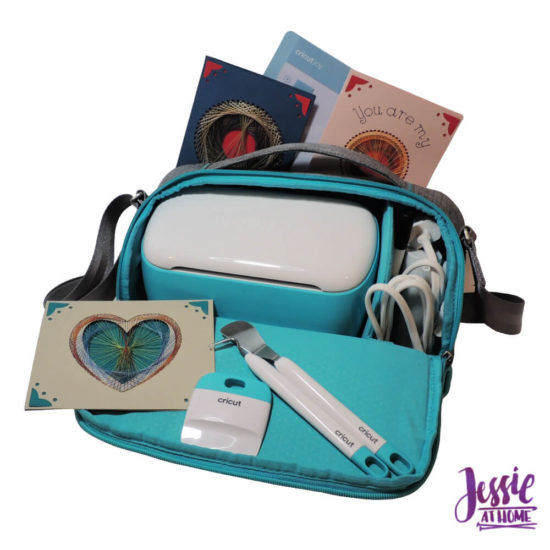
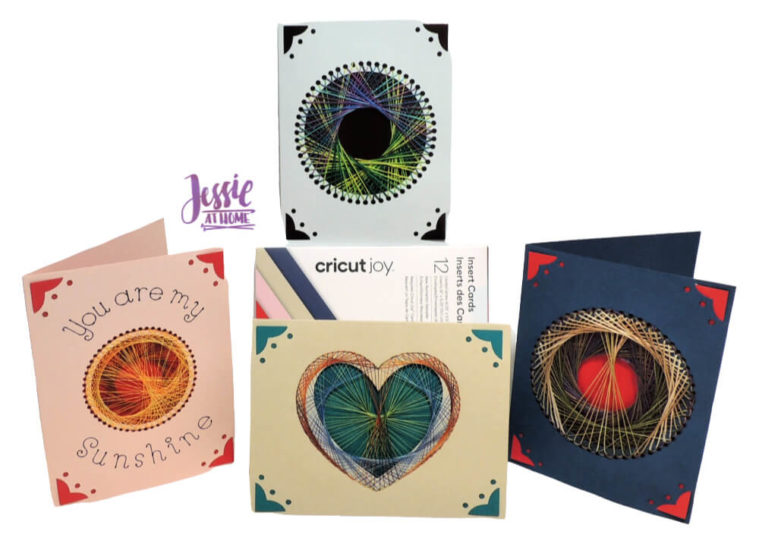
String Art Greeting Cards – my newest obsession
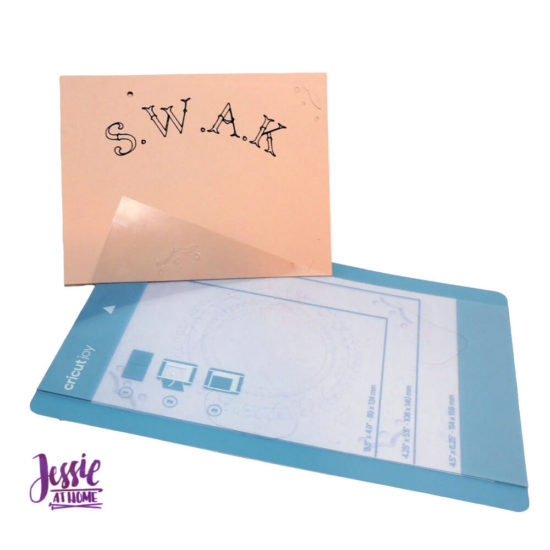
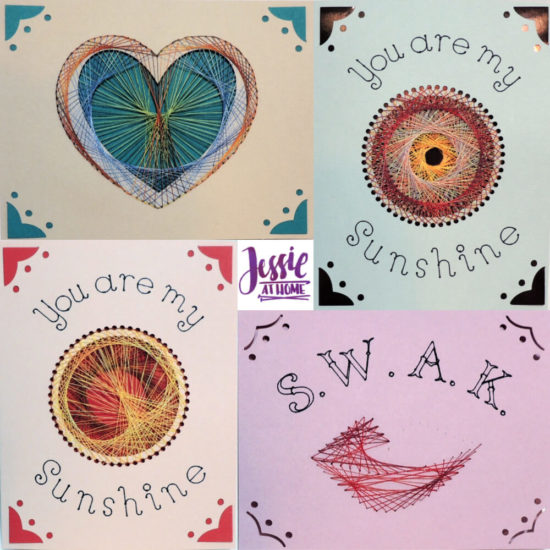
I’m officially obessed with making these string art greeting cards, they’re so much fun! There are plenty of awesome cards to make with your Cricut Joy in the Cricut Design Space, but I had string art in my head, so I made string art! I saved the project on Design Space, so you can make these cards HERE.
The cards will cut one at a time. If you’re making the Sunshine or S.W.A.K. cards be sure to pay attention to the screen. You’ll have to put in the pen for the writing first, and then switch to the cutting blade.
The card mat allows you to slide the back of the card under the cutting surface and then stick the front of the card to the top of the cutting surface.
Don’t forget to remove the mat dust cover. I completely forgot with my first card. The letters worked fine, but as soon as the cutting started the card started sliding all over the place. It took me a moment to remember the “cancel” button. It was pretty funny!
Once I actually used everything properly, it all worked wonderfully! I made several cards and have been enjoying weaving thread through them to make all sorts of lovelies. The Cricut card blanks come with inserts that fit in the cut corners to give the designs a contrasting background.
Below are instructions on how I strung a couple of my cards.
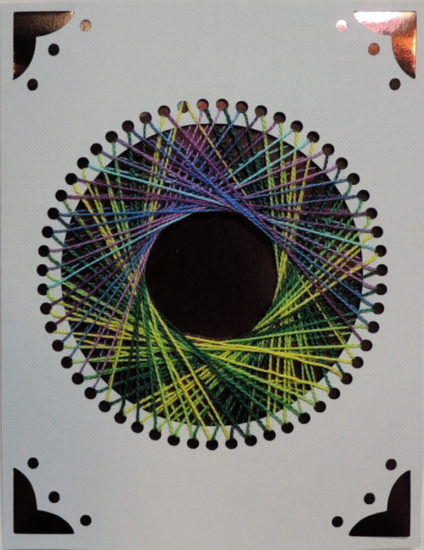
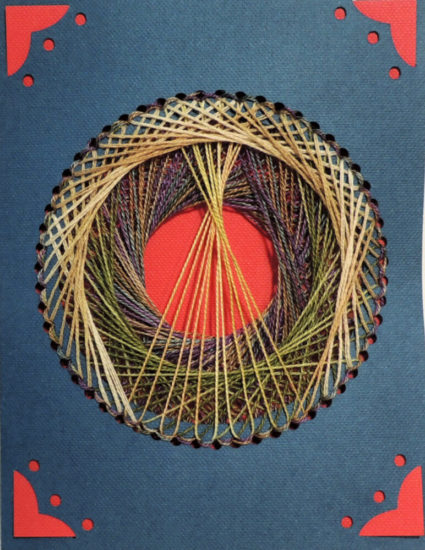
Simple Circle
The card seen below and the “You are my Sunshine” card both have 55 small holes around the center hole. On the inside of the card you can number the top hole 1 and then continue numbering counterclockwise around to 55. This way the numbers will go clockwise from the front. I only numbered every 5th hole, but you do you!
This first design is so easy. First thread up a long strand of embroidery floss in a needle, and tape the end just above hole 1 on the inside of the card. Come up through 1 then down through 20. Next come up through 2 then down through 21. Keep going in this manner, moving over one hole clockwise with each pass, until your next pass will be the same as the first.
When you need to add more thread, just tape the ends to the inside of the card.
For the card below I switched colors towards the end for a little accent. Once done, tape the yarn end down and slide in the card insert.
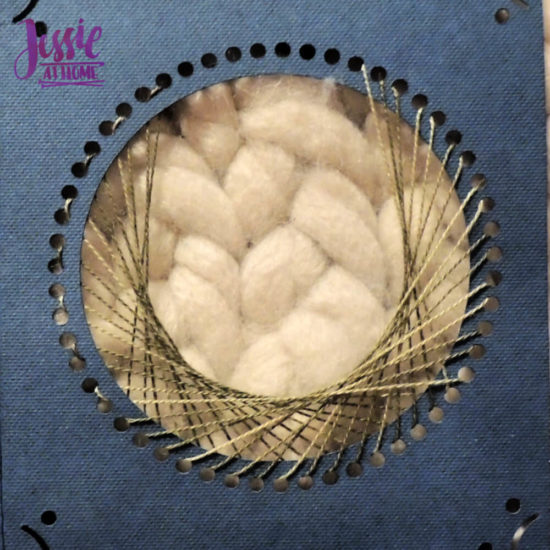
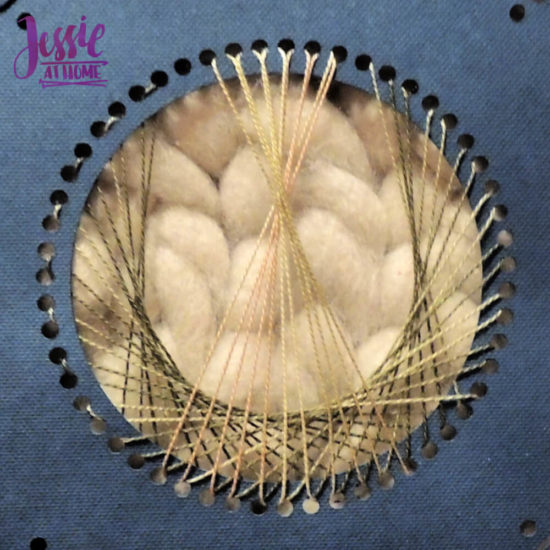
Super Circle
This card has a few layers. Prep the same way by numbering 1-55.
Super Circle String Art First Layer – Come up 4 then down 20. Next up 21 then down 5; up 6, down 22; up 23, down 7.
Keep going in this manner until you come up 35 then down 19. Tape thread and continue on to next layer.
Super Circle String Art Second Layer – This layer is a bit hard to explain, so I’m going to list all the ups and downs:
3, 33; 32, 3; 2, 31; 30, 2; 1, 29; 28, 1; 55, 27; 26, 55; 54, 25; 24, 54; 53, 23.
Tape thread and continue on to next layer.
Super Circle String Art Third Layer (tans in front- Come up 32 then down 44. Next up 45 then down 33; up 34, down 46; up 47, down 35.
Keep going in this manner until you come up 24 then down 14. Tape thread and continue on to next layer.
Super Circle String Art Fourth Layer (purples in back) – Come up 55 then down 1. Next up 20 then down 21; up 1, down 2; up 21, down 22; up 2, down 3; up 22, down 23.
Keep going in this manner until you’ve gone completely around and are about to repeat the first pass. Tape thread, slip in the insert, and admire your creation!
More String Art Greeting Cards!
Here are a few more cards I’ve made so far. For the heart and the lips I used variegated sewing thread. As you can see, I haven’t finished the lips yet. I’m really going to enjoy giving these cards!!
Now give yourself or someone else some Joy!
Now is the time to bring some Joy! You can grab your Cricut Joy HERE. You can get Free Economy Shipping on orders $99+ with code SHIPMAY or MAYSHIP through May 31, 2020.
OK my friends, time to get crafty!
[signature]