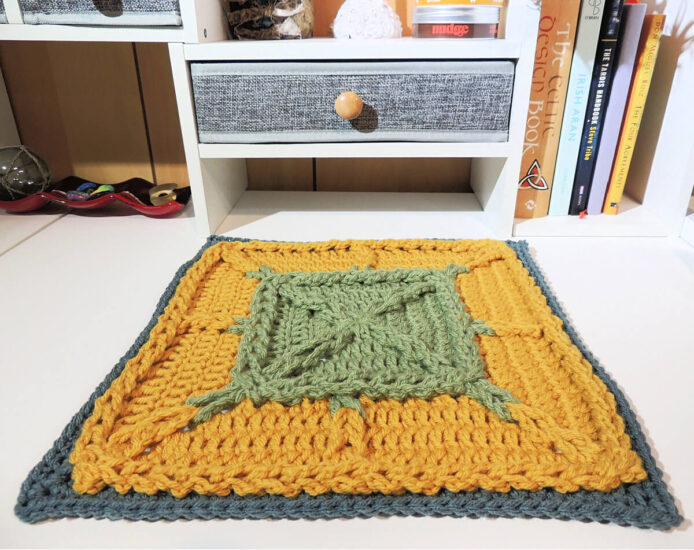
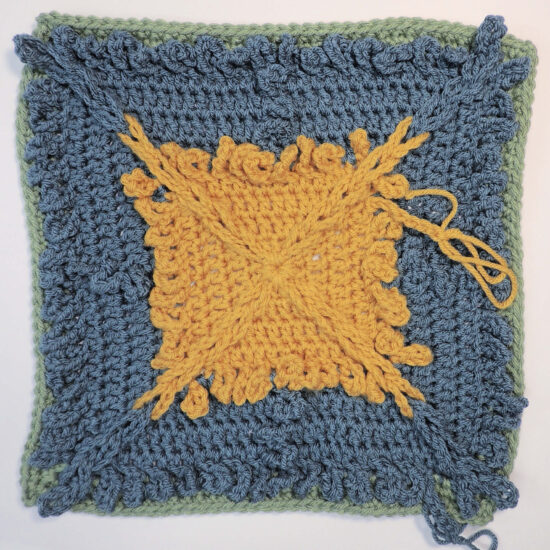
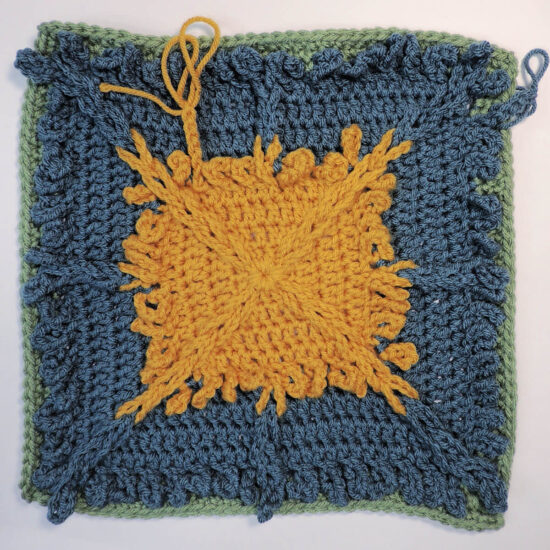
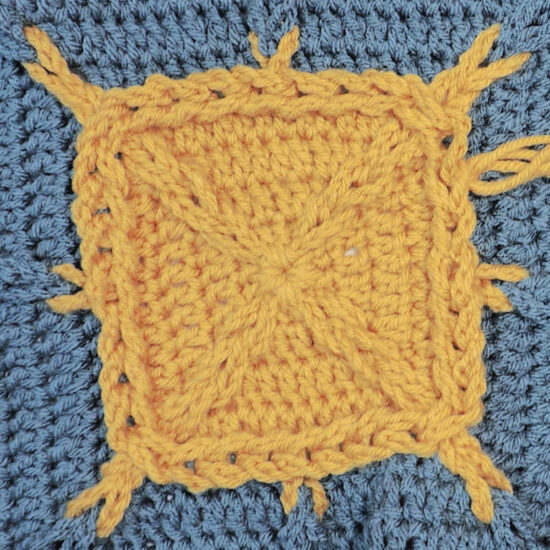
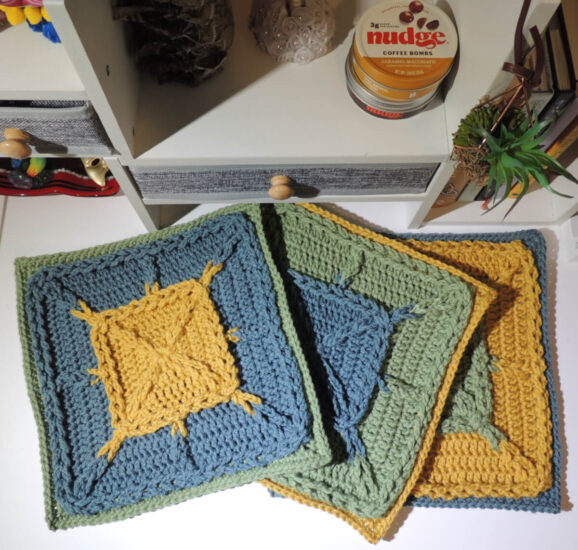
Inside: Create a stunning, 12” Jacob’s Ladder Afghan Square with this free crochet pattern and stitch a breathtaking geometrical motif.
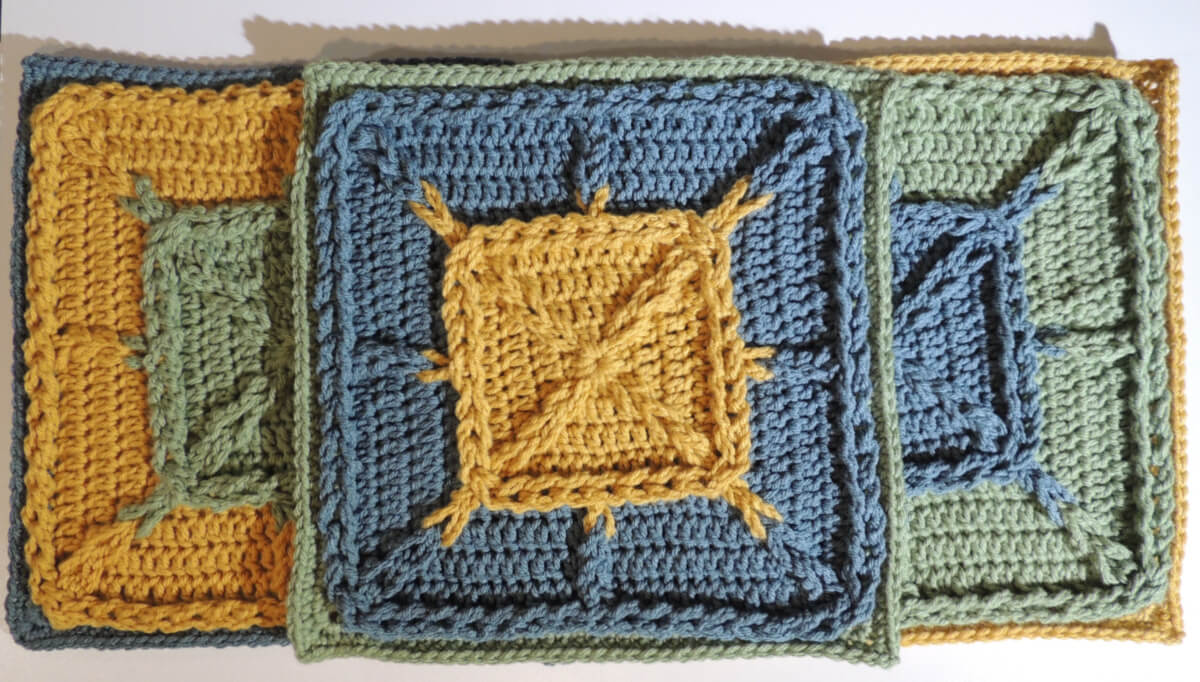
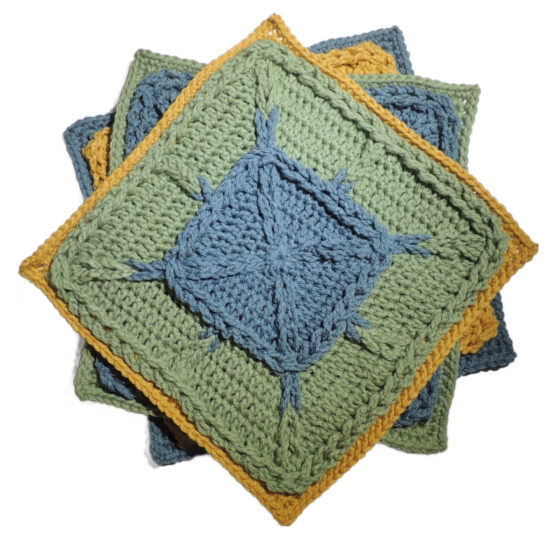
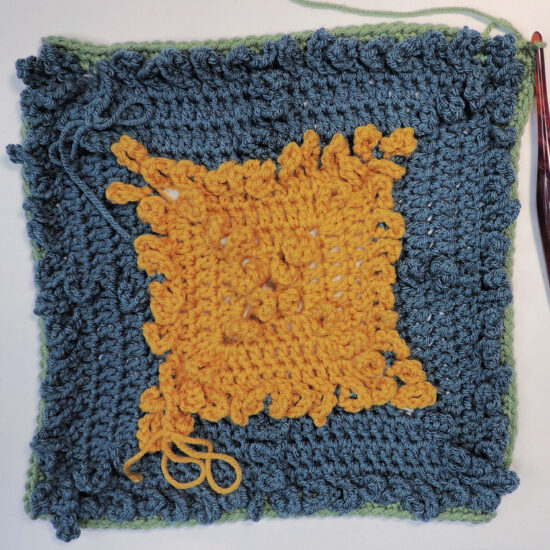
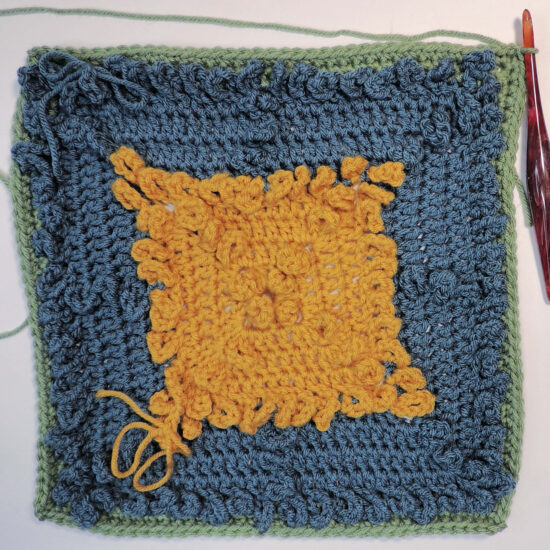
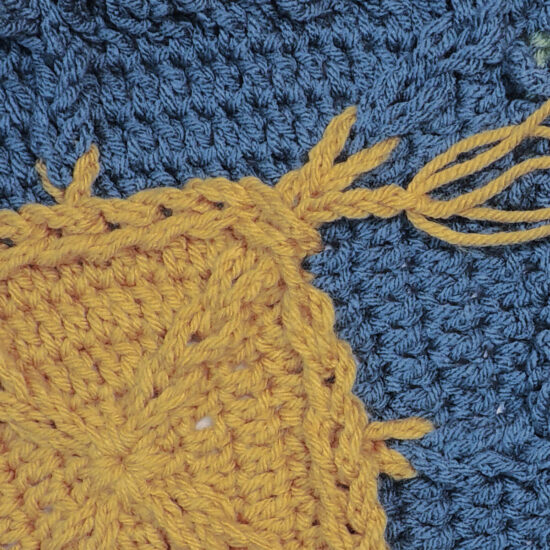
X marks the spot on this geometric Jacob’s ladder crochet square. The decorative chains of the Jacob’s ladder stitch make an “X” through the center of the square, as well as a few other patterns.
I’m super excited that the Jacob’s Treasure afghan square is the first block of the 2024 Moogly CAL! You can find the announcement post that will give all the details HERE.
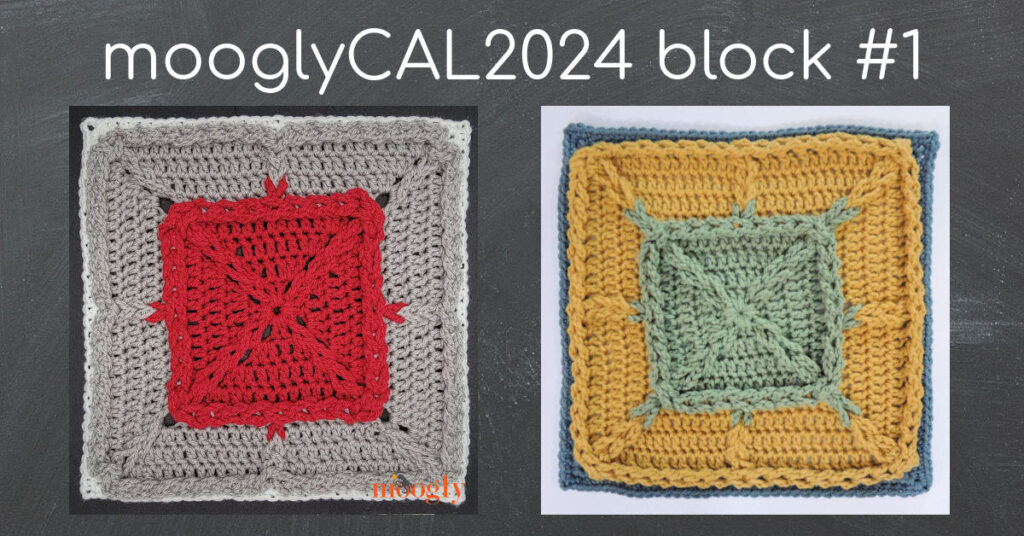
Table of Contents
A variation of the Jacob’s ladder stitch is used in this free crochet pattern. Rather then crochet long chain spaces that create a ladder look, and then looping them together, you will crochet chain loops and then chain those together.
This block is written to be made in 3 colors. However, it will look wonderful in a solid color with its stunning texture. You could also make it in 2 colors, change colors every-other round, or whatever strikes your fancy.
Jacob’s Treasure Afghan Square
Crochet Pattern
Intermediate Skill Level
Designed by Jessie Rayot
Supplies & Stats
Size
12” Square
Yarn
Caron One Pound: (100% Acrylic), Size 4 – Medium/Worsted/Aran, 812 yds / 454 g, (1.79 yds/g)
155 yds / 85 g total used for one block
Samples made with: 10654 Dijon, 19655 Succulent and 19639 Canal
Crochet Hook
US J/10 (6.0 mm)
Gauge
Learn about gauge HERE
12 sts x 7 rows = 4” [10 cm] in dc
Other Supplies
Stitches and Abbreviations
click on highlighted sts for tutorials
ch – chain
dc – double crochet
dch2 – double chain 2
rnd – round
sc – single crochet
sl st – slip stitch
sp(s) – space(s)
st(s) – stitch(es)
yo – yarn over
( ) – work step in parentheses in indicated stitch
[ ] – work step in brackets number of times indicated
Special Stitches
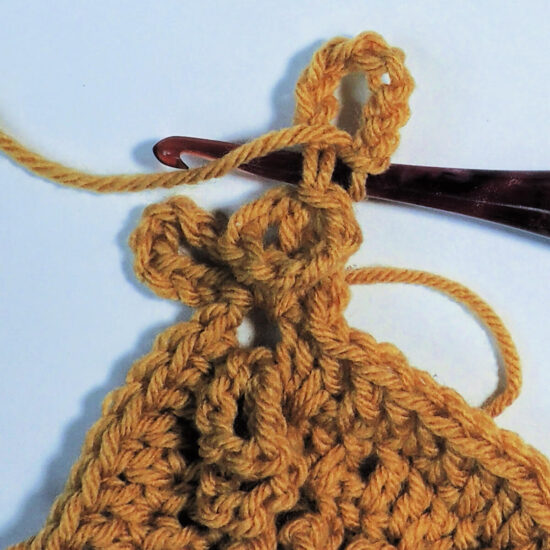
Double Chain 2 (dch2): Insert hook in st, yo, pull up a loop (2 loops on hook), yo, pull through both loops, there are 2 vertical loops coming off the loop on the hook, insert hook in the loop farthest from the hook, yo, pull up a loop (2 loops on hook), yo, pull through both loops.
Dch2 can be replaced with a ch 2 or 3.
Standing Double Crochet (sdc): Place slip knot on hook, hold in place with index finger so it doesn’t rotate, yo, insert hook in designated st, yo, pull up a loop (3 loops on hook), yo, pull through 2 loop (2 loops on hook), yo, pull through all loops.
Standing Single Crochet (ssc): Place slip knot on hook, hold in place with index finger so it doesn’t rotate, insert hook in designated st, yo, pull up a loop (2 loops on hook), yo, pull through all loops.
Pattern Notes
- Read through all instructions before beginning.
- Always crochet with chain loops held in front of work.
- The stitch count is at the end of each rnd after the period, usually only if the count has changed from the previous rnd. {count here}
- Chs and sl sts are not included in stitch counts unless specified.
Jacob’s Ladder Afghan Square Pattern
Stitching the Square
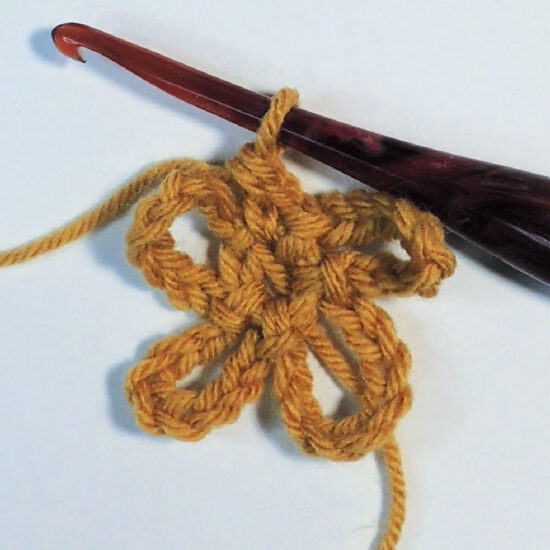
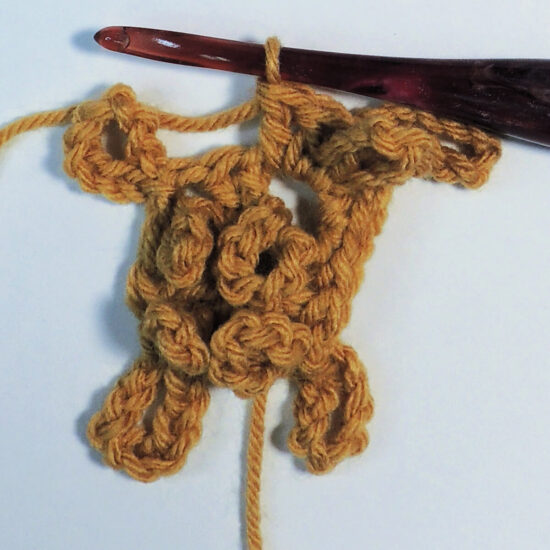
Rnd 1: With Color A, ch 4, sl st in first ch made to form a ring, [ch 9, sl st in ring] 4 times. {4 chain loops}
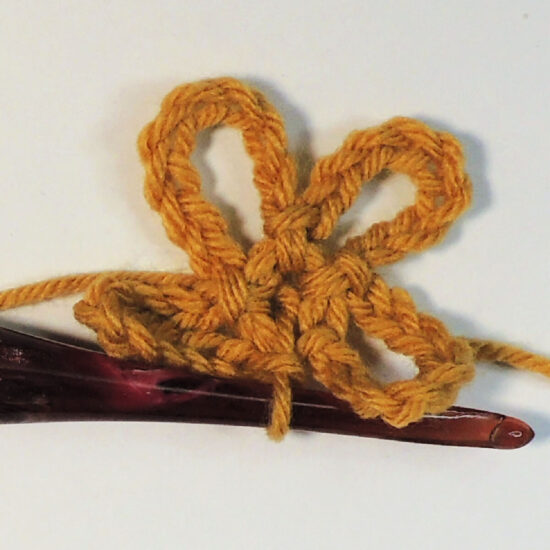
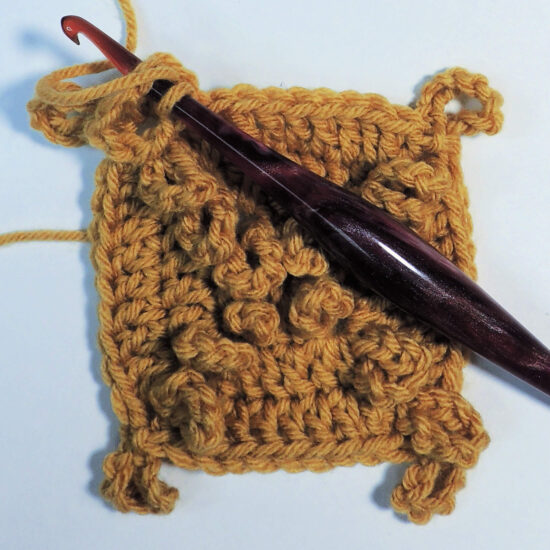
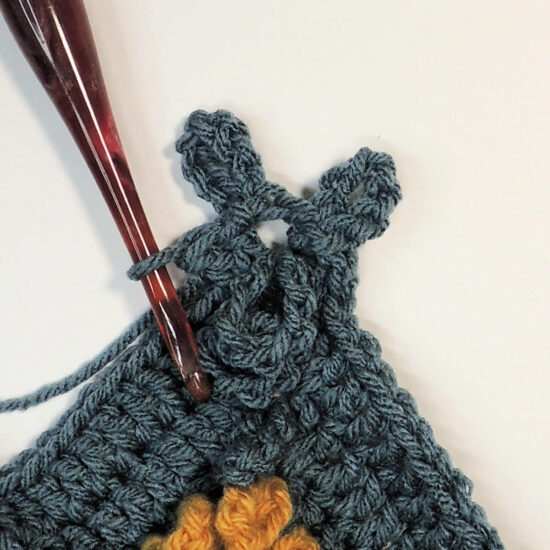
Rnd 2: From this point forward, hold chain loops in front of work, so new stitches lay behind them, ch 1, dch2 around ring, [ch 10, sl st in first ch made, ch 1, 2 dc around next sl st and in ring] 3 times, ch 10, sl st in first ch made, ch 1, dc around next sl st and in ring, sl st in top of beginning dch2. {2 dc on each side}
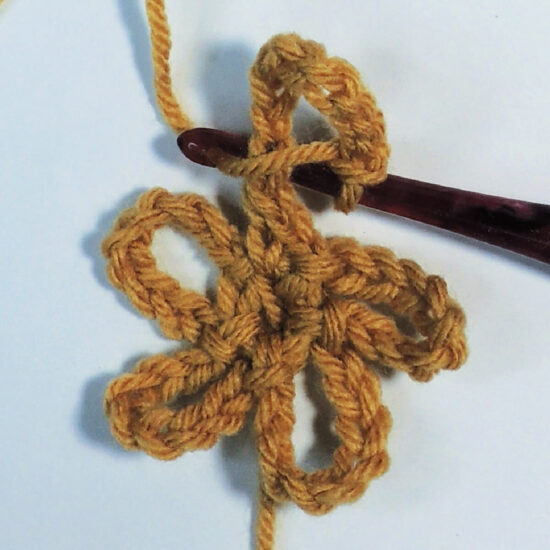
Rnd 3: Ch 1, dch2 around ch just before ch-loop, [ch 10, sl st in first ch made, ch 1, 2 dc around ch just after ch-loop, dc in each of next 2 sts, 2 dc around ch just before ch-loop] 3 times, ch 10, sl st in first ch made, ch 1, 2 dc around ch just after ch-loop, dc in each of next 2 sts, dc around beginning ch 1 and the ch the dch2 is worked around, sl st in top of dch2. {6 dc on each side}
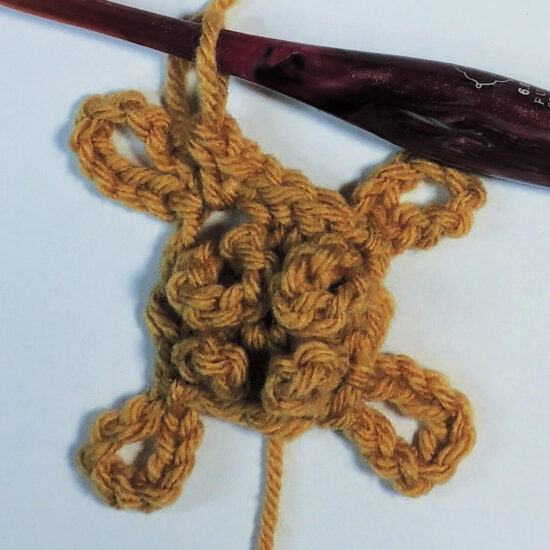
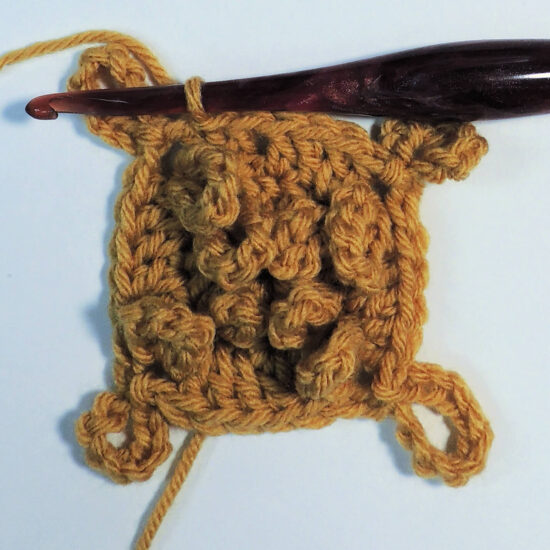
Rnd 4: Ch 1, dch2 around ch just before ch-loop, [ch 10, sl st in first ch made, ch 1, 2 dc around ch just after ch-loop, dc in each of next 6 sts, 2 dc around ch just before ch-loop] 3 times, ch 10, sl st in first ch made, ch 1, 2 dc around ch just after ch-loop, dc in each of next 6 sts, dc around beginning ch 1 and the ch the dch2 is worked around, sl st in top of dch2. {10 dc on each side}
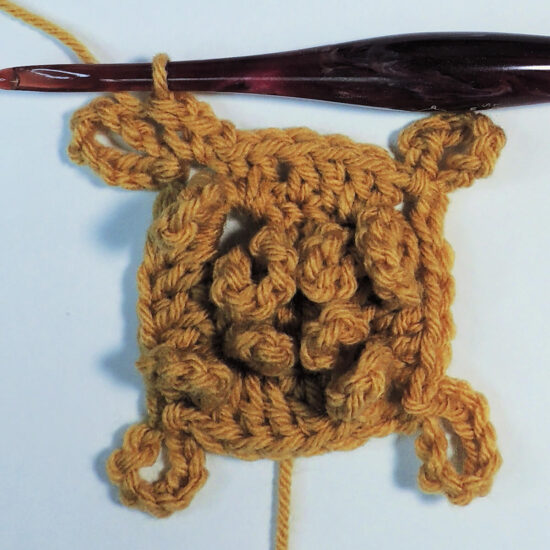
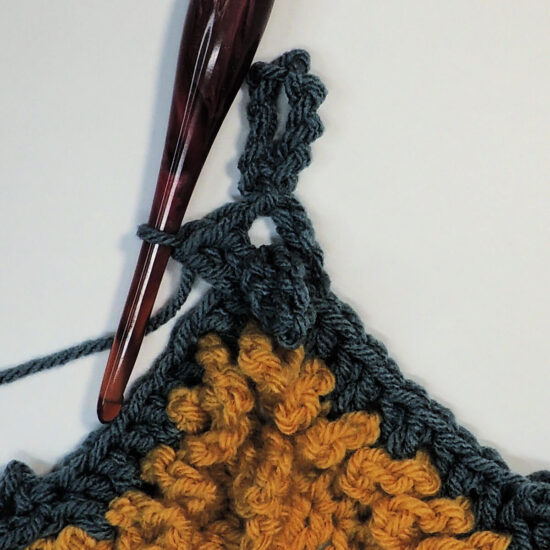
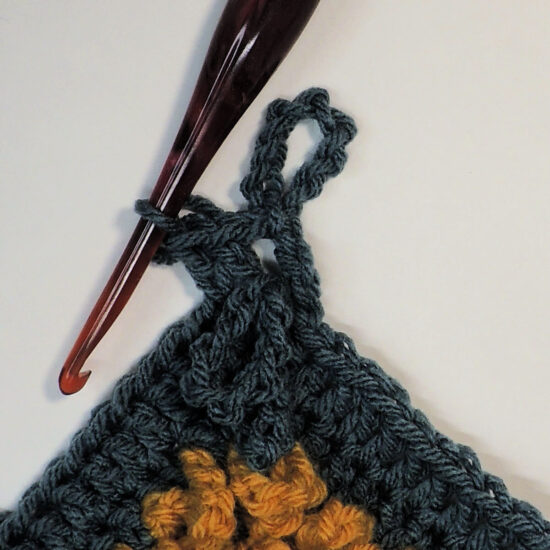
Rnd 5: Ch 1, (dch2, dc) around ch just before ch-loop, *ch 7, sl st in last dc made, ch 10, sl st in first ch made, ch 8, sl st in first ch made, 2 dc around ch just after ch-loop, [ch 7, sl st in last dc made, dc in each of next 2 sts] 2 times, [ch 7, sl st in last dc made, dc in next st] 2 times, [ch 7, sl st in last dc made, dc in each of next 2 sts] 2 times, ch 7, sl st in last dc made, 2 dc around ch just before ch-loop; repeat from * 2 more times, ch 7, sl st in last dc made, ch 10, sl st in first ch made, ch 8, sl st in first ch made, 2 dc around ch just after ch-loop, [ch 7, sl st in last dc made, dc in each of next 2 sts] 2 times, [ch 7, sl st in last dc made, dc in next st] 2 times, [ch 7, sl st in last dc made, dc in each of next 2 sts] 2 times, sl st to top of beginning dch2, ch 7. {14 dc on each side}
Cut Color A and fasten off leaving a long tail. Leave ch 7 with long tail hanging in front of work until Finishing.
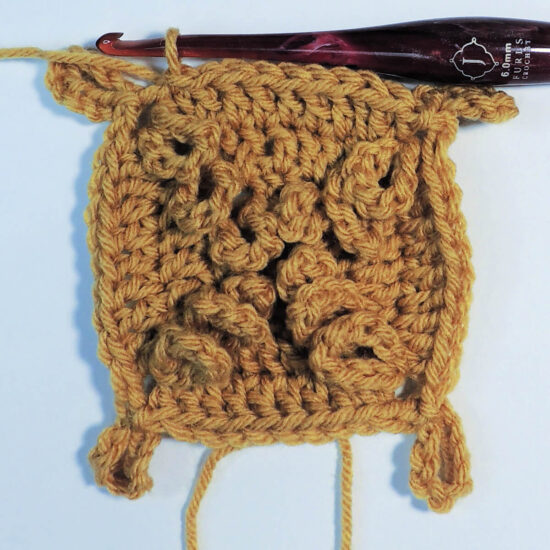
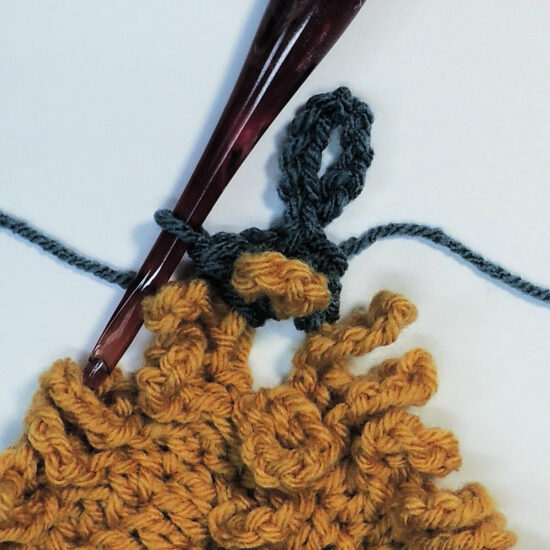
Rnd 6: With Color B, dc around a ch between first and second ch-loop in a corner, [ch 10, sl st in first ch made, ch 1, 2 dc around ch between second and third corner ch-loop, dc in each of next 7 sts, ch 7, sl st in last dc made, dc in each of next 7 sts, 2 dc around ch between first and second corner ch-loop] 3 times, ch 10, sl st in first ch made, ch 1, 2 dc around ch between second and third corner ch-loop, dc in each of next 7 sts, ch 7, sl st last dc made, dc in each of next 7 sts, dc around beginning ch 1 and the ch the dch2 is worked around, sl st in top of beginning dc. {18 dc on each side}

Rnd 7: Ch 1, dch2 around ch just before ch-loop, [ch 10, sl st in first ch made, ch 1, 2 dc around ch just after ch-loop, dc in each of next 9 sts, ch 7, sl st in last dc made, dc in each of next 9 sts, 2 dc around ch just before ch-loop] 3 times, ch 10, sl st in first ch made, ch 1, 2 dc around ch just after ch-loop, dc in each of next 9 sts, ch 7, sl st in last dc made, dc in each of next 9 sts, dc around beginning ch 1 and the ch the dch2 is worked around, sl st in top of dch2. {22 dc on each side}

Rnd 8: Ch 1, dch2 around ch just before ch-loop, [ch 10, sl st in first ch made, ch 1, 2 dc around ch just after ch-loop, dc in each of next 11 sts, ch 7, sl st in last dc made, dc in each of next 11 sts, 2 dc around ch just before ch-loop] 3 times, ch 10, sl st in first ch made, ch 1, 2 dc around ch just after ch-loop, dc in each of next 11 sts, ch 7, sl st in last dc made, dc in each of next 11 sts, dc around beginning ch 1 and the ch the dch2 is worked around, sl st in top of dch2. {26 dc on each side}
Rnd 9: Ch 1, (dch2, dc) around ch just before ch-loop, *ch 7, sl st in last dc made, ch 9, sl st in second ch made, 2 dc around ch just after ch-loop, [ch 7, sl st last dc made, dc in each of next 2 sts] 13 times, ch 7, sl st in last dc made, 2 dc around ch just before ch-loop; repeat from * 2 more times, ch 7, sl st in last dc made, ch 9, sl st in second ch made, 2 dc around ch just after ch-loop, [ch 7, sl st in last dc made, dc in each of next 2 sts] 13 times, sl st to top of beginning dch2, ch 7. {30 dc on each side}
Cut Color B and fasten off leaving a long tail. Leave ch 7 with long tail hanging in front of work until Finishing.
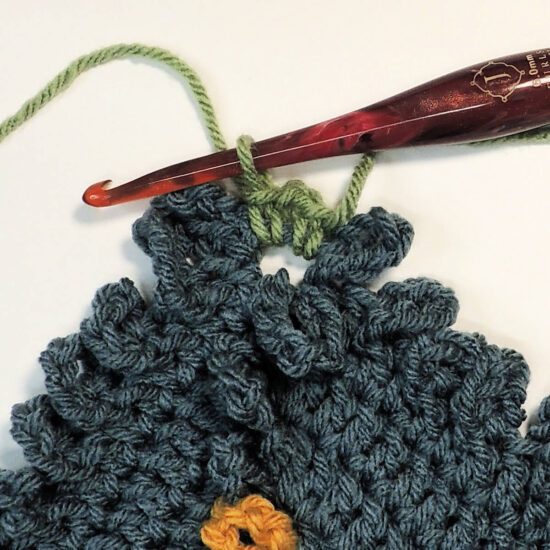
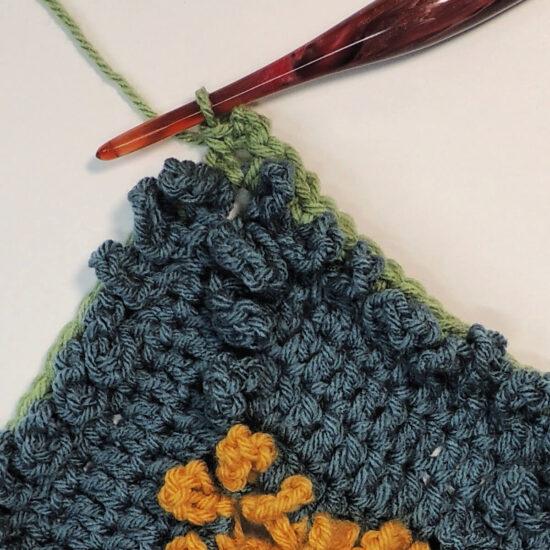
Rnd 10: With Color C sc in a ch-2 corner sp, ch 2, sc in same sp, [sc in each dc to next ch-2 sp, (sc, ch 2, sc) in ch-2 sp] 3 times, sc in each dc to next ch-2 sp, sl st in top of beginning sc. {32 sc on each side}
Rnd 11: Sl st in ch-2 corner sp, ch 3, sc in same sp, [sc in each sc to next ch-2 sp, (sc, ch 2, sc) in ch-2 sp] 3 times, sc in each sc to next ch-2 sp, sc in next ch-2 sp, sl st in beginning ch-3 sp. {34 sc on each side}
Rnd 12: Ch 3, sc in same sp, [sc in each sc to next ch-2 sp, (sc, ch 2, sc) in ch-2 sp] 3 times, sc in each sc to next ch-2 sp, sc in next ch-2 sp, sl st in beginning ch-3 sp. {36 sc on each side}
Cut Color C.

Finishing
- Refer to schematic, loops will be referred to by the letter of the schematic line they are on, and the round number they are in.
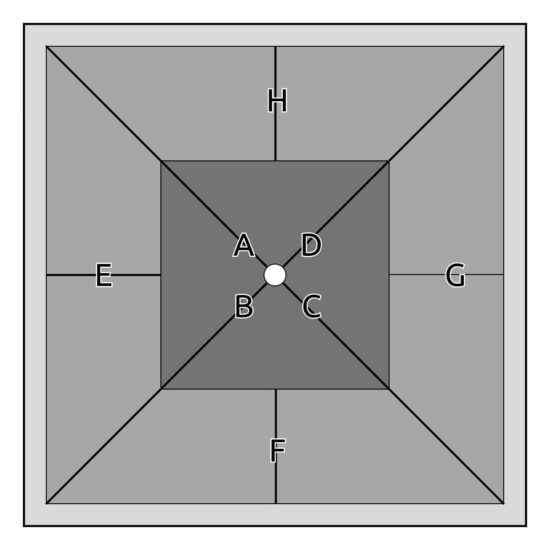
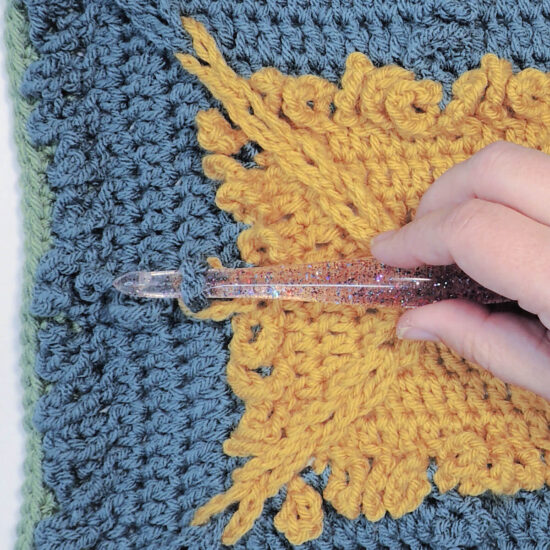
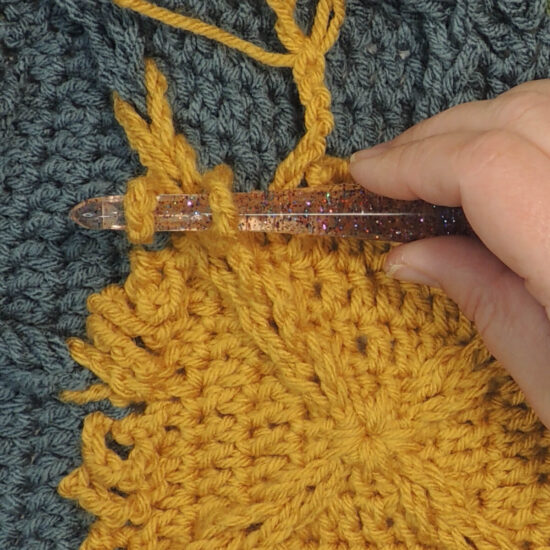
- Jacob’s Ladder Chain A
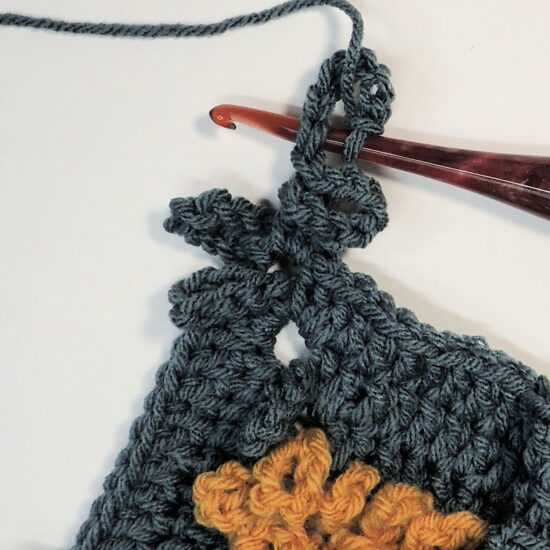
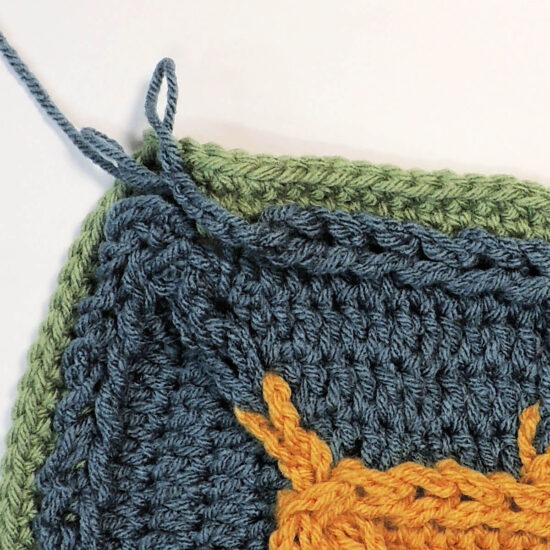
- Pull A2 through A1, then A3 through A2, then A4 through A3, and so on until A8 is pulled through A7.

- There are 2 loops on either side of A in Rnd 9, for right handed crochet, pull the left A9 loop through A8, for left handed crochet pull the right A9 loop through A8.
- Repeat Jacob’s Ladder Chain A with lines B, C, & D.
- Jacob’s Ladder Chain E
- Pull E6 through E5, then E7 through E6, then E8 through E7.
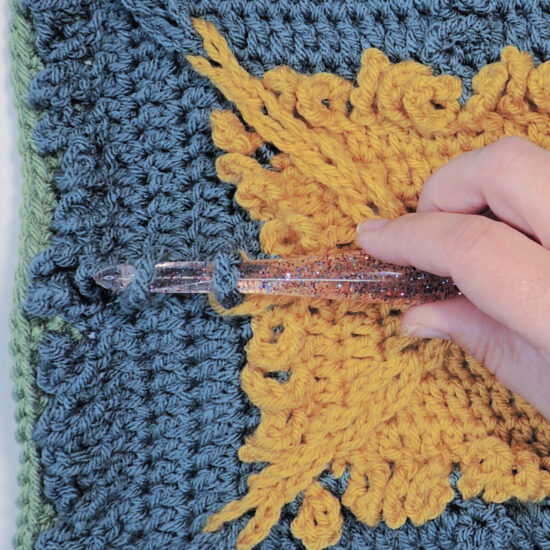
- There are 2 loops on either side of E in Rnd 9, for right handed crochet, pull the left E9 loop through E8, for left handed crochet pull the right E9 loop through E8.

- Repeat Jacob’s Ladder Chain E with lines F, G, & H.
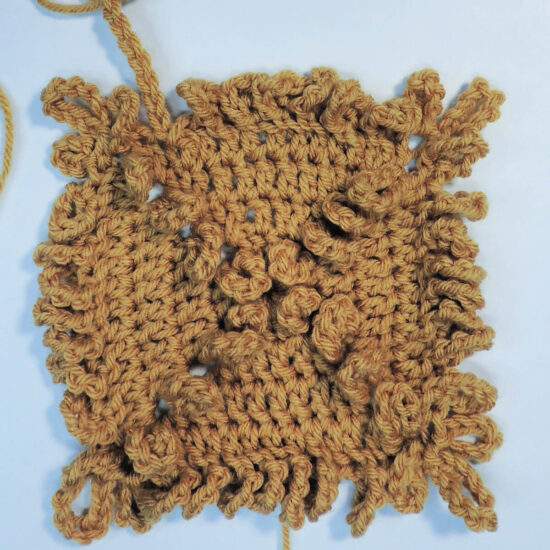
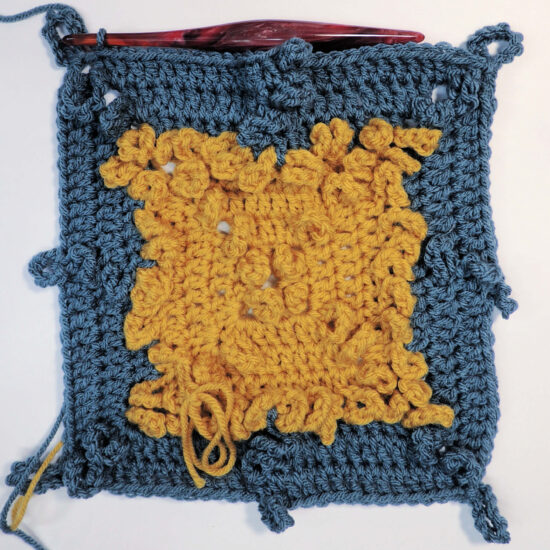
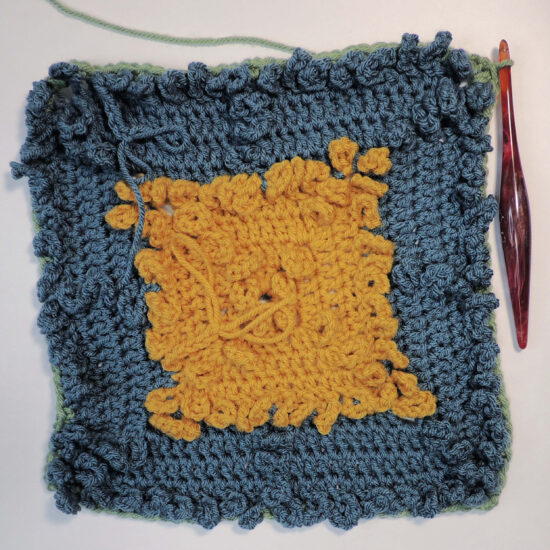
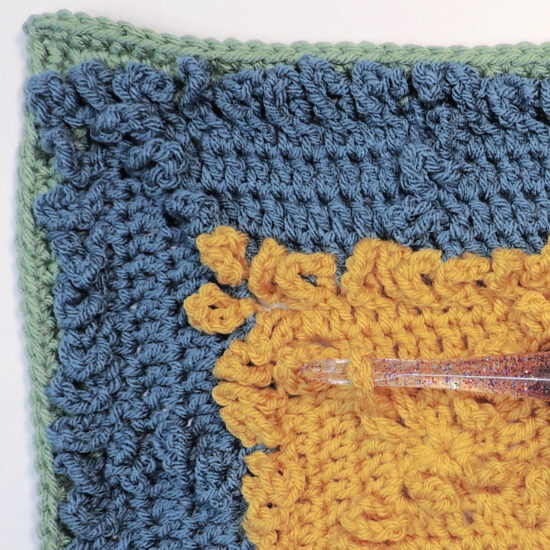
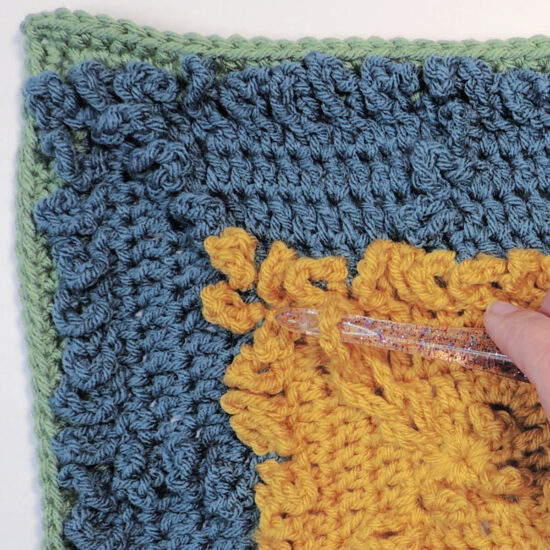
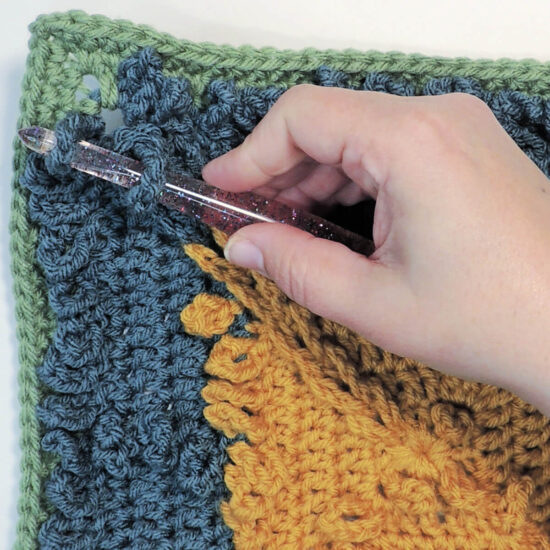
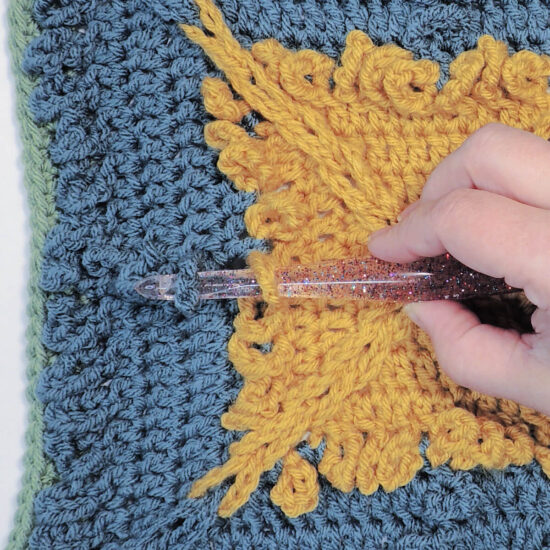
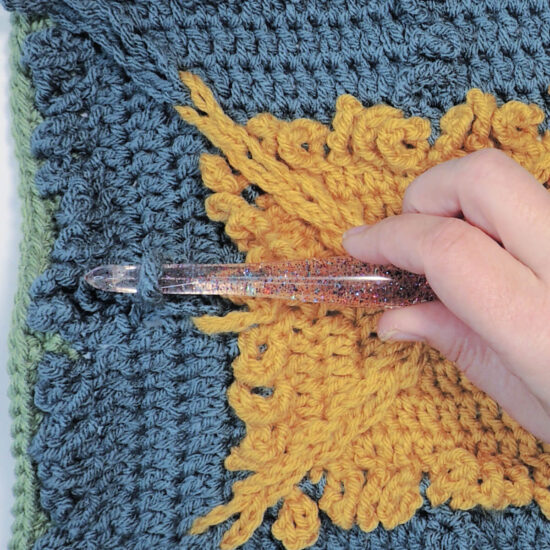
- Inner Jacob’s Ladder Square
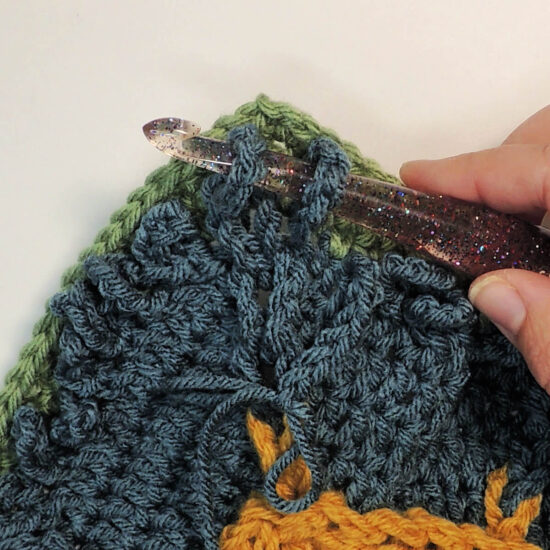
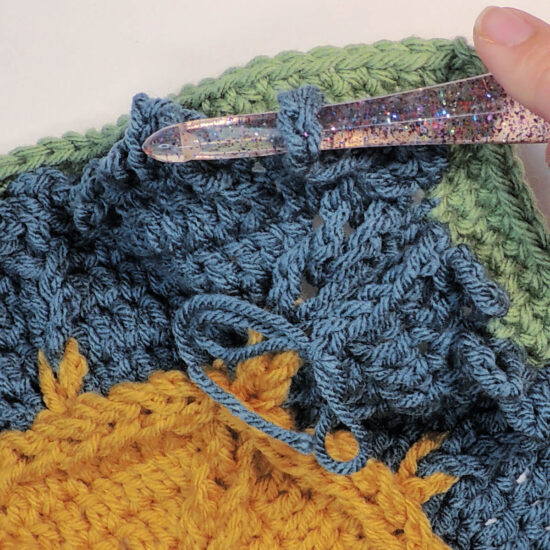
- Find the hanging ch-7 in Rnd 5, for right handed crochet work to the left, for left handed crochet work to the right.
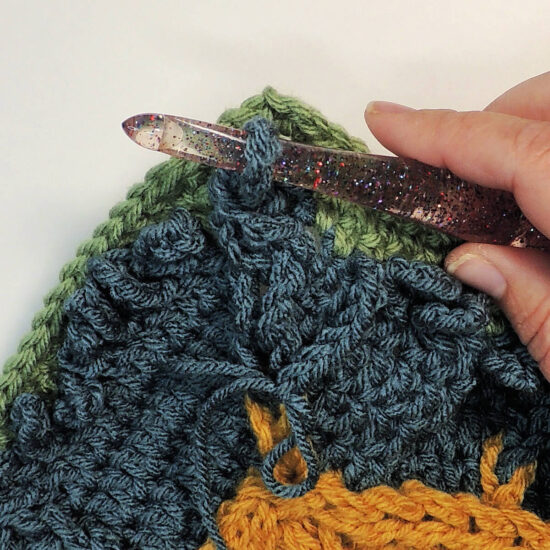
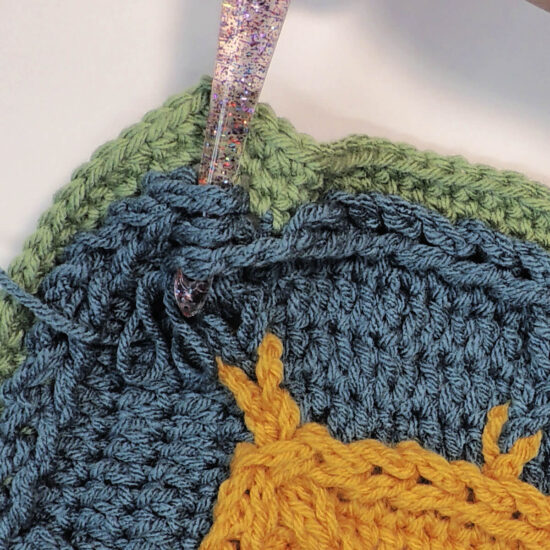
- Take the 2nd ch-loop after the hanging ch-7 and pull it through the 1st, then pull the 3rd through the 2nd, then the 4th through the 3rd, and so on until the ch-7 is pulled through the last ch-loop
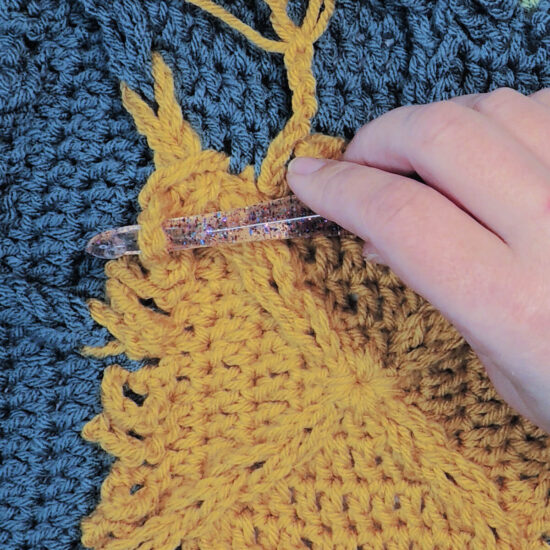
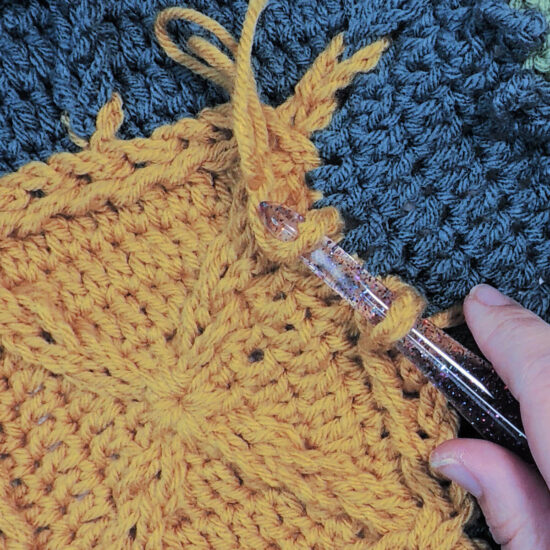
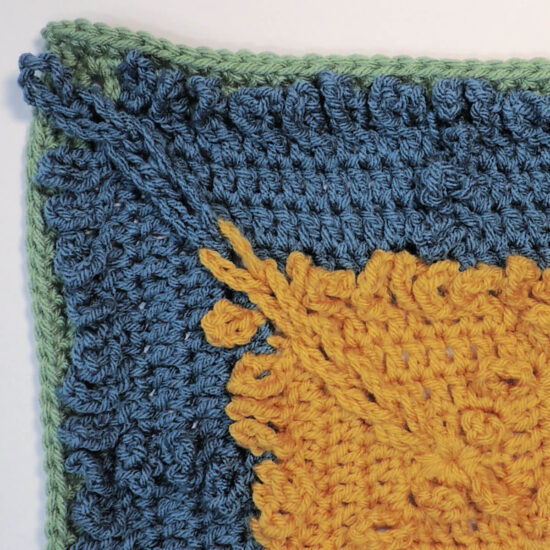
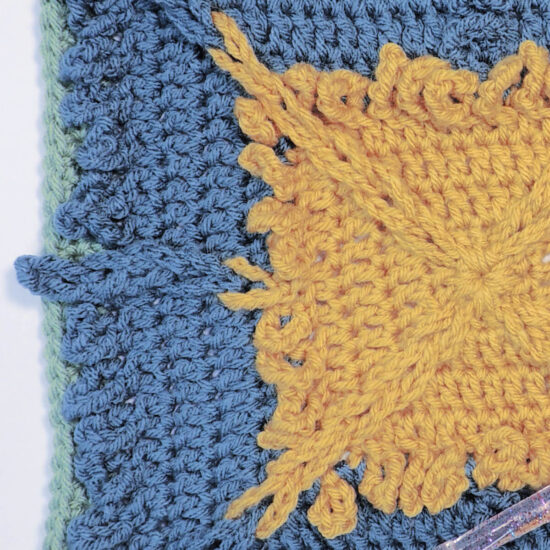
- Pull the ch-7 around the base of the first ch-loop.
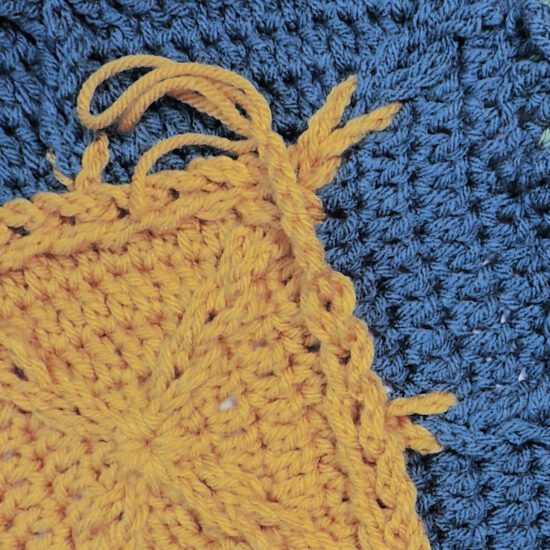
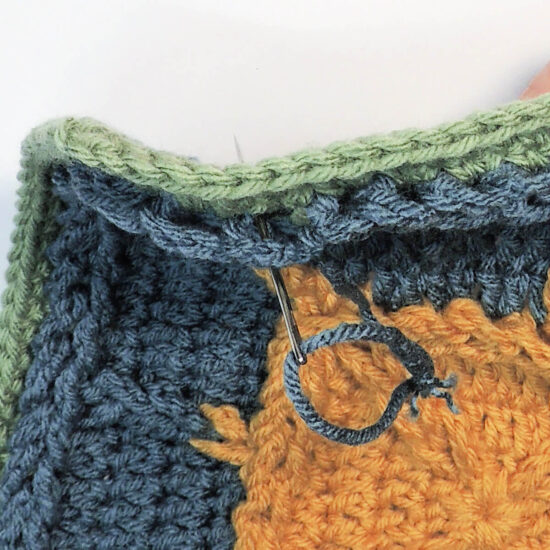
- Thread a yarn needle on the end of the yarn tail at the end of the ch-7 and sew the end of the ch-7 inside the last loop (where the ch-7 started)
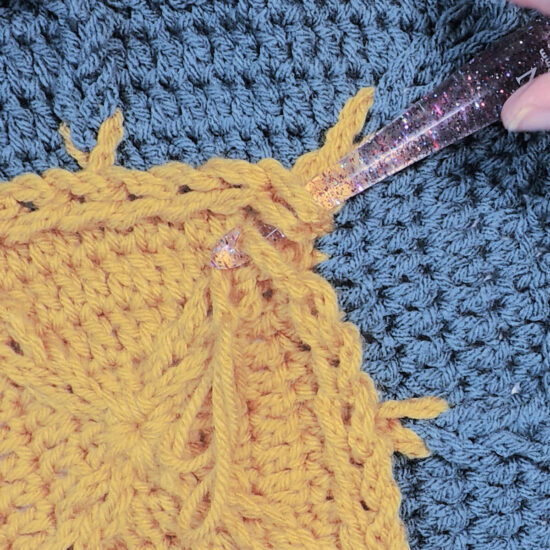
- Repeat the Inner Jacob’s Ladder Square steps with the Outer Jacob’s Ladder Square.
- Weave in all ends.
- Block to 12” square.
Happy Stitching!
Video Tutorials
I hadn’t planned on making the end of 2023 and beginning of 2024 super busy, then I bought Crochet Foundry and my schedule got a bit away from me. I have not had a chance to add the intro and outro to these videos, or the captions. I will. For now, I’m sharing them anyway because they will still give you all the info you need!
Color A: Rounds 1-5
Color B: Rounds 6-9
Color C: Rounds 10-12
Finishing
Did you enjoy what you found here at Jessie At Home? Then sign up for my newsletter and like my Facebook page, so you’ll get all the updates on new tutorials, other posts, sales, and coming events.
If you have any questions, want to share pictures of your work, or just want to chat with Jessie and other crafty individuals, than join one of our free Zoom Sit & Stitches. Find them on our Events Calendar.

© Copyright 2024 Jessie Rayot / Jessie At Home LLC All my videos, patterns, charts, photos and posts are my own work, so you may not copy them in any way. If you want to share this information with someone, then share the link to this post.


Hello, I love the new patter, but I need some help. Unfortunately, the video tutorials aren’t working.
Check your ad blockers – if the videos don’t work for you, it’s probably your ad blockers.
Yes for me. Thank you!
Thank you!!
I am having so much trouble following along through all the fast forwarding on the videos. I spend more time stopping and rewinding every 2 seconds. Its so hard to see the stitches. I feel I am getting all worked up and its supposed to be relaxing. Would anyone have any tips I can use? I am self taught for years but this is my first attempt at this type of design.
Make sure your following along with the pattern. This is meant to be an aid along with the pattern. The video is not intended to be used as the pattern.
Thank you for this beautiful pattern and tutorials. But I’m having difficulty seeing precisely where and how you are attaching the loops in round 5. The dark yarn adds to the difficulty. After I attach, my yarn is on the right side of the loop and I have to pull it around to the left, then everything is twisted. I’m so disappointed to not be able to understand the directions.
Did you watch the video? There isn’t a new yarn being attached in Rnd 5, so I’m not sure what you are asking about.