Inside: Get creative with the basic bunting crochet pattern and make vibrant decorations to enhance any event or living space.

The yarn for this design was provided by Herrschners. All opinions are my own.
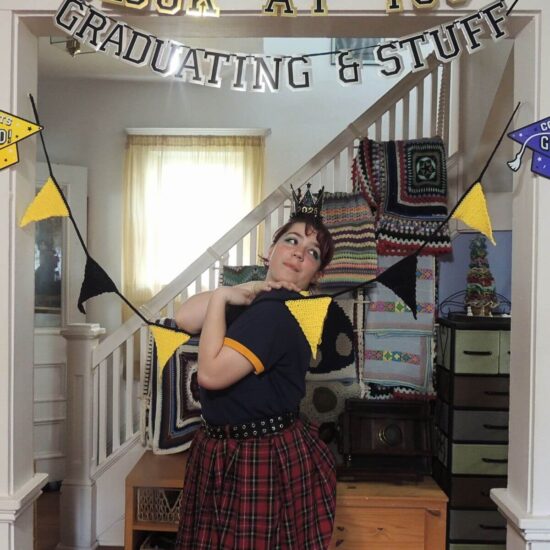
This crochet bunting instantly adds a pop of color and charm to any space, inside or out. It’s one of those projects that works for just about any occasion, like a birthday party, backyard BBQ, or just to make your living room feel extra cheery. You can pick your favorite shades or mix a bunch of bold colors for a playful, eye-catching look.
Rather knit this pattern? Find the Grand Old Bunting Knit Pattern HERE.
If you’re new to bunting, it’s basically a string of flags or shapes, often used as a decoration for parties or just to brighten up a space. With crochet, you can totally customize your look, from soft pastels to bright rainbow stripes. In this guide, I’ll walk you through making your own triangular flag crochet bunting, from materials to tips for stringing them up (and helping them last outside in the weather). Stick around for some unique ideas and pro tips too!

Choosing Yarn, Hook, and Colors
The fun starts with picking out your yarn. The best yarn for bunting is usually a mediumweight cotton since it holds its shape well and doesn’t get fuzzy as quickly if you use it outdoors. Acrylic also works if you want really bright colors on a budget. I usually reach for a 4mm – 5mm crochet hook. A bigger hook gives the triangles a bit more drape, while a smaller one makes them tighter (good for places that get windy).
- Cotton yarn – Great for durability and crisp lines. Easy to wash, too.
- Acrylic yarn – Super affordable, comes in every color under the sun.
- Color scheme ideas: Try alternating colors for a classic look, go with all pastels, or use leftover yarn scraps for a funky, mismatched vibe.
Make sure your yarn isn’t too heavy because bulky yarn makes the flags sag and pull down the string. If you’re planning on using the bunting outside, give preference to yarns that say “fade-resistant” on the label. Another factor to consider is texture: smooth yarn tends to hold up better and keeps your flags neat. Also, light colors might show dirt more easily outdoors, so plan your palette to blend with your space and needs.
Basic Bunting Crochet Pattern
Easy Crochet Pattern
Designed by Jessie Rayot
Supplies
Sizes
1 (2, 3)
Bunting has 9 (11, 13) flags
Finished Measurements
Flag Width 4.75 (5.75, 7) in / 12 (14.5, 18) cm
Flag Length 6 (7.25, 8.5) in / 15 (18.5, 21.5) cm
Bunting Length 91 (135, 187) in / 231 (343, 475) cm
Yarn
Village Yarn Craft Cotton: (100% Cotton), size 4 / worsted weight, 115 yds / 105 m, 71 g / 2.5 oz per skein
Bunting Cord Color: MC
- 22 (33, 45) yds / 20 (30, 41) m
- 14 (20, 28) g / 0.5 (0.7, 1) oz
Flag Color(s) (total for all 9 (11, 13) flags): CC
- 95 (170, 285) yd / 85 (155, 260) m
- 60 (105, 175) g / 2.1 (3.7, 6.2) oz
Crochet Hook
US G 6/4.0 mm – Furls Onyx Streamline Metal Crochet Hook used for sample
Gauge
Learn about gauge HERE
15 sts x 19 rows = 4 in / 10 cm in sc
Other Supplies
- Stitch Markers (10 (12, 14))
- Tapestry / Yarn Needle
Stitches and Abbreviations
click on highlighted sts for tutorials
CC: Contrast/Coordinating Color
ch: chain
MC: Main Color
pm: place marker
sc: single crochet
sc2tog: single crochet 2 together
sl st: slip stitch
st(s): stitch(es)
Get the Ad-Free Printable PDF at These Sites
- Jessie At Home – Buy directly from me, you can also get bonus printables!
- Ravelry
- Etsy
- LoveCrafts
Pattern Notes
- Read through all instructions before beginning.
- The stitch count is at the end of each row after the period, usually only if the count has changed from the previous row. [count here]
- Chs and sl sts are not included in stitch counts unless specified.
Step-by-Step Triangle Flag Bunting Pattern
Start / Hanging Cord
With MC, ch 25, sl st to first ch made to form hanging loop, [ch 36 (44, 52), pm] 9 (11, 13) times, ch 18 (22, 26), pm, ch 25, sl st to last marked st to form second hanging loop. [392 (556, 752) chs total]
Flags
First Flag
Row 1: Sl st in each ch to next marker, remove marker, ch 1, sc in each of next 18 (22, 26), leave remaining sts unworked. [18 (22, 26) sc]
NOTE: Remaining Flag rows will be worked with only the 18 (22, 26) sts from Row 1.
Row 2: Do not cut main color, switch to CC (whichever one desired for this flag), ch 1, turn, sc to end. [18 (22, 26) sc]
Rows 3-4: Ch 1, turn, sc2tog, sc to end. [16 (20, 24) sts after completing Row 4]
Row 5: Ch 1, turn, sc to end.
Repeat rows 3-5 until only 2 sts remain.
Last Row: Ch 1, turn, sc2tog.
Fasten off CC.
Remaining Flags
Pick up MC, repeat from Row 1 of First Flag.
Finishing
- Sl st in each ch to hanging loop.
- Fasten off.
- Weave in all ends.
- Block.
Tips for Consistent Triangles
- Check your tension and aim to keep each triangle the same size for a tidy look along the whole bunting.
- If your triangle edges are wavy or a bit uneven, try blocking them—dampen and pin them flat to dry. I like to use water with a bit of Unicorn Clean Fibre Rinse mixed in. This works wonders, especially for cotton yarn.
- Counting stitches at the end of each row for your first few triangles can help spot any skipped stitches. It’s an easy fix that makes a big difference in appearance.
Finishing Touches & Customization Ideas
This is where you can really get creative! Add little embellishments if you want, like pom poms on the tips, tiny bells, or tassels at the bottom of each flag. For extra flair, try crocheting a scalloped border along the two longer sides of your triangles or adding a row of single crochet stitches around each one in a contrasting color. Another fun idea is to add small appliques (flowers, letters, or shapes) for a personalized touch.
- Mix and match different colors for each flag.
- Alternate solid and striped triangles for a retro-inspired look.
- Add appliques like stars, hearts, or letters. Make them special for baby showers, birthday parties, or seasonal holidays.
- Hang mini fairy lights along with the bunting for eye-catching night displays. Great for garden parties and celebrations!
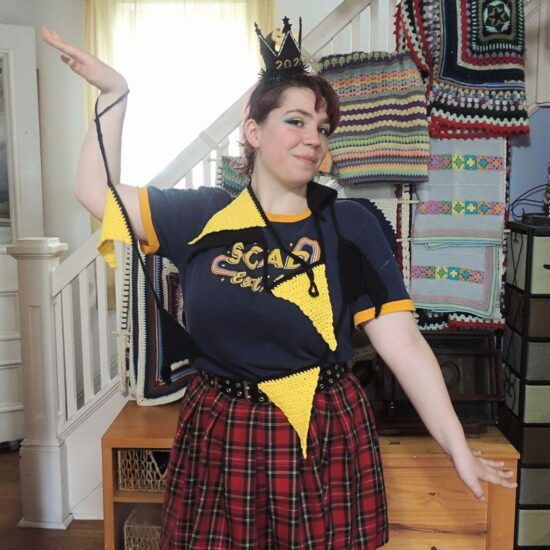
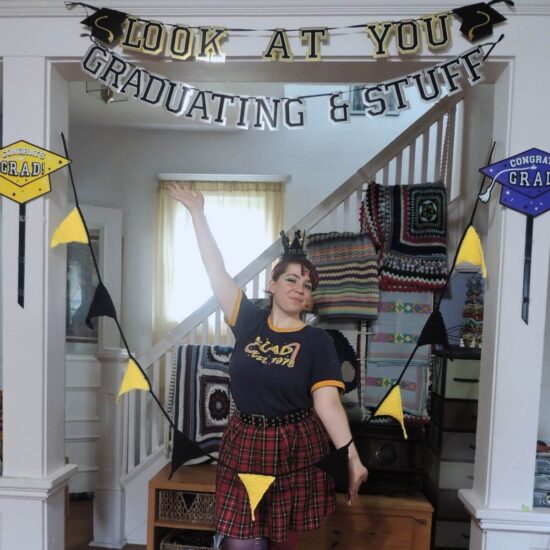
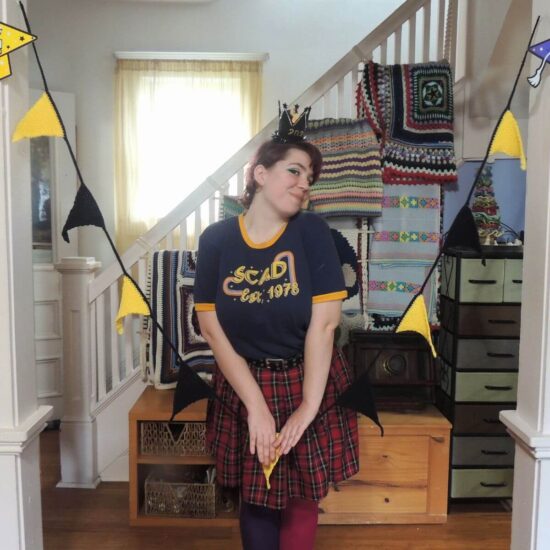
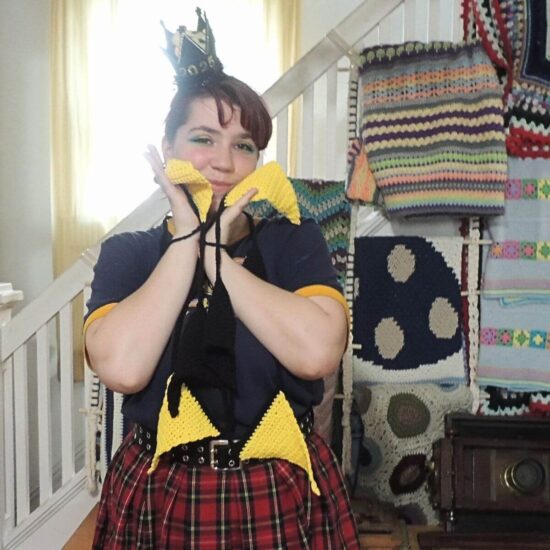
You can also bring your bunting up a notch by making themed sets for different times of year—think autumn shades for Halloween or bright red, white, and blue for summer holidays. I made a set in SCAD (Savana college of Art and Design) colors for my daughter, as she will be starting there in the fall. Let your imagination lead the way!
Please note that customizations may change the yarn amounts used.
Tassels
- Cut 20 pieces of yarn 18” long for each tassel.
- Cut one 24” long piece of yarn for tie string for each tassel.
- Insert crochet hook through point of flag. Grab the center of the tie string and pull it through about 1 inch, this makes a loop on your hook. Use the crochet hook to pull the 2 ends of the tie string through the loop on your hook. Tighten up the knot just made.
- Spread the 2 ends of the tie strings to the sides, and place the center of the tassel pieces across the attachment point. Knot the tie strings around the center of the tassel pieces tightly.
- Fold the tassel in half at the knot just made. Add one tie string end to the tassel and leave the other off to the side (do not clip any ends yet).
- Thread the remaining long tie string end onto the yarn needle. Pinch the tassel from the top, so the tip of your fingers are where you want the bottom of the wrapped section. Tightly wrap the long tie string around the tassel, working up for about 1/4-1/2 inch. Sew the end straight through the tassel at the top of the wrap. Move over 1 wrap of yarn and sew the end back through the center of the tassel, coming out at the top center of the tassel. Sew the yarn through the bottom stitch of the flag and then back through the center of the tassel.
- Clip tassel ends even.
Add or Subtract Flags
To add or subtract flags from the bunting: add or subtract 1 repeat of [ch 36 (44, 52), pm] to the start for each flag you want to add or subtract from the bunting. This will add or subtract 36 (44, 52) from the entire row count for each flag you add or subtract.
Space Between Flags
To change the length of the space between flags, first determine how many stitches you want to add or subtract to each space – there are 3.75 stitches in each inch. Next, add or subtract that amount to the number of sts at the beginning of the starting chain, to each repeat section of the starting chain, and at the end of the staring chain.
Flag Width
To change the flag width, first determine how many stitches you want to add or subtract to each flag – there are 3.75 stitches in each inch. Next, add or subtract that amount to the number of sts to each repeat section of the starting chain.
Next, add or subtract the same number of sts to the sc count in Row 1 of each flag.
Flag Length
To make the flags longer, sc more rows between each set of decrease rows.
Long Banner Flags
To make rectangular banner, repeat Row 2 of flag until the banner is the desired length.
To add a pointed end to the banner, make the rectangular banner then:
- Sc2tog, k until 2 sts remain, sc2tog.
- Repeat until 4 sts remain.
- Sc2tog twice.
- Sc2tog.
Outdoor Use & Durability Tips
Crocheted bunting isn’t just for indoors. These look awesome on fences, deck railings, and gazebos. If you want your bunting to hold up outside, here are some handy tips:
- Use cotton yarn since it doesn’t stretch or fade as quickly as some other fibers.
- Secure each end well, using a knot that’s easy to untie if the weather turns stormy.
- Bring the bunting indoors if there’s really heavy rain to prevent mildew.
- If your yarn says “machine washable,” just toss the bunting in a laundry bag and wash cold if it gets dirty. Village Yarn Craft Cotton will wash well. 🙂
- Consider giving your finished bunting a quick soak in a fabric protector such as Unicorn Fibre Rinse. This can give a little extra boost against weather and color loss.
Proper care and the right materials will ensure your eye-catching bunting lasts through season after season of celebrations.
Common Troubleshooting Questions
Why are my triangles curling?
If your triangles curl up, it usually means you’re pulling the starting chain too tight or maybe skipping stitches at the end of rows without realizing it. Try loosening your tension and count your stitches at the end of each row for a couple triangles to get the hang of it. Blocking your finished triangles can also help them relax and lie flat.
Can I make the triangles fist and then add them to a chain, ribbon or string?
Go for it! Start with a crochet chain that is 1 ch longer than the number of sc in Row 1 of the Flag, then sc in the second ch from the hook and each remaining ch. Now pick up the Flag pattern starting with Row 2.
How many triangles do I need?
To make a “traditional” style bunting, plan on a flag every 3 to 4 inches along the chain. For a standard 6-foot bunting, 12 to 16 triangles looks great (depending on your flag size and spacing).
Can I mix yarn weights?
It’s best to stick to one yarn weight so all your flags are roughly the same stiffness. If you do want to mix, adjust your hook sizes to get triangles that match in size as closely as possible. Keeping your gauge consistent across the flags helps the bunting hang evenly and look tidy.
How do I keep the flags from twisting?
If your flags tend to twist or flip when hung, occasionally add a small weight like a bead or button to the tip of each triangle to help them hang straight. If you are modifying the pattern, evenly spacing and securely attaching the flags along the chain also makes a difference.
Next Steps: Make It Your Own
Making crochet bunting is one of those projects that never gets old; you can whip up a bunch of triangles in front of the TV and use them all year. Try a set in earthy colors for fall, or go neon for summer vibes. Don’t be afraid to check out new color combinations, try out border patterns, or switch up the shape of your triangles for more variety.
Ready to Start?
- Pick your yarn and colors—mix and match for a fun and lively look.
- Crochet your triangles using the simple pattern above. Try experimenting with stripes or block colors for extra charm.
- String them together with your favorite method, and add embellishments if you like.
Bring your bunting to parties, hang it in the garden, or just brighten up a bedroom. If you try the pattern, let me know how it goes, or share your color combos below. Happy crocheting! And remember, with every batch of bunting, you’ll find new ways to step up your style and technique. Don’t hesitate to try something new each time!
Happy Stitching!
Did you enjoy what you found here at Jessie At Home? Then sign up for my newsletter and like my Facebook page, so you’ll get all the updates on new tutorials, other posts, sales, and coming events.
If you have any questions, want to share pictures of your work, or just want to chat with Jessie and other crafty individuals, than join one of our free Zoom Sit & Stitches. Find them on our Events Calendar.

© Copyright 2025 Jessie Rayot / Jessie At Home®, LLC All my videos, patterns, charts, photos and posts are my own work, so you may not copy them in any way. If you want to share this information with someone, then share the link to this post.


