
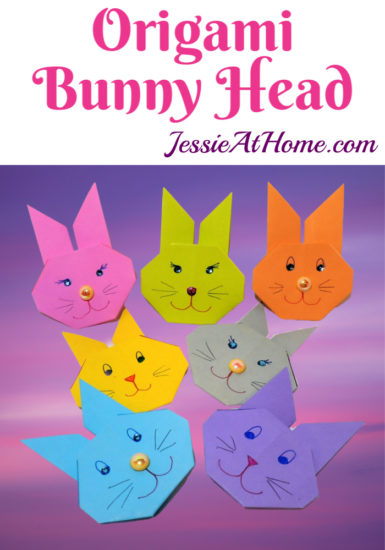
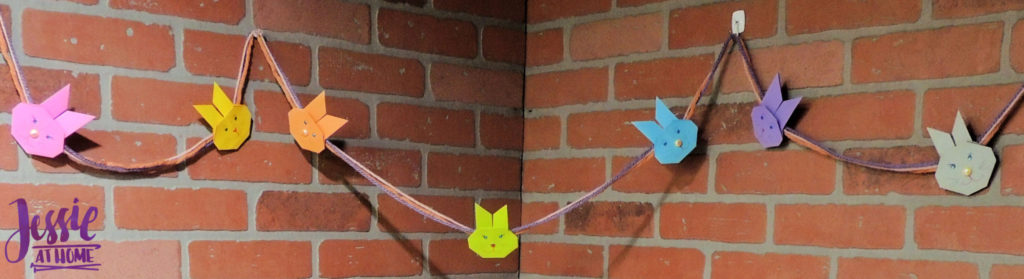
The Origami Bunny Head Pattern is super simple to make, so it’s great for kids and beginners. Turn them into holiday bunting, attach them to cards or presents, stick a few in with candy, or so many other ideas! You can use them in class gifts if you’re trying to stay away from food. Use different size paper to make these cuties in any size! You will find the written and pictorial pattern for the Origami Bunny Head below.
Origami has been one of my hobbies since I was 8 years old. My grandmother introduced me to origami and it remains something that keeps her close to my heart. I’m pleased to be able to share this ancient art form with you! You can find more Origami Pattern Tutorials here: https://www.jessieathome.com/origami-patterns/
Origami Bunny Head Tutorial
In the finished creation, only one side of the paper will be visible.
Be sure to crease well after each fold.
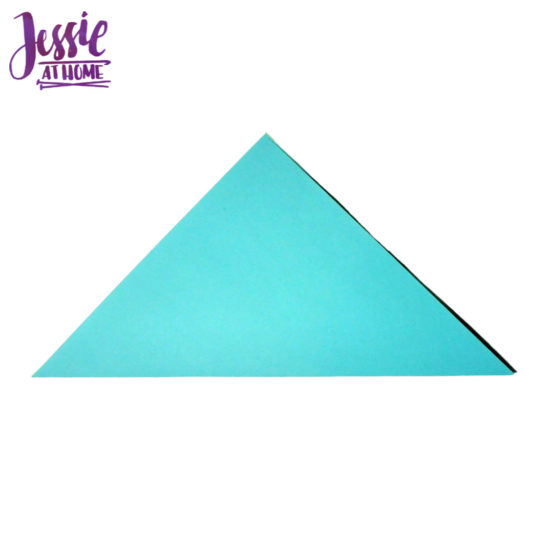
Step 1: Fold square piece of paper in half diagonally with the right side (the side you want to see) of the paper on the outside.
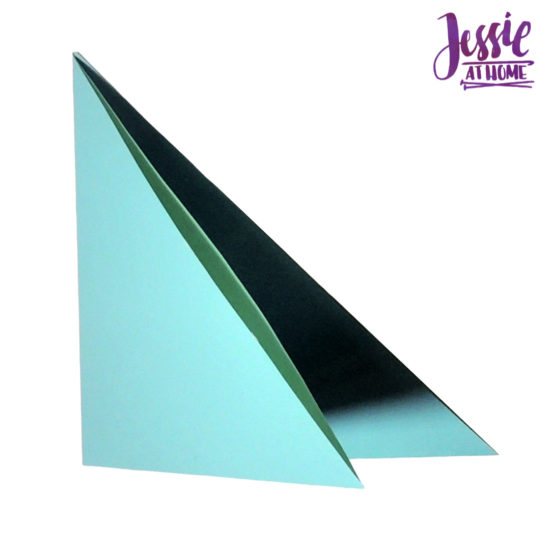
Step 2: Fold in half again the other way, then unfold.
Step 3: Fold the bottom of the triangle up. (Use about 1/5 of the length in the fold.)

Step 4: Fold the top tip of the triangle down. (Use a little less then in Step 3.)

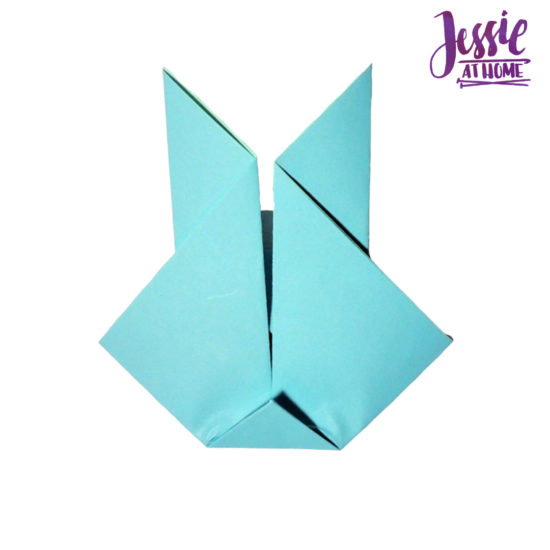
Step 5: Fold the bottom left half of the paper up so that it lines up with the center fold. Then repeat with the other side.
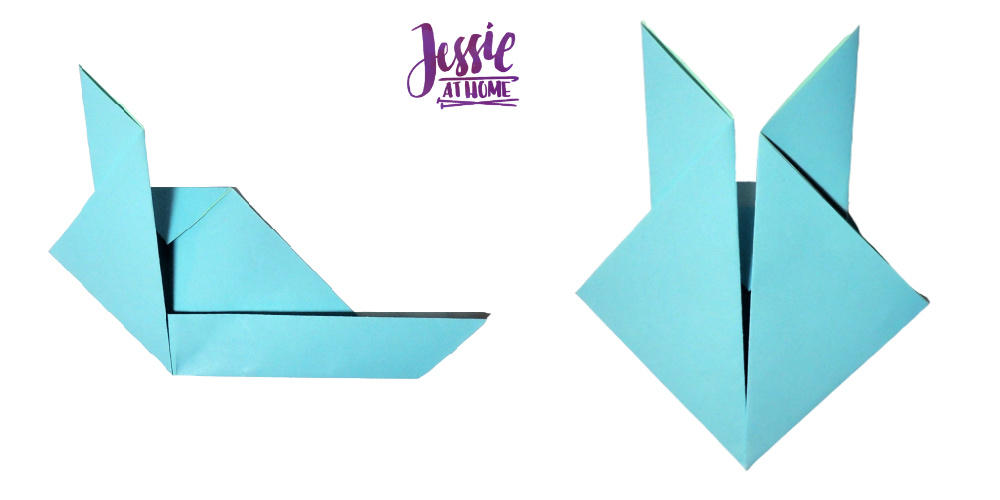
Step 6: Fold the bottom point up a small amount. (A little less then the top was folded down in Step 4.)
Step 7: Fold both side points in a small amount.
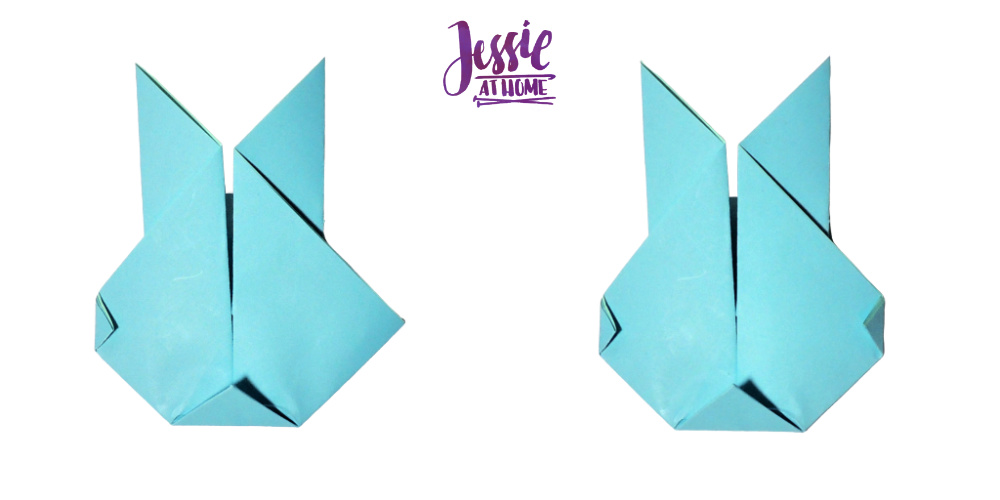
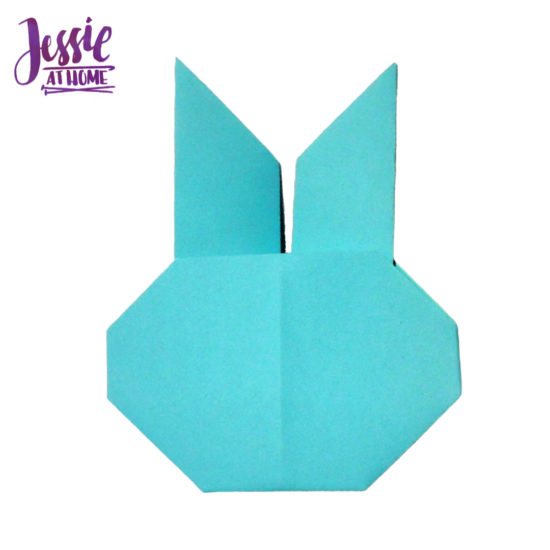
Step 8: Turn over – Now you have an Origami Bunny Head!
You can decorate your bunny in any way you want!
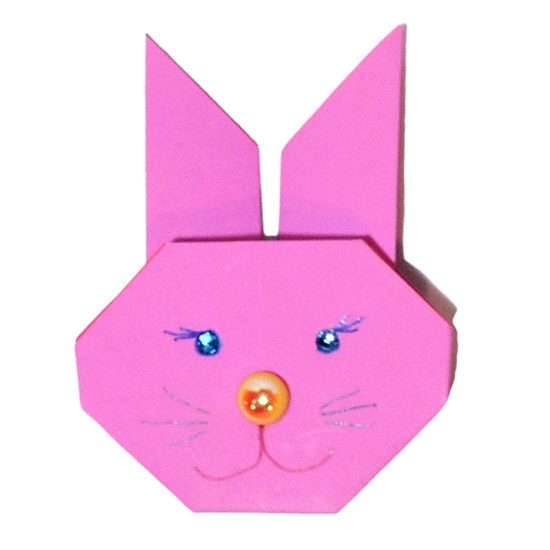
I made 7 of them, decorated them, then taped them onto some yarn to make spring bunting.
Find a video tutorial for this creation on Tangi, HERE.
Find more Origami Pattern Tutorials HERE.
Find some Origami Supplies that I like HERE.
[signature]


These are so cute! I’m showing my grandsons in our next crafting session. Thank you for sharing ❤
Awesome!! They are so fun to color and decorate!