
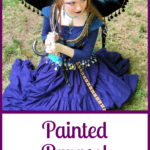

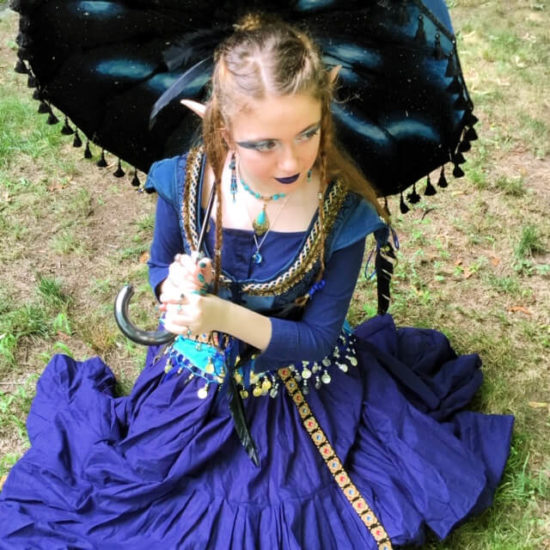
This painted parasol is full of beauty, fantasy, and amazement. My dear young friend Alyssandre is going to teach you how to paint one! She had told me she had this pretty parasol that she wanted to paint and I saw an opportunity! Alyssandre is a talented young artist, and I love featuring fellow artist, so why not team up?
Many products used in this tutorial were provided by Plaid. All opinions are those of myself and Alyssandre.
Alrighty; Alyssandre wrote up the steps to her painted parasol and took lots of photos. So, here they are!
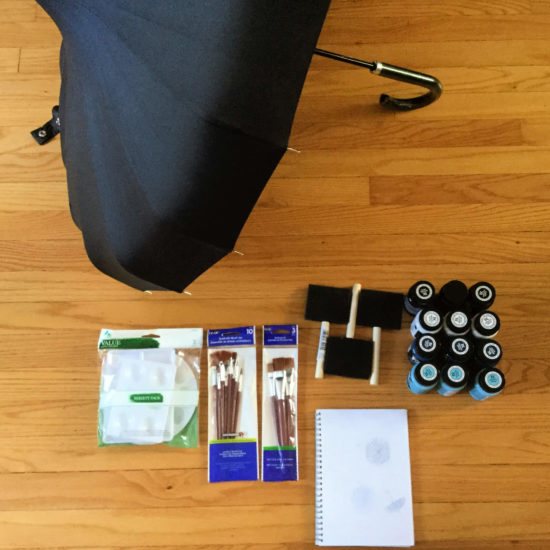
Materials
- Plaid FX Paint in: Blizzard, Aquarius, Carbon and Commander Navy.
- Plaid Paint Brushes
- Sponge Brushes
- Paint Tray
- Parasol
- Masking Tape
- Old Toothbrush or a Hard Bristle Brush
- Waterproofing Sealant
- *Optional* Lace Trim, Thread & Needle
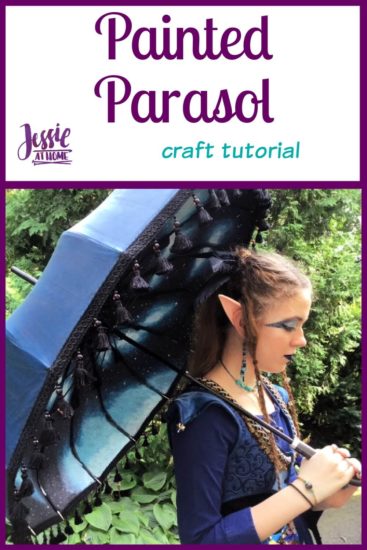
Painted Parasol Tutorial
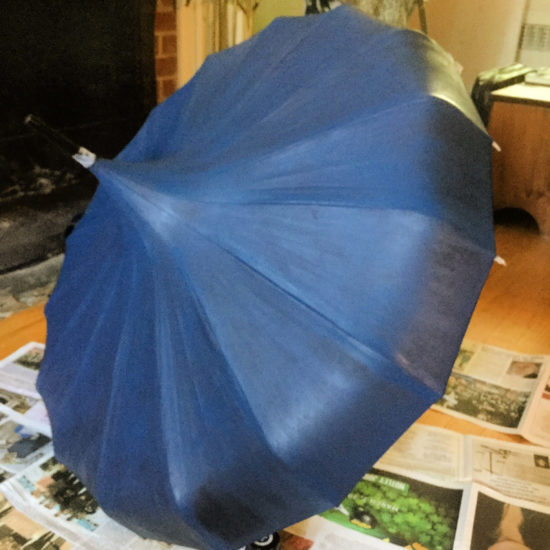
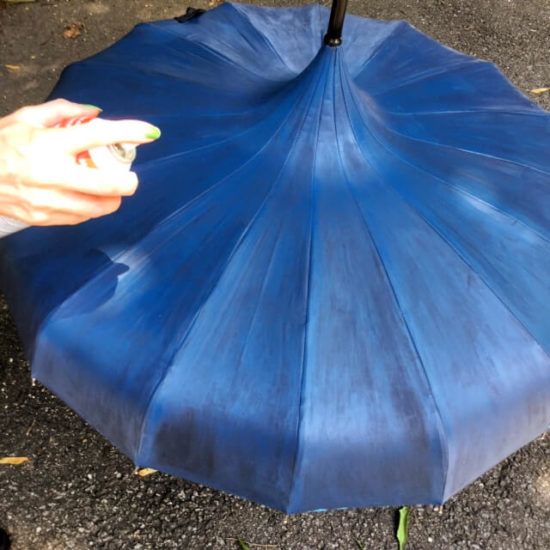
After reading the paint’s instructions. Paint the top of the parasol entirely in dark blue then let it dry for an hour
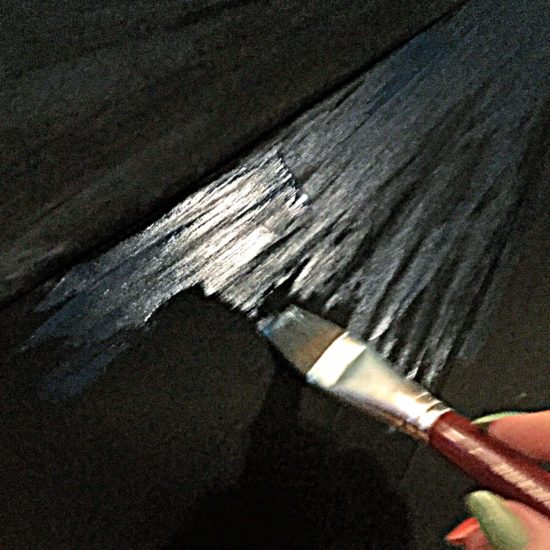
Add another coat and let dry
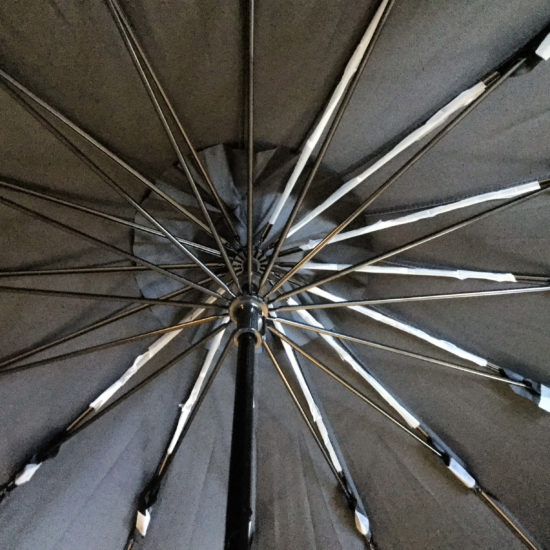
To get ready to paint the underside of the parasol, start by taping off any parts you don’t want to get paint on.
Before attempting the galaxy look on the bottom of the parasol, try doing it on a different surface to get use to the paints and the technique. I suggest looking up tutorials on how to paint galaxies on YouTube to get an idea of how to do it.
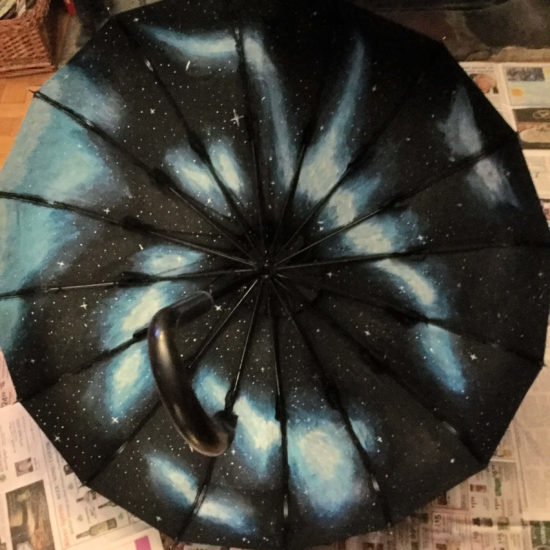
Using sponge brushes, take your time in painting your galaxy. Remember to refer to your galaxy tutorial if you feel the need. For each color, I recommend doing two coats or more to make the color pop more and seem a little more opaque.
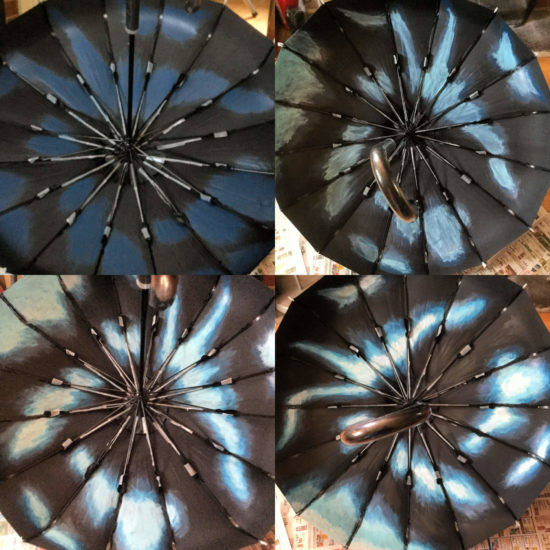
Use an old toothbrush to make the stars of your galaxy. Or you can use whatever method that works for you. For some of the stars, I simply dipped the end of a bamboo skewer (or end of paint brush) into the paint and dotted it at random.
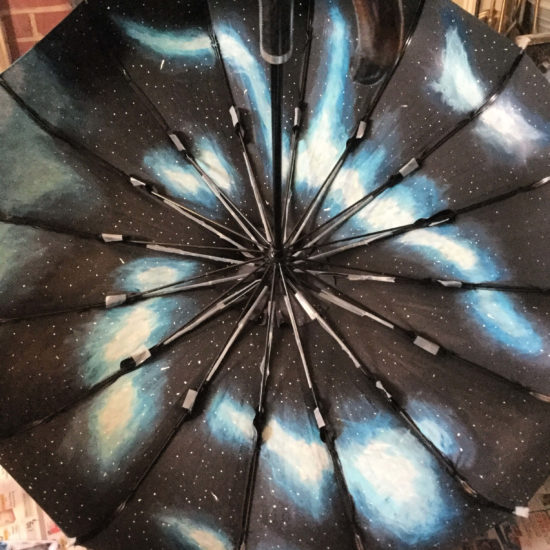
Lastly use a detail brush to paint the bigger twinkly stars in your galaxy.
Finishing
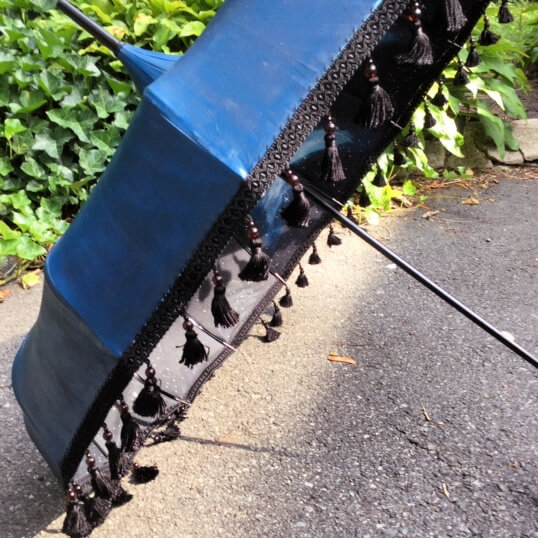
For the sake of keeping your paint job safe. I recommend sealing the parasol with a waterproofing sealant. I am using “Atsko SILICONE WATER-GUARD” because it only takes one coat and won’t leave a stench after spaying.
This last step is optional. I am taking a trim and sewing it around the entire edge of the parasol.
Done
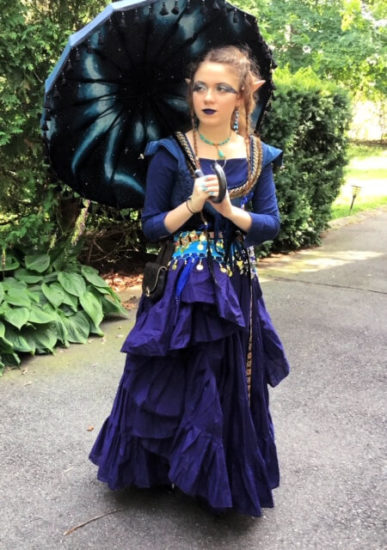
Wasn’t that awesome? I love Alyssandre’s painted parasol. I think we may have to get her to make some more crafty tutorials for us in the future.
Happy crafting my friends!
Here are some products you may find useful.
Did you enjoy what you found here at Jessie At Home? Then sign up for my newsletter and like my Facebook page, so you’ll get all the updates on new tutorials, other posts, sales, and coming events.
If you have any questions, want to share pictures of your work, or just want to chat with Jessie and other crafty individuals, than join one of our free Zoom Sit & Stitches. Find them on our Events Calendar.

© Copyright 2020 Jessie Rayot / Jessie At Home®, LLC All my videos, patterns, charts, photos and posts are my own work, so you may not copy them in any way. If you want to share this information with someone, then share the link to this post.


The parasol is fun, Alyssandre did a great job.