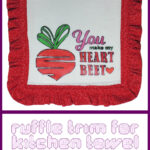
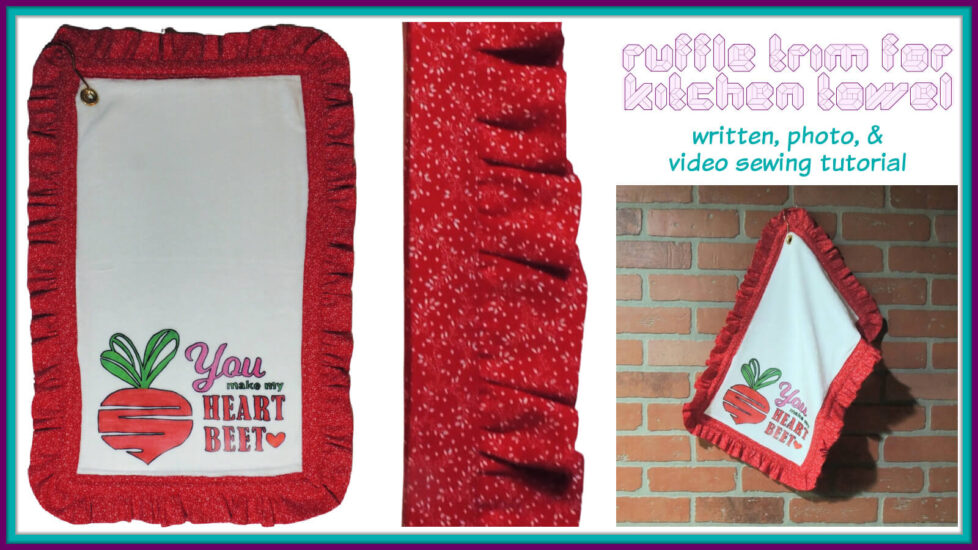
Adding a ruffle trim to a kitchen towel or other items is not scary with this written, photo, and video sewing tutorial!
Products for this tutorial were provided by Artesprix and Cricut. All opinions are my own.
Ruffle trim can seem hard or scary, but it’s so much easier then most people think. This tutorial will guide you through making the trim and then attaching it to a kitchen towel. Of course, you can use this technique to add a fabric ruffle trim to a large variety of items, so have fun with it!
Here are the other posts in this series
Ruffle Trim Supplies
- Kitchen towel: sample is a poly sport towel which is the Artesprix blank of the month for March 2021, decorated with a design from the Cricut Design Space using Artesprix sublimation markers – Use code Jessie10 to get 10% off Artesprix products
- 1/2 yard Quilting Fabric
- Sewing Thread
- Sewing Needle
- Straight Pins

Making Ruffle Trim
How to make a Ruffle Trim Video Tutorial
If you can’t see this video, try watching it on YouTube HERE.
Measure around your towel and add 6″ to find the length of trim you need to make. This will be referred to as Trim Length.
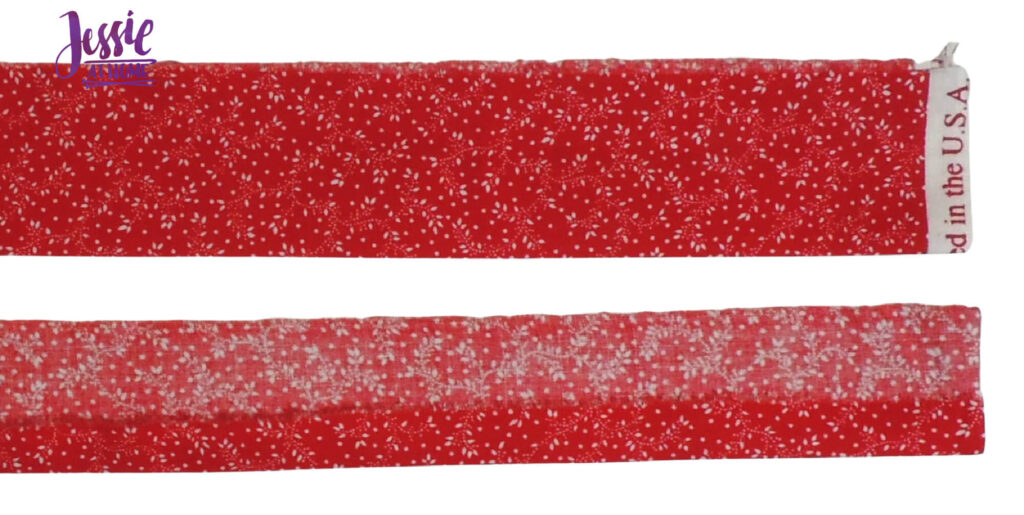
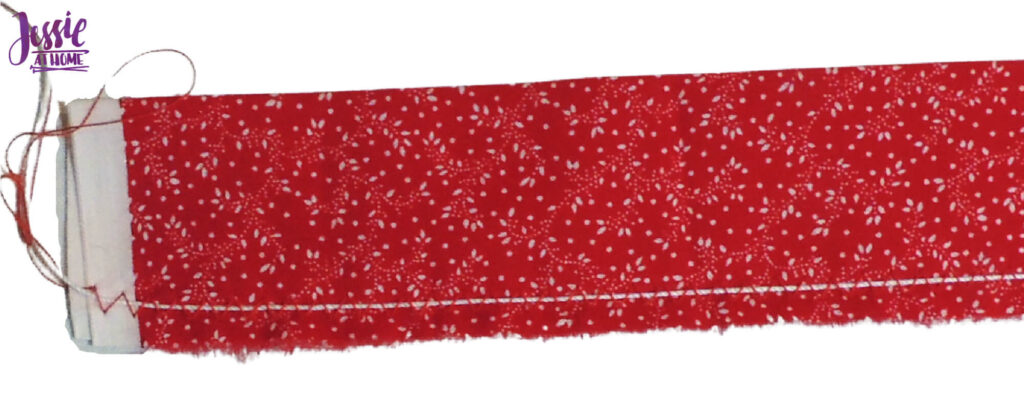
Cut 2 pieces of fabric 1 3/4″ wide by the Trim Length. It may be necessary to cut multiple pieces 1 3/4″ wide and seem them together in order to get each piece long enough. These pieces will be referred to as the Trim Base.
Fold one long side of each Trim Base over 1/2″, then press. Trim Base pieces will now be 1 1/4″ wide.
Cut 1 piece of fabric 3″ wide by twice the Trim Length. It may be necessary to cut multiple pieces 3″ wide and seem them together in order to get each piece long enough. These pieces will be referred to as the Ruffle.
Fold Ruffle in half so it’s 1 1/2″ wide, then press.
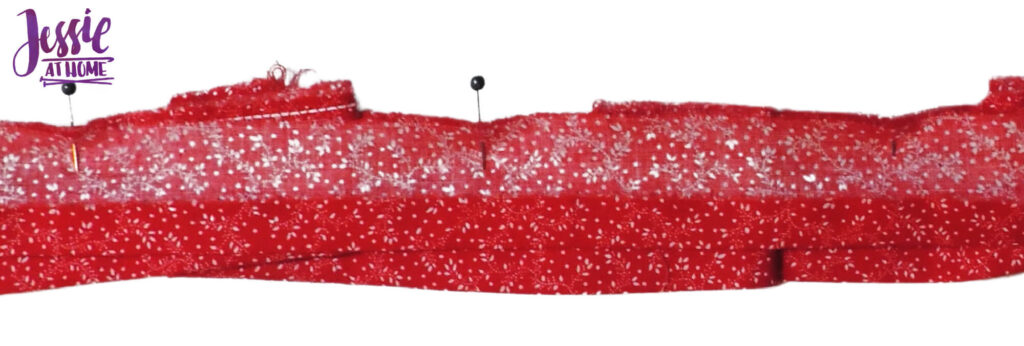
Fold each Trim Base in half and mark with a pin on the cut (not folded) side. Then fold each of those halves in half and mark with a pin. Continue folding each half in half and marking until each section between marks is less than 6″.
Sew a gathering stitch on cut edge (opposite folded edge) of ruffle. Do this by setting sewing machine to a wide and long zig zag stitch and than stitching close to edge of Ruffle and OVER TOP of a piece of crochet thread. Take care not to sew through crochet thread. The crochet thread should be incased by the zig zag stitch.
Fold Ruffle in half and mark with a pin on the cut (not folded) side. Fold each of those halves in half and mark with a pin. Continue folding each half in half and marking until there are the same number of sections as in the Trim Base. The Ruffle sections will be twice as long as the Trim Base sections.
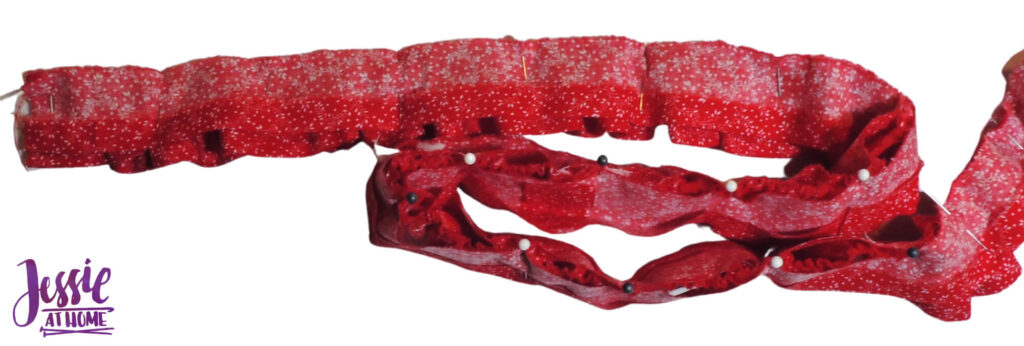
Place one Trim Base right side up on table. Next place Ruffle on top with the cut ends even. Finally place other Trim Base right side down on top of Ruffle with cut ends even. Pin all layers together at one end. Then pin all layers together at next set of pins (the Ruffle section will be twice as long as the Trim Base sections, this is the way it’s supposed to be). Pin all layers together at next set of pins, and continue to end. All layers should end at the same time.
Gently pull the crochet thread from one end, gathering the Ruffle. Slide the gathering along and continue pulling the crochet thread until half the piece is gathered so the Ruffle sits perfectly inside the two Trim Base pieces. Tie the crochet thread together with the thread ends of the zig zag stitch so the gathering stays. Repeat this process on the other end to gather the other half of the Ruffle.
Sew all layers together 1/2″ from the cut edges.
Cut the knots off the crochet thread and gently pull to remove it so it doesn’t interfere with the drape of your finished piece.
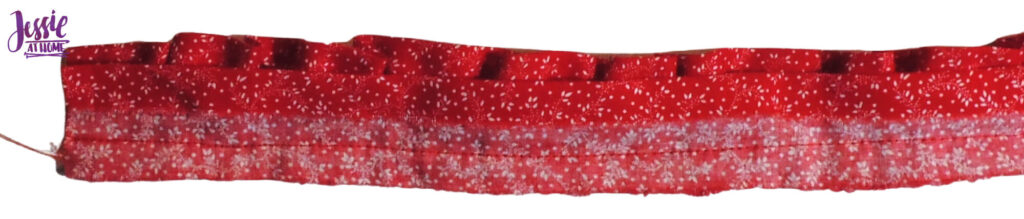
Fold on Trim Base down at stitching line so the right side is out, and press. Repeat with other Trim Base.
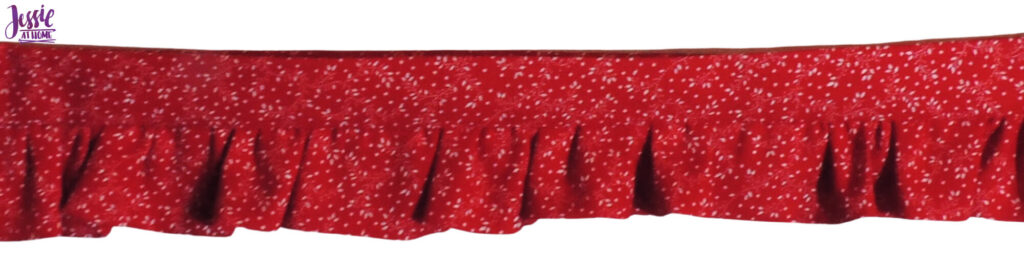
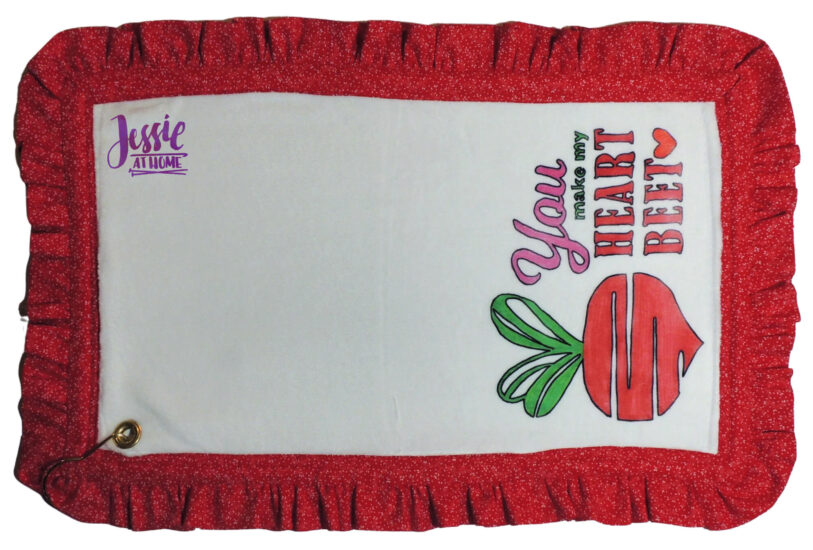
Your Ruffle Trim is now complete and ready to be sewn on to whatever you want to trim!!
Attaching Ruffle Trim
How to attach a Ruffle Trim Video Tutorial
If you can’t see this video, try watching it on YouTube HERE.
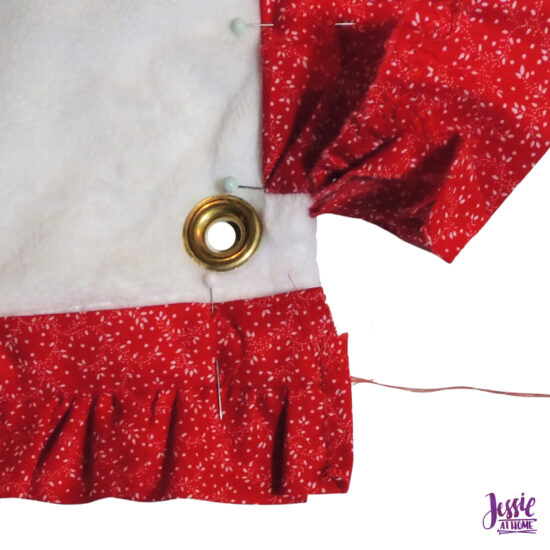
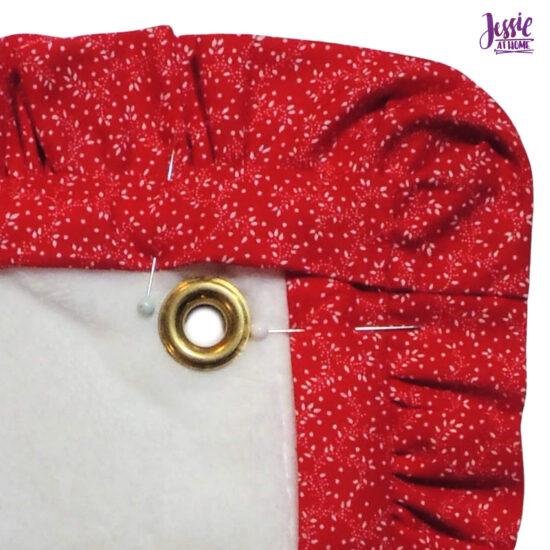
Start at one corner of towel and encase towel between Trim Bases, leaving about 1″ hanging off the end. Pin through all layers every 2-3 inches.
When a corner is reached, wrap the trim around the corner and fold the Trim Bases at a 45° angle to make them neat.
Continue pining to a few inches before end.
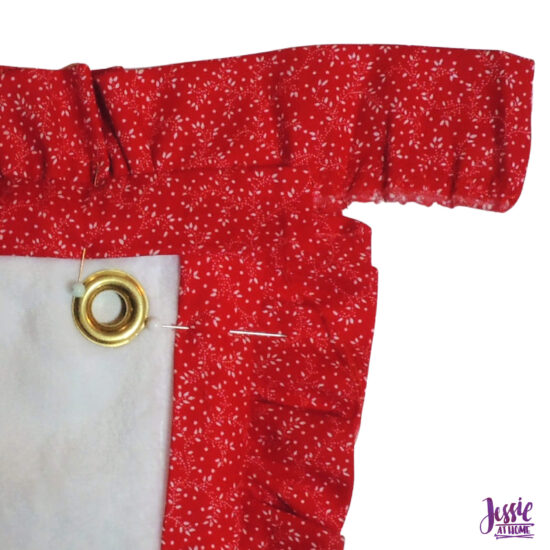
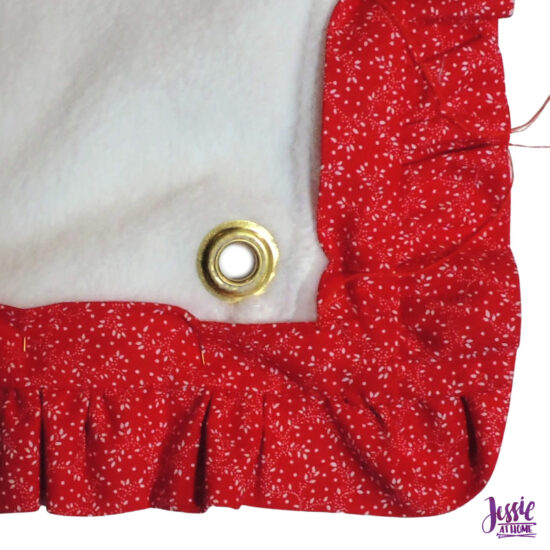
Go back to the starting end and cut it so only 1/4″ is hanging off the end. Clip the stitching holding the layers together in the part hanging off the end. Fold the Ruffle over on the right side and hand stitch down. Clip the Trim Bases so they line up with the end.
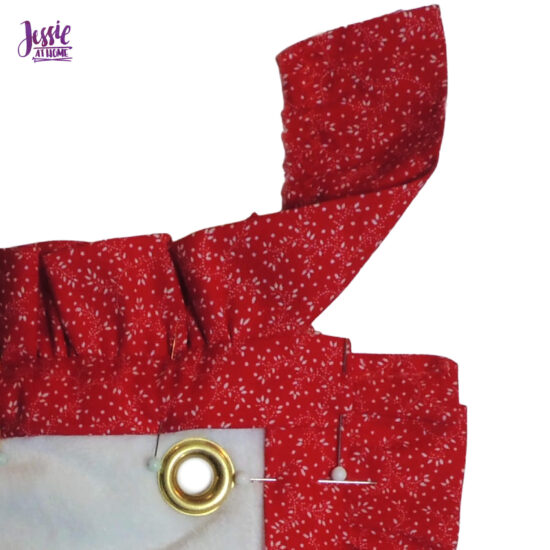
Cut other end of trim through all layers 1″ past the end of the towel. Clip the stitching holding the layers together in the part hanging off the end. Separate the layers, the ruffle will ungather, don’t fret.
Fold the Trim Base on the front under so it lines up with the top of the starting trim base, pin the fold, but do not pin the Trim Base to anything else.
Fold the end of the Ruffle 1/4″ towards the back and hand stitch down.
Pin the Ruffle under the front Trim Base to end, around the corner, and along the side; gathering the Ruffle as needed so the end of the Ruffle lines up with the end of the side of the Trim Base. Hand stitch Ruffle to front Trim Base and then hand stitch them both to the starting end of the Ruffle and front Trim Base.
Fold the back Trim Base so it lines up with the edge of the starting trim base and hand stitch it down.
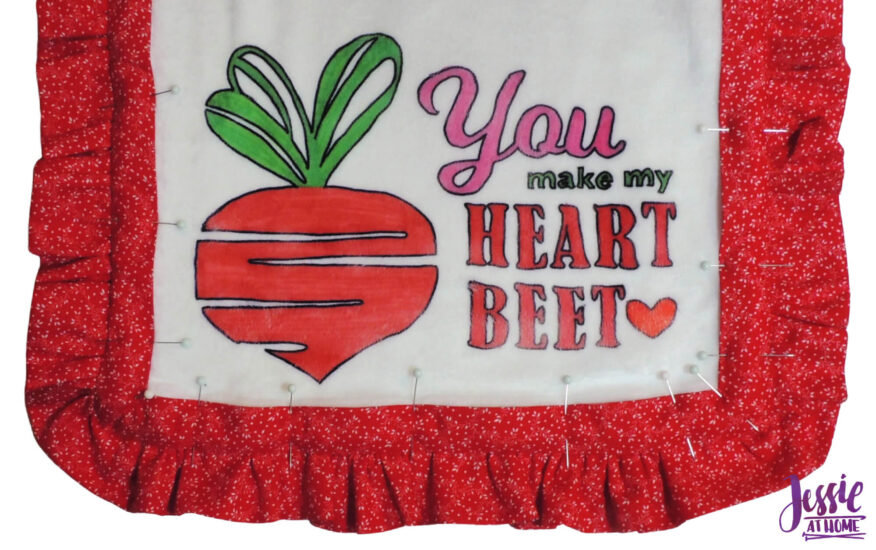
From the front, top stitch Trim Base to towel on machine, 1/4″ from edge. Make sure the Trim base on the back does not come unfolded as it is sewn. Top stitch again 1/16″ from the edge.
Admire your awesome work and enjoy! Use the towel to wipe the sweat from your brow.
Did you enjoy what you found here at Jessie At Home? Then sign up for my newsletter and like my Facebook page, so you’ll get all the updates on new tutorials, other posts, sales, and coming events.
If you have any questions, want to share pictures of your work, or just want to chat with Jessie and other crafty individuals, than join one of our free Zoom Sit & Stitches. Find them on our Events Calendar.

© Copyright 2021 Jessie Rayot / Jessie At Home®, LLC All my videos, patterns, charts, photos and posts are my own work, so you may not copy them in any way. If you want to share this information with someone, then share the link to this post.