

Make fun retro kitchen towels with Artesprix sublimation markers, then trim them using the other tutorials from this week.
Products in this tutorial were provided by Artesprix and Cricut. All opinions are my own.
Have you heard about the Artesprix Blank of the Month? Every month there’s a special sublimation blank for sale. The blank may not be available once the month ends, so don’t miss it!
Even better? You can always get 10% off your Artesprix purchase with code Jessie10.
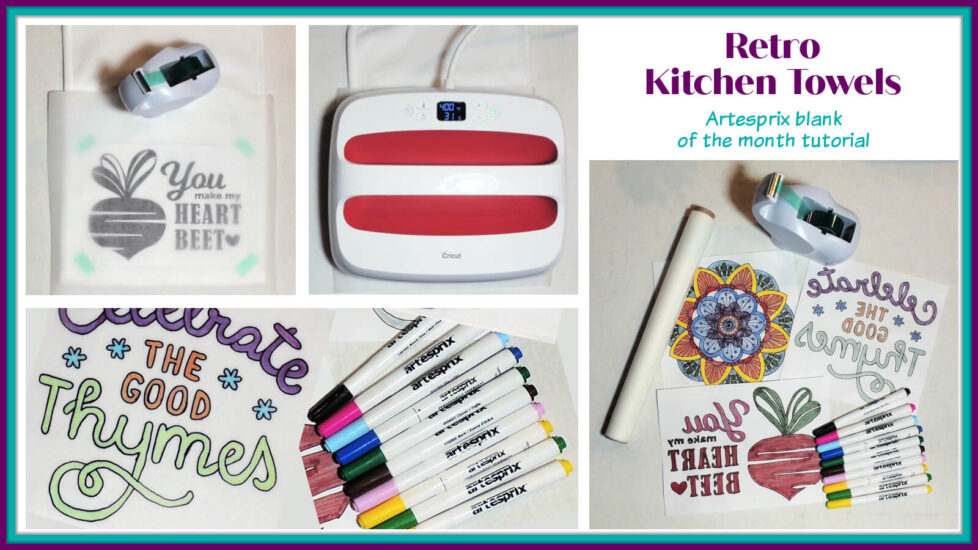
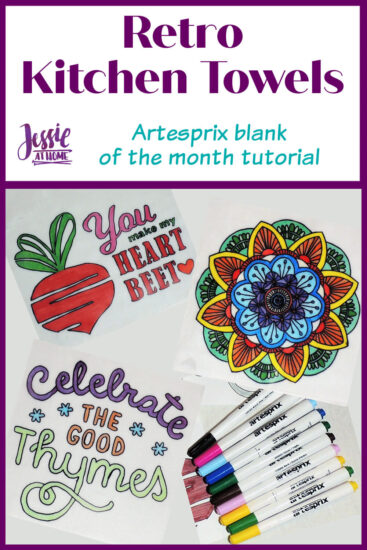
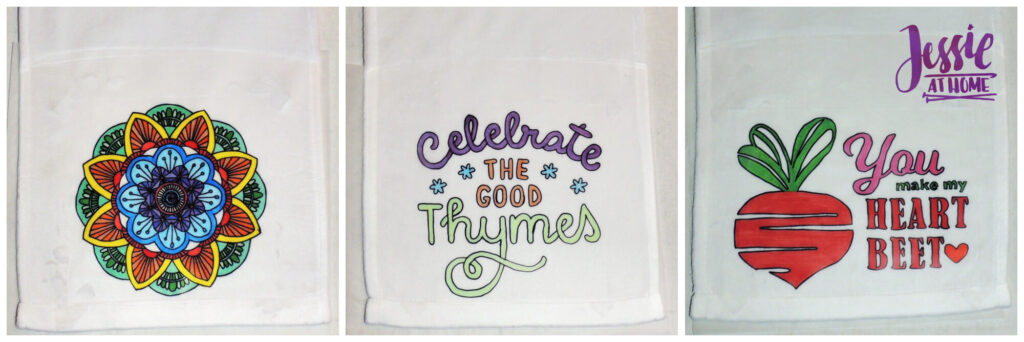
The March blank of the month is a poly sports towel. I got 3 and I’m using them for retro kitchen towels. Let me walk you through what I did with them!
Retro Kitchen Towels Supplies
- Polyester Towel (Artesprix Blank of the Month March 2021)
– This Blank of the Month is over, but you can find some similar blanks HERE. Read the listings to make sure they are what you need. - Artesprix Sublimation Markers
- Cricut *optional
- Cricut EasyPress or some other heat press
- Lint Roller
- Heat Tape
- Silicon Paper
Tutorials to add borders to towels
Choosing Designs
To begin, I pulled out my Cricut Maker and opened up Cricut Design Space. I set the image search to Draw Only and Print Then Cut, then typed in a search word. I tried “mandala” and “Kitchen”.
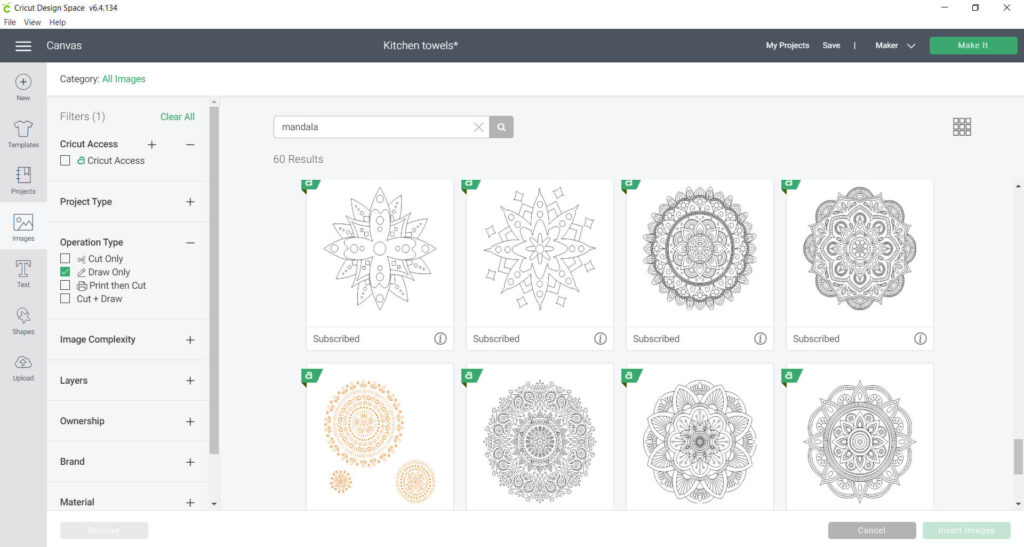
Once I found the three images I wanted, I put them all on my Design Space Canvas, and then set them each to print then cut. If your image is too big for print then cut, you’ll get an error message like you see below.
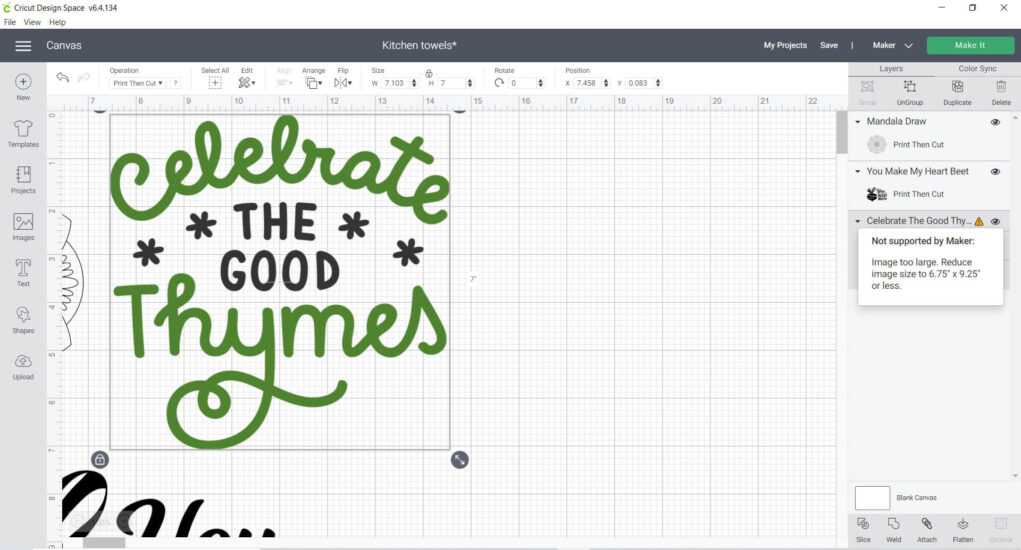
I adjusted the size of each of my images so they would fit in the print then cut size parameters.

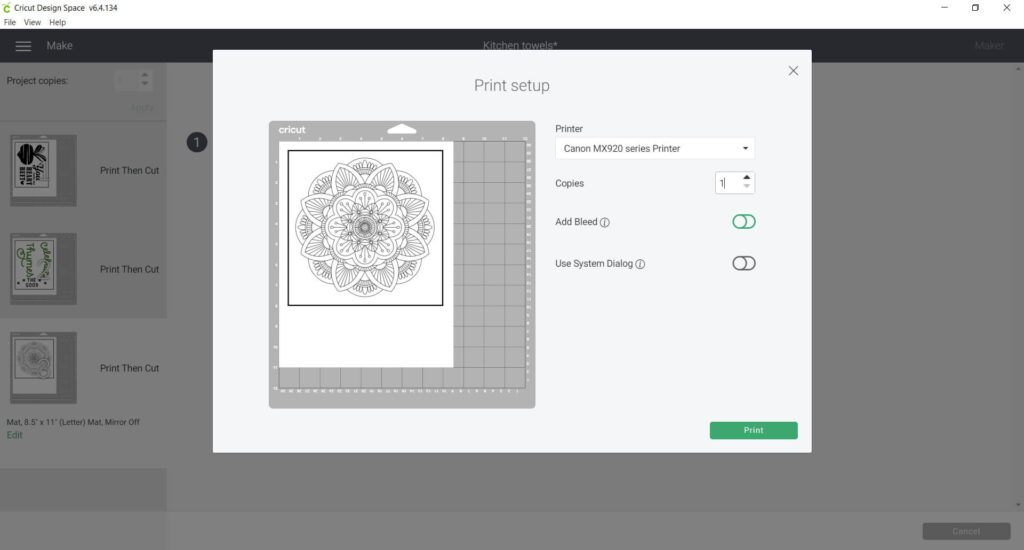
Finally I clicked “make it” and sent them each to the printer.

As I send each one, I made sure to turn off the “add bleed” option. Obviously I didn’t actually cut the image, I skipped over that step and just printed each one on regular printer paper. I did NOT mirror any of the images.
Coloring
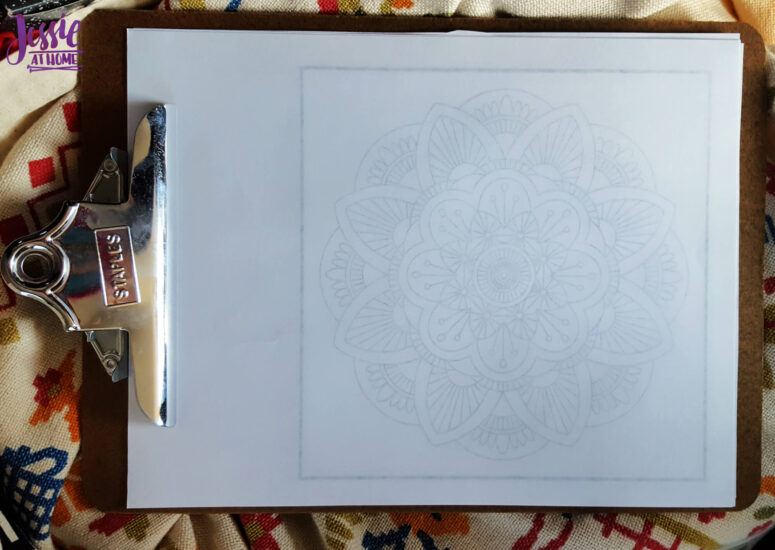
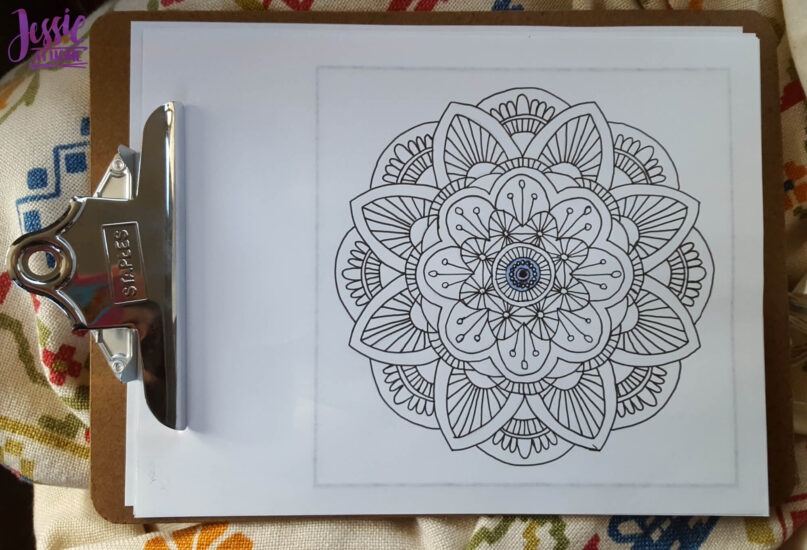
Time to color! Now at this point the kiddos needed their braces removed, so off we went. Due to Covid restrictions, I wasn’t allowed in the building, so I got into the back seat of my car and tossed the pictures on a clipboard. I colored the back of the images, as I that way I wouldn’t have to worry about the printer ink, and it would also mean that the images with words would be facing the correct way after they end up on the towels.
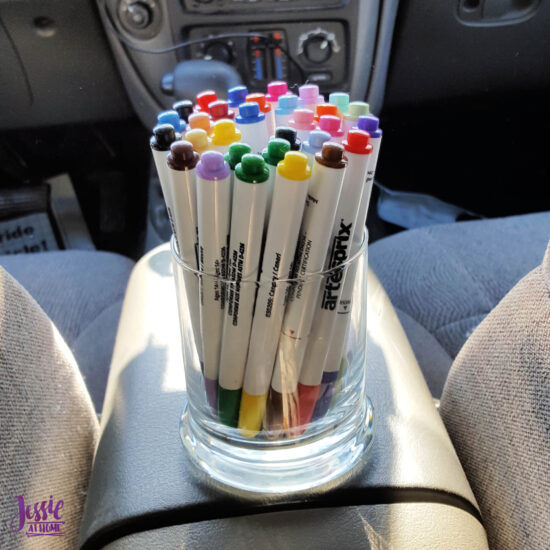
I keep my markers in a little glass container. When not in use I store it on the side, and when using the markers I stand it up so the markers are point down. This is the best way to take care of your sublimation markers.
First I used the fine point black marker to trace all the outlines to the back of the printer paper. Then I colored them all in. Keep in mind that the final color will be the color on the cap of the pen. Some of the colors look rather different on the paper.
Sublimation Time
Woo Hoo! Time to sublimate my retro kitchen towels.
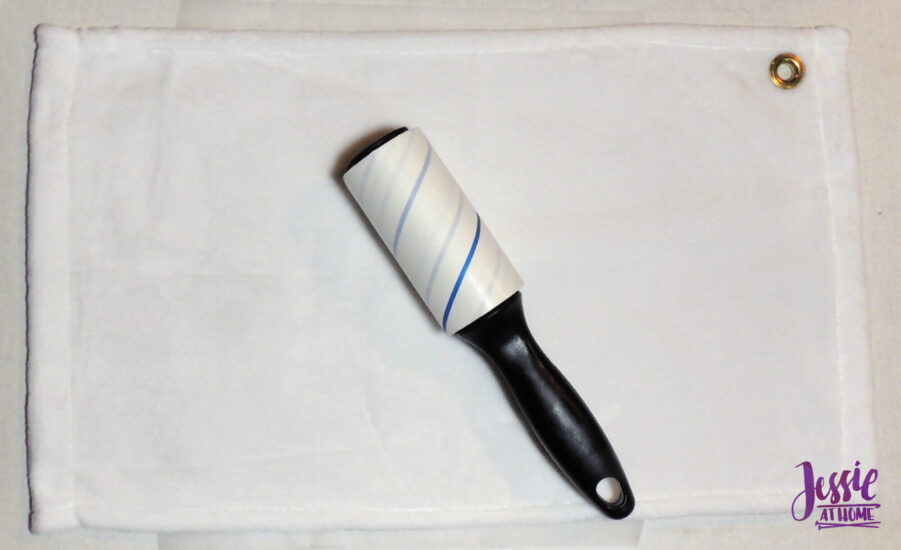
First things first, whenever sublimating on fabric, always lint roll. Make sure the fabric is clean and lint free so the ink sticks to the fabric, and not lint or dirt.
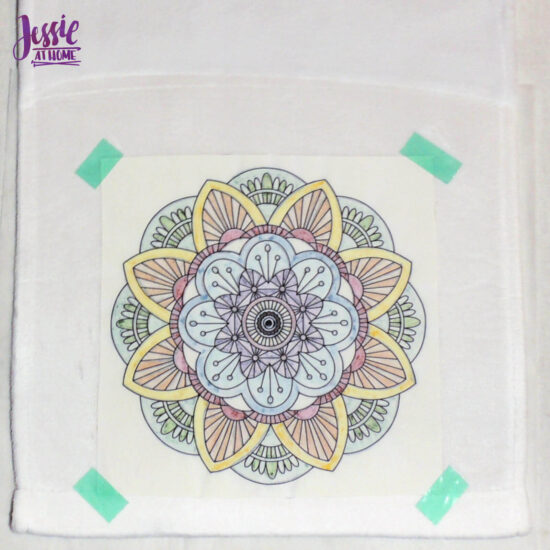
Now it’s time for your sublimation sandwich. First lay down some protective silicon paper, then your blank with the side you want to sublimate up. Next place the sublimation image you colored on paper colored side down.
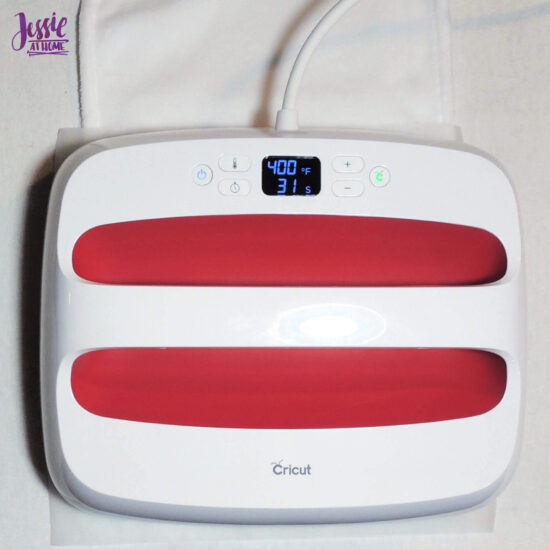
At this point it’s a good idea to remove the image and pre-heat the blank for 15 seconds. Then put the image back down and tape it using heat tape. Make sure the tape doesn’t cover any colored part of the image, as the heat won’t go through it very well. Lastly put down another piece of silicon paper.
Time to heat! Artesprix blanks are listed on the Artesprix site with the time and temp needed to sublimate. For the poly towels set the EasyPress temp to 400 and the time to 45 seconds.
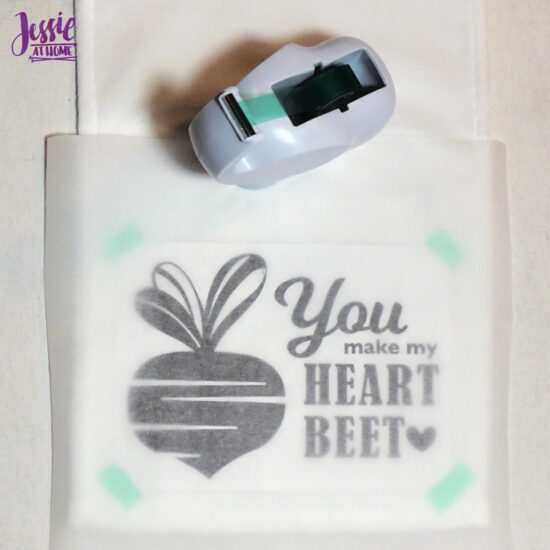
I love hw the paper looks when you take off the press and the top piece of silicon paper. It’s like a little teaser of what you’re about to see.
Now peel off the paper (without burning yourself) and admire your creation! I still gasp at how bright and crisp and amazing the images are every time. You’d think I’d be used to it by now, but I’m not!
Once I had my colorful designs on my towels it was time to add a little trim around the edges. I posted tutorial for each of the towel trims earlier this week: Crochet, Knit, Fabric.
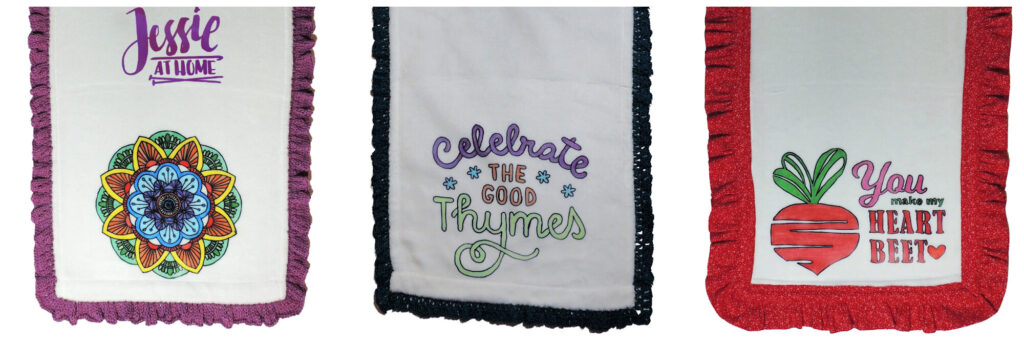
Now it’s time to hang these cuties up in my kitchen! They’ll go so well with my retro signs I have in there.
Did you enjoy what you found here at Jessie At Home? Then sign up for my newsletter and like my Facebook page, so you’ll get all the updates on new tutorials, other posts, sales, and coming events.
If you have any questions, want to share pictures of your work, or just want to chat with Jessie and other crafty individuals, than join one of our free Zoom Sit & Stitches. Find them on our Events Calendar.

© Copyright 2021 Jessie Rayot / Jessie At Home®, LLC All my videos, patterns, charts, photos and posts are my own work, so you may not copy them in any way. If you want to share this information with someone, then share the link to this post.