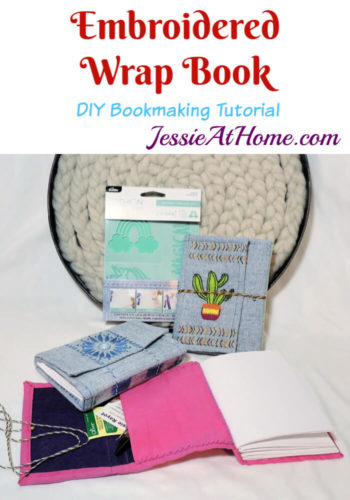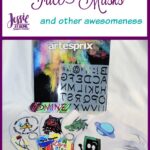

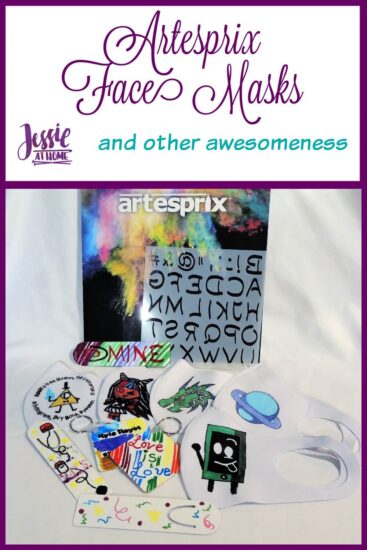
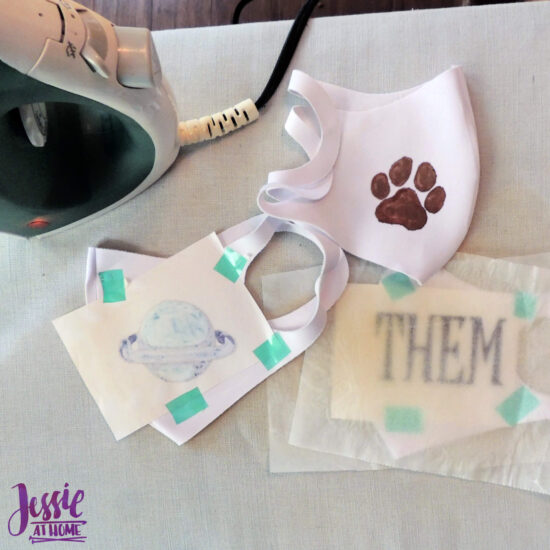
The kids made Artesprix face masks and they are so cool! They were fun and easy to make and come out beautiful.
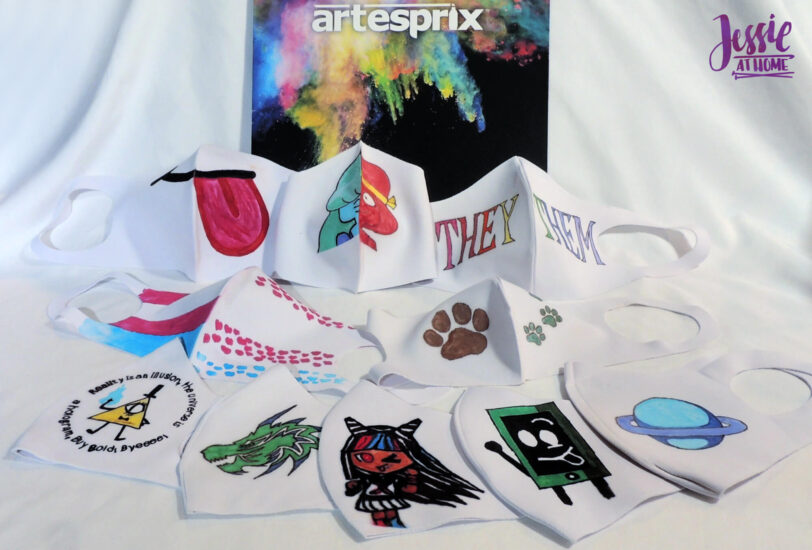
You’d think we would get use to the awesomeness that is Artesprix, but we still gasp in awe every time we peal away the paper and reveal our latest creation. We have so many more ideas and we can’t wait to make All The Things!
Some products used in this post were provided by Artesprix. All opinions are my own.
What is Artesprix?
Well the big awesome product is their sublimation markers. The markers have an angled edge so you can make thin or thick lines and even use them like calligraphy pens. Plus you can get a set of just black that has 2 each of 3 different points, fine, round, and the same angled edge as the rest.
They carry several sets of colors, and if you get them all you will only have duplicates of black, and you’ll end up with 2 of the same yellow. Other than that, the rest of the colors are different. It’s important to note that the colors will end up the color of the cap, as when you color them on paper they don’t all look quite the same.
To use the Artesprix sublimation markers, you color your image in revers on paper, then iron it onto a polyester or polyester treated blank. The colors permanently transfer to the blank. It’s pretty nifty!
We had so much fun making various goodies with Artesprix pens and blanks, that we wanted to share how to make some yourself. You will need some or all of the following items:
- Artesprix Markers
- Artesprix Blanks and/or other polyester sublimation blanks – if you can’t find the blanks you want from Artesprix. We used THESE masks.
- Paper – any paper, printer paper, notebook paper, graph paper…
- Siliconized Release Paper
- Heat Press – Preferred, but a home iron will work if you don’t have a heat press.
- Pencil – to draw your ideas.
- Heat Tape – Artesprix heat tape fits in regular tape dispensers. I need to but one for my heat tape now. I think I need THIS one!
- Heat Mat – it’s really a good idea if you are using an iron, as you can ruin your ironing surface without one.
Drawing and Coloring
First you need to trace your blank onto your paper. It’s important to remember that you will be making your paper version in reverse of the finished item.
We found the easiest way to not mess up was to trace the blank onto our paper with the side we want to decorate facing up. Then we could darken the outline and add in anything we wanted to draw/write without having to do it in reverse. Next we flipped the paper over and colored the image from the back so it would be reversed.
You can see the kiddos coloring away below. You’ll notice we also printed out Kyla’s name in a few fonts. She was able to choose the one she wanted for her luggage tag and then just flipped the paper over and traced it with the Artesprix markers on the back so it was reversed!
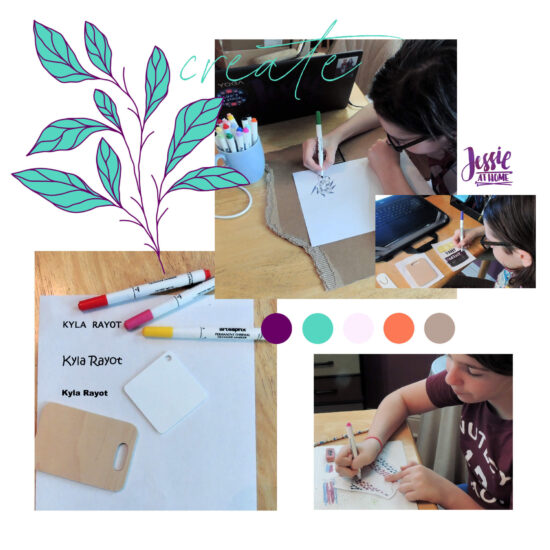
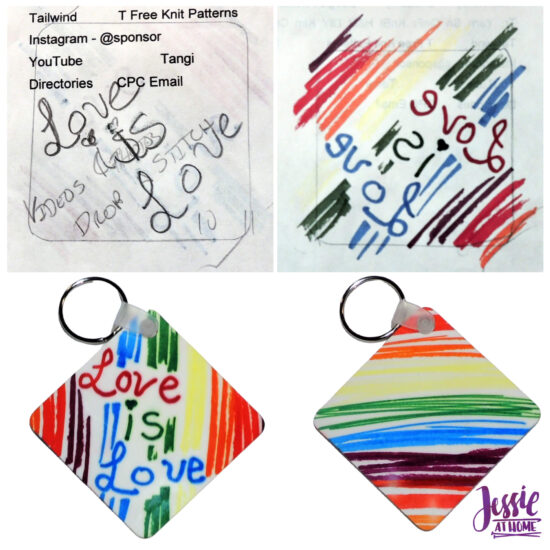
In addition to using printed images and writing, we did some freehand. Below you can see where I traced a keychain blank on a scrap piece of paper and then wrote “Love is Love”. I then flipped the paper over and colored it all in how I wanted with the markers. No worries about pencil lines, they won’t transfer. I wanted the colors to go all the way to the edge, so I colored over the edges to be sure it would work right.
Transferring
Once we had all our paper images colored in, we transferred. First we made a “sublimation sandwich”. This means we put down some silicon paper, then the blank with the side we wanted to transfer onto facing up, then the colored paper facing down, then another sheet of silicon paper.
We used the heat tape to tape the colored paper and the blank together. The heat tape will not transfer heat, so be sure it’s not covering any of the colored part of your paper.
Now we pressed! Check the Artesprix site HERE for heat and time notes. You can also find FAQs HERE. For the masks we put our iron (with no water in it) on the highest setting and pressed WITHOUT MOVING the iron for 2 minutes. We did our best to keep the steam holes off the images.
In a few cases we had to tile our ironing, meaning we ironed one part, then picked up the iron and ironed the next part. You’ll need to do this if your image is bigger then the iron, or if the steam holes are over any of the image, as they will not get hot enough to transfer the image.
Now you will either need some heat protection for your fingers, or you’ll need to let your piece cool down before taking everything apart to reveal your awesomeness.
More Tips
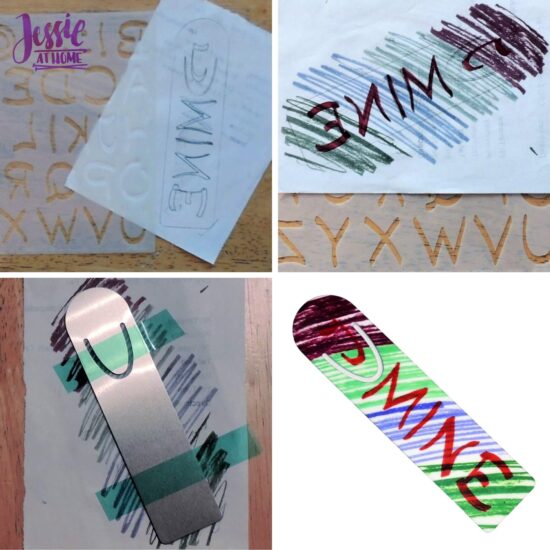
If you used letter stencils like THESE, you can use them in reverse to write backwards. I made a bookmark to clearly mark my books as mine!
If you have colored the entire area of your blank, be sure to tape UNDER the blank so that the tape doesn’t disrupt the heat (look at the bottom left image below).
If your blank is polyester on both sides, then you can decorate both sides. Just do them one at a time. Scroll back up to the “Love is Love” keychain I made to see what I mean.
There you have it. Now go fourth and make your own Artesprix face masks and other awesomeness my crafty friends!
Did you enjoy what you found here at Jessie At Home? Then sign up for my newsletter and like my Facebook page, so you’ll get all the updates on new tutorials, other posts, sales, and coming events.
If you have any questions, want to share pictures of your work, or just want to chat with Jessie and other crafty individuals, than join one of our free Zoom Sit & Stitches. Find them on our Events Calendar.

© Copyright 2020 Jessie Rayot / Jessie At Home®, LLC All my videos, patterns, charts, photos and posts are my own work, so you may not copy them in any way. If you want to share this information with someone, then share the link to this post.