
This reversible door hanger DIY craft is fun for kids and adults. What an awesome way to let your kids add their own style to their room.
Some products in this tutorial were provided by Artesprix. All opinions are my own.
The August 2021 Blank of the Month is a reversible door hanger. The door hanger (also called a door knob hanger) is white plastic and can be sublimated on both sides. Don’t forget to use code Jessie10 to get 10% off your Artesprix order – not valid on the Heat Press or sale items.
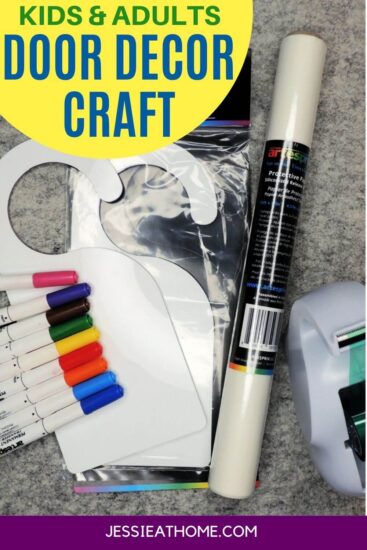
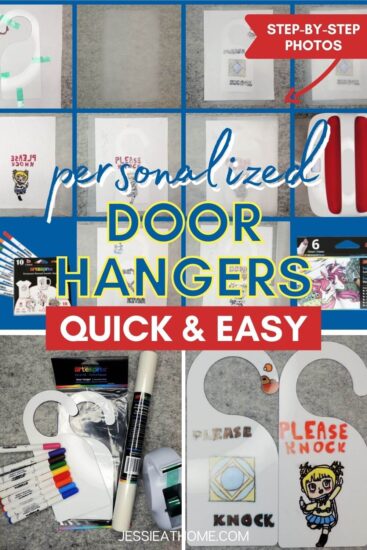
Reversible Door Hanger Supplies
Use code Jessie10 to get 10% off your Artesprix order – not valid on the Heat Press or sale items.
- Reversible Door Hanger – This is no longer the Blank of the Month, but you can find similar blanks to those used in this tutorial HERE.
- Sublimation Markers
- Heat Tape
- Protective Paper (silicon)
- EasyPress, Heat Press, Iron, or Similar
- Lint Roller
- Heat Safe Surface
- Image to color and sublimate (more on this later)
Reversible Door Hanger DIY Tutorial
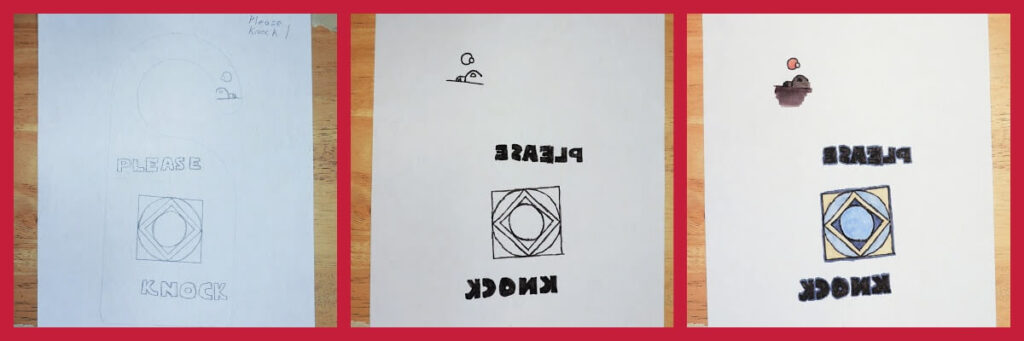
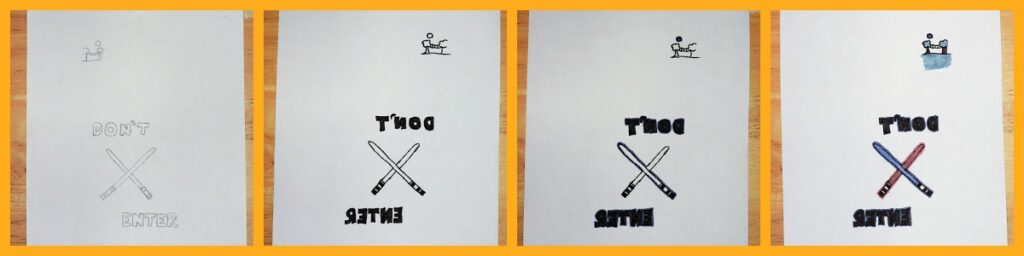
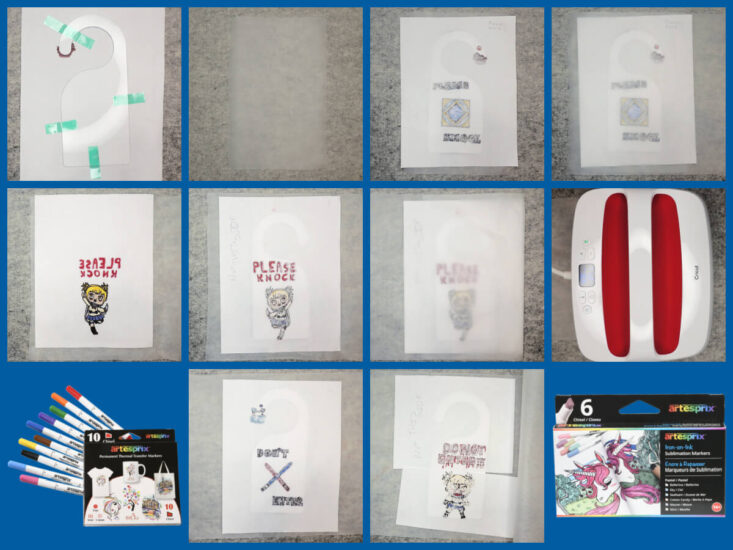
I had two door hangers, so I let each of the kids make one. We started by tracing both sides of the door hanger. It’s important that you don’t make two of the same side if you are decorating any of the hanger section, as Vada did.
Once you’ve traced the blank, you can draw your design. I always suggest drawing it as you want it, then using a light box or window to trace it in reverse on the other side. That way you can color in the mirror imaged side with the Artesprix sublimation markers, and after you sublimate it, it will be the right direction. This is a must if you have any letters or other images that won’t work if they are backwards.
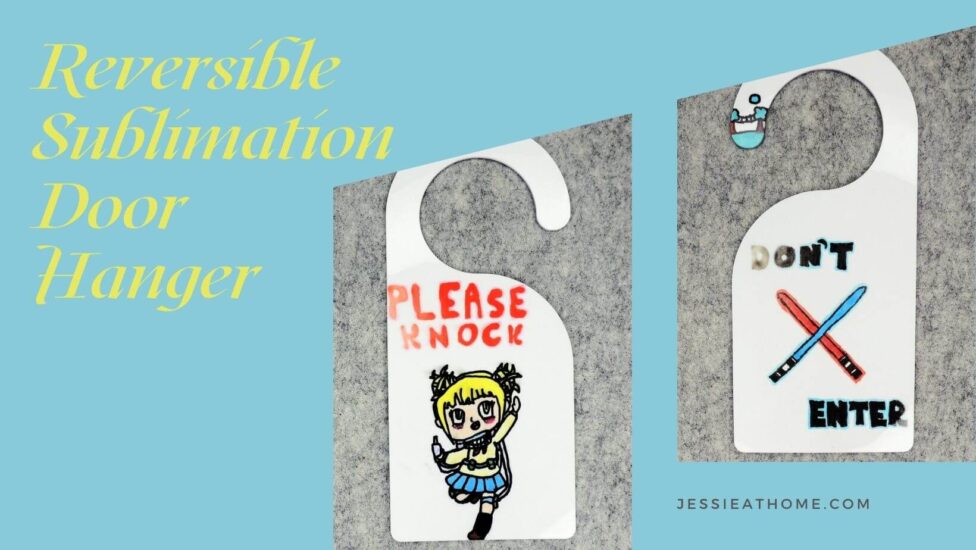
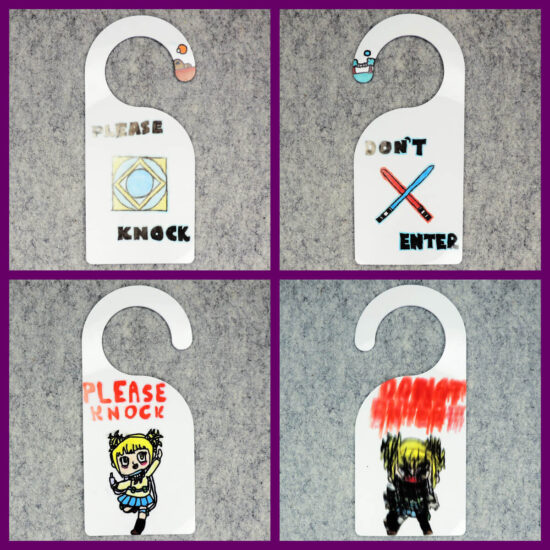
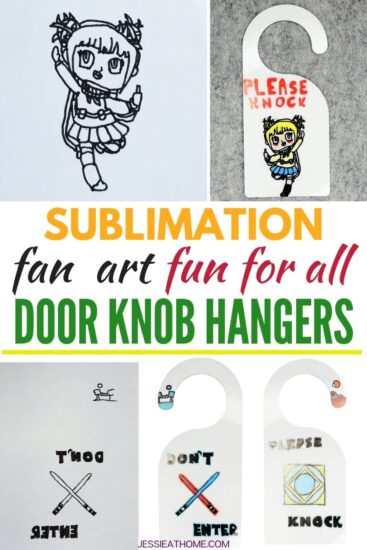
For the first side, Vada made a “Please Knock” Star Wars themed sign, complete with a little Tatooine image on the end of the hanger.
For the opposite side, Vada made a “Don’t Enter” sign. I guess that’s for times when even knocking won’t get you in. They included crossed light sabers, and a little ewok village image on the hanger.
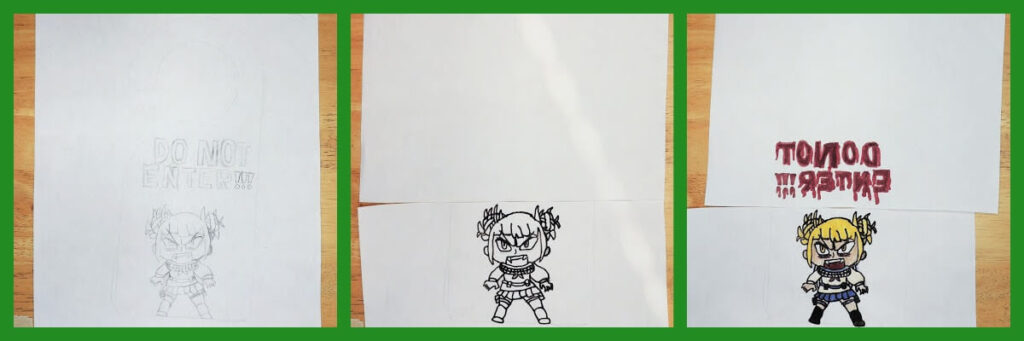
Kyla also made “Please Knock” and “Don’t Enter” signs for the two sides of her reversible door hanger. She drew a character from a manga comic she likes. The “Please Knock” side has the girl looking rather happy.

On the “Don’t Enter” side, the girl is rather scary. Kyla explained that she’s not really a vampire, but she’s kind of a vampire. Anyway, Kyla got the girl all traced out with the black marker and realized that she had started coloring the wrong side. So I just cut between the words and the image, and then Kyla was able to color the back of the words without having to recolor the image.
Sublimation Sandwich
Once you’ve finished coloring, it’s time for the sublimation sandwich! First tape the blank to the colored side of the paper. make sure to use enough tape (more on this later). Now the sandwich is made with the bottom bun of heat safe paper, then the meat of the sublimation blank, then the cheese of the colored paper (these last two are taped together), and lastly with the top bun of more heat safe paper.
Now it’s time to cook! Use your heat source, in my case a Cricut EasyPress. Check your sublimation blank to be sure you have the correct time and temp. Artesprix lists the time and temp for each blank on their site. For this one it’s 400 degrees for 90 seconds.
Now I had a bit of a glitch and thought it was 400 degrees for 30 seconds. So my door hangers aren’t as awesome as usual, the colors aren’t all the way there. I ordered two more so the kiddos could make new ones, and I’ll be sure to use the correct time.
On the last one I did, I thought maybe the problem was that I needed more pressure, so I pushed down on my EasyPress. Well, I guess I didn’t press straight down, and I didn’t use enough tape, because Kyla’s scary girl is super scary now.
I always tell you I’ll share my mistakes so you don’t have to make them. The moral here is: Be super sure you have the correct time and temp for your blank, and be super sure to use enough heat safe tape!
Don’t forget to use code Jessie10 to get 10% off your Artesprix order – not valid on the Heat Press or sale items.
Happy sublimating my crafty friends!
Did you enjoy what you found here at Jessie At Home? Then sign up for my newsletter and like my Facebook page, so you’ll get all the updates on new tutorials, other posts, sales, and coming events.
If you have any questions, want to share pictures of your work, or just want to chat with Jessie and other crafty individuals, than join one of our free Zoom Sit & Stitches. Find them on our Events Calendar.

© Copyright 2021 Jessie Rayot / Jessie At Home®, LLC All my videos, patterns, charts, photos and posts are my own work, so you may not copy them in any way. If you want to share this information with someone, then share the link to this post.