

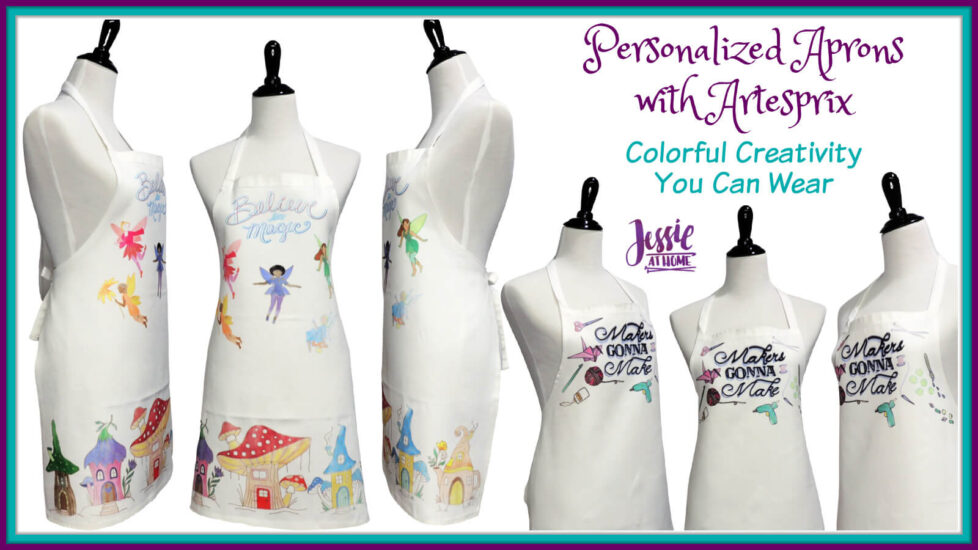
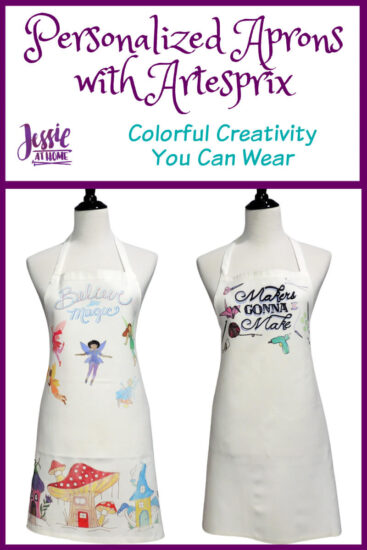
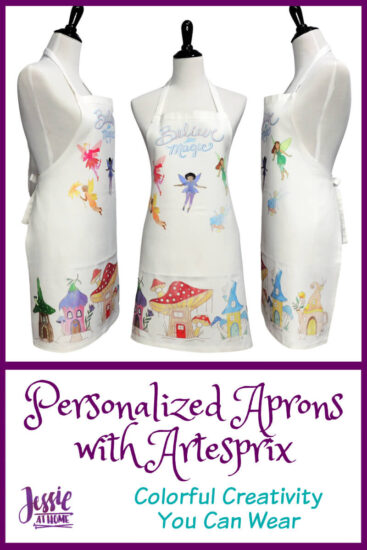
Make personalized aprons with this month’s Artesprix Blank of the Month for yourself and your creative and foodie friends.
Some products in this tutorial were provided by Artesprix. All opinions are my own.
At first I wasn’t sure what to do with the June 2021 Blank of the Month: Poly Linen Apron. Then I realized I had cooking aprons but no crafting aprons and idea abounded! Now I’m sharing some of those ideas with you to use with your Poly Apron. Don’t forget to use code Jessie10 to get 10% off anytime you order from Artesprix!
Not only did I sublimate some super fun images onto them, but I also added pockets, trim, and switched up the neck strap so it doesn’t pull on the back of your neck. I tend to load up my pockets in craft aprons and my neck starts to hurt from the neck straps. So I replaced them with straps that attach to the waist ties.
You can find the DIY Apron Pockets tutorial HERE. You can find the tutorial for cross-back straps and trim HERE.
Before we get started, do you want to see my aprons grow? Here’s a fun video!
If you can’t see this video, try watching it on YouTube HERE.
Personalized Apron Supplies
- Poly Linen Apron (BotM April 2021)
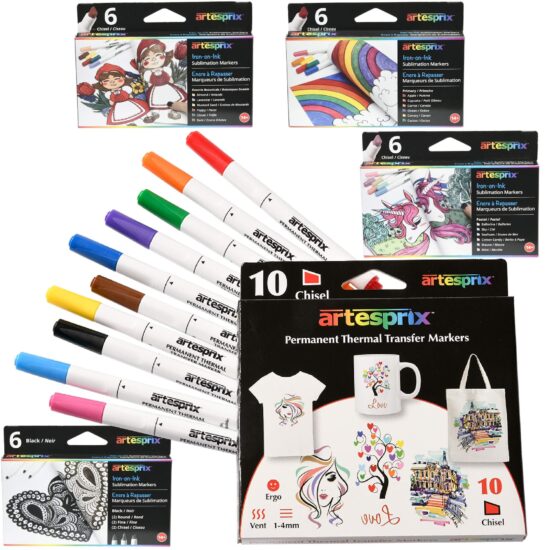
– This Blank of the Month is over, but you can find some similar blanks HERE. Read the listings to make sure they are what you need. - Sublimation Markers
- Heat Tape
- Protective Paper (silicon)
- EasyPress, Heat Press, Iron, or Similar
- Lint Roller
- Heat Safe Surface
- Image(s) to color and sublimate
Prep and Process
Before you sublimate your personalized apron, it’s important you get your prep right. It’s not necessary to pre-wash for sublimation, as your image with shrink right along with the fabric if the fabric shrinks in the wash.
I did pre-wash my apron and found it got a few small pills. I used my Gleener fuzz remover to clean it up quickly and safely. If you find any pills, be sure to remove them in a way that doesn’t damage the fabric, such as with a Gleener.
Next you need to run a lint roll over the apron. I ran mine over the entire front twice, to be super sure all the lint was gone.
This is one blank where you WILL notice a problem if you do not pre-heat the blank. I set my EasyPress to 600° and pre-heated the entire apron in sections for 20 seconds each. It’s not so much that the apron needs to be hot when before you sublimate, it’s that 600° is really hot and it will shrink your apron a tiny bit. If this happens while your sublimating, you will get a shadow or fuzzy edge.
After preheating, it’s time to sublimate. As always, you want to make your sublimation sandwich. First place some Protective Paper on your Heat Safe Surface, then your apron, right side up, next your colored image on regular paper with the colored side down. Use Heat Tape to hold the image in place, taking care not to put the tape over any of the colored section as it will dull the heat and mess up your image. Lastly give the whole thing a cover with more Protective Paper and your ready for heat!
Sublimate your Poly Linen Apron at 600° for 60 seconds. Don’t burn yourself in the excitement of seeing how it worked.
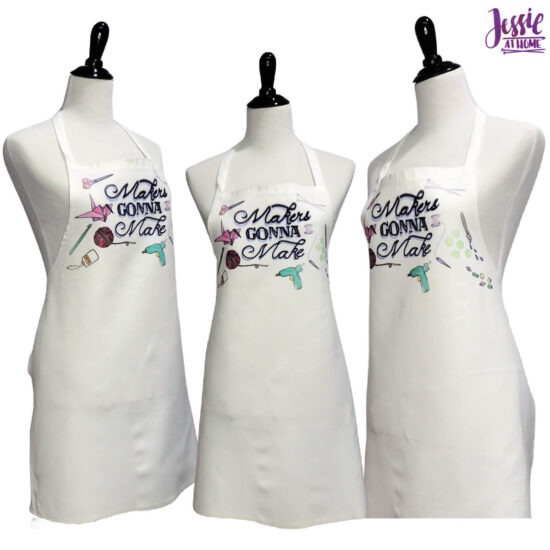
Makers Gonna Make Personalized Apron
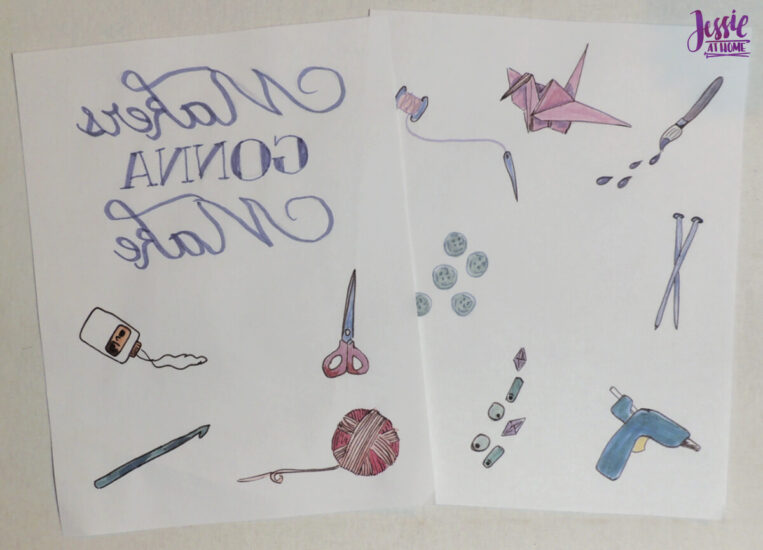
For this apron I printed out the Jessie At Home images I had made for various crafts, along with some text. I used PicMonkey to create the text. After I printed the images out, I flipped them over and colored them on the back. This is my favorite way to get my images colored in reverse.
I didn’t outline everything in black, just some of them. For the text I used purple. Once I sublimated the text, I thought it was too light. So, I recolored the text with black and re-sublimated it. I love how it came out, with the purple looking like a shadow of the text!

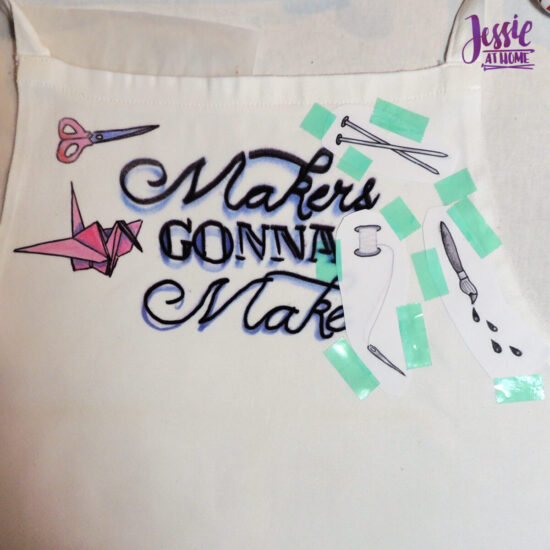
Once I had the text on, I planned out the placement of the rest of the images, and took a picture with my phone so I could refer back to it as I worked. I sublimated a few images at a time, just enough to fit under my EasyPress. Remember, you can re-use the heat tape as long as there’s no ink on it. Most of the pieces in the image below were reusable, but you can see one is on the A in gonna, and that piece couldn’t be reused. Reusing is great, but don’t mess up your image trying to save tape should be trash.
I love my crafty personalized apron. It’s so very Jessie At Home!
Nature Fairies Personalized Apron
This apron started with me figuring out a Cricut hack! I found 5 adorable fairies and 5 sweet fairy homes that were draw and cut in Cricut Access. It was easy to just remove the cut part and set them as draw only. After sizing them as I wanted, I was ready to draw.
I have an old Cricut Mat that is only a little bit sticky. I use it for draw only projects and just tape the paper down with some washi tape or masking tape. This is great for printer paper, because a sticky mat can sometimes be too sticky depending on your paper.
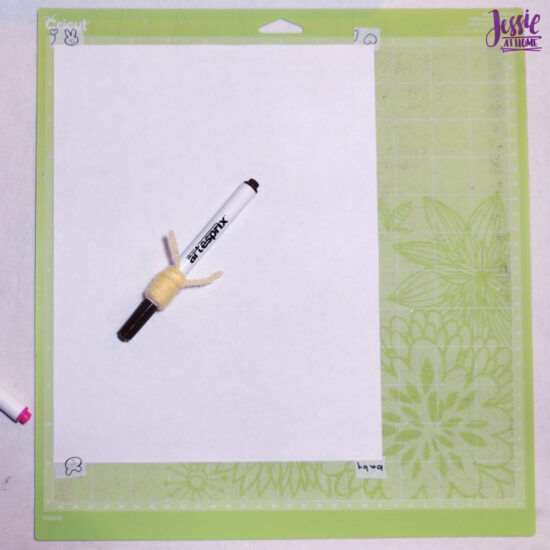
Now using a Cricut pen is fine if you’re going to use the drawn image like a printed image, but I wanted to draw the images with my Sublimation Markers. I opened the marker holder on my Cricut and pushed it up so the holder part popped out. The Artesprix marker was too thin to fit inside. So I wrapped some yarn around the marker 3 times, and it fit perfectly.
I found that the little lip on the Artesprix Markers is exactly where the marker should meet the top of the Cricut Marker holder. If you’re having issues, there’s a great tutorial HERE.
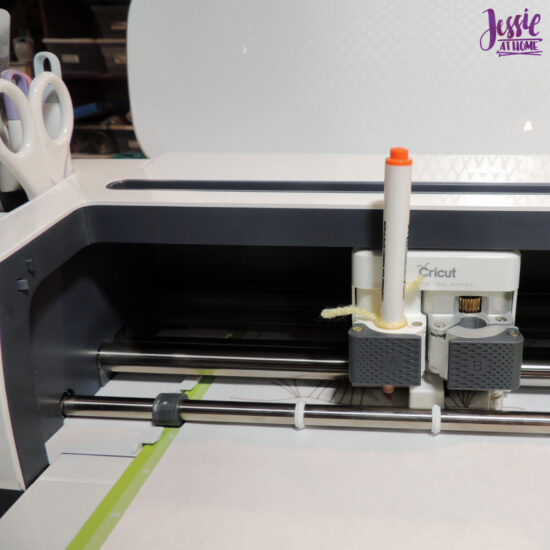
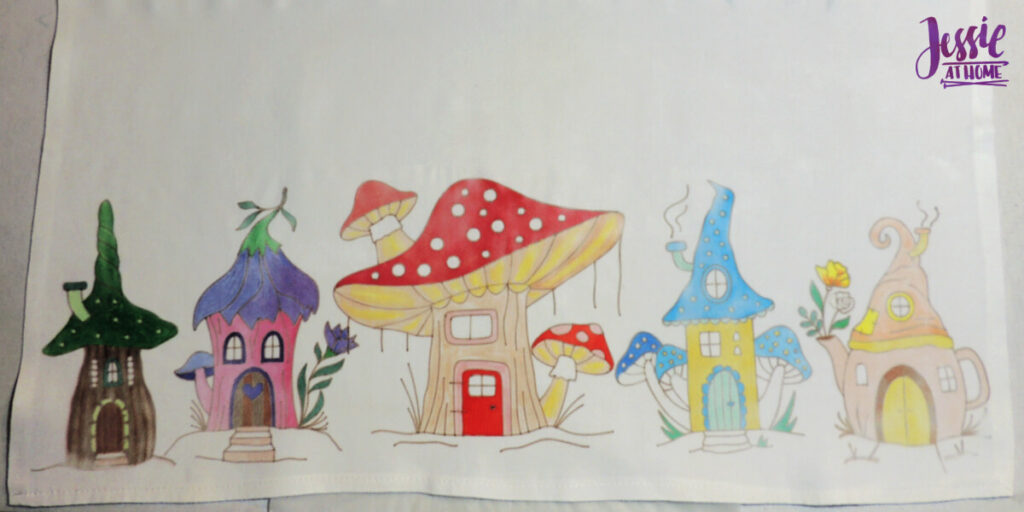
Now I just let my Cricut draw all my happy little images with various colors. I didn’t want black outlines. For the homes I used brown, and for the fairies I changed the colors for each.
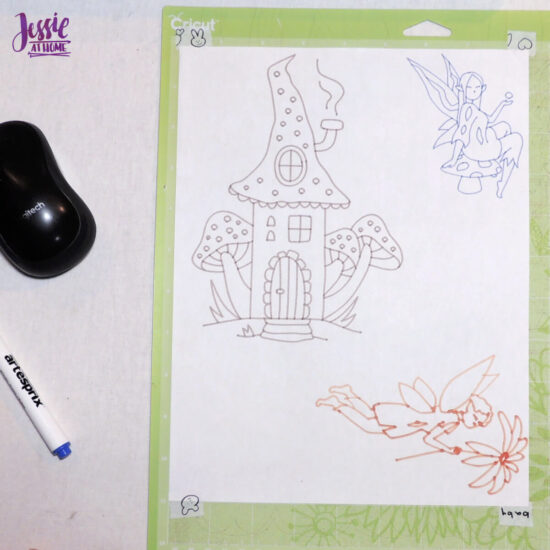
Coloring time! I love coloring, it’s so calming and creative. I used the 2 different browns and almond for skin tones, along with no color for one.
Check out these little cuties!
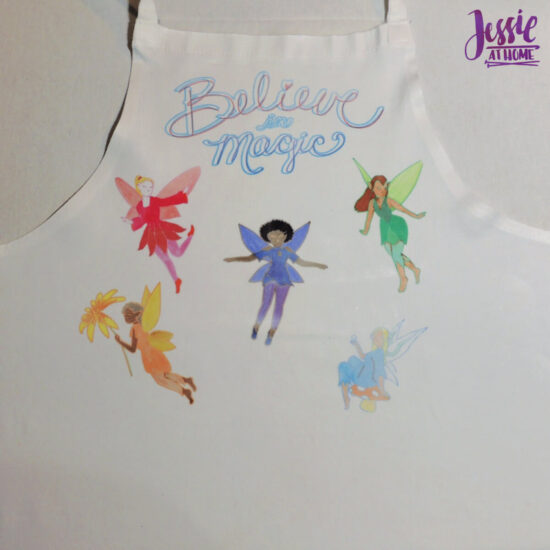
And the houses, how can you not love the houses?! I want to move in!
OK my crafty friends, what designs are you going to use on your personalized aprons? Remember, this is the blank of the month, so when the month is gone, so are the aprons!
Happy coloring!
Did you enjoy what you found here at Jessie At Home? Then sign up for my newsletter and like my Facebook page, so you’ll get all the updates on new tutorials, other posts, sales, and coming events.
If you have any questions, want to share pictures of your work, or just want to chat with Jessie and other crafty individuals, than join one of our free Zoom Sit & Stitches. Find them on our Events Calendar.

© Copyright 2021 Jessie Rayot / Jessie At Home®, LLC All my videos, patterns, charts, photos and posts are my own work, so you may not copy them in any way. If you want to share this information with someone, then share the link to this post.